Page 98 of 1354
BE279−01
BE5780
BE4674
BE−82
− BODY ELECTRICALAUDIO SYSTEM
1996 RAV4 (RM447U)
INSTALLATION
INSTALL ANTENNA ROD
(a) Insert the cable of the rod until it reaches the bottom.
HINT:
�When inserting the cable, the teeth on the cable must face
toward the front of the vehicle.
�Insert the antenna approx. 300 mm (11.8 in.)
(b) Wind the cable to retract the rod by turning the ignition
switch to the ”LOCK” position.
HINT:
�If the ignition switch is already in the ”LOCK” position, per-
form step 1 (c) first, then turn the ignition switch to the
”ACC” position.
�In case the cable is not wound, twist it as shown in the il-
lustration.
�Even if the rod has not retracted fully, install the antenna
nut and inspect the antenna rod operation. It will finally re-
tract fully.
(c) Inspect the antenna rod operation by pushing the radio
wave band select buttons.
Page 105 of 1354
H01976
Centering Bolt
Standard Bolt
BO0ZS−01
N11408
N11409
N11458
BO−8
− BODYHOOD
1996 RAV4 (RM447U)
HOOD
ADJUSTMENT
HINT:
Since the centering bolt is used as the hood hinge and lock set
bolt, the hood and lock cannot be adjusted with it on. Substitute
the bolt with washer for the centering bolt.
1. ADJUST HOOD IN FORWARD/REARWARD AND
LEFT/RIGHT DIRECTIONS
Adjust the hood by loosening the hood side hinge bolts.
Torque: 13 N·m (130 kgf·cm, 9 ft·lbf)
2. ADJUST FRONT EDGE OF HOOD IN VERTICAL
DIRECTIONS
Adjust the hood by turning the cushions.
3. ADJUST HOOD LOCK
Adjust the lock by loosening the 2 bolts and nut.
Torque:
7.5 N·m (75 kgf·cm, 65 in.·lbf) for bolt
8.5 N·m (85 kgf·cm, 74 in.·lbf) for nut
Page 107 of 1354

DISASSEMBLY
HINT:
Tape the screwdriver tip before using to pry parts.
1. w/o Power Window:
REMOVE REGULATOR HANDL")
BO483−01
BO0020
N11412
N11473
N17924
BO−10
− BODYFRONT DOOR
1996 RAV4 (RM447U)
DISASSEMBLY
HINT:
Tape the screwdriver tip before using to pry parts.
1. w/o Power Window:
REMOVE REGULATOR HANDLE
Pull off the snap ring with a shop rag and remove the regulator
handle and plate.
2. REMOVE INSIDE HANDLE BEZEL
(a) Remove the screw.
(b) Using a screwdriver, pry out the bezel.
3. REMOVE OUTSIDE REAR VIEW MIRROR COVER
4. REMOVE DOOR PULL HANDLE
5. w/ Power window:
REMOVE POWER WINDOW SWITCH
6. REMOVE DOOR TRIM
(a) Remove the 3 screws.
(b) Insert a screwdriver between the door and door trim to pry
out the door trim.
(c) Pull the trim upwards to remove it.
7. REMOVE DOOR INSIDE HANDLE
(a) Disconnect the link and door lock cable.
(b) Remove the 2 screws and inside handle.
8. REMOVE SERVICE HOLE COVER
HINT:
At the time of reassembly, bring out the links through the service
hole cover.
9. REMOVE OUTSIDE REAR VIEW MIRROR
10. REMOVE DOOR GLASS RUN
11. REMOVE DOOR BELT MOULDING
12. REMOVE DOOR SPEAKER
Page 108 of 1354
N11460
N17925
N11568
N17926
− BODYFRONT DOOR
BO−11
1996 RAV4 (RM447U)
13. REMOVE DOOR GLASS
(a) Open the door glass until the bolts appear in the service
hole.
(b) Remove the 2 bolts.
NOTICE:
Be careful not to drop the door glass.
(c) Pull up the door glass upwards to remove it.
14. REMOVE WINDOW REGULATOR
(a) Remove the door lock cable from the window regulator.
(b) Remove the 6 nuts.
(c) Disconnect the connector.
(d) Remove the regulator through the service hole.
HINT:
At the time of reassembly, apply MP grease to the window regu-
lator rollers.
15. REMOVE DOOR LOCK
(a) Remove the clip.
(b) Disconnect the link from the door lock.
(c) Remove the 3 screws.
Torque: 5.4 N·m (55 kgf·cm, 48 in.·lbf)
HINT:
At the time of reassembly, apply adhesive to the 3 screws.
Part No. 08833−00070, THREE BOND 1324 or equiva-
lent
(d) w/ Power door lock:
Disconnect the connector.
(e) Remove the door lock through the service hole.
Page 109 of 1354
N17927
BO−12
− BODYFRONT DOOR
1996 RAV4 (RM447U)
HINT:
At the time of reassembly, apply MP grease to the sliding sur-
face of the door lock.
16. REMOVE OUTSIDE HANDLE
17. REMOVE DOOR LOCK CYLINDER
Remove the snap ring and door lock cylinder from the outside
handle.
Page 110 of 1354
BO0ZV−01
N11553
N11554
BO2556
− BODYFRONT DOOR
BO−13
1996 RAV4 (RM447U)
ADJUSTMENT
1. ADJUST DOOR IN FORWARD/REARWARD AND VER-
TICAL DIRECTIONS
Using SST, adjust the door by loosening the body side hinge
bolts.
SST 09812−00010
Torque: 23 N·m (230 kgf·cm, 17 ft·lbf)
2. ADJUST DOOR IN LEFT/RIGHT AND VERTICAL
DIRECTIONS
Loosen the door side hinge bolts to adjust.
HINT:
Substitute the standard bolt for the centering bolt (See page
BO−8).
Torque: 25 N·m (260 kgf·cm, 19 ft·lbf)
3. ADJUST DOOR LOCK STRIKER
(a) Check that the door fits and door lock linkages are ad-
justed correctly.
(b) Loosen the striker mounting screws to adjust.
(c) Using a plastic hammer, tap the striker to adjust it.
Page 114 of 1354

8. REMOVE DOOR BELT MOULDING
9. REMOVE DOOR GLASS RUN
10. REMOVE DIVISION BAR
11. REMOVE REAR DOOR QUARTER WINDOW WEATH-
ER")
H03784: 5 Clips
H03785
N14554
− BODYREAR DOOR
BO−17
1996 RAV4 (RM447U)
8. REMOVE DOOR BELT MOULDING
9. REMOVE DOOR GLASS RUN
10. REMOVE DIVISION BAR
11. REMOVE REAR DOOR QUARTER WINDOW WEATH-
ERSTRIP
12. REMOVE REAR DOOR QUARTER WINDOW GLASS
13. REMOVE DOOR GLASS AND WINDOW REGULATOR
ASSEMBLY
(a) Disconnect the connector.
(b) Remove the 3 bolts and nut from the window regulator.
(c) w/o Power Window:
Remove the 3 bolts from the window regulator.
(d) Remove the 2 nuts and glass channel from the window
regulator lift arm bracket, then remove the door glass.
(e) Remove the window regulator through the service hole.
HINT:
At the time of reassembly, apply MP grease to the window regu-
lator rollers.
14. REMOVE DOOR LOCK ASSEMBLY
(a) w/ Power door Lock:
Disconnect the connector.
(b) Disconnect the 2 links from the outside handle.
(c) Remove the 3 screws and door lock assembly.
Torque: 5.4 N·m (55 kgf·cm, 48 in.·lbf)
HINT:
At the time of reassembly, refer to following procedure.
�Apply adhesive to the 3 screws.
Page 115 of 1354
N14555
BO−18
− BODYREAR DOOR
1996 RAV4 (RM447U)
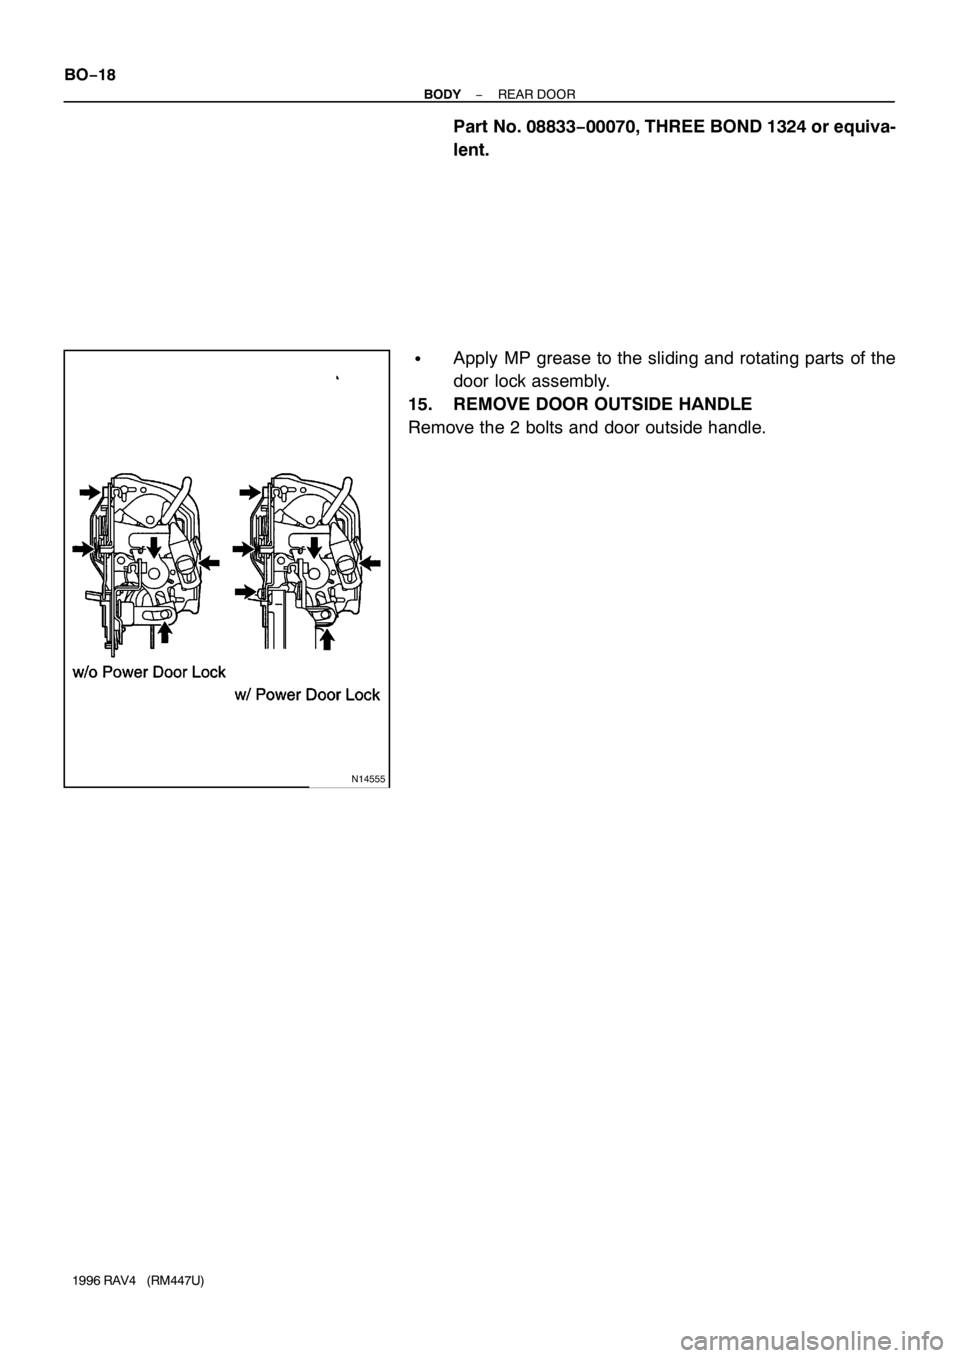
Part No. 08833−00070, THREE BOND 1324 or equiva-
lent.
�Apply MP grease to the sliding and rotating parts of the
door lock assembly.
15. REMOVE DOOR OUTSIDE HANDLE
Remove the 2 bolts and door outside handle.


HOOD
ADJUSTMENT
HINT:
Since the centering bolt is used as the hood hinge and lock set
bolt,")

13. REMOVE DOOR GLASS
(a) Open the door glass until the bolts appear in the service
hole.
(b) Remove the 2 bolts.
NOTICE:
Be")

HINT:
At the time of reassembly, apply MP grease to the sliding sur-
face of the door lock.
16. REMOVE OUTSIDE HANDLE
17. REMOVE DOOR LOCK CYLIND")

ADJUSTMENT
1. ADJUST DOOR IN FORWARD/REARWARD AND VER-
TICAL DIRECTIONS
Using SST, adjust the door by loosening the body")