Page 89 of 2248
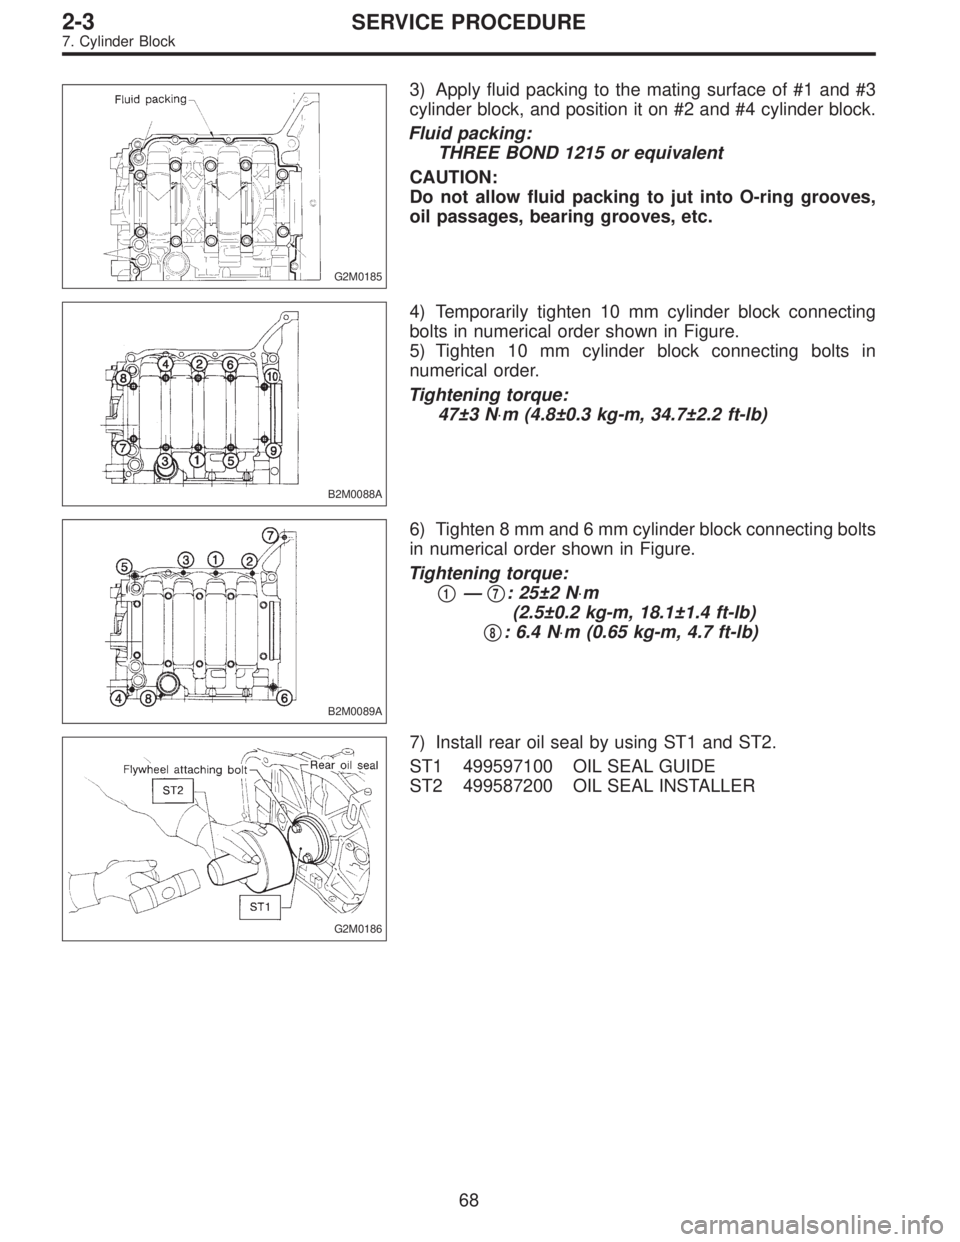
G2M0185
3) Apply fluid packing to the mating surface of #1 and #3
cylinder block, and position it on #2 and #4 cylinder block.
Fluid packing:
THREE BOND 1215 or equivalent
CAUTION:
Do not allow fluid packing to jut into O-ring grooves,
oil passages, bearing grooves, etc.
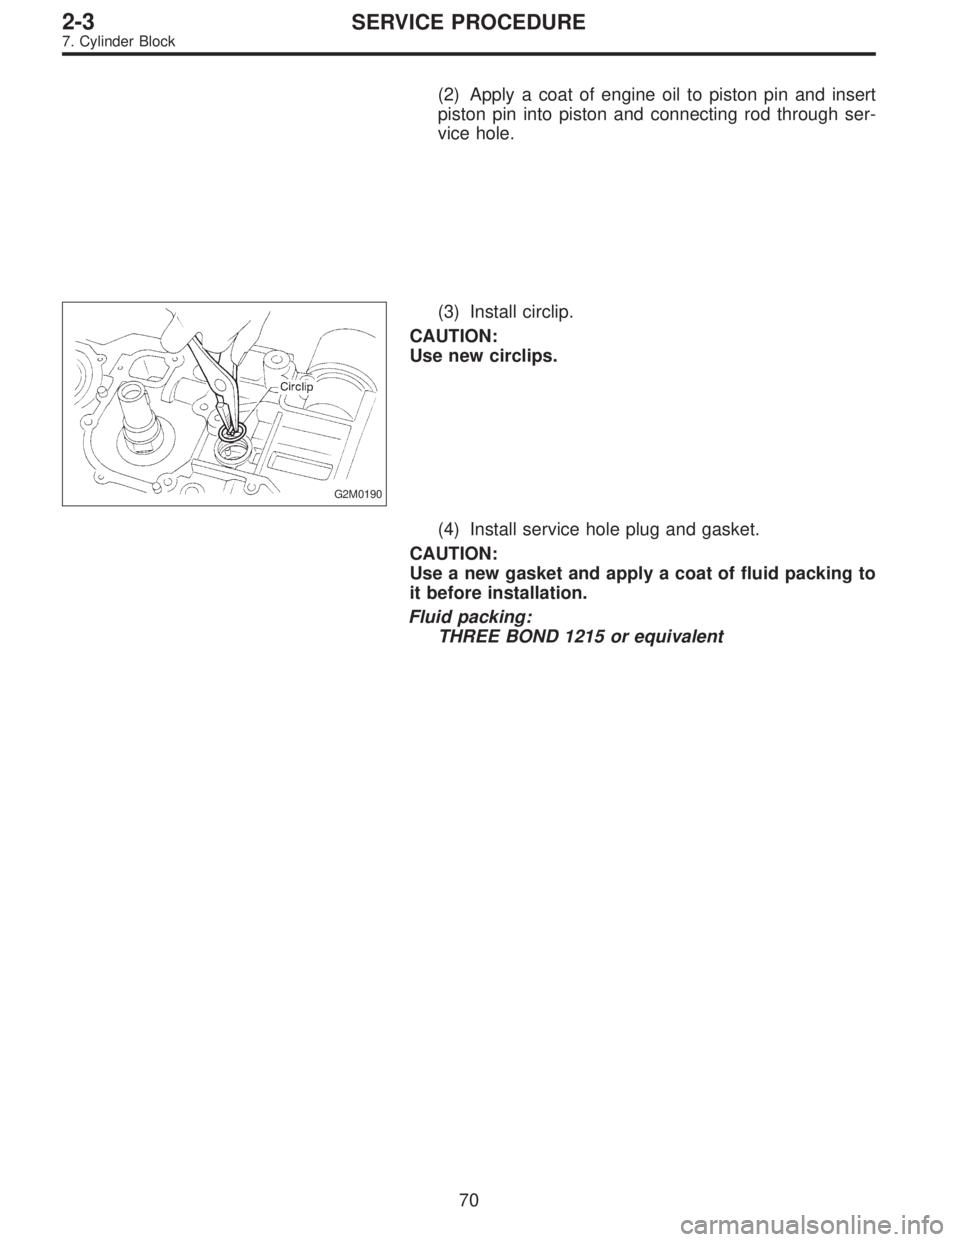
B2M0088A
4) Temporarily tighten 10 mm cylinder block connecting
bolts in numerical order shown in Figure.
5) Tighten 10 mm cylinder block connecting bolts in
numerical order.
Tightening torque:
47±3 N⋅m (4.8±0.3 kg-m, 34.7±2.2 ft-lb)
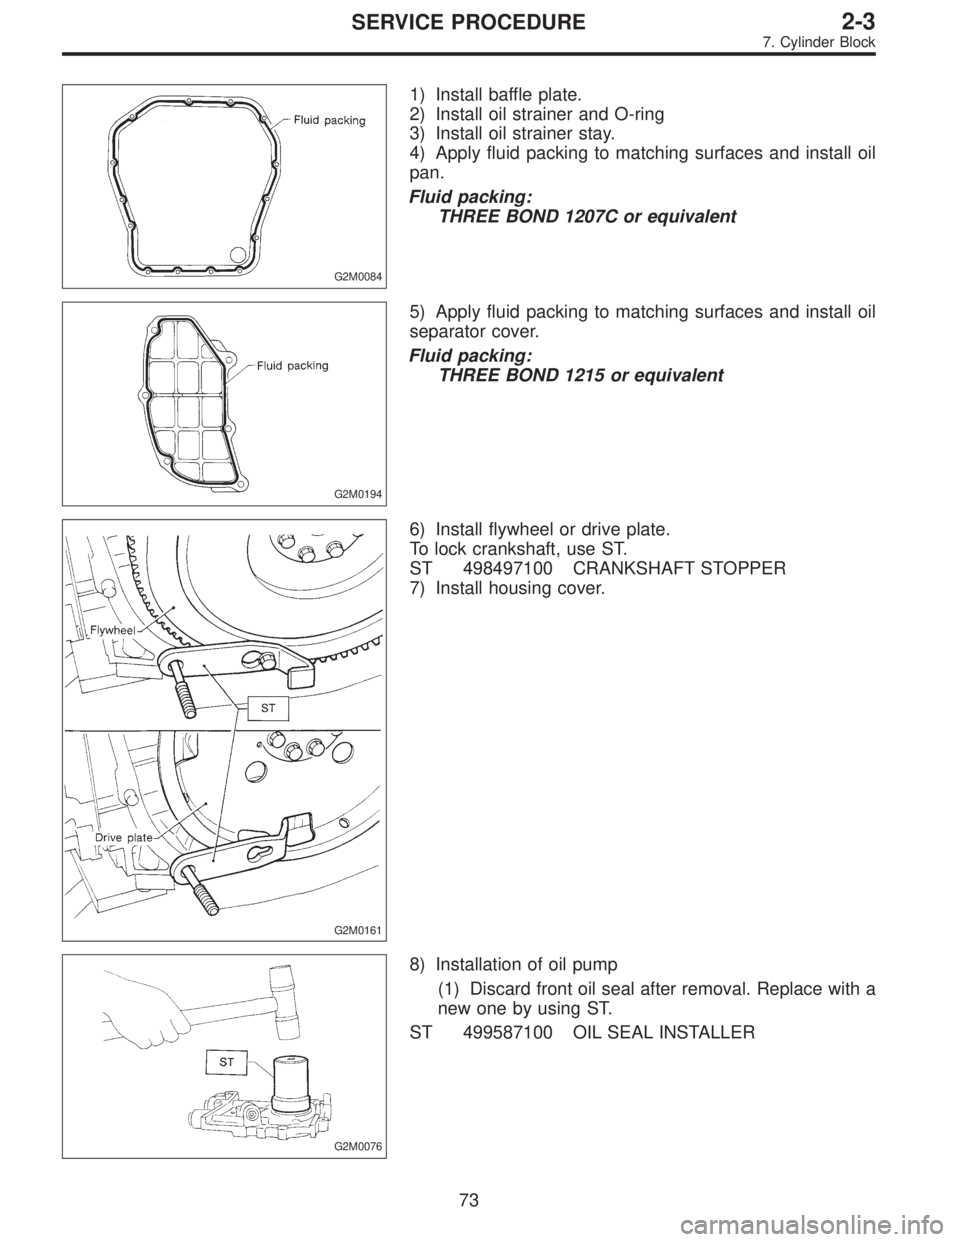
B2M0089A
6) Tighten 8 mm and 6 mm cylinder block connecting bolts
in numerical order shown in Figure.
Tightening torque:
�
1—�7: 25±2 N⋅m
(2.5±0.2 kg-m, 18.1±1.4 ft-lb)
�
8: 6.4 N⋅m (0.65 kg-m, 4.7 ft-lb)
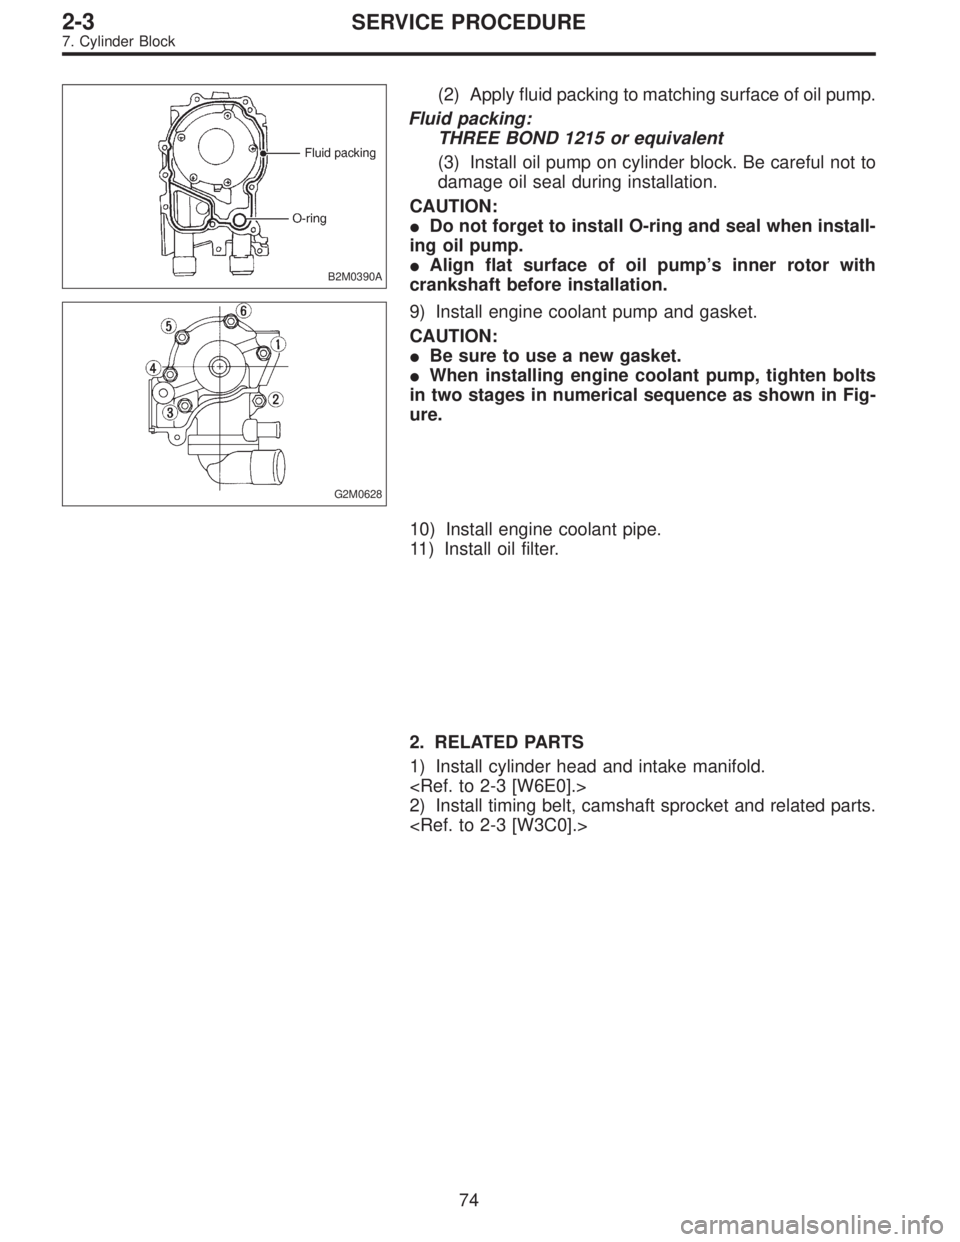
G2M0186
7) Install rear oil seal by using ST1 and ST2.
ST1 499597100 OIL SEAL GUIDE
ST2 499587200 OIL SEAL INSTALLER
68
2-3SERVICE PROCEDURE
7. Cylinder Block
Page 91 of 2248
(2) Apply a coat of engine oil to piston pin and insert
piston pin into piston and connecting rod through ser-
vice hole.
G2M0190
(3) Install circlip.
CAUTION:
Use new circlips.
(4) Install service hole plug and gasket.
CAUTION:
Use a new gasket and apply a coat of fluid packing to
it before installation.
Fluid packing:
THREE BOND 1215 or equivalent
70
2-3SERVICE PROCEDURE
7. Cylinder Block
Page 94 of 2248
G2M0084
1) Install baffle plate.
2) Install oil strainer and O-ring
3) Install oil strainer stay.
4) Apply fluid packing to matching surfaces and install oil
pan.
Fluid packing:
THREE BOND 1207C or equivalent
G2M0194
5) Apply fluid packing to matching surfaces and install oil
separator cover.
Fluid packing:
THREE BOND 1215 or equivalent
G2M0161
6) Install flywheel or drive plate.
To lock crankshaft, use ST.
ST 498497100 CRANKSHAFT STOPPER
7) Install housing cover.
G2M0076
8) Installation of oil pump
(1) Discard front oil seal after removal. Replace with a
new one by using ST.
ST 499587100 OIL SEAL INSTALLER
73
2-3SERVICE PROCEDURE
7. Cylinder Block
Page 95 of 2248
B2M0390A
(2) Apply fluid packing to matching surface of oil pump.
Fluid packing:
THREE BOND 1215 or equivalent
(3) Install oil pump on cylinder block. Be careful not to
damage oil seal during installation.
CAUTION:
�Do not forget to install O-ring and seal when install-
ing oil pump.
�Align flat surface of oil pump’s inner rotor with
crankshaft before installation.
G2M0628
9) Install engine coolant pump and gasket.
CAUTION:
�Be sure to use a new gasket.
�When installing engine coolant pump, tighten bolts
in two stages in numerical sequence as shown in Fig-
ure.
10) Install engine coolant pipe.
11) Install oil filter.
2. RELATED PARTS
1) Install cylinder head and intake manifold.
2) Install timing belt, camshaft sprocket and related parts.
74
2-3SERVICE PROCEDURE
7. Cylinder Block
Page 106 of 2248
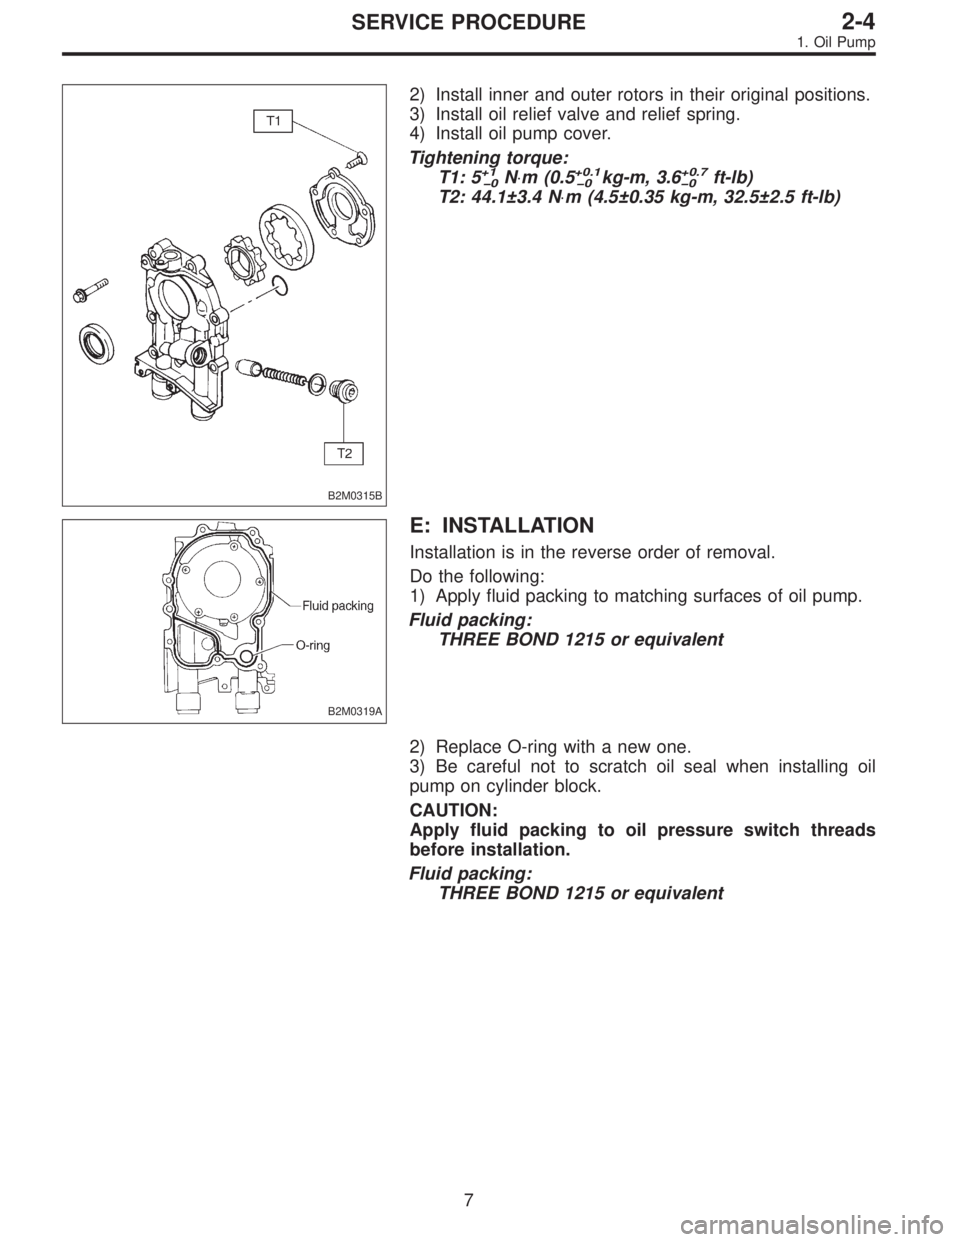
B2M0315B
2) Install inner and outer rotors in their original positions.
3) Install oil relief valve and relief spring.
4) Install oil pump cover.
Tightening torque:
T1: 5
+1
0N⋅m (0.5+0.1
0kg-m, 3.6+0.7
0ft-lb)
T2: 44.1±3.4 N⋅m (4.5±0.35 kg-m, 32.5±2.5 ft-lb)
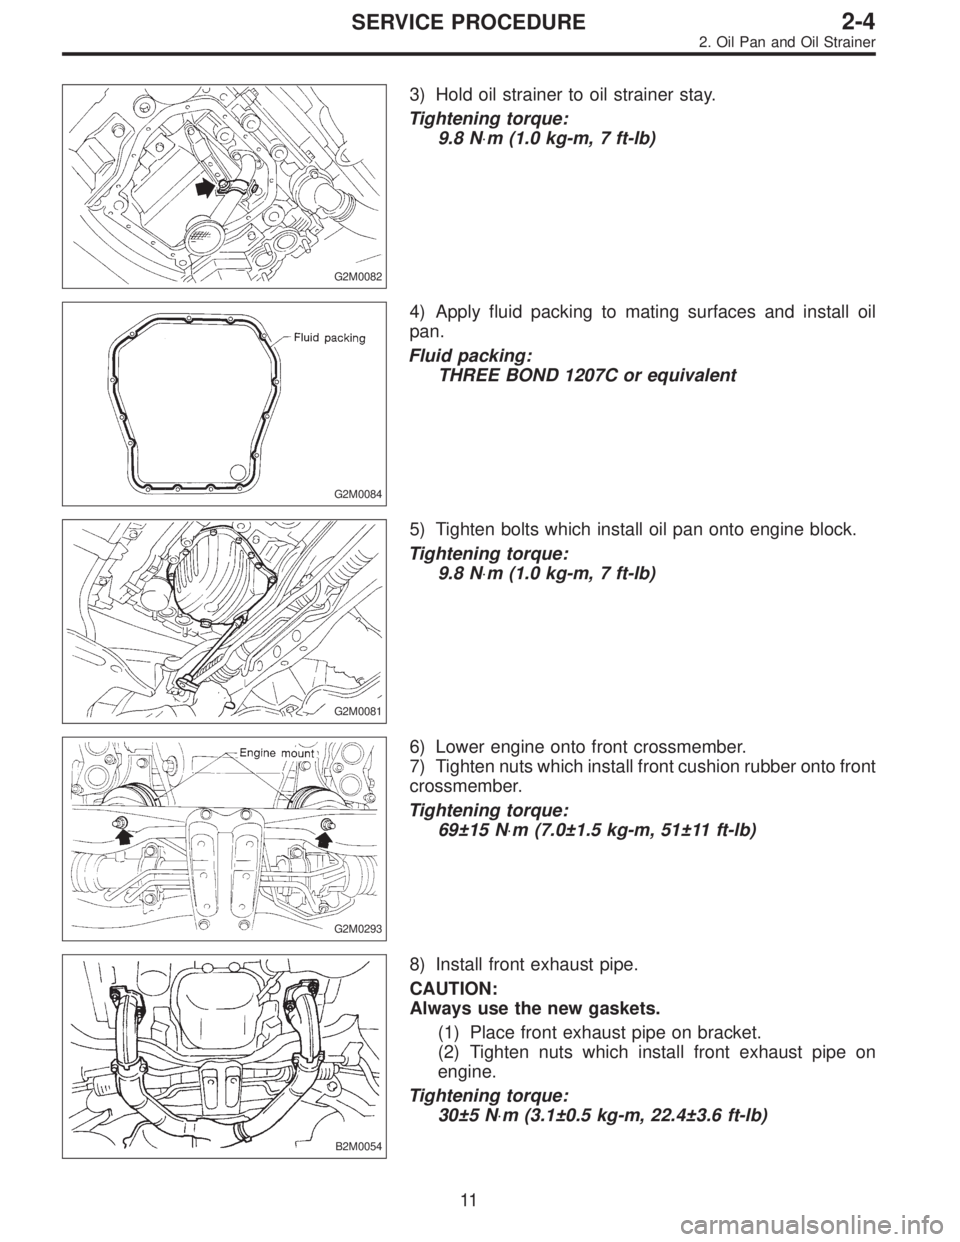
B2M0319A
E: INSTALLATION
Installation is in the reverse order of removal.
Do the following:
1) Apply fluid packing to matching surfaces of oil pump.
Fluid packing:
THREE BOND 1215 or equivalent
2) Replace O-ring with a new one.
3) Be careful not to scratch oil seal when installing oil
pump on cylinder block.
CAUTION:
Apply fluid packing to oil pressure switch threads
before installation.
Fluid packing:
THREE BOND 1215 or equivalent
7
2-4SERVICE PROCEDURE
1. Oil Pump
Page 110 of 2248
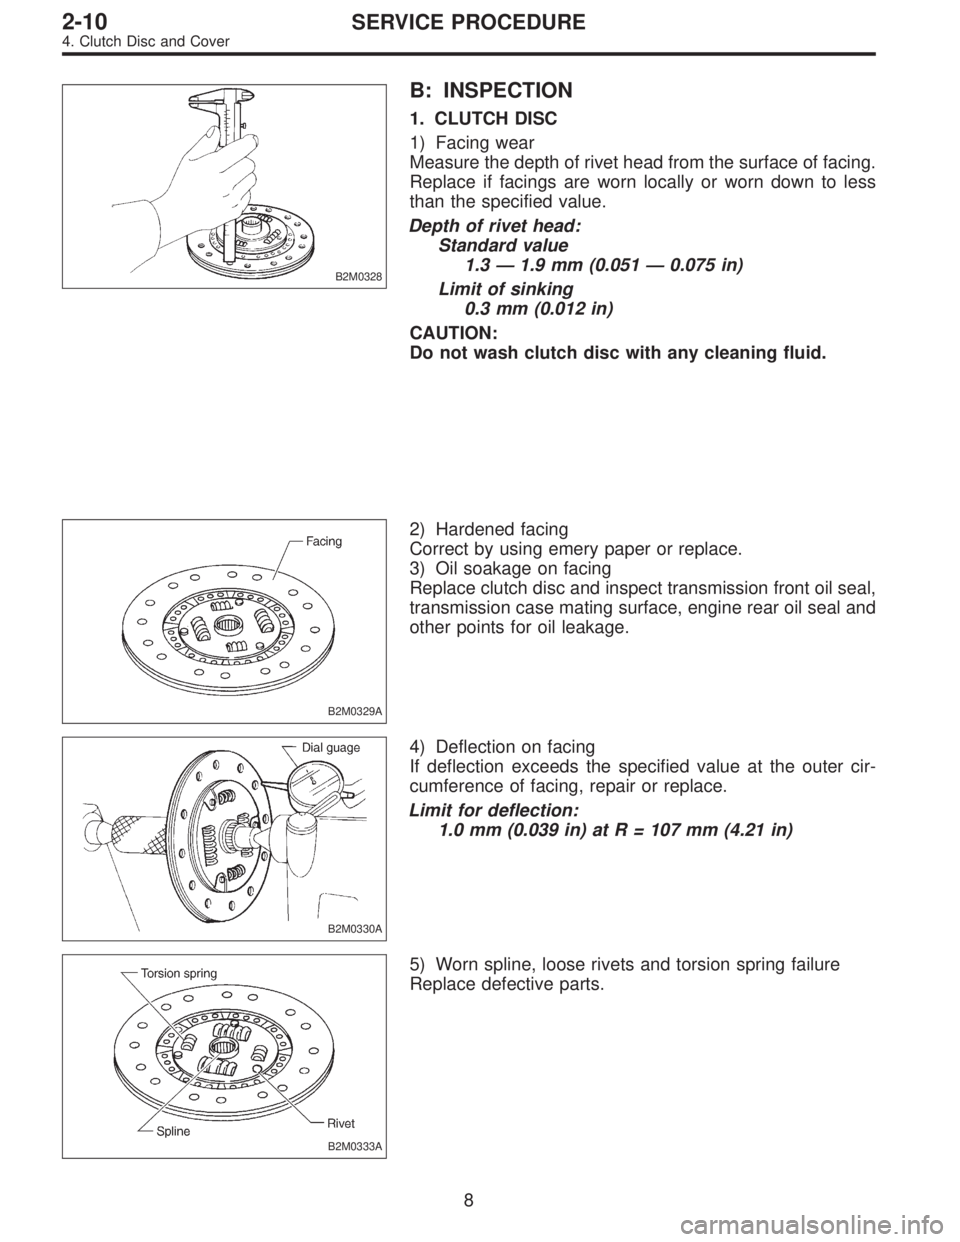
G2M0082
3) Hold oil strainer to oil strainer stay.
Tightening torque:
9.8 N⋅m (1.0 kg-m, 7 ft-lb)
G2M0084
4) Apply fluid packing to mating surfaces and install oil
pan.
Fluid packing:
THREE BOND 1207C or equivalent
G2M0081
5) Tighten bolts which install oil pan onto engine block.
Tightening torque:
9.8 N⋅m (1.0 kg-m, 7 ft-lb)
G2M0293
6) Lower engine onto front crossmember.
7) Tighten nuts which install front cushion rubber onto front
crossmember.
Tightening torque:
69±15 N⋅m (7.0±1.5 kg-m, 51±11 ft-lb)
B2M0054
8) Install front exhaust pipe.
CAUTION:
Always use the new gaskets.
(1) Place front exhaust pipe on bracket.
(2) Tighten nuts which install front exhaust pipe on
engine.
Tightening torque:
30±5 N⋅m (3.1±0.5 kg-m, 22.4±3.6 ft-lb)
11
2-4SERVICE PROCEDURE
2. Oil Pan and Oil Strainer
Page 230 of 2248
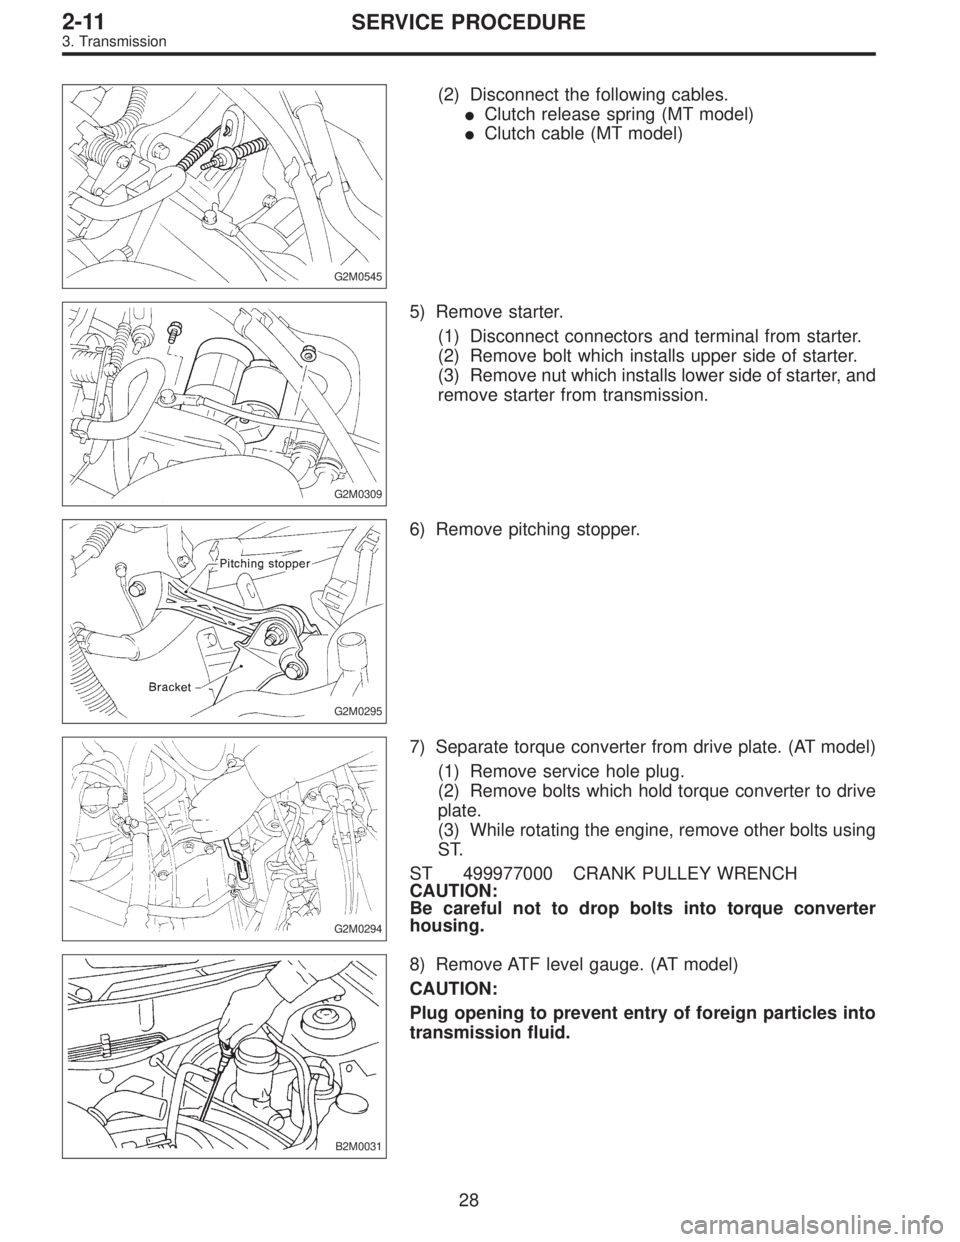
B2M0328
B: INSPECTION
1. CLUTCH DISC
1) Facing wear
Measure the depth of rivet head from the surface of facing.
Replace if facings are worn locally or worn down to less
than the specified value.
Depth of rivet head:
Standard value
1.3—1.9 mm (0.051—0.075 in)
Limit of sinking
0.3 mm (0.012 in)
CAUTION:
Do not wash clutch disc with any cleaning fluid.
B2M0329A
2) Hardened facing
Correct by using emery paper or replace.
3) Oil soakage on facing
Replace clutch disc and inspect transmission front oil seal,
transmission case mating surface, engine rear oil seal and
other points for oil leakage.
B2M0330A
4) Deflection on facing
If deflection exceeds the specified value at the outer cir-
cumference of facing, repair or replace.
Limit for deflection:
1.0 mm (0.039 in) at R = 107 mm (4.21 in)
B2M0333A
5) Worn spline, loose rivets and torsion spring failure
Replace defective parts.
8
2-10SERVICE PROCEDURE
4. Clutch Disc and Cover
Page 262 of 2248
G2M0545
(2) Disconnect the following cables.
�Clutch release spring (MT model)
�Clutch cable (MT model)
G2M0309
5) Remove starter.
(1) Disconnect connectors and terminal from starter.
(2) Remove bolt which installs upper side of starter.
(3) Remove nut which installs lower side of starter, and
remove starter from transmission.
G2M0295
6) Remove pitching stopper.
G2M0294
7) Separate torque converter from drive plate. (AT model)
(1) Remove service hole plug.
(2) Remove bolts which hold torque converter to drive
plate.
(3) While rotating the engine, remove other bolts using
ST.
ST 499977000 CRANK PULLEY WRENCH
CAUTION:
Be careful not to drop bolts into torque converter
housing.
B2M0031
8) Remove ATF level gauge. (AT model)
CAUTION:
Plug opening to prevent entry of foreign particles into
transmission fluid.
28
2-11SERVICE PROCEDURE
3. Transmission