1995 PONTIAC BONNEVILLE fuel
[x] Cancel search: fuelPage 6 of 338
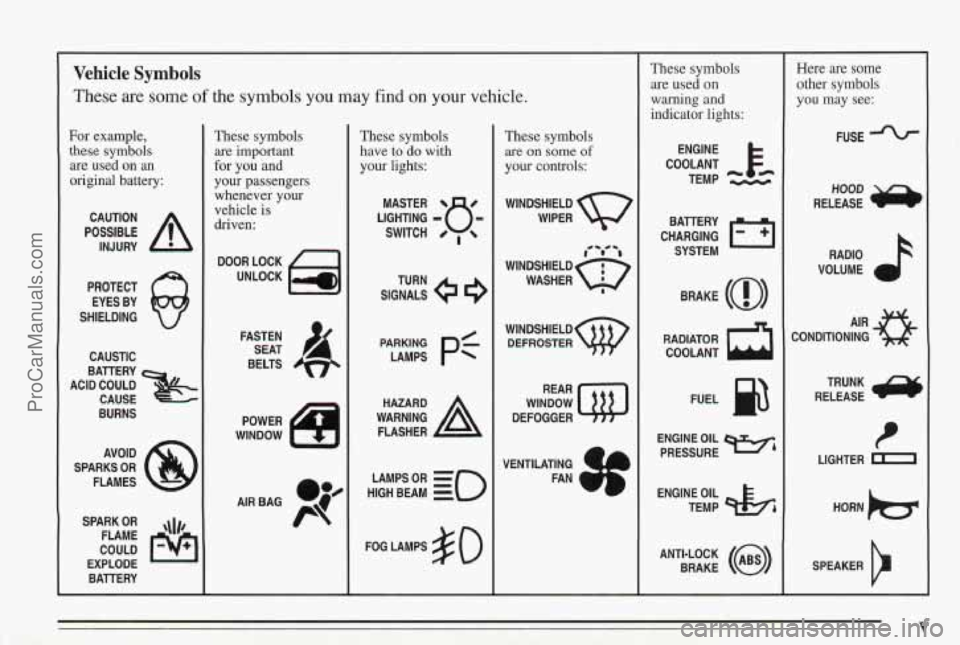
Vehicle Symbols
These are some of the symbols you may find on your vehicle.
For example,
these symbols
are used on
an
original battery:
POSSIBLE A
CAUTION
INJURY
PROTECT EYES BY
SHIELDING
CAUSTIC
ACID COULD BATTERY
CAUSE
BURNS
AVOID
SPARKS
OR
FLAMES
SPARK
OR ,\I/,
COULD FLAME
EXPLODE BAllERY
These symbols are
important
for you and
your passengers
whenever your
vehicle
is
driven:
DOOR LOCK
UNLOCK
FASTEN SEAT
4
BELTS
POWER
WINDNOW
These symbols
have
to do with
your lights:
SIGNALS 9
TURN
HIGH
LAMPSoR BEAM = =o
FOG LAMPS $0
These symbols
are on some of
your controls:
WIPER w
WINDsHIELDw DEFROSTER
WINDOW
DEFOGGER
VENTILATING
4 1
FAN CI
These symbols are used on
warning
and
indicator lights:
COOLANT Fe
TEMP --
ENGINE
CHARGING
I-1
BATTERY SYSTEM
BRAKE
(0)
RADIATOR COOLANT
a
FUEL @
ENGINE OIL
PRESSURE Wb
TEMP OIL 45
ANTI-LOCK (@)
BRAKE
Here are some
other symbols
you may see:
FUSE
RADIO
VOLUME
CONDITIONING
AIR 43
TRUNK
RELEASE
t
LIGHTER n
SPEAKER
V ProCarManuals.com
Page 55 of 338
Operation
The driver’s door will unlock when UNLOCK is
pressed. If pressed again within
25 seconds, all doors
will unlock. Also, if your car is equipped with a locking
fuel filler door
it will unlatch at this time. All doors will
lock when
LOCK is pressed.
The
trunk will unlock when the opened trunk symbol on
the key fob
is pressed, but only when the ignition is off.
Press any button to illuminate the interior lamps (see
“Illuminated Entry System” in the Index).
Matching Transmitter(s) To Your Vehicle
Each key chain transmitter is coded to prevent another
transmitter from unlocking your vehicle.
If a transmitter
is lost
or stolen, a replacement can be purchased through
your dealer. Remember
to bring any remaining
transmitters with you when you
go to your dealer. When
the dealer matches the replacement transmitter to your
vehicle, the remaining transmitters must also be
matched. Once the new transmitter
is coded, the lost
transmitter will not unlock your vehicle. You
can match
a transmitter to as many different
vehicles as you own, provided they are equipped with
exactly the same model system, (General Motors ofks
several different models of these systems on their
vehicles.) Each vehicle can have only two transmitters
matched to it.
See your dealer to match transmitters to another vehicle.
Battery Replacement
Under normal use, the batteries in your key chain
transmitter should last about two years.
You can tell the batteries
are weak if the transmitter
won’t work at the normal range in any location.
If you
have to get close to your vehicle before the transmitter
works, it’s probably time to change the batteries.
2-6
ProCarManuals.com
Page 59 of 338
Stopping the alarm: If you set off the alarm by accident,
unlock any door with your key.
You can also turn off the
alarm by pressing the UNLOCK button on the Remote
Keyless Entry System transmitter. The
alarm won’t stop
if you try to unlock a door any other way.
Testing the alarm: Open the window, then follow the
directions for activating the system described earlier.
Once the
alarm is set, reach through the window and
manually unlock the door from the inside
or turn on the
ignition. The alarm should sound.
I€ the alarm does not sound when it should, check to see
if the horn works. The horn fuse may be blown. To
replace the fuse, see “Fuses and Circuit Breakers” in the
Index.
To reduce the possibility of theft, always activate the
theft deterrent system when leaving your vehicle.
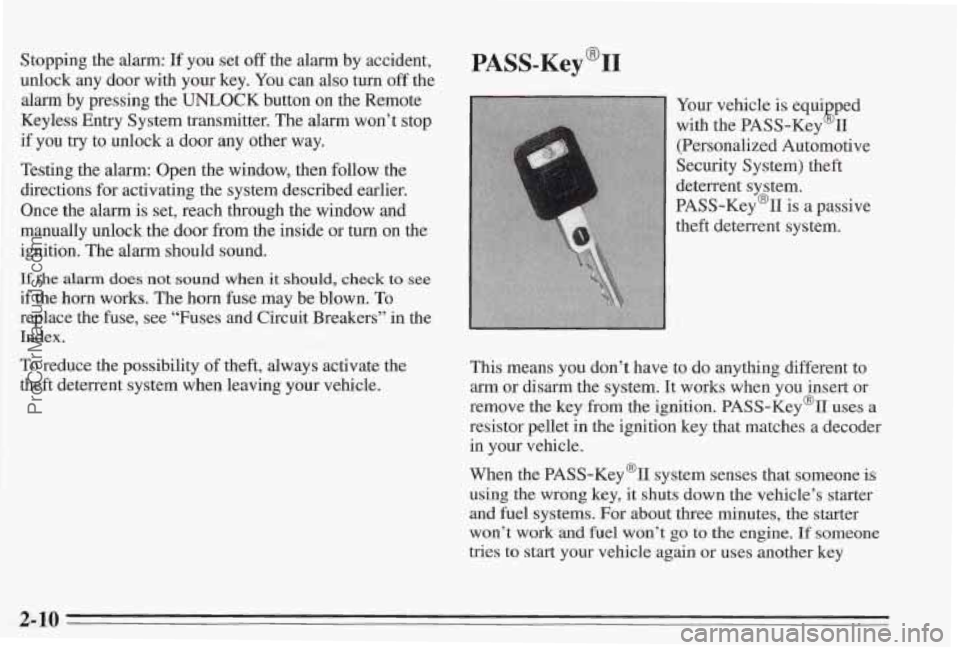
PASS-Key@II
Your vehicle is equi -ed
with the PASS-Key II
(Personalized Automotive
Security System) theft
deterrent system.
PASS-Key(%
is a passive
theft deterrent system.
k?
This means you don’t have to do anything different to
arm or disarm the system. It works when you insert or
remove the
key from the ignition. PASS-Key% uses a
resistor pellet in the ignition key that matches a decoder
in your vehicle.
When the PASS-Key% system senses that someone is
using the wrong key, it shuts down the vehicle’s starter
and fuel systems.
For about three minutes, the starter
won’t work and
fuel won’t go to the engine. If someone
tries to start your vehicle again
or uses another key
2-10
ProCarManuals.com
Page 65 of 338
2. If it doesn’t start right away, hold your key in
START for about three to five seconds at a time until
your engine starts. Wait about
15 seconds between
each try
to help avoid draining your battery.
3. If your engine still won’t start (or starts but then
stops), it could be flooded with
too much gasoline.
Try pushing
your accelerator pedal all the way to the
floor and holding it there as you hold
the key in
START for about three seconds. If the vehicle starts
briefly but then stops again, do
the same thing, but
this
time keep the pedal down far five or six seconds.
This clears the extra gasoline €rom the engine. After
waiting about 15 seconds, repeat the nod starting
procedure.
NOTICE:
Your engine is designed to work wkh the
electronics
in your vehicle. If you add electrical
parts or accessories, you could change the way
the fuel injection system operates. Before adding
electrical equipment, check with your dealer.
If
you don’t, your engine might not perform
properly.
If you everhave to have your vehicle towed, see
the part of this manual that tells how to do it
without damaging your vehicle. See “Towing
Your Vehicle” in the lndex.
2-16
ProCarManuals.com
Page 66 of 338
Driving Through Deep Standing Water
NOTICE:
If you drive too quickly through deep puddles or
standing water, water can come in through your
engine's air intake and badly damage your
engine. Never drive through water that is slightly
lower than the underbody
of your vehicle. If you
can't avoid deep puddles
or standing water, drive
through them very slowly.
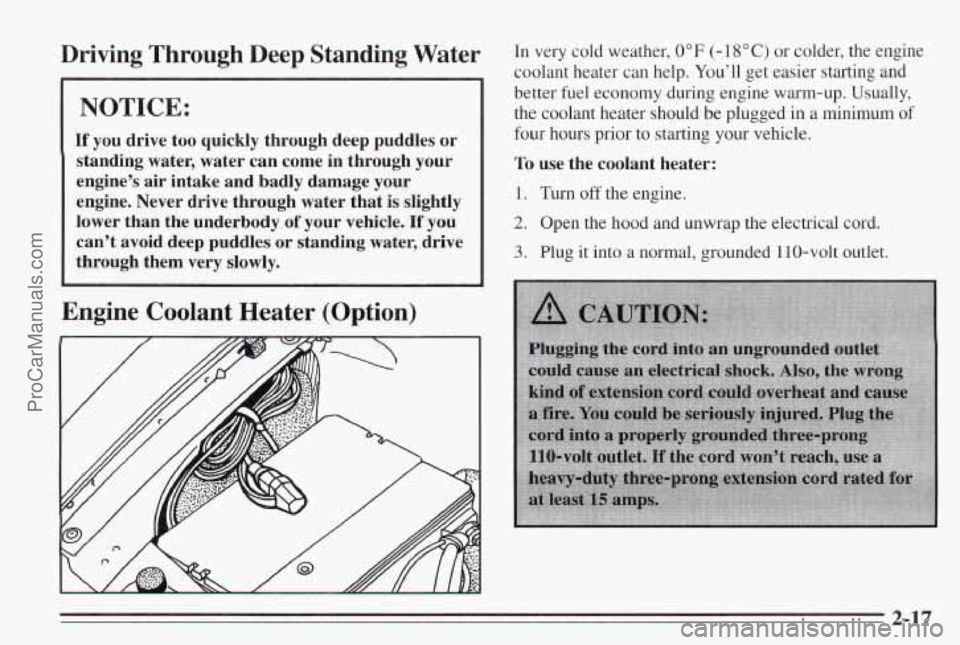
Engine Coolant Heater (Option)
In very cold weather, 0°F (- 18 "C) or colder, the engine
coolant heater can help.
You'll get easier starting and
better fuel economy during engine warm-up.
Usually,
the coolant heater should be plugged in a minimum of
four hours prior
to starting your vehicle.
To use the coolant heater:
1. Turn off the engine.
2. Open the hood and unwrap the electrical cord.
3. Plug it into a normal, grounded 110-volt outlet.
2-17
ProCarManuals.com
Page 70 of 338
DRIVE (D): This is like @, but you never go into
OVERDRIVE.
Here are some times you might choose DRIVE (D)
instead of
a:
- When driving on hilly, winding roads
- When towing a trailer, so there is less shifting
between gears
- When going down a steep hill
SECOND (2): This position gives you more power but
lower fuel economy. You can
use SECOND (2) on hills.
It can help control your speed as you go down steep
mountain roads, but then you would also want to use
your brakes off and on.
NOTICE:
Don’t drive in SECOND (2) for more than 5
miles (8 km), or at speeds over 55 mph (88 km/h),
or you can damage your transaxle. Use
@ or
DRIVE (D) as much as possible.
Don’t shift into SECOND
(2) unless you are going
slower than
65 mph (105 kd), or you can
damage your engine. FIRST
(1): This
position gives you even more power
(but lower fuel economy) than SECOND
(2). You can
use it on very steep hills, or in deep snow or mud.
If the
selector lever is put in FIRST (l), the transaxle won’t
shift into first gear until
the vehicle is going slowly
enough.
NOTICE:
If your front wheels can’t rotate, don’t try to
drive. This might happen
if you were stuck in
very deep sand or mud or were up against
a solid
object. You could damage your transaxle.
Also,
if you stop when going uphill, don’t hold
your vehicle there with only the accelerator
pedal. This could overheat and damage the
transaxle. Use your brakes or shift into PARK (P)
to hold your vehicle in position on a hill.
2-21
ProCarManuals.com
Page 71 of 338
Performance Shifting (Option)
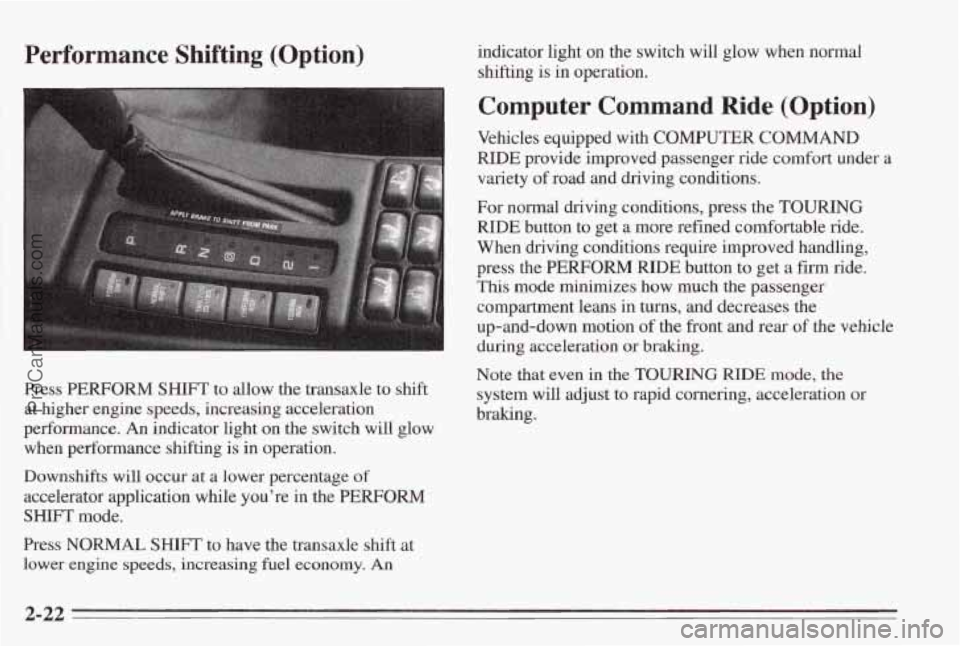
Press PERFORM SHIFT to allow the transaxle to shift
at higher engine speeds, increasing acceleration
performance. An indicator light on
the switch will glow
when performance shifting is in operation.
Downshifts will occur at a lower percentage of
accelerator application while you’re in the
PERFORM
SHIFT mode.
Press NORMAL
SHIFT to have the transaxle shift at
lower engine speeds, increasing fuel economy. An
indicator light on the switch will glow when normal
shifting
is in operation.
Computer Command Ride (Option)
Vehicles equipped with COMPUTER COMMAND
RIDE provide improved passenger ride comfort under a
variety of road and driving conditions.
For normal driving conditions, press the
TOURING
RIDE button to get a more refined comfortable ride.
When driving conditions require improved handling,
press the
PERFORM RIDE button to get a firm ride.
This mode minimizes how much the passenger
compartment leans in turns, and decreases the
up-and-down motion
of the front and rear of the vehicle
during acceleration or braking.
Note that even in the TOURING RIDE mode, the
system will adjust to rapid cornering, acceleration or
braking.
2-22
ProCarManuals.com
Page 98 of 338
The Instrument Panel -- Your
Information System
Your instrument panel is designed to let you know at a
glance how your vehicle is running. You’ll know how
fast you’re going, how much fuel you’re using, and
many other things you’ll need to drive safely and
economically.
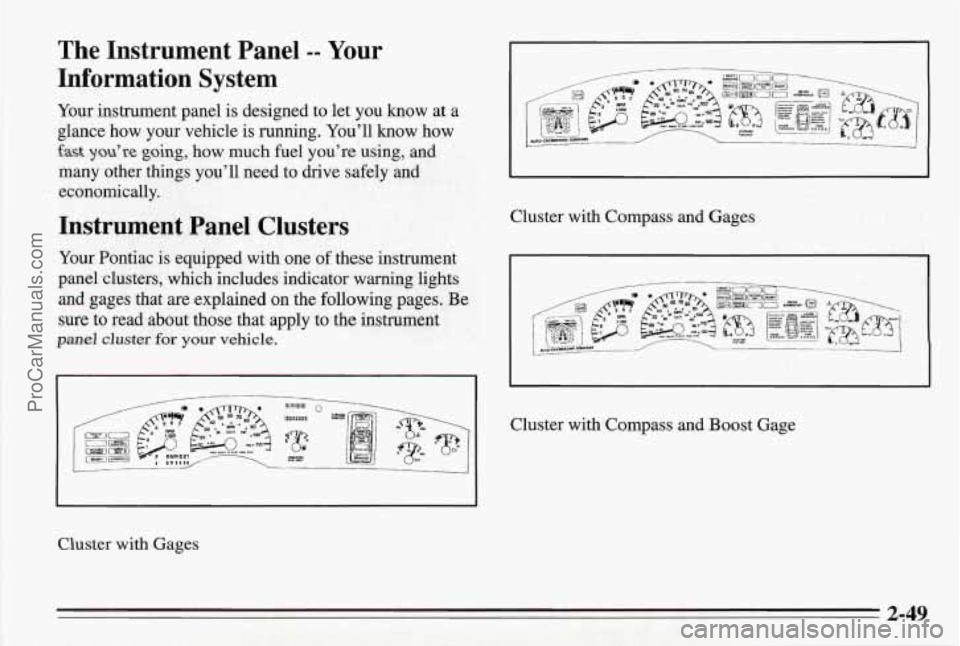
Instrument Panel Clusters
Your Pontiac is equipped with one of these instrument
panel clusters, which includes indicator warning lights
and gages that are explained on the following pages. Be
sure to read about those
that apply to the instrument
panel cluster for your vehicle.
Cluster with Gages Cluster
with Compass and Gages
I
I
Cluster with Compass and Boost Gage
2-49
ProCarManuals.com