1995 PONTIAC BONNEVILLE fog light
[x] Cancel search: fog lightPage 6 of 338
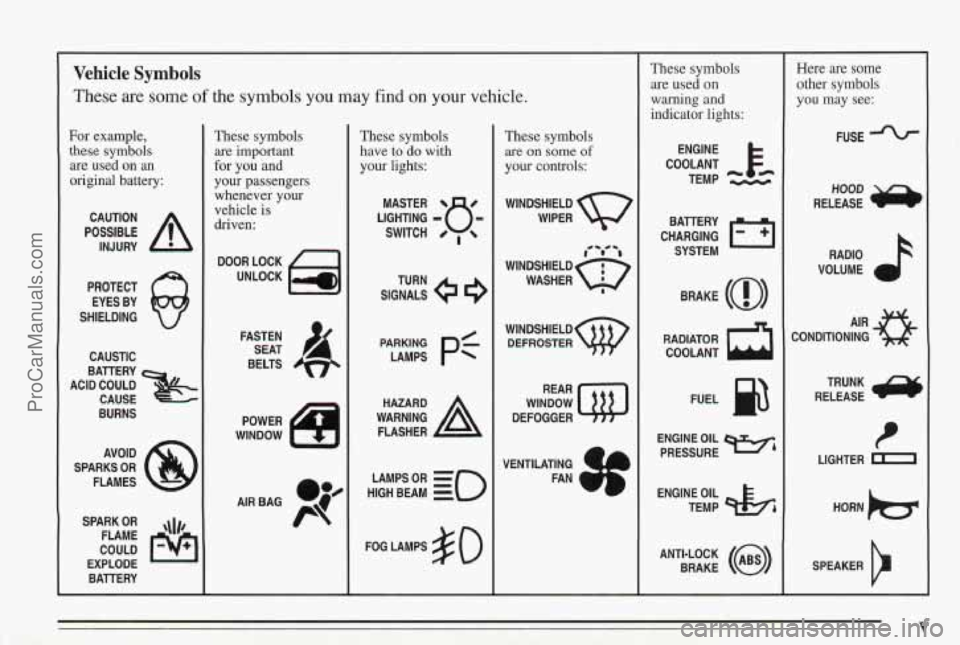
Vehicle Symbols
These are some of the symbols you may find on your vehicle.
For example,
these symbols
are used on
an
original battery:
POSSIBLE A
CAUTION
INJURY
PROTECT EYES BY
SHIELDING
CAUSTIC
ACID COULD BATTERY
CAUSE
BURNS
AVOID
SPARKS
OR
FLAMES
SPARK
OR ,\I/,
COULD FLAME
EXPLODE BAllERY
These symbols are
important
for you and
your passengers
whenever your
vehicle
is
driven:
DOOR LOCK
UNLOCK
FASTEN SEAT
4
BELTS
POWER
WINDNOW
These symbols
have
to do with
your lights:
SIGNALS 9
TURN
HIGH
LAMPSoR BEAM = =o
FOG LAMPS $0
These symbols
are on some of
your controls:
WIPER w
WINDsHIELDw DEFROSTER
WINDOW
DEFOGGER
VENTILATING
4 1
FAN CI
These symbols are used on
warning
and
indicator lights:
COOLANT Fe
TEMP --
ENGINE
CHARGING
I-1
BATTERY SYSTEM
BRAKE
(0)
RADIATOR COOLANT
a
FUEL @
ENGINE OIL
PRESSURE Wb
TEMP OIL 45
ANTI-LOCK (@)
BRAKE
Here are some
other symbols
you may see:
FUSE
RADIO
VOLUME
CONDITIONING
AIR 43
TRUNK
RELEASE
t
LIGHTER n
SPEAKER
V ProCarManuals.com
Page 88 of 338
Instrument Panel Intensity Control
You can brighten or dim your instrument cluster lamps
by rotating the headlamp switch. Rotate the switch all
the way counterclockwise to turn on the interior
courtesy lamps. Rotate the switch clockwise to
turn off
the instrument cluster lamps and displays.
Twilight Sentinel (Option)
Push in the headlamp switch
to
turn your headlamps off.
Rotate the twilight sentinel
switch clockwise from
OFF.
Depending on how dark it becomes outside, the twilight
sentinel
turns your headlamps on automatically, when
they’re needed. Avoid covering the sensor located near
the windshield, by the defroster outlet
-- otherwise your
headlamps will stay on. The
twilight sentinel will keep your headlamps on
for as
long as three minutes to light your way when you leave
your vehicle. Rotate the twilight sentinel switch to
MAX
for a three-minute delay. Rotate it the other way to
reduce the delay.
Also, it’s possible that your headlamps might go out if
you drove from a dark area into a bright area, such as a
lighted parking lot.
If this happens, turn on your
headlamps with the regular headlamp switch.
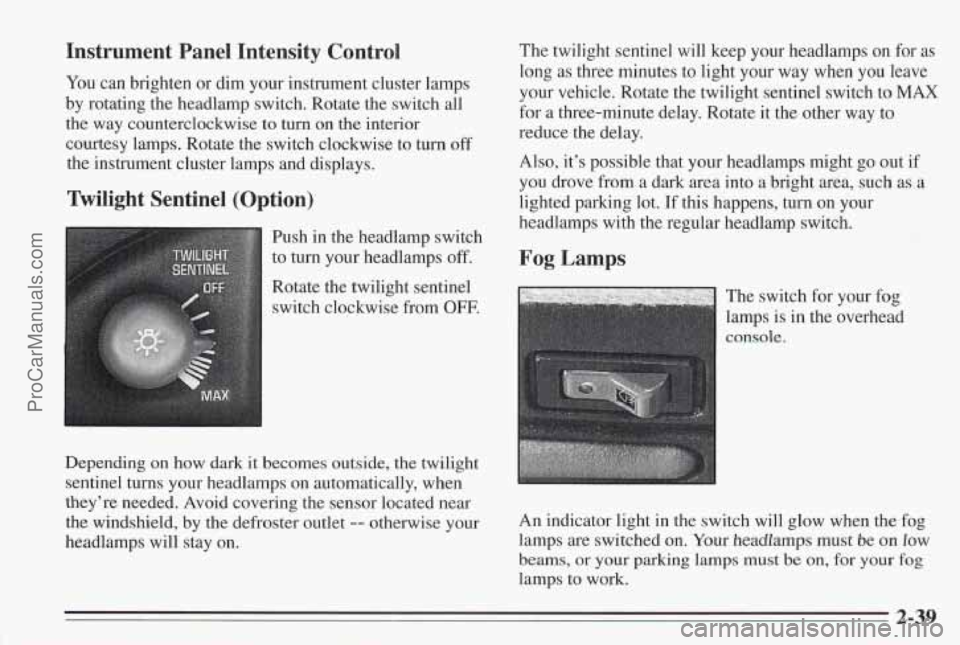
Fog Lamps
The switch for your fog
lamps is in the overhead
An indicator light in the switch will glow when the fog
lamps are switched
on. Your headlamps must be on low
beams, or your parking lamps must be on, for your fog
lamps to work.
2-39
ProCarManuals.com
Page 120 of 338
3. Release the MODE button. The heading display will
start to rotate.
4. Drive the car in small circles. Don’t drive faster than
10 mph.
out. It usually takes
1 to 5 circles.
this when the direction bars are on and the
CALIBRATE light is
off.
5. Drive in circles until the CALIBRATE light goes
6. Your compass should be calibrated. You will know
Compass Accuracy: Your compass may show different
headings around bridges, power lines, large metal
objects, and steep hills. This is normal and
is true of
compasses in general.
If you put large metal objects like golf clubs in the trunk
they could affect accuracy. If the accuracy is close, the
compass will adapt
to these objects over time.
If you use an antenna with a magnetic base, it is best to
mount it away from the center of the trunk near the rear
window. The
rear defog system can affect accuracy, and
the
compass corrects for the rear defog. However, if the rear
defog is turned on while making sharp turns, the
accuracy may be off. When you turn the rear defog
off
again, the accuracy returns to normal.
Do not turn on the rear defog if you are trying to
calibrate. The system will not allow the calibration. You
will hear the chime, and CALIBRATE will flash for a
few seconds.
Be aware that metal objects are sometimes buried in the
ground. They
can affect accuracy and you may not know
they are there. As an example, many concrete roads
have metal reinforcements inside.
ProCarManuals.com
Page 123 of 338
Standard Climate Control
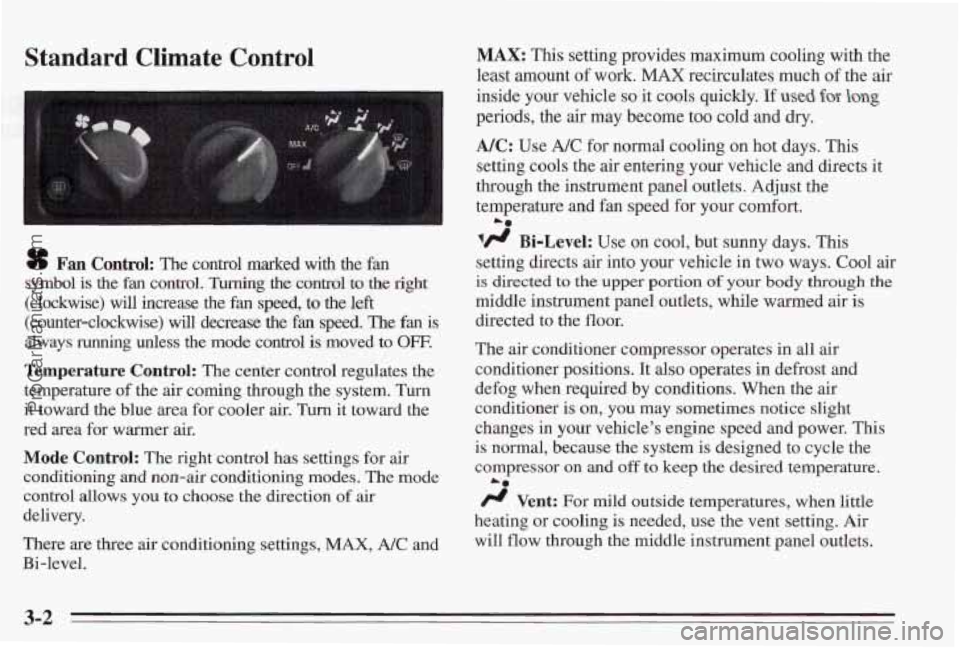
sf Fan Control: The control marked with the fan
symbol is
the fan control. Turning the control to the right
(clockwise) will increase the fan speed, to the left
(counter-clockwise) will decrease the fan speed. The fan is
always running unless the mode control is moved to OFF.
Temperature Control: The center control regulates the
temperature
of the air coming through the system. Turn
it toward the blue area for cooler air.
Turn it toward the
red area for warmer air.
Mode Control: The right control has settings for air
conditioning and non-air conditioning modes.
The mode
control allows
you to choose the direction of air
delivery.
There are three air conditioning settings,
MAX, A/C and
Bi-level.
MAX: This setting provides maximum cooling with the
least amount
of work. MAX recirculates much of the air
inside your vehicle
so it cools quickly. If used for- long
periods, the air may become too cold and dry.
NC: Use A/C for normal cooling on hot days. This
setting cools the air entering your vehicle and directs it
through the instrument panel outlets. Adjust the
temperature
and fan speed for your comfort.
lfl Bi-Level: Use on cool, but sunny days. This
setting directs air into your vehlcle in two ways. Cool air
is directed to the upper portion of your body through the
middle instrument panel outlets, while warmed air is
directed to the floor.
The
air conditioner compressor operates in all air
conditioner positions. It also operates in defrost and
defog when required by conditions. When the
air
conditioner is on, you may sometimes notice slight
changes
in your vehicle’s engine speed and power. This
is
normal, because the system is designed to cycle the
compressor on
and off to keep the desired temperature.
/J Vent: For mild outside temperatures, when little
heating or cooling is needed, use the vent setting. Air
will
flow through the middle instrument panel outlets.
La
3-2
ProCarManuals.com
Page 124 of 338
Use the air outlets to adjust and direct the air flow.
Adjust the temperature control and fan control as
desired. The air conditioning compressor is not working
when vent is selected.
I# Heat: This setting directs warmed air through the
heater ducts toward the floor. Adjust the fan speed and
the temperature control for your comfort. Some warm
air is diverted to the windshield to minimize fogging.
'fl Defog: This setting directs air to the heater ducts
and toward the windshield. Use defog on cool, humid
days to keep the windshield and side windows clear.
Adjust the fan speed and temperature for your cornfort.
9 Defrost: This setting directs most of the air toward
the windshield. Use defrost when you want to remove
fog or ice from the windshi'eld. Adjust the temperature
control toward
warm and the fan control toward high.
Defrost will work better if heavy snow and ice
are
cleared away from the hood, windshield and the air inlet
area between the hood and windshield.
0
w.
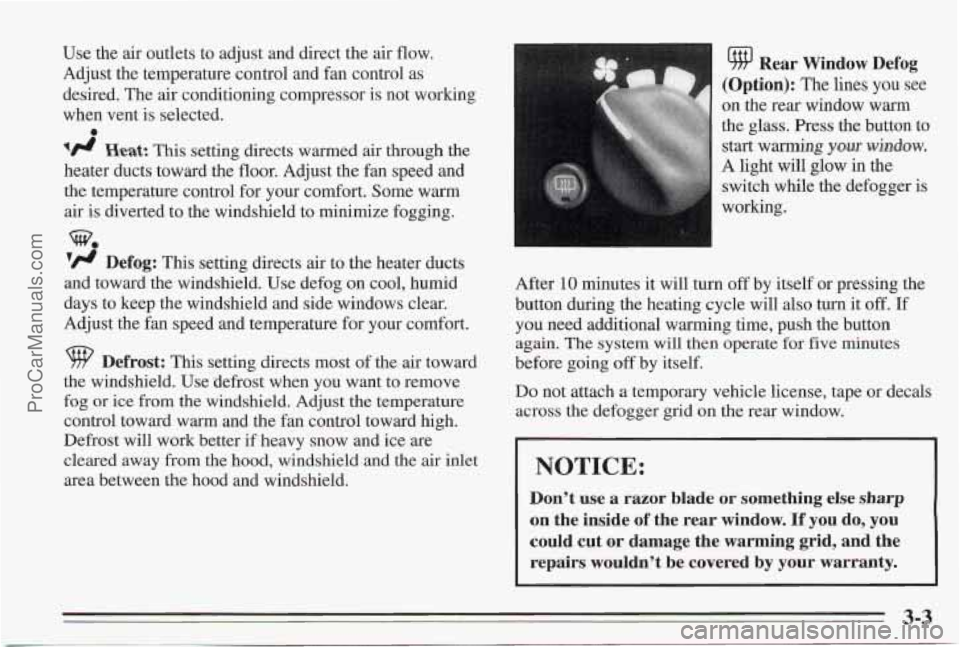
u/HI Rear Window Defog
(Option): The lines you see
on the rear window warm
the glass. Press the button to
A light
will glow in the
switch while the defogger is
working. start
warming ymr wlndow.
After 10 minutes it
will turn off by itself or pressing the
button during the heating cycle will
also turn it off. If
you need additional warming time, push the button
again. The system will then operate for five rninutes
before going off by itself.
Do not attach a temporary vehicle license, tape or decals
across the defogger grid
on the rear window.
NOTICE:
Don't use a razor blade or something else sharp
on the inside of the rear window. If you do, you
could cut or damage the warming grid, and the
repairs wouldn't be covered
by your warranty.
3-3
ProCarManuals.com
Page 126 of 338
MANUAL OPERATION: The system can be used in
various ways to manually adjust the air delivery mode or
the fan speed.
Pressing the
MODE button will cause air to be delivered
through the floor, middle or windshield outlets and stay in the mode selected until the mode button or the auto
button is pushed. Notice the arrows
in the display.
The HEAT mode supplies
air to the floor outlets and is
used primarily in cold weather. To adjust the temperature
of the air supplied, press the TEMP button up or down.
DEFOG delivers air to the floor and the windshield
outlets and is used on cold, humid days when
some
window fogging occurs.
BI-LEVEL delivers warm air to the floor and cooler air to
the middle outlets. Bi-level
is used on cool but sunny days.
In each of these modes, the fan speed may be adjusted
by pushing the fan button up or down as necessary for
comfort.
To warrn or cool the air delivered, push the
TEMP button up or down.
OFF: This button is used to turn off the system. Fresh
air will continue to flow through the vehicle, and the
system
will try to maintain the previously set
temperature.
The outside temperature will show in the
display when the system is
OFF.
A/C: Press the A/C button to turn the air conditioning on
and
off. The system will cool and dehumidfy the air inside
the car.
In the AUTO mode the display will indicate that
A/C is on, but the air conditioning compressor only operates
when the system determines it
is needed. Slight changes in
engine power may be felt as the compressor cydes.
Recirc: When RECIRC is selected, the system
will limit the amount of fresh air entering your vehicle.
This is helpful when you are trying to cool the air
quickly or limit odors entering your vehicle. In the
AUTO mode, the system will use RECIRC as necessary
to cool the air. Pressing the RECIRC will change
the
operation to a manual mode and the air will recirculate
for
10 minutes. RECIRC will show in the display and
then return to EXT TEMP display.
9 Defrost: Push the defrost button to clear the
windshield of fogging or icing in extremely humid or
cold conditions. If you select defrost from
AUTO, the
system will control the fan speed. Use the fan button to
adjust the fan speed and the TEMP button to adjust the
air temperature for your comfort.
rear window warm the glass. Press the button to start
warming your window.
Rear Window Defogger: The lines you see on the
3-5
ProCarManuals.com
Page 264 of 338
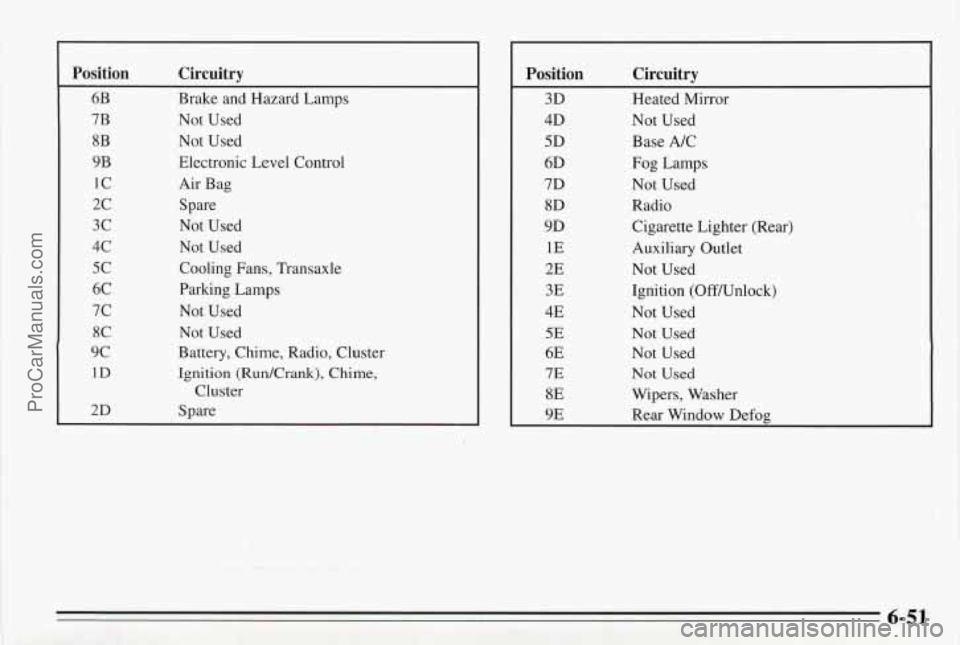
Position Circuitry
6B Brake and Hazard Lamps
7B Not Used
8B Not Used
9B Electronic Level Control
1c Air Bag
2c Spare
3c Not Used
4c Not Used
5c Cooling Fans, Transaxle
6C Parking Lamps
7c Not Used
8C Not Used
9c Battery, Chime, Radio, Cluster
1D Ignition (RudCrank), Chime,
2D Spare Cluster
Position Circuitry
3D Heated Mirror
4D Not Used
5D Base
A/C
6D Fog Lamps
7D Not Used
8D Radio
9D Cigarette Lighter (Rear)
1E Auxiliary Outlet
2E Not Used
3E Ignition (OffAJnlock)
4E Not Used
5E Not Used
6E Not Used
7E Not Used
8E Wipers, Washer
9E Rear Window Defog
ProCarManuals.com
Page 327 of 338
Automatic Transaxle Fluid ........................ 6-20
Adding
.................................... 6-21
Checking ................................... 6-20
Battery
...................................... 6-29
Battery Replacement, Remote Keyless Entry
.......... 2-6
Battery Warning Light
........................... 2-63
Battery, Warnings
............................ 5-2, 5-4
BBB Auto Line ................................. 8-3
Belt, Engine Accessory
.......................... 6- 11
Belt, Engine Accessory (Supercharged)
............. 6- 12
BoostGage
.................................... 2-66
Brake Adjustment
.............................. 6-29
Brake Fluid, Adding
............................. 6-28
Brake Master Cylinder
........................... 6-27
BrakePedalTravel
.............................. 6-29
Brake System Parts, Replacing
.................... 6-29
Brake System Warning Light
...................... 2-53
Brake-Transaxle Shift Interlock
............... 2-27, 7-39
BrakeWe
ar .................................... 6-28
Brake, Parking
................................. 2-23
Brakes, Anti-Lock
............................... 4-6
Brakes, Trailer
................................. 4-33
Braking
........................................ 4-5
Braking, In Emergencies
.......................... 4-9
Break-In, New Vehicle
.......................... 2- 13
Bulb Replacement .............................. 6-53
Headlamps ................................. 6-30
Taillamps ................................... 6-3 1
Blizzard ...................................... 4-26
BTSI (Brake-Transaxle Shift Interlock)
......... 2-27, 7-39
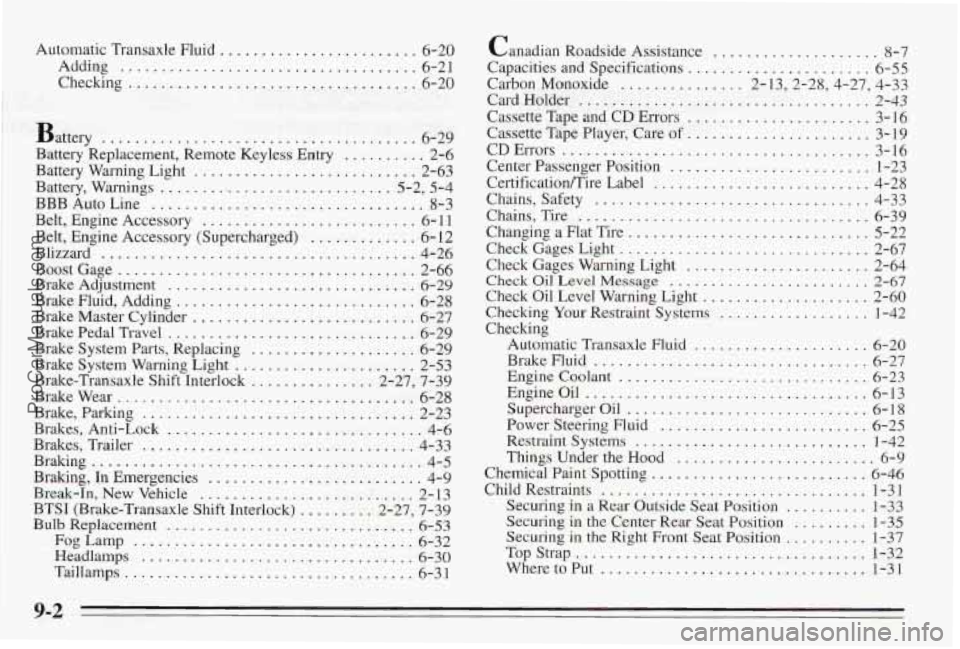
FogLamp
.................................. 6-32 Canadian
Roadside Assistance
.................... 8-7
Capacities and Specifications
...................... 6-55
Carbon Monoxide
............... 2.13.2.28.4.27. 4.33
Card Holder
................................... 2-43
Cassette Tape and CD Errors ...................... 3-16
Cassette Tape Player. Care of ...................... 3-19
CDEl-rors
..................................... 3-16
Center Passenger Position
........................ 1-23
Certification/Tire Label
.......................... 4-28
Chains, Safety
................................. 4-33
Chains, Tire
................................... 6-39
Changing a Flat Tire ............................. 5-22
Check Gages Light
.............................. 2-67
Check Gages Warning Light
...................... 2-64
Check Oil Level Message ........................ 2-67
Check Oil Level Warning Light .................... 2-60
Checking
Your Restraint Systems .................. 1-42
Automatic Transaxle
Fluid ..................... 6-20
BrakeFluid
................................. 6-27
Checking
Engine Coolant
.............................. 6-23
EngineOil
.................................. 6-13
Supercharger Oil
............................. 6-18
Power Steering Fluid
......................... 6-25
Restraint Systems
............................ 1-42
Things Under the Hood ........................ 6-9
Chemical Paint Spotting
.......................... 6-46
Child Restraints
................................ 1-31
Securing
in a Rear Outside Seat Position .......... 1-33
Securing in the Right Front Seat Position .......... 1-37
TopStrap ................................... 1-32
Securing in the Center Rear
Seat Position
......... 1-35
WheretoPut
................................ 1-31
9-2
ProCarManuals.com