Page 123 of 338

Standard Climate Control
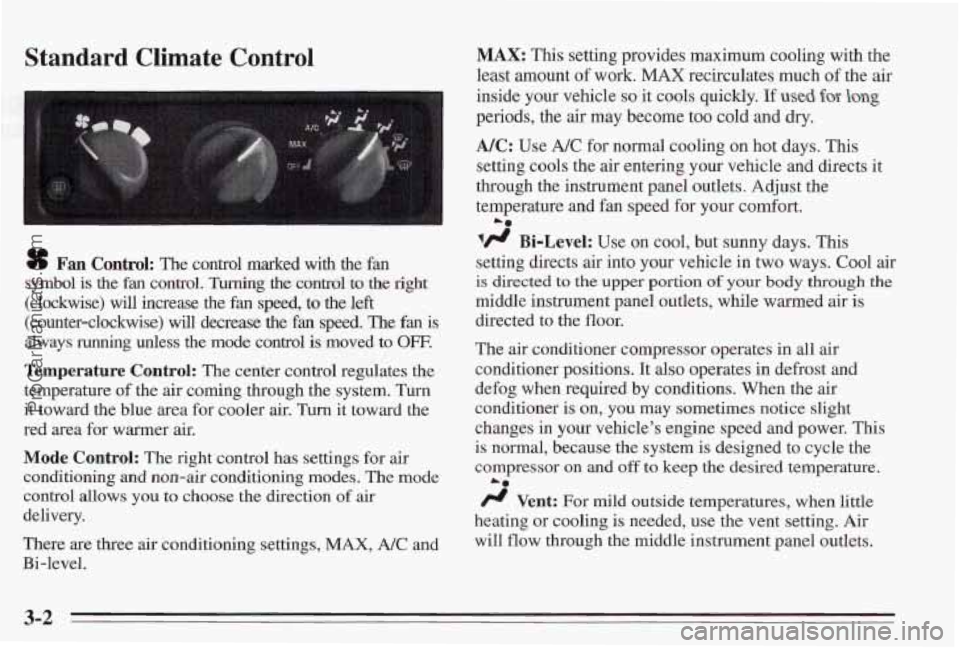
sf Fan Control: The control marked with the fan
symbol is
the fan control. Turning the control to the right
(clockwise) will increase the fan speed, to the left
(counter-clockwise) will decrease the fan speed. The fan is
always running unless the mode control is moved to OFF.
Temperature Control: The center control regulates the
temperature
of the air coming through the system. Turn
it toward the blue area for cooler air.
Turn it toward the
red area for warmer air.
Mode Control: The right control has settings for air
conditioning and non-air conditioning modes.
The mode
control allows
you to choose the direction of air
delivery.
There are three air conditioning settings,
MAX, A/C and
Bi-level.
MAX: This setting provides maximum cooling with the
least amount
of work. MAX recirculates much of the air
inside your vehicle
so it cools quickly. If used for- long
periods, the air may become too cold and dry.
NC: Use A/C for normal cooling on hot days. This
setting cools the air entering your vehicle and directs it
through the instrument panel outlets. Adjust the
temperature
and fan speed for your comfort.
lfl Bi-Level: Use on cool, but sunny days. This
setting directs air into your vehlcle in two ways. Cool air
is directed to the upper portion of your body through the
middle instrument panel outlets, while warmed air is
directed to the floor.
The
air conditioner compressor operates in all air
conditioner positions. It also operates in defrost and
defog when required by conditions. When the
air
conditioner is on, you may sometimes notice slight
changes
in your vehicle’s engine speed and power. This
is
normal, because the system is designed to cycle the
compressor on
and off to keep the desired temperature.
/J Vent: For mild outside temperatures, when little
heating or cooling is needed, use the vent setting. Air
will
flow through the middle instrument panel outlets.
La
3-2
ProCarManuals.com
Page 128 of 338
Audio Systems
The following pages describe the audio systems
available for your Pontiac, and how to get the best
performance from them. Please read about the system in
your vehicle.
Setting the Clock for Stereo Radio
1. With the ignition on,
press
SET. The SET
indicator will appear on
the digital display
for
five seconds.
2. While set is displayed, press and hold SEEK until
the correct minute appears
on the display.
3. While set is displayed, press and hold SEEK until
the correct hour appears.
Setting the Clock for Radios with Cassette
or CD
1. Press and hold the HR or
MIN button until the
hours or minutes begin
to change on the time
display. While the radio
is in the time set mode,
the colon in
the display
will blink.
2. Press the HR and MIN buttons until the correct time
appears.
ProCarManuals.com
Page 137 of 338

Cassette Tape and CD Errors
If “E” and a number appears in the radio display, an
error has occurred and the cassette or compact disc
cannot play temporarily.
If the error occurred while trying to play a cassette tape,
the following conditions may have caused the error:
The cassette tape is tight and the cassette player
cannot
turn the hubs of the cassette tape. “E10” may
be displayed.
Hold the cassette with the open end
down and try turning the right hub
counter-clockwise
with a pencil. Flip the tiq% dmr
and repeat. If the hubs do not turn easily, your
cassette tape may be damaged and should not be
used
in the cassette player. Try a new tape to make
sure that your cassette player is working properly.
The cassette tape is broken. “El 1” may be displayed.
Check to see if your tape is broken.
Try a new
cassette tape.
If the error occurred while trying to play a CD in the
radio or in the
CD changer, the following conditions
may have caused the error:
The road is too rough. The disc should play when the
road is smoother.
0 The disc is dirty, scratched, wet or upside down.
The air is very humid. If so, wait about an hour and
try again.
If any error oc’curs repeatedly or if an error cannot be
corrected, please contact your dealer.
If your radio
displays an error number, write it down and provide it to
your dealer when reporting the problem.
3-16
ProCarManuals.com
Page 138 of 338

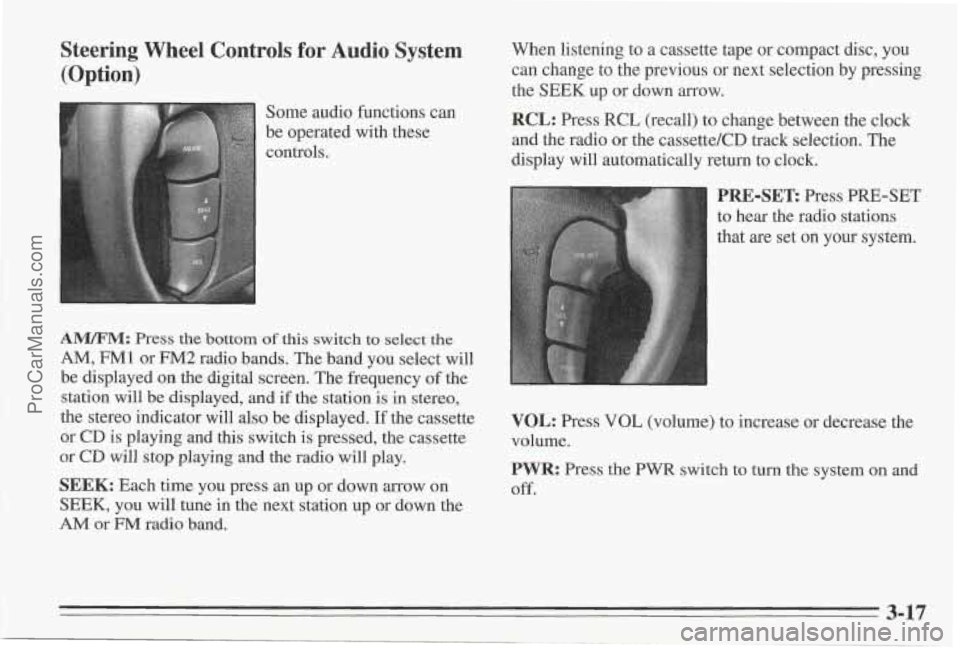
Steering Wheel Controls for Audio System (Option)
Some audio functions can
be operated with these
controls,
A"M: Press the bottom of this switch to select the
AM, FM1 or FM2 radio bands. The band you select will
be displayed on the digital screen. The frequency
of the
station will be displayed, and if the station is
in stereo,
the stereo indicator will also be displayed.
If the cassette
or
CD is playing and this switch is pressed, the cassette
or CD will stop playing and the radio will play.
SEEK: Each time you press an up or down arrow on
SEEK, you will tune in the next station up or down the
AM or FM radio band. When listening to
a cassette tape or compact disc, you
can change to the previous or next selection by pressing
the
SEEK up or down arrow.
RCL: Press RCL (recall) to change between the clock
and the radio or the cassette/CD track selection. The
display will automatically return to clock.
'RE-SET: Press PRE-SET
o hear the radio stations
hat
are set on your system.
VOL: Press VOL (volume) to increase or decrease the
volume.
PWR: Press the PWR switch to turn the system on and
Off.
3-17
ProCarManuals.com