Page 182 of 274

Downloaded from www.Manualslib.com manuals search engine Substitute Oil (LT1 Only): When adding
oil to maintain engine oil level, if an oil
meeting GM Standard GM4718M is not
available, you can use oil designated
either
SAE 5W-30 API Service SH or SG
at all temperatures, or
SAE 1OW-30 API
Service
SH or SG at temperatures above
0°F (-18°C). This oil should not be used
for an oil change.
Substitute Oil (LT5 Only): When adding
oil to maintain engine oil level, if an oil
meeting
GM Standard GM4718M is not
available, you can use oil designated SAE
1OW-30 API Service SH or
SG at all
temperatures. This oil should not be used
for an oil change.
Engine Oil Additives
Don’t add anything to your oil. Your
Chevrolet dealer is ready to advise if you
think something should be added.
When to Change Engine Oil
See if any one of these is true for you:
Most trips are less than 4 miles
It’s below freezing outside and most
trips are less than
10 miles (16 km).
(6 km).
The engine is at low speed most of
the time (as
in stop-and-go traffic).
Most trips are through dusty places.
If any one of these is true for your
vehicle, you need to change your oil and
filter every 3,000 miles
(5 000 km) or
3 months
- whichever comes first.
(See “Engine Oil Life Monitor” in the
Index.)
If none of them is true, change the oil
every 7,500 miles
( 12 500 km) or 12
months
- whichever comes first. Change
the filter at the first oil change and at
every other oil change after that. (See
“Engine Oil Life Monitor” in the Index.)
Engine Coolant Heater (Engine Block
Heater)
An engine coolant heater can be a big
help if you have to park outside in very
cold weather,
0 “F (- 18 “C) or colder. If
your vehicle has this feature, see “Engine
Coolant Heater” in the Index.
What to Do with Used Oil
Did you know that used engine oil
contains certain elements that may be
unhealthy for your skin and could even
cause cancer? Don’t let used oil stay on your
skin for very long. Clean your skin
and nails with soap and water, or a good
hand cleaner. Wash or throw away
clothing or rags containing used engine
oil. (See the manufacturer’s warnings
about the use and disposal of oil
products.)
Used oil can be a real threat to the
environment. If you change your own oil,
be sure to drain all free-flowing oil from
the filter before disposal. Don’t ever
dispose of oil by putting it in the trash,
pouring it on the ground, into sewers, or
into streams or bodies of water. Instead,
recycle
it by taking it to a place that
collects used oil. If you have a problem
properly disposing of your used oil, ask
your dealer, a service station or
a local
recycling center for help. L 1
181 ...
Page 194 of 274

Downloaded from www.Manualslib.com manuals search engine Brake Master Cylinder
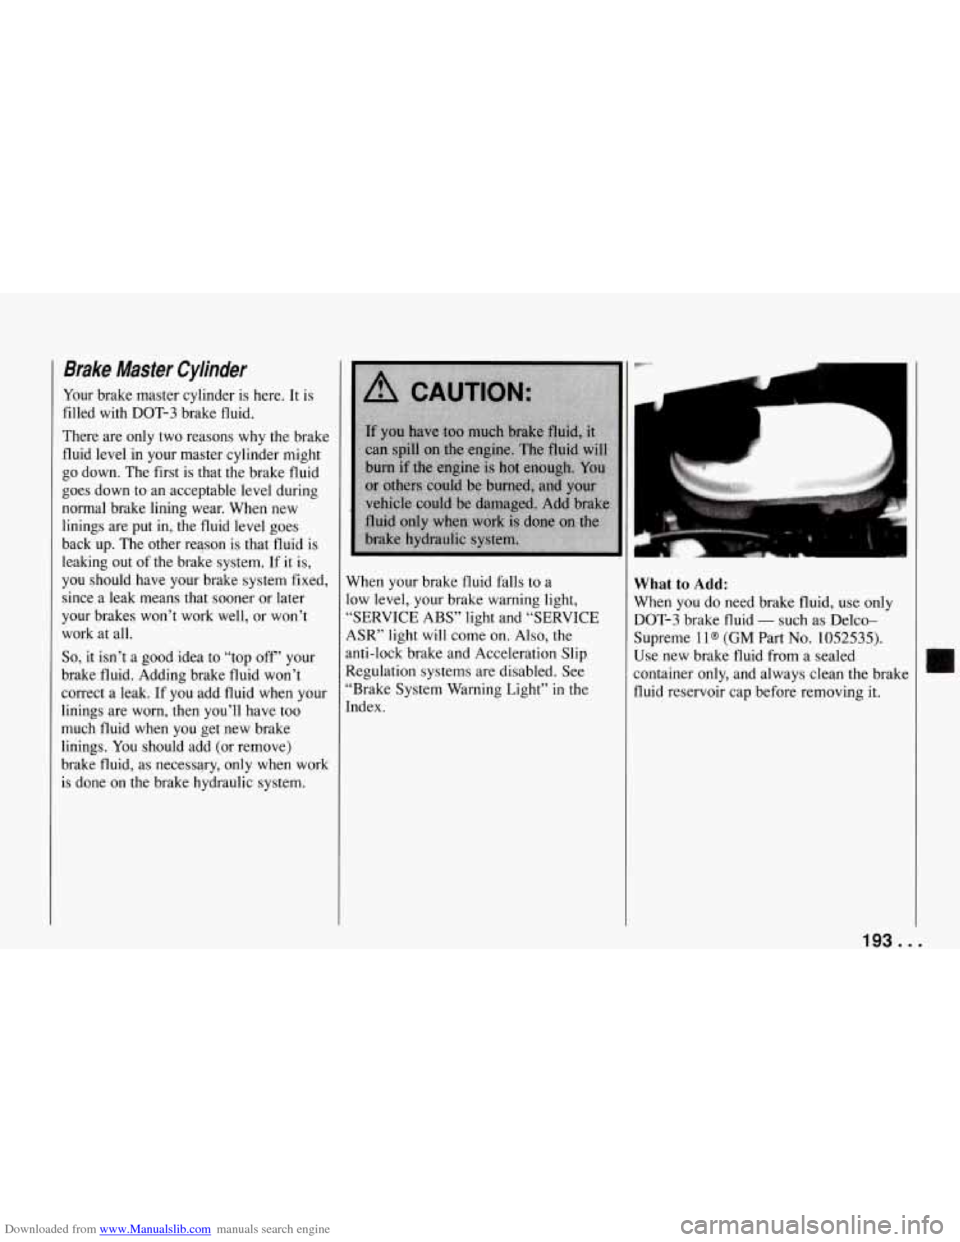
Your brake master cylinder is here. It is
filled with DOT-3 brake fluid.
There are only two reasons why the brake
fluid level in your master cylinder might
go down. The first is that the brake fluid
goes down to an acceptable level during
normal brake lining wear. When new
linings are put in, the fluid level goes
back up. The other reason is that fluid is
leaking out of the brake system.
If it is,
you should have your brake system fixed,
since a leak means that sooner or later
your brakes won’t work well, or won’t work at all.
So, it isn’t a good idea to “top off’ your
brake fluid. Adding brake fluid won’t
correct a leak. If you add fluid when your
linings are worn, then you’ll have too
much fluid when you get new brake
linings. You should add (or remove)
brake fluid, as necessary, only when work
is done on the brake hydraulic system. When your brake fluid falls to a
low level, your brake warning light,
“SERVICE ABS” light and “SERVICE
ASR” light will come on. Also, the
anti-lock brake and Acceleration Slip
Regulation systems are disabled. See
“Brake System Warning Light” in the
Index.
What to Add:
When you do need brake fluid, use only
DOT-3 brake fluid
- such as Delco-
Supreme
1 l@ (GM Part No. 1052535).
Use new brake fluid from a sealed
container only, and always clean the brak
fluid reservoir cap before removing it.
193 ...
Page 197 of 274
Downloaded from www.Manualslib.com manuals search engine Service and Appearance Care
4. Remove the two screws from both
sides of the cover. Before you remove
the last screw, put your hand under the
cover to hold it.
5. Reach around the hood and pull the
cover straight out. Be careful not to
scratch the paint.
6.
7.
8.
9.
Remove the four screws from the
retainer near each corner of the
headlight. Don’t move the large-head
adjusting screws or your headlight
will not be aimed properly.
Hold the headlight and remove the
retainer.
Remove the headlight and unplug the
electrical connector.
Reverse the steps with a new
headlight.
Fog Lamp
You can reach the fog lamps from under
the front bumper.
1. Remove the screw in the access door.
Open the door.
1/8 turn and pull it out.
wiring harness.
2. Turn the bulb base counterclockwise
3. Disconnect the bulb base from the
4. Reverse the steps with a new bulb.
. . ,196
Page 198 of 274
Downloaded from www.Manualslib.com manuals search engine Front Turn Signal
1. Open the hood.
2. Find the socket at the front of the
engine compartment.
turn and pull it out.
3. Turn the socket counterclockwise 1/4
4.
5.
Push the bulb in, turn it
counterclockwise, then pull it out.
Reverse the steps with a new bulb.
The socket has three large tabs and
one small tab. Be sure
to line up the
small tab with the small notch in the
housing.
.A
Rear 'hrn Signal and Taillight
1. Remove the screws.
197.
I1
..
Page 199 of 274
Downloaded from www.Manualslib.com manuals search engine Service and Appearance Care
2. Pull the lens out.
3. Push the bulb in, turn it
counterclockwise, then pull it out.
4. Reverse the steps with a new bulb. To
prevent water from getting inside the
lens, make sure the lens seal is
properly positioned.
. . .I98
lack-up Light
I'ou can reach the back-up lights by
emoving the license plate and reaching
hrough the opening.
. Push the tab on the socket and turn it
counterclockwise.
!. Push the bulb in, turn it
counterclockwise, then pull it out.
1. Reverse the steps with a new bulb.
Page 200 of 274
Downloaded from www.Manualslib.com manuals search engine Sidemarker
You can reach the front sidemarker from
inside the engine compartment.
Reach the rear sidemarker from under the vehcle.
1. Turn the socket counterclockwise 1/4
turn and pull it out.
2. Pull the bulb straight out.
3. Reverse the steps with a new bulb.
I
:ornering Light
lou can reach the front cornering. light
rom inside the engine compartment.
!each the rear cornering light from under
he vehicle.
. Press the tab on the socket, turn it
counterclockwise
1/4 turn and pull it
out.
n c
199 ...
Page 201 of 274
Downloaded from www.Manualslib.com manuals search engine Service and Appearance Care
2. Push the bulb in, turn it
counterclockwise, then pull it out.
3. Reverse the steps with a new bulb.
0
Rear Cargo Compartment Light
1. Pry the cover off with a screwdriver.
Be sure to pry from the rear side, or
you could break the tab on the cover.
(Coupe)
2. Remove the bulb.
3. Reverse the steps with a new bulb.
Rear Cargo Compartment Light
(Convertible)
1.
2.
3.
Pry the cover off with a screwdriver.
Remove the bulb.
Reverse the steps with a new bulb.
:enter High-Mounted Stoplight
Except ZR-1)
‘ou can reach the center high-mounted
toplight by removing the license plate
nd reaching through the opening.
. Turn the socket counterclockwise 1/4
turn and pull it out.
. . .200
Page 202 of 274
Downloaded from www.Manualslib.com manuals search engine 2. Push the bulb in, turn it
counterclockwise, then pull it out.
3. Reverse the steps with a new bulb.
ii
Center High-Mounted Stoplight (ZR-1) I 4.
side of hatch, near the roof.
the
roof.
3. Gently pull the assembly away from Remove
the two screws on the
underside of the assembly.
Remove the rubber backing and pry
the lens from the assembly.
201 . . .