1994 CHEVROLET CORVETTE ignition
[x] Cancel search: ignitionPage 112 of 274

Downloaded from www.Manualslib.com manuals search engine I- - 1-0
I I I
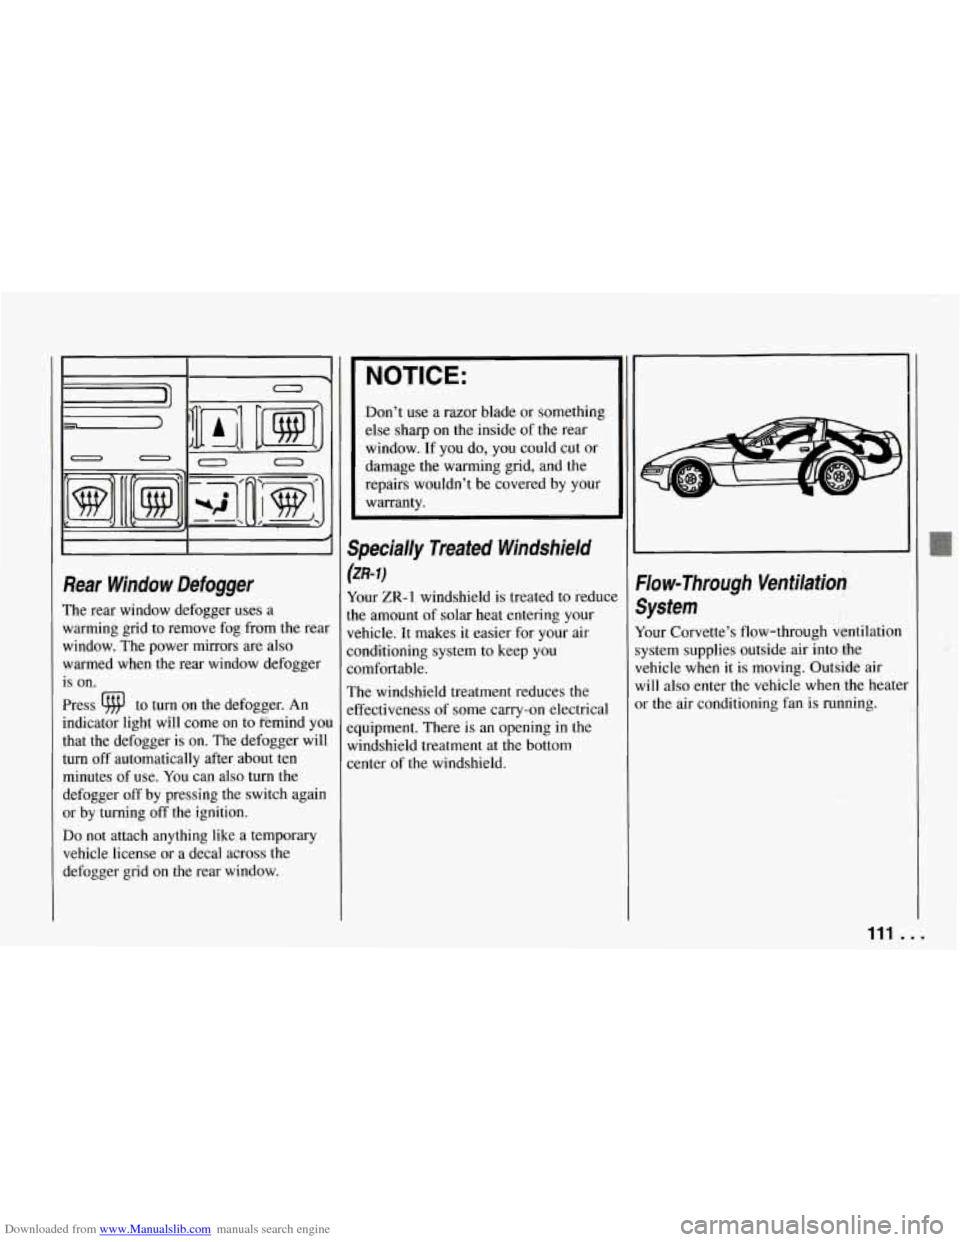
Rear Window Defogger
The rear window defogger uses a
warming grid to remove fog from the rear
window. The power mirrors are also
warmed when the rear window defogger
is on.
Press
9 to turn on the defogger. An
indicator light will come on to fiemind you
that the defogger is on. The defogger will
turn off automatically after about ten
minutes
of use. You can also turn the
defogger
off by pressing the switch again
or by turning
off the ignition.
Do not attach anything like a temporary
vehicle license or a decal across the
defogger grid on the rear window.
NOTICE:
Don’t use a razor blade or something
else sharp on the inside of the rear
window. If
you do, you could cut or
damage the warming grid, and the
repairs wouldn’t be covered by your
warranty.
Specially Treated Windshield
(ZR-I)
Your ZR-1 windshield is treated to reduct
the amount of solar heat entering your
vehicle. It makes it easier for your air
conditioning system to keep you
comfortable.
The windshield treatment reduces the
effectiveness of some carry-on electrical
equipment. There is an opening in the
windshield treatment at the bottom
center of the windshield.
Vow-Through Ventilation
System
four Corvette’s flow-through ventilation
lystem supplies outside air into .the
Iehicle when it is moving. Outside air
vi11 also enter the vehicle when the heater
)r the air conditioning fan
is running.
111 . .
Page 118 of 274

Downloaded from www.Manualslib.com manuals search engine Repeat: Press “REPT” to go to the
beginning of the current track after eight
seconds or more
of play. After eight
seconds or less of play, the player will
return to the beginning of the previous
track.
Search: Press “SRCH’ to go to the
beginning of the next track.
Scan: Press “SCAN” to listen to the first
eight seconds of each track. Press it again
to stop scanning.
Compression: Press “COMP” to make
loud and soft passages more nearly equal
in volume. Press
it again for normal play.
To Stop the Disc Player
0
0
0
Turn the power off or turn the ignition
key
off. The disc stays in the player
and will resume playing at the point
where it stopped.
Press “STOP-PLAY” to stop playing
the disc and switch to radio. Press it
again to restart the disc at the point
where it stopped.
Press “EJCT” to eject the disc and
switch to radio. If the ignition or audio
system is turned
off, the player will
pull the disc back in if you don’t
remove it from the opening within
30 seconds.
Understanding Radio Reception
FM Stereo
FM stereo will give you the best sound.
But FM signals will reach only about
10 to 40 miles (16 to 65 km). And, tall
buildings or hills can interfere with
FM signals, causing the sound to come
and go.
AM
The range for most AM stations is greater
than for
FM, especially at night. The
longer range, however, can cause stations
to interfere with each other. AM can pick
up noise from things like storms and
power lines. Try reducing the treble to
reduce this noise if you ever get it. Care of Your Cassette Tape
Player
A tape player that is not cleaned regularly
can cause reduced sound quality, ruined
cassettes, or a damaged mechanism.
Cassette tapes should be stored in their
cases away from contaminants, direct
sunlight, and extreme heat. If they aren’t,
they may not operate properly or cause
failure of the tape player.
Your tape player should be cleaned
regularly each month or after every 15
hours of use. If
you notice a reduction in
sound quality, try a known good cassette
to see if the tape or the tape player
is
at fault. If this other cassette has no
improvement in sound quality, clean the
tape player.
117.. .
Page 144 of 274

Downloaded from www.Manualslib.com manuals search engine 1 Jump Starting
If your battery has run down, you may
want to use another vehicle and some
jumper cables to start your Corvette.
But please follow the steps below to
do it safely.
NOTICE:
Ignoring these steps could result
in costly damage to your vehicle
that wouldn’t be covered by your
warranty.
Trying to start your Corvette by
pushing or pulling it could damage
your vehicle,
even if you have a
manual transmission. And if you
have an automatic transmission, it
won’t start that way.
Ib Jump Start Your Corvette:
1. Check the other vehicle. It must have
a 12-volt battery with a- negative
ground system.
NOTICE:
If the other system isn’t a 12-volt
system with a negative ground, both
vehicles can be damaged.
2. Get the vehicles close enough so the
jumper cables can reach, but be sure
the vehicles aren’t touching each
other. If they are, it could cause a ground connection you don’t
want.
You wouldn’t be able to start your
Corvette, and the bad grounding could
damage the electrical systems.
3. Turn off the ignition on both vehicles.
Turn
off all lights that aren’t needed,
and radios. This will avoid sparks and
help save both batteries. And it could
save your radio!
I NOTICE:
I
If you leave your radio on, it could be
badly damaged. The repairs wouldn’t
be covered by your warranty.
4. Open the hoods and locate the
batteries. Find the positive
(+) and
negative
(-) terminals on each.
143 ...
Page 148 of 274

Downloaded from www.Manualslib.com manuals search engine IC
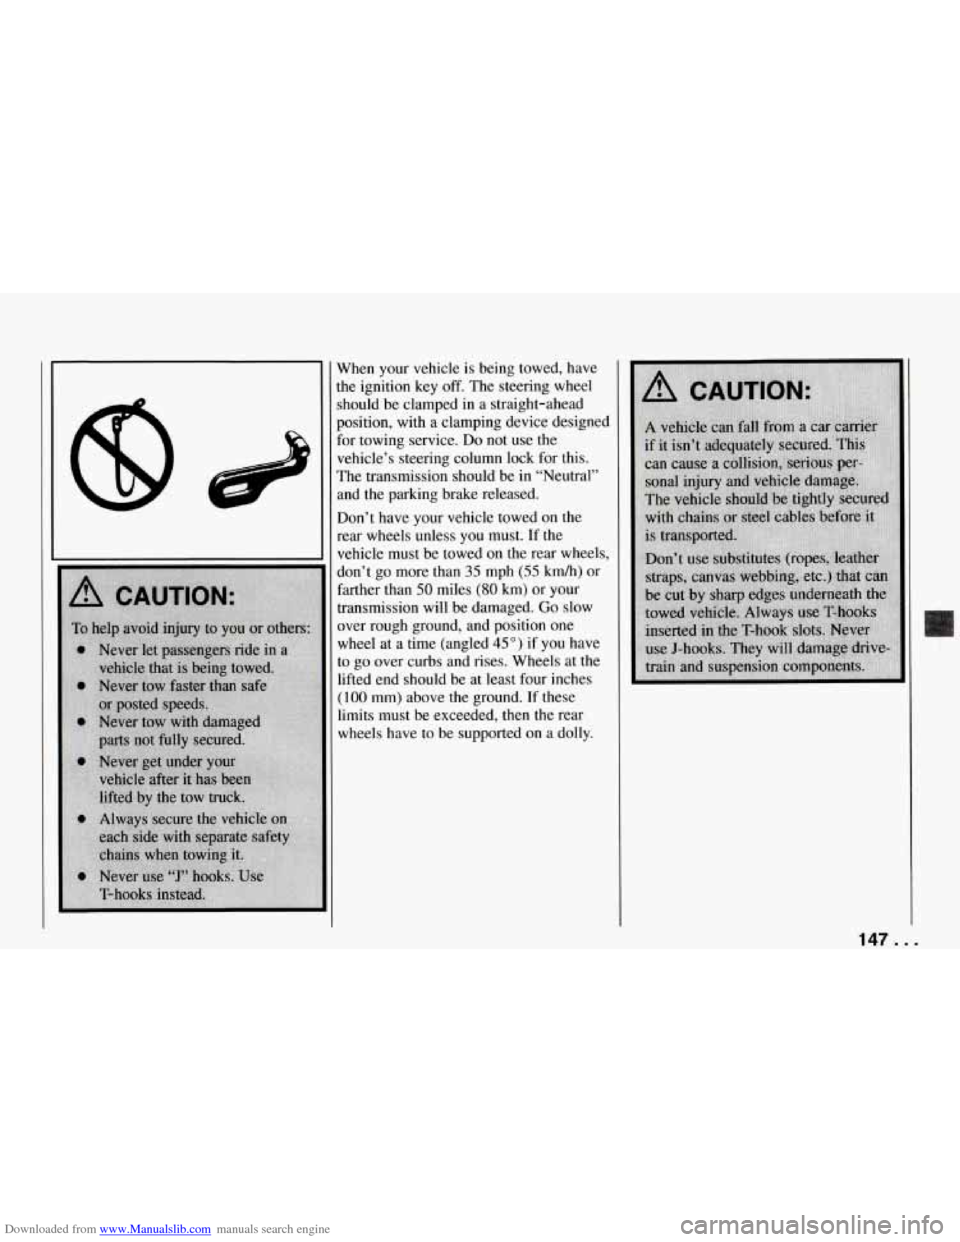
When your vehicle is being towed, have
he ignition key
off. The steering wheel
should be clamped in a straight-ahead
position, with a clamping device designed
For towing service.
Do not use the
vehicle’s steering column lock for this.
The transmission should be in “Neutral”
and the parking brake released.
Don’t have your vehicle towed
on the
rear wheels unless you must. If the
vehicle must be towed on the rear wheels,
don’t go more than
35 mph (55 kmh) or
farther than
50 miles (80 km) or your
transmission will be damaged.
Go slow
mer rough ground, and position one
wheel at a time (angled
45”) if you have
to go over curbs and rises. Wheels at the
lifted end should be at least four inches
(1 00 mm) above the ground. If these
limits must be exceeded, then the rear
wheels have to be supported
on a dolly.
14f ...
Page 221 of 274

Downloaded from www.Manualslib.com manuals search engine Service and Appearance Care
I EoA7 I
POWER WINDOW
lu
D
.
Instrument Panel Fuse Block
1 - A/C Module (5 Amp)
2 - Blank
3 - Windshield WiperNVasher Switch
4 - Radio Receiver Box (Ignition)
5 - Heated Mirrors (5 Amp.)
6 - Taillight, Daytime Running Lights
Module (15 Amp.)
Assembly
(30 Amp.)
(5 Amp.)
7 - Horn Relay
(15 Amp.)
*Export Horn
(20 Amp.)
8 - Hazard Flashers; Brake Switch
(20 Amp.)
9 - Crank-Air Bag (5 Amp.)
10 - Crank-Parmeutral Shitch
(Automatic); Clutch (Manual)
(5 Amp.)
11 - RH Illumination (5 Amp.)
12 - LH Illumination (5 Amp.)
13 - Console Illumination (5 Amp.)
14 - Fuel Pump 1 (10 Amp.)
15 - Fuel Pump 2 (LT5) (IO Amp.)
16 - Central Control Module; Daytime
Running Lights Module
(5 Amp.)
17 - Generator; Vacuum Pump (LT5);
Valet Mode (LT5); EGR Circuit
(LT5); Oxygen Sensors (LT5)
(10 Amp.)
and A/C Control Head; Heater and
A/C Programmer; Rear Defog
Relay
(10 Amp.)
19 - Utility Plug (15 Amp.)
20 - Heated Oxygen Sensors (LT1)
(15 Amp.)
21 - Fuel Pump Relay Coil #2 (LT5);
Selective Ride Control Module;
ABS Module; Transmission Clutch
Control Switch (Automatic);
Air Pump Relay; Diverter Valve;
Secondary Bypass Valve (LT5)
(10 Amp.)
22 - Injectors #1,4,6,7 (LT1); Primary
Injectors #1-8 (LT5); Ignition Coil
Module (LT5); Ignition Coil Plate
Connector (LT5) (10 Amp.)
18 - A/C Compressor Clutch; Heater
. . .220
Page 222 of 274

Downloaded from www.Manualslib.com manuals search engine 23 - Injectors #2, 3, 5, 8 (LTI);
Secondary Injector Relays (#1,2
(LT5); Secondary SF1 Control
Modules (LT5)
(10 Amp.)
24 - Turn Signal Flashers (10 Amp.)
25 - Ignition Coil and Ignition Coil
26 - Passive Keyless Entry Module
27 - Instrument Cluster; Driver Module (10 Amp.)
(5 Amp.)
Information Center; Air Bag Derm; Acceleration Slip Regulation
Switch
(15 Amp.)
Transmission Position Switch; One
to Four Shift Solenoid
(10 Amp.)
29 - Primary Cooling Fan Relay Coil;
Secondary Cooling Fan Relay Coil
28 - Backup Lights Switch;
(5 Amp.)
30 - Direct Ignition Module; Camshaft Sensor; Canister Purge Solenoid;
Throttle Position Sensor Buffer
Module; EGR Circuit (LT1);
31
32
Secondary Air Inlet Solenoid
(LT5); Electronic Ignition Control
Module (LT5); One to Four Shift
Relay
( 10 Amp.)
Power Mirror Adjuster Control;
Lighted Rearview Mirror; Visor
Vanity Mirrors
(5 Amp.)
Cruise Control Engage Switch;
Daytime Running Lights Module;
Low Tire Pressure Warning
Module
(5 Amp.)
33 - Engine Control Module (5 Amp.)
34 - Air Bag System (15 Amp.)
35 - Central Control Module (5 Amp.)
36 - Footwell Courtesy Lights; Door
Courtesy Lights; Glove
Compartment Lights; Lighted
Rearview Mirror
(5 Amp.)
37 - Bose Amplifier Relay; Power
Antenna Relay; Cargo
Compartment Lights
(20 Amp.)
Relay
(5 Amp.)
38 - LCD; Tone Generator; Dome Light
39 - Central Control Module (5 Amp.)
40 - Radio Receiver Box (Battery);
Radio Control Head; Passive
Keyless Entry Module
(5 Amp.)
41 - Sport Seat (10 Amp.)
42 - Power Door Lock Switches; Driver
Information Center; Passive
Keyless Entry Module
(20 Amp.)
43 - A/C Programmer (5 Amp.)
44 - Cigar Lighter; Accessory Plug
45 - Hatch or Deck Lid Release Relay
K - Power Seats (30 Amp. Circuit
L - Blank
M - Power Windows (30 Amp: Circuit
N - Blank
P - Blank
(15 Amp.)
(25 Amp.)
Breaker)
Breaker)
221 . I
Page 223 of 274

Downloaded from www.Manualslib.com manuals search engine Service and Appearance Care
. . .222
1 I INTERIOR LIGHTING
20A I
I RH HDLP 30A I I I
h 3 5 I SECONDARY COOLING FAN
40A I
6 I EXTERIOR LIGHTING
60A
I
7 piiiFiAAccsy
I
AIR PUMP
20A I
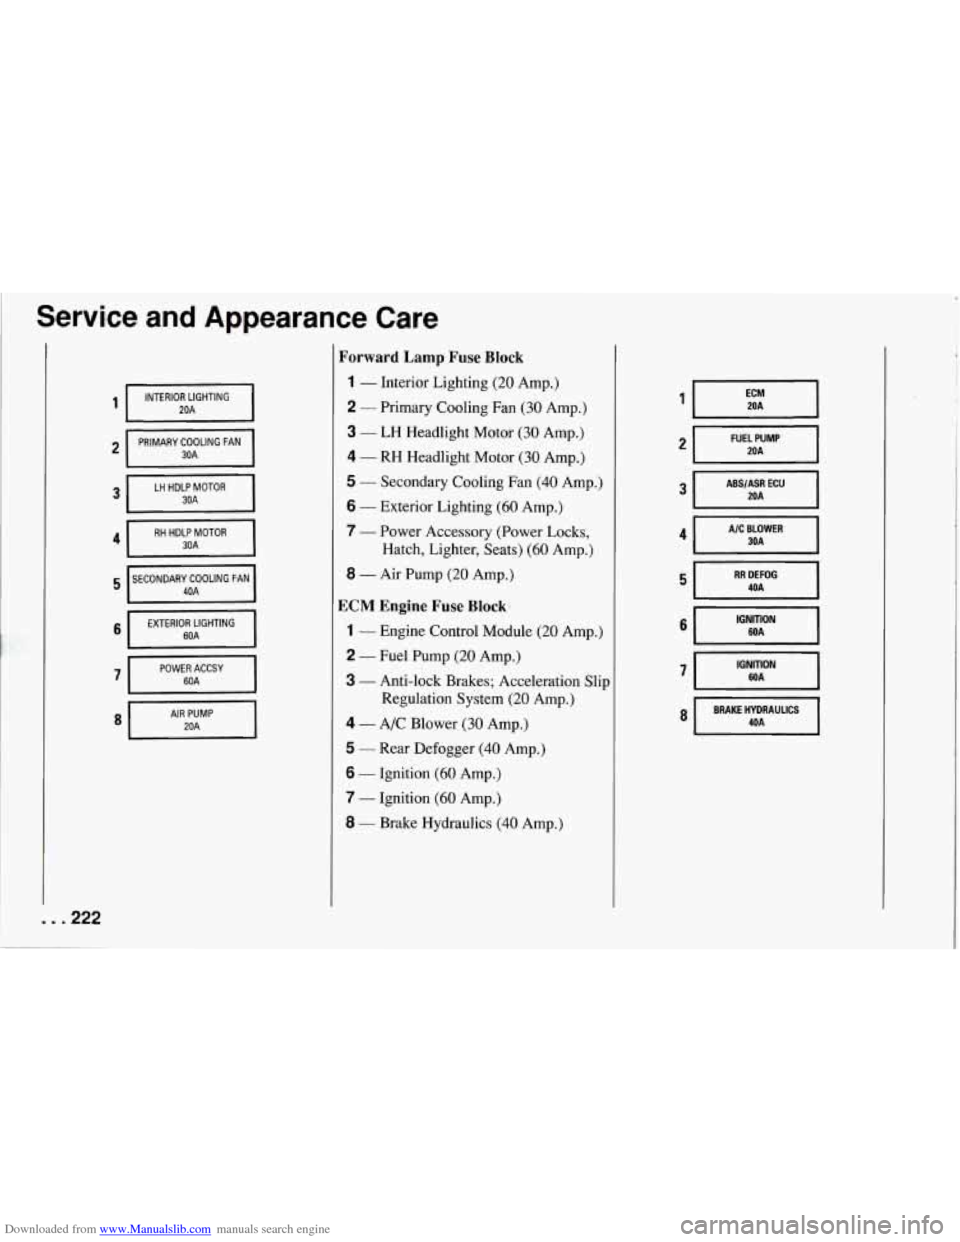
Forward Lamp Fuse Block
1 - Interior Lighting (20 Amp.)
2 - Primary Cooling Fan (30 Amp.)
3 - LH Headlight Motor (30 Amp.)
4 - RH Headlight Motor (30 Amp.)
5 - Secondary Cooling Fan (40 Amp.)
6 - Exterior Lighting (60 Amp.)
7
- Power Accessory (Power Locks, Hatch, Lighter, Seats)
(60 Amp.)
8 - Air Pump (20 Amp.)
ECM Engine Fuse Block.
1 - Engine Control Module (20 Amp.)
2 - Fuel Pump (20 Amp.)
3 - Anti-lock Brakes; Acceleration Slip
Regulation System
(20 Amp.)
4 - A/C Blower (30 Amp.)
5 - Rear Defogger (40 Amp.)
6 - Ignition (60 Amp.)
7 - Ignition (60 Amp.)
8 - Brake Hydraulics (40 Amp.)
FUEL PUMP
ABS/ASR ECU
A/C BLOWER
IGNITION WA I
8 I BRAKE HYDRAULICS 4OA I
Page 265 of 274

Downloaded from www.Manualslib.com manuals search engine Index
Engine Running
.................. 58. 59
Starting Your
................. 47
andthe
..................... 230
Extended Mobility Tires
......... 205
Extender. Safety Belt
............. 33
Fabric Protection
.............. 21 1
Fan Control Buttons
............. 106
Features and Controls ............ 35
Fiberglass Springs
.............. 2 16
Filling Your Tank
............... 174
Finish Care (Paint)
.............. 214
Finish Damage (Paint)
........... 2 15
Flashers. Hazard Warning
........ 142
Flat Tire. Changing a ............ 159
Flat Tire. Storing a
.......... 167. 168
Flat. If a Tire Goes
.............. 159
Fluid
Automatic Transmission
....... 184
Manual Transmission
.......... 186
Power Steering
............... 191
Recommended
............... 244
Windshield Washer
........... 192
Fog Lights
..................... 68
Foreign Countries. Fuels in
....... 174
Foreign Material Paint Damage
.... 21 5
Forward Lamp Fuse Block ........ 222
Freeway Driving
............... 134
... 264
Environment. Your Vehicle
Exhaust. Engine
................. 59 Front
Map Lights
................... 68
Seat. Manual
................. 12
Towing Hook-ups
............. 148
Fuel
......................... 173
Fuels in Foreign Countries
........ 174
Fuse Block FuelGage
...................... 83
ECM Engine
................. 222
Forward Lamp
............... 222
Instrument Panel
............. 220
Fuses and Circuit Breakers
..... 219
Gasolines for Cleaner Air
....... 173
Gauges Engine Coolant Temperature
..... 89
Engine Oil Pressure
............ 91
Engine Oil Temperature
......... 92
Fuel
........................ 83
Readings. Numeric
............. 83
Warning Lights and Indicators
.... 82
Glass ......................... 213
GM Participation in BBB Auto Line
-
Markings .................... 82
Alternative Dispute Resolution
Program
.................. 253
Halogen Bulbs
............... 195
Hardtop. Cleaning and Storage of
. . 215
Hardtop. Convertible
............ 100
Hatch Release. Remote ........... 41 Hazard Warning Flashers
......... 142
Headlights
..................... 67
Headlight Doors
................. 67
Headlight High/Low Beam
........ 62
Heater. Engine Coolant (Block)
..... 50
Heating ....................... 107
Highway Hypnosis
.............. 135
Hill and Mountain Roads ......... 136
Hood Release
.................. 175
Hood. Checking Things under the
. . 175
Hook.Ups. Front Towing
......... 148
Hook.Ups. Rear Towing
......... 149
Horn
.......................... 60
How to Add Coolant to the
Coolant Recovery Tank
........ 153
How To Add Coolant to the
Coolant High Fill Reservoir
............. 154. 157
Hydraulic Clutch
............... 187
Hydroplaning
.................. 133
Hypnosis. Highway
............. 135
Identification Number. Vehicle
.... 218
Idling. Rovgh
...... : ............ 50
If a Tire Goes Flat .............. 159
If You’re Stuck: In Sand. Mud. Ice or Snow
.................... 169
Ignition Switch
.................. 46
Inflation
- Tire Pressure .......... 206
Inside Daymight Rearview
Mirror
....................... 69