1994 CHEVROLET CORVETTE fuses
[x] Cancel search: fusesPage 45 of 274

Downloaded from www.Manualslib.com manuals search engine Features and Controls
I Universal Theft
Deterrent
‘our Corvette has a theft deterrent
larm system. With this system, the
SECURITY” light will flash as you
pen the door (if your ignition is
off).
‘his light reminds you to arm the theft
eterrent system. Here’s how to do it:
. Open the door.
. Lock the door with the power door
lock switch or the Passive Keyless
Entry system. The “SECURITY” lieht
will come on.
. Close all the doors. The “SECURITY’
light should go
off.
... 44
Now, if a door or the hatch is opened
without the key or Passive Keyless Entry
system, the alarm will go
off. Your horn
will sound for three minutes, then it will
go
off to save battery power.
The theft deterrent system won’t
arm if
you lock the doors with a key or manual
door lock, or if you lock the vehicle after
the doors are closed.
If your passenger stays in the vehicle
when you leave with the keys, have the
passenger lock the vehicle after the doors
are closed. This way the alarm won’t
arm,
and your passenger won’t set it off.
Always use your key or the Passive
Keyless Entry system to unlock a door.
Unlocking a door any other way will set
off the alarm.
If you do set off the alarm
accidentally, there are three ways to stop
it:
Unlock any door with your key.
Put the ignition key in the ignition.
Use the Passive Keyless Entry system.
How to Test the Alarm
1. Make sure the rear hatch is latched.
2. Lower a window.
3. Arm the system.
4. Close the doors and wait five seconds.
5. Reach through the open window and
unlock the door from inside. The
alarm should sound.
6. Turn off the alarm.
If the alarm doesn’t go
off, check to see
if the horn works. If not, check the horn
fuse. See “Fuses and Circuit Breakers” in
the Index. If the horn does work, but the
alarm doesn’t go
off, see your dealer.
Page 46 of 274

Downloaded from www.Manualslib.com manuals search engine I
PASS-Key@
Your vehicle is equipped with the
PASS-Key@ (Personalized Automotive
Security System) theft deterrent system.
PASS-Key@ is a passive theft deterrent
system. This means you don’t have to do
anything different to arm or disarm the
system. It works when you insert or
remove the key from the ignition.
PASS-Key@ uses a resistor pellet in
the ignition key that matches a decoder
in your vehicle. When the PASS-Key@ system
senses that
someone is using the wrong key, it shuts
down the vehicle’s starter and fuel
systems. For about three minutes,
the
starter won’t work and fuel won’t go to
the engine. If someone tries to start your
vehicle again or uses another key during
this time, the shutdown period will start
over again. This discourages someone
from randomly trying different keys with
different resistor pellets in an attempt to
make a match.
The ignition key must be clean and dry
before it’s inserted in
the ignition or the
engine may not start. If the “SECURITY”
light comes on, the key may be dirty or
wet.
If this happens and the starter won’t work,
turn the ignition off. Clean and dry
the
key, wait three minutes and try again. If
the starter still won’t work, wait three
minutes and
try the other ignition key. At
this time, you may also want to check
the
fuses (see “Fuses and Circuit Breakers’’ in
the Index). If the starter won’t work with the
other key, your vehicle needs service.
[f your vehicle does start, the first ignition
key may be faulty. See your Chevrolet
Jealer or a locksmith who can service the
PASS-Key@
However, if you accidentally use a key
that has
a damaged or missing resistor
pellet, you will see no “SECURITY”
light.
You don’t have to wait three
minutes before trying the proper key.
if the resistor pellet is damaged
OF
missing, the starter won’t work. Use the
other ignition key, and see your Chevrolet
dealer or a locksmith who can service the
PASS-Key@ to have a new key made.
If the “SECURITY” light comes on while
driving, have your vehicle serviced as
soon as possible.
If you lose or damage a PASS-Key@
ignition key, see your Chevrolet
dealer or a locksmith who can service
PASS-Key@. In an emergency, call the
Chevrolet Roadside Assistance Program
at
1 -800-CHEV USA (1 -800-243-8872).
45 . I
Page 63 of 274

Downloaded from www.Manualslib.com manuals search engine Features and Controls
L L
c
L
A green arrow on the instrument panel
will flash in the direction of the
turn or
lane change.
To signal a lane change, just raise or
lower the lever until the green arrow start
to flash. Hold it there until you complete
your lane change. The lever will return b!
itself when you release
it.
As you signal a turn or a lane change, if
the arrows don’t flash but just stay on, a
signal bulb may be burned out and other
drivers won’t see your
turn signal.
If a bulb is burned out, replace it to help
avoid an accident.
If the green arrows
don’t go on at all when you signal a
turn,
check the fuse (see “Fuses” in the Index)
and for burned-out bulbs.
Headlight High/..ow Beam
To change the headlights from low beam
to high or high to low, pull the turn signal
lever all the way toward you. Then
release it. When the high beams are on,
this blue light on the instrument panel
also will be on.
Windshield Wipers
You control the windshield wipers by
turning the band with the wiper symbol
on it.
For a single wiping cycle,
turn the band
to “MIST.” Hold it there until the wipers
start, then let go. The wipers will stop
after one cycle. If you want more cycles,
hold the band on “MIST” longer.
You can set the wiper speed for a long or
short delay between wipes. This can be
very useful in light rain or snow. Turn the
band to choose the delay time. The closer
to
“LO,” the shorter the delay.
... 62
Page 111 of 274

Downloaded from www.Manualslib.com manuals search engine Comfort Controls and Audio Systems
except ‘j and-; and at all
temperatures above freezing.
3. Press the arrows on the fan speed
switch if you don’t like the automatic
setting. In
“AUTO # ” on hot days,
the fan speed will be low at fist to
help get rid of the hot inside air..
When the air conditioner is on,
you may
notice slight changes
in your vehicle’s
engine speed and power. This is normal
because the system is designed to cycle
the compressor on and off to keep the
desired temperature and help fuel
economy.
Defogging and Defrosting
Windows
Your vehicle has several settings for
clearing your windows. The air
conditioner compressor will run to help
remove moisture from the air.
To defrost the windshield quickly:
1. Press the arrows on the “TEMP SET”
switch to set
a comfortable
temperature.
2. Press .
3. The fan will go to high speed. After
the windows are clear, you can lower
. . .I10
the speed using 7 or
“AUTO .”
To warm passengers while keeping the
windshield clear:
1. Press the arrows on the “TEMP SET”
switch
to set a comfortable
temperature.
2. Press -2 and at the same time.
3. Press the arrows on the fan speed
switch if you don’t like the automatic
setting.
To defrost
the side windows quickly:
1. Press the arrows on the “TEMP SET”
switch to set a‘comfortable
temperature.
2. Press c2 .
3. Press the arrows on the fan speed
switch if you don’t like the automatic
setting.
System Problems
If ,the light above a button flashes when
you turn on the ignition, your system may
have an electrical problem. The flashing
will continue for one minute, then stop.
The flashing light could also mean the
refrigerant level
is too low in your
system. The light will continue to flash, even
if refrigerant
is added, until the
system is reset. Have your system
checked and serviced
if needed.
To reset yoilr system:
1. Turn your ignition key to “Off’ or
2. Remove the courtesy lights and radio
fuses from the main fuse panel and
wait one minute. See “Fuses and
Circuit Breakers” in the Index.
3. Put the fuses back in and start your
The light shouldn’t come on and your
system should be working properly. If
you still have a problem, see your dealer.
“LOCK.”
vehicle.
Page 172 of 274

Downloaded from www.Manualslib.com manuals search engine Here you will find information
about the care of your Corvette
.
This part begins with service
and fuel information. and then it
shows how
to check important
fluid and lubricant levels
. There
is also technical information
about your vehicle. and a section devoted
to its
appearance care
.
Part 6
Service & Appearance Care
Service ........................................................
Fuel ..........................................................
Checking Things under the Hood ...................................
HoodRelease .................................................
Engineoil .................................................
Aircleaner ........................... ...................
Automatic Transmission Fluid ..................................
Manual Transmission Fluid ......................................
Hydraulic Clutch ...............................................
RearAxle ....................................................
Enginecoolant ................................................
Power Steering Fluid ...........................................
Windshield Washer Fluid ........................................
Brake Master Cylinder ..........................................
Battery ......................................................
Bulb Replacement ...............................................
Windshield Wiper Blades ..........................................
Tires ..........................................................
Appearancecare ................................................
Appearance Care Materials Chart ...................................
Vehicle Identification Number (VIN) ................................
Service Parts Identification Label ...................................
Add-on Electrical Equipment ......................................
Fuses and Circuit Breakers ........................................
Replacement Bulbs ..............................................
Capacities and Specifications ...................................
LoadingYourVehicle ............................................
172
173
175
175
178
182 184
186
187
188
188
191
192
193
195
195
202
202
204
210
217
218
218
218
219
223
224
171 ..
Page 220 of 274

Downloaded from www.Manualslib.com manuals search engine Fuses and Circuit
Breakers
The wiring circuits in your vehicle are
protected from short circuits by a
combination of maxi-fuses, mini-fuses
and circuit breakers. This greatly reduces
the chance of fires caused by electrical
problems.
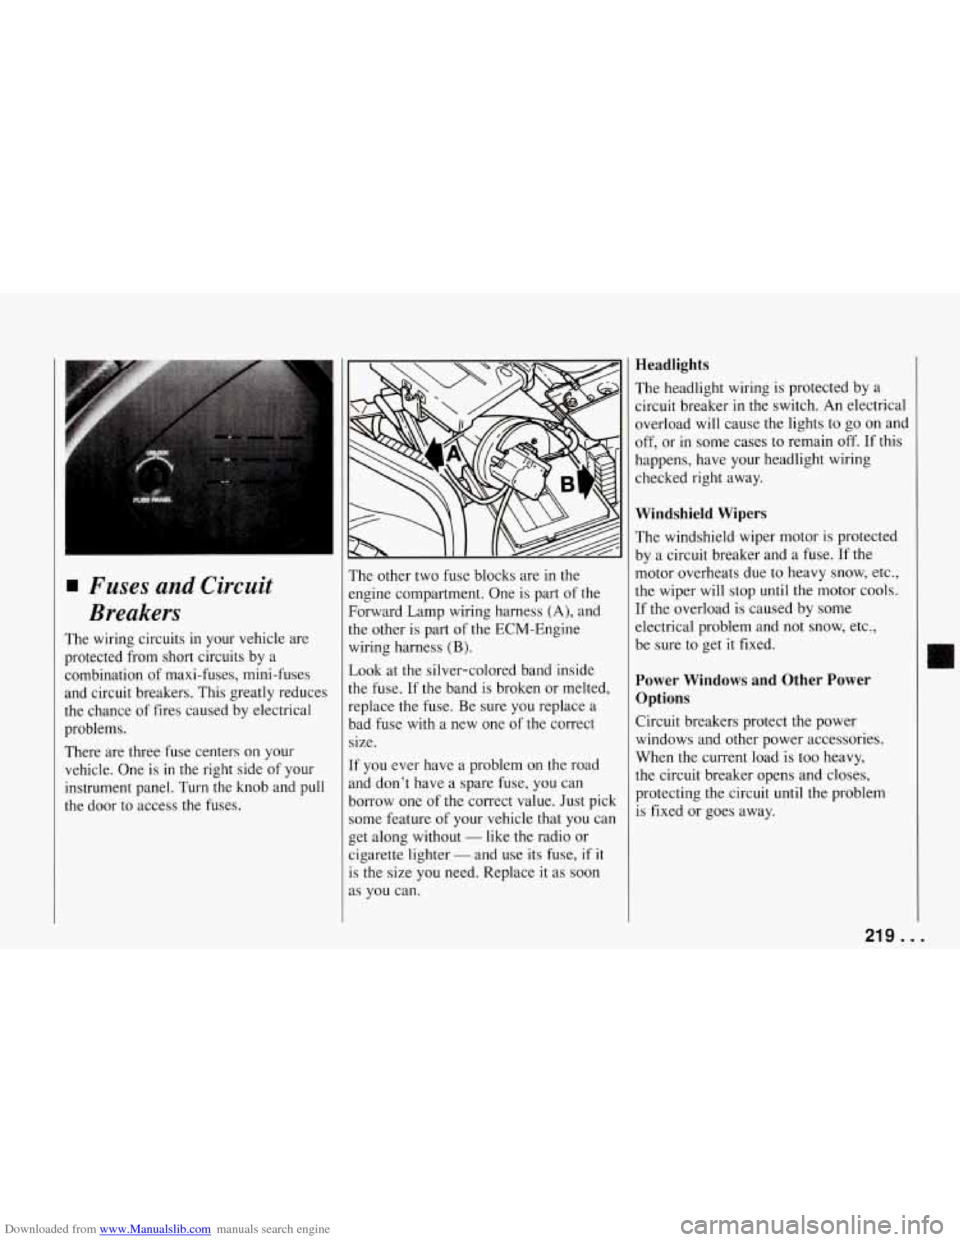
There are three fuse centers on your
vehicle. One
is in the right side of your
instrument panel. Turn the knob and pull
the door to access the fuses. The other
two fuse blocks are in the
engine compartment. One is part of the
Forward Lamp wiring harness
(A), and
the other is part of the ECM-Engine
wiring harness
(B).
Look at the silver-colored band inside
the fuse. If the band is broken or melted,
replace the fuse. Be sure you replace a
bad fuse with a new one of the correct
size.
If you ever have a problem on the road
and don’t have a spare fuse, you can
borrow one of the correct value. Just pick
some feature of your vehicle that you can
get along without
- like the radio or
cigarette lighter
- and use its fuse, if it
is the size you need. Replace it as soon
as you can.
Headlights
The headlight wiring is protected by a
circuit breaker
in the switch. An electrical
overload will cause the lights to go on and
off, or in some cases to remain
off. If this
happens, have your headlight wiring
checked right away.
Windshield Wipers
The windshield wiper motor is protected
by a circuit breaker and a fuse. If the
motor overheats due to heavy snow, etc.,
the wiper will stop until the motor cools.
If the overload is caused by some
electrical problem and not snow, etc.,
be sure to get
it fixed.
Power Windows and Other Power
Options
Circuit breakers protect the power
windows and other power accessories.
When the current load is too heavy,
the circuit breaker opens and closes,
protecting the circuit until the problem
is fixed or goes away.
II
219 ...
Page 263 of 274

Downloaded from www.Manualslib.com manuals search engine Index
Bulb Replacement Front Turn Signal
............. 197
Headlights
.................. 195
Rear Cargo Compartment Light
. . 200
Rear Turn Signal and Taillight
... 197
Sidemarker
.................. 199
Bulbs. Halogen
................. 195
Bulbs. Replacement
............. 223
Capacities and Specifications
...... 224
Care of Safety Belts
............. 212
Canadian
Roadside Assistance
... 255
Carbon Monoxide
............... 59
Cassette Tape and Compact Disc
Player. AM/FM Stereo with
..... 11 5
Cassette Tape Player. AM/FM
Stereo with
.................. 113
Cassette Tape Player. Care of Your
. 11 7
Center Console
.................. 72
Chains. Tire
................... 209
Changing a Flat Tire
............. 159
Changing System Light
........... 94
Checking Things under the
Hood
....................... 175
Checking Your Restraint Systems
... 33
Chevrolet Roadside
Chevrolet Service Publications
Check
Gauges Light
.............. 93
Chemical Paint Spotting
.......... 2 16
Assistance
.................. 255
(Ordering Information)
........ 258 Child
Restraints
................. 29
Passenger Seat
................ 30
Top Strap
.................... 29
Children (Safety Belts)
............ 28
Children. Larger (Safety Belts)
..... 3 1
Cinch Feature. Lap Belt ........... 21
Circuit Breakers. Fuses and
....... 219
City Driving
................... 134
Cleaner. Air
................... 182
Cleaning Convertible Top
.............. 2 14
Dulso-Coated Moldings
........ 2 13
Fabric
...................... 211
Glass
....................... 213
Hardtop. and Storage of
........ 21 5
Inside of Your Corvette
........ 210
Instrument Panel. Top of
....... 2 12
Leather
..................... 2 12
Outside of Your Corvette ....... 214
Problems. Special
............. 2 1 1
Removable Roof Panel ......... 2 13
Soft-Touch Surfaces
........... 2 12
Speaker Covers
.............. 2 12
Tires ....................... 215
Vinyl
....................... 212
Windshield and
Cigarette
Lighter
................ 76
Engine
..................... 215
Wiper Blades
.............. 213
Climate Control. Automatic
Electronic
................... 108 Zlock.
Setting the
............... 113
Zluster. Instrument
............... 80
Clutch. Hydraulic ............... 187
Comfort Controls
............... 106
Comfort Controls and Audio
Systems
.................... 105
Compact Disc Player. AM/FM
Stereo with Cassette Tape and
... 115
Compact Discs. Care
of Your ....... 118
Compact Disc. To Play a
......... 116
Compact Spare Tire
............. 169
Compartments. Storage and
........ 72
Concealed Headlights
............ 67
Console. Center
................. 72
Control of a Vehicle
............. 124
Control. Loss of
................ 130
Controls Air Conditioner
.............. 106
Brightness
................... 67
Comfort
.................... 106
Cruise ....................... 64
Features and
.................. 35
Seat
......................... 12
Convertible Hardtop
............. 100
To Install Your
............... 103
To Remove Your
............. 100
Convertible Top
................. 96
Cleaning Your
............... 214
To Lower Your
................ 96
To Raise Your
................. 99
Convex Outside Mirror
........... 69
... 262
Page 265 of 274

Downloaded from www.Manualslib.com manuals search engine Index
Engine Running
.................. 58. 59
Starting Your
................. 47
andthe
..................... 230
Extended Mobility Tires
......... 205
Extender. Safety Belt
............. 33
Fabric Protection
.............. 21 1
Fan Control Buttons
............. 106
Features and Controls ............ 35
Fiberglass Springs
.............. 2 16
Filling Your Tank
............... 174
Finish Care (Paint)
.............. 214
Finish Damage (Paint)
........... 2 15
Flashers. Hazard Warning
........ 142
Flat Tire. Changing a ............ 159
Flat Tire. Storing a
.......... 167. 168
Flat. If a Tire Goes
.............. 159
Fluid
Automatic Transmission
....... 184
Manual Transmission
.......... 186
Power Steering
............... 191
Recommended
............... 244
Windshield Washer
........... 192
Fog Lights
..................... 68
Foreign Countries. Fuels in
....... 174
Foreign Material Paint Damage
.... 21 5
Forward Lamp Fuse Block ........ 222
Freeway Driving
............... 134
... 264
Environment. Your Vehicle
Exhaust. Engine
................. 59 Front
Map Lights
................... 68
Seat. Manual
................. 12
Towing Hook-ups
............. 148
Fuel
......................... 173
Fuels in Foreign Countries
........ 174
Fuse Block FuelGage
...................... 83
ECM Engine
................. 222
Forward Lamp
............... 222
Instrument Panel
............. 220
Fuses and Circuit Breakers
..... 219
Gasolines for Cleaner Air
....... 173
Gauges Engine Coolant Temperature
..... 89
Engine Oil Pressure
............ 91
Engine Oil Temperature
......... 92
Fuel
........................ 83
Readings. Numeric
............. 83
Warning Lights and Indicators
.... 82
Glass ......................... 213
GM Participation in BBB Auto Line
-
Markings .................... 82
Alternative Dispute Resolution
Program
.................. 253
Halogen Bulbs
............... 195
Hardtop. Cleaning and Storage of
. . 215
Hardtop. Convertible
............ 100
Hatch Release. Remote ........... 41 Hazard Warning Flashers
......... 142
Headlights
..................... 67
Headlight Doors
................. 67
Headlight High/Low Beam
........ 62
Heater. Engine Coolant (Block)
..... 50
Heating ....................... 107
Highway Hypnosis
.............. 135
Hill and Mountain Roads ......... 136
Hood Release
.................. 175
Hood. Checking Things under the
. . 175
Hook.Ups. Front Towing
......... 148
Hook.Ups. Rear Towing
......... 149
Horn
.......................... 60
How to Add Coolant to the
Coolant Recovery Tank
........ 153
How To Add Coolant to the
Coolant High Fill Reservoir
............. 154. 157
Hydraulic Clutch
............... 187
Hydroplaning
.................. 133
Hypnosis. Highway
............. 135
Identification Number. Vehicle
.... 218
Idling. Rovgh
...... : ............ 50
If a Tire Goes Flat .............. 159
If You’re Stuck: In Sand. Mud. Ice or Snow
.................... 169
Ignition Switch
.................. 46
Inflation
- Tire Pressure .......... 206
Inside Daymight Rearview
Mirror
....................... 69