1994 CHEVROLET CORVETTE fuel
[x] Cancel search: fuelPage 54 of 274
Downloaded from www.Manualslib.com manuals search engine NOTICE:
Don’t drive in “2” (Second Gear) for
more than
5 miles (8 km), or at
speeds over
55 mph (88 km/h), or
you can damage your transmission.
Use or “D” as much as possible.
Don’t shift into
“2” unless you are
going slower than
65 mph (1 05
km/h), or you can damage your
engine.
0 1 (First Gear)
This position gives you even more power
(but lower fuel economy) than
“2.” You
can use it on very steep hills, or in deep
snow or mud. If the selector lever is put
ir
“1,” the transmission won’t shift into first
gear until the vehicle is going slowly
enough.
NOTICE:
If your rear wheels can’t rotate, don’t
try to drive. This might happen if you
were stuck in very deep sand or mud
or were up against a solid object. You
could damage your transmission.
Also, if you stop when going uphill,
don’t hold your vehicle there with
only the accelerator pedal. This
could overheat and damage the
transmission. Use your brakes or
shift into
“P” (Park) to hold your
vehicle in position on a hill.
Maximum engine speed is limited to
protect driveline components from
improper operation.
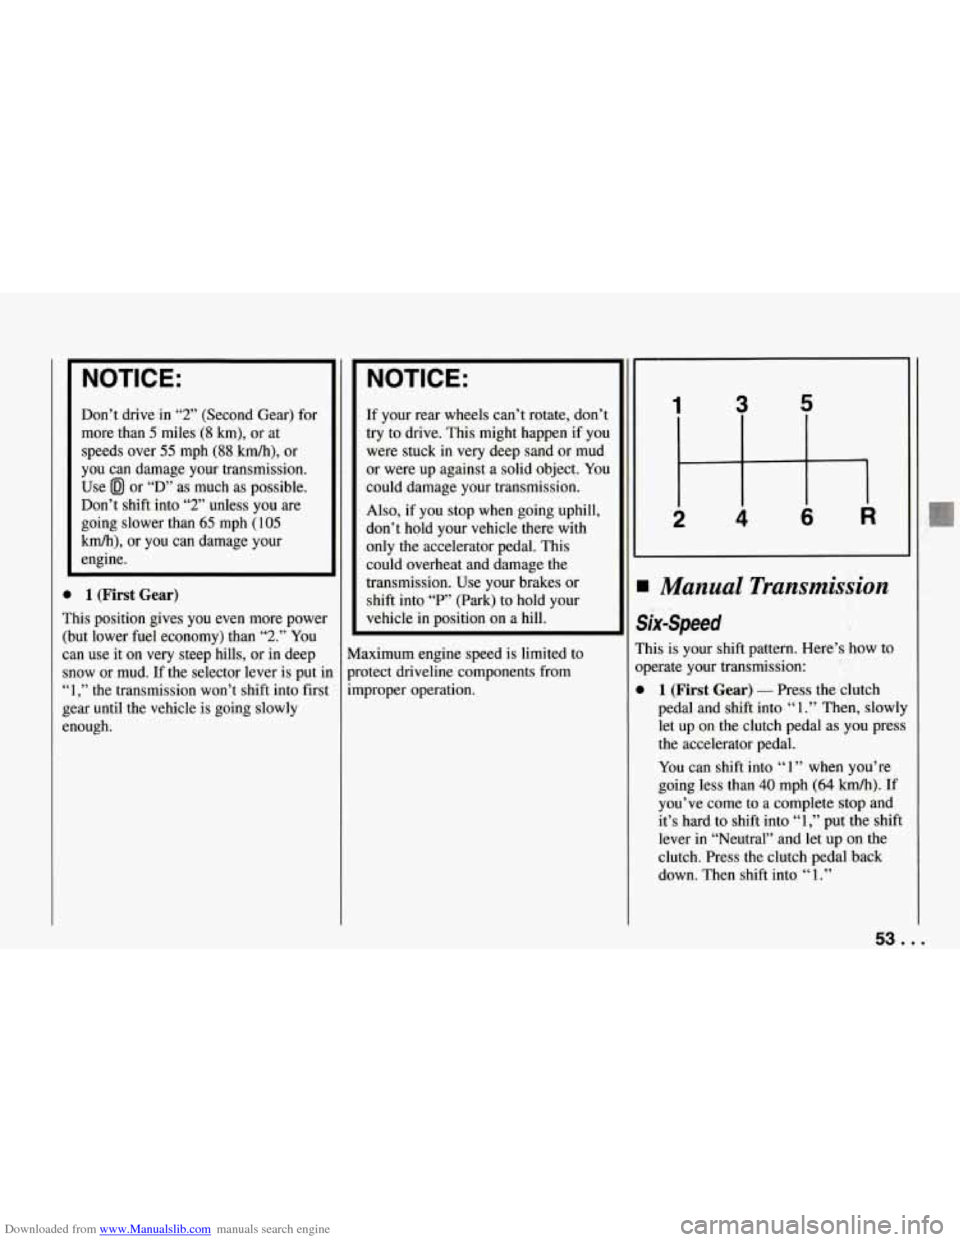
1 3 5
I Manual Transmission
six-Speed
?his is your shift pattern. Here’s how to
bperate your transmission:
1 (First Gear) - Press the clutch
pedal and shift into
“ 1 .” Then, slowly
let up on the clutch pedal as
you press
the accelerator pedal.
You can shift into
‘‘ 1 ” when you’re
going less than
40 mph (64 km/h). If
you’ve come to a complete stop and
it’s hard to shift into
“1,” put the shift
lever in “Neutral” and let up on the
clutch. Press the clutch pedal back
down. Then shift into
“1.”
53 ...
Page 55 of 274

Downloaded from www.Manualslib.com manuals search engine Features and Controls
0
0
0
0
0
2 (Second Gear) - Press the clutch
pedal as you
let up on the accelerator
pedal and shift into
“2.” Then, slowly
let up on the clutch pedal as you press
the accelerator pedal.
3,4,5 and 6 (Third, Fourth, Fifth
and Sixth Gears)
- Shift into “3,”
“4,” “5” and “6” the same way you do
for
“2.” Slowly let up on the clutch
pedal as you press the accelerator
pedal.
To Stop - Let up on the accelerator
pedal and press the brake pedal. Just
before the vehicle stops, press
the
clutch pedal and the brake pedal, and
shift to “Neutral.”
Neutral - Use this position when
you start or idle your engine.
R (Reverse) - To back up, press
down the clutch pedal, and shift into
“R.” If the shift lever has a ring on it,
you have to lift the ring before you
can shift into
“R” (Reverse). If you
don’t have the ring, just apply
pressure to get the lever past
“5” and
“6” into “R” (Reverse). Let up on the
clutch pedal slowly while pressing the
accelerator pedal.
Shift Speeds (MANUAL TRANSMISSION)
This chart shows when to shift to the next higher gear for best fuel economy.
MANUAL TRANSMISSION RECOMMENDED SHIFT SPEEDS, IN MPH (km/h)
Acceleration Shift Speed
Engine
1 to2 I 2to3 I 3to4 I 4t05 I 5t06
[f your speed drops below 20 mph
(30 kmh), or if the engine is not running
smoothly, you should downshift to the
next lower gear.
You may have to
downshift two or more gears to keep the
zngine running smoothly or for good
performance.
I NOTICE:
When you are shifting gears, don’t
move the gear shift lever around
needlessly. This can damage parts of
the transmission and may require
costly repair. Just shift directly into the next appropriate gear.
... 54
Page 56 of 274
Downloaded from www.Manualslib.com manuals search engine One to Four Light
(MANUAL TRANSMISSION)
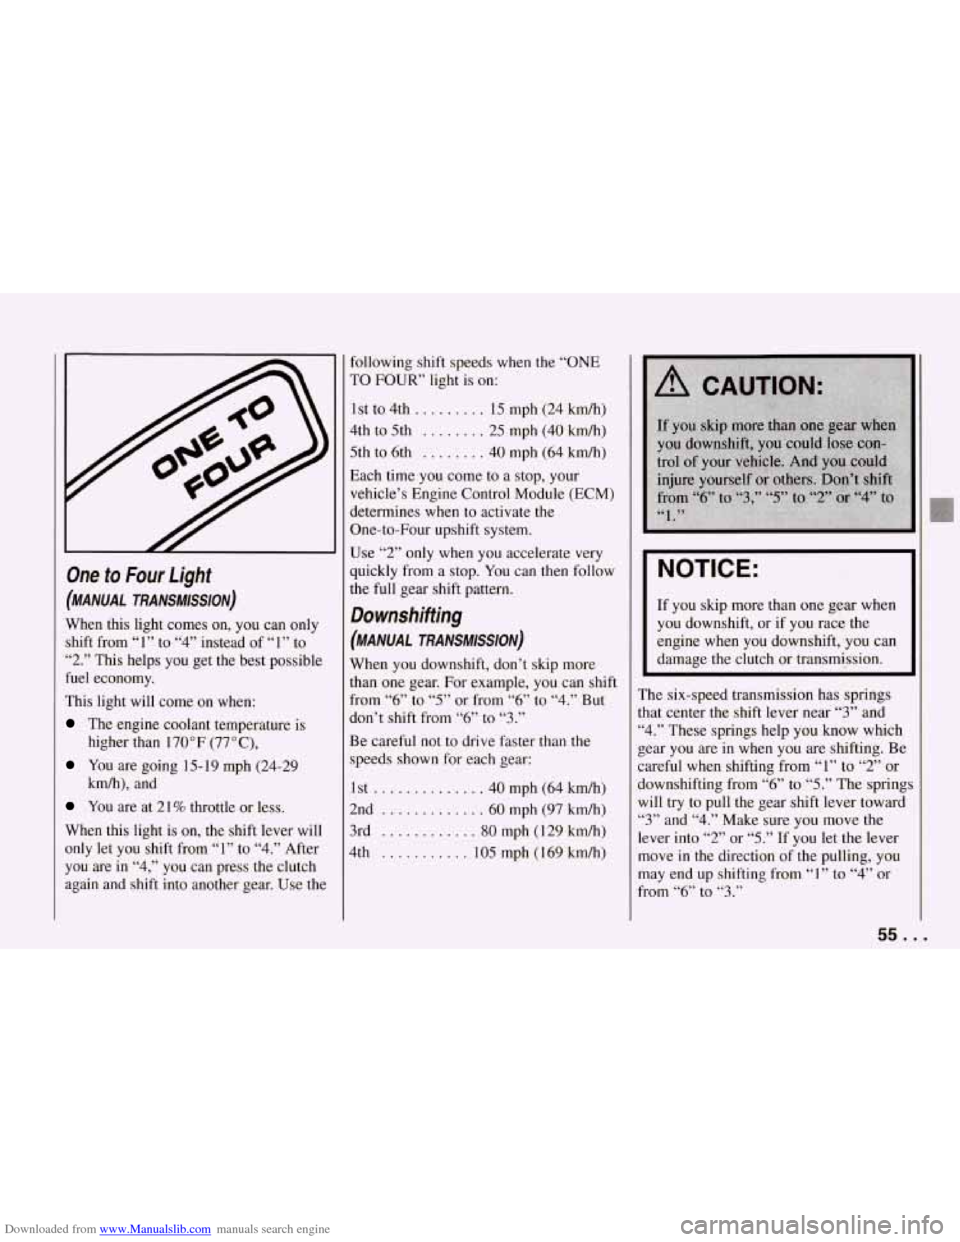
When this light comes on, you can only
shift from “1” to
“4” instead of “1” to
“2.” This helps you get the best possible
fuel economy.
This light will come on when:
The engine coolant temperature is
higher than 170°F (77”C),
You are going 15- 19 mph (24-29
kmh), and
You are at 21% throttle or less.
When this light is on, the shift lever will
only let you shift from “1” to
“4.” After
you are in “4,” you can press the clutch
again and shift into another gear. Use the following shift speeds
when the “ONE
TO FOUR’ light is on:
1st to 4th..
....... 15 mph (24 km/h)
4th to 5th ........ 25 mph (40 kmh)
5th to 6th ........ 40 mph (64 km/h)
Each time you come to a stop, your
vehicle’s Engine Control Module (ECM)
determines when to activate
the
One-to-Four upshift system.
Use
“2” only when you accelerate very
quickly from a stop. You can then follow
the full gear shift pattern.
Downshifting
(MANUAL TRANSMISSION)
When you downshift, don’t skip more
than one gear. For example, you can shift
from
“6” to “5” or from “6” to “4.” But
don’t shift from
“6” to “3.”
Be careful not to drive faster than the
speeds shown for each gear:
1st
.............. 40 mph (64 kmh)
2nd
............. 60 mph (97 kmh)
3rd
............ 80 mph (1 29 kmh)
4th ........... 105 mph (169 kmh)
I NOTICE:
If you skip more than one gear when
you downshift, or if you race the
engine when you downshift, you can
damage the clutch or transmission.
~~
The six-speed transmission has springs
that center the shift lever near
“3” and
“4.” These springs help you know which
gear you are in when you are shifting. Be
careful
when shifting from “1” to “2” or
downshifting from “6” to
“5.” The spring;
will try to pull the gear shift lever toward
“3” and “4.” Make sure you move the
lever into
“2” or “5.” If you let the lever
move
in the direction of the pulling, you
may end up shifting from
“1” to “4” or
from
“6” to “3.”
55. .
Page 68 of 274

Downloaded from www.Manualslib.com manuals search engine Ieadlights
?he headlight knob controls these lights:
b Headlights
1 Taillights
1 Parking lights
1 Sidemarker lights
hm the knob to $R to turn on your
leadlights and other operating lights.
rurn the knob to:OO:to turn on your
mking and other operating lights without
‘our headlights.
rurn the knob to “OFF’ to turn off the
ights.
(our digital display will dim at dusk to
emind you to turn on your headlights. To
read your odometer and fuel level with
the ignition
off, turn on your parking
lights.
Lights On Reminder
If you turn the ignition “Off” and leave
the lights on, you will hear a chime.
Brightness Control
The “DIMMER’ switch controls the
brightness of your instrument panel lights
when your headlights or parking lights are
on. Move the switch up or down to
brighten or dim the lights. If you turn the
switch all the way up, your courtesy,
reading, map and cargo area lights will
some on. Be sure to turn off the lights
when you leave your vehicle.
Headlight Doors
The headlight doors are designed to open
when you
turn the headlights on and close
when you turn the headlights and parking
lights
off. If you turn the headlights on,
then turn
the headlight switch back to the
parking lights setting, the headlight doors
will stay open.
You can open the doors manually using
the knob next to the headlight assembly.
Turn the knob counterclockwise until the
doors are open.
The headlight doors should be open when
driving in icy or snowy conditions to
prevent the doors from freezing closed
and when washing the vehicle to help
clean the headlights.
67. .
Page 81 of 274
Downloaded from www.Manualslib.com manuals search engine Features and Controls
Instrument Cluster
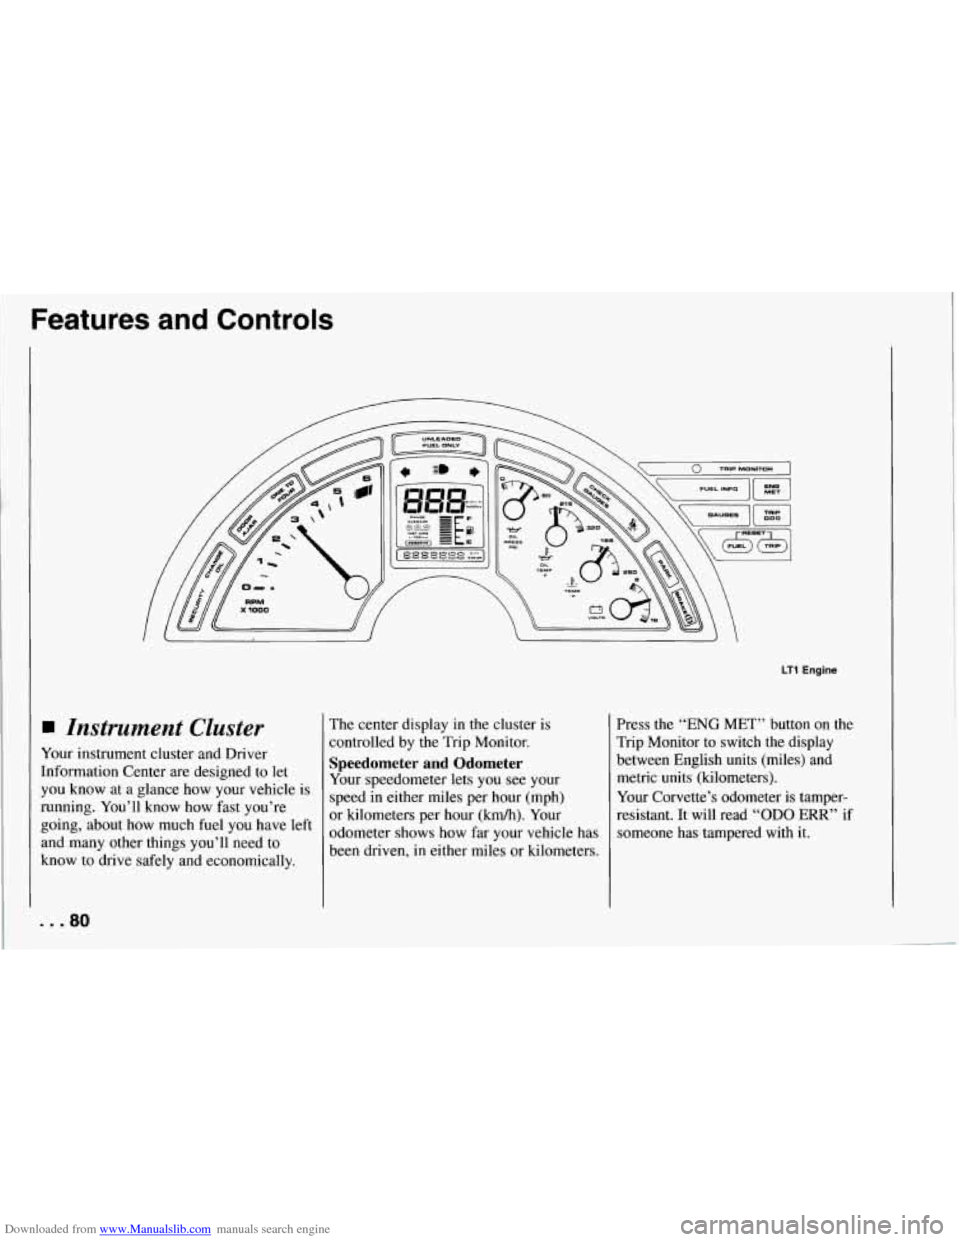
Your instrument cluster and Driver
Information Center are designed to let
you know at a glance how your vehicle is
running. You’ll know how fast you’re
going, about how much fuel you have left
and many other things you’ll need to
know to drive safely and economically. The
center display in
the cluster is
controlled by the Trip Monitor.
Speedometer and Odometer
Your speedometer lets you see your
speed in either miles per hour (mph)
or kilometers per hour (kmh).
Your
odometer shows how far your vehicle has
been driven,
in either miles or kilometers.
LT1 Engine
Press the “ENG MET” button on the
Trip Monitor to switch the display
between English units (miles) and
Your Corvette’s odometer is tamper-
resistant. It will read
“OD0 ERR” if
someone has tampered with it.
~ metric units (kilometers).
... 80
Page 82 of 274
Downloaded from www.Manualslib.com manuals search engine If a new odometer is installed, it will
automatically reset to the correct reading.
If an electrical or other problem makes
setting the odometer correctly impossible,
then it’s set at zero, but
a label on the
driver’s door must show the old reading
and when the new one was installed.
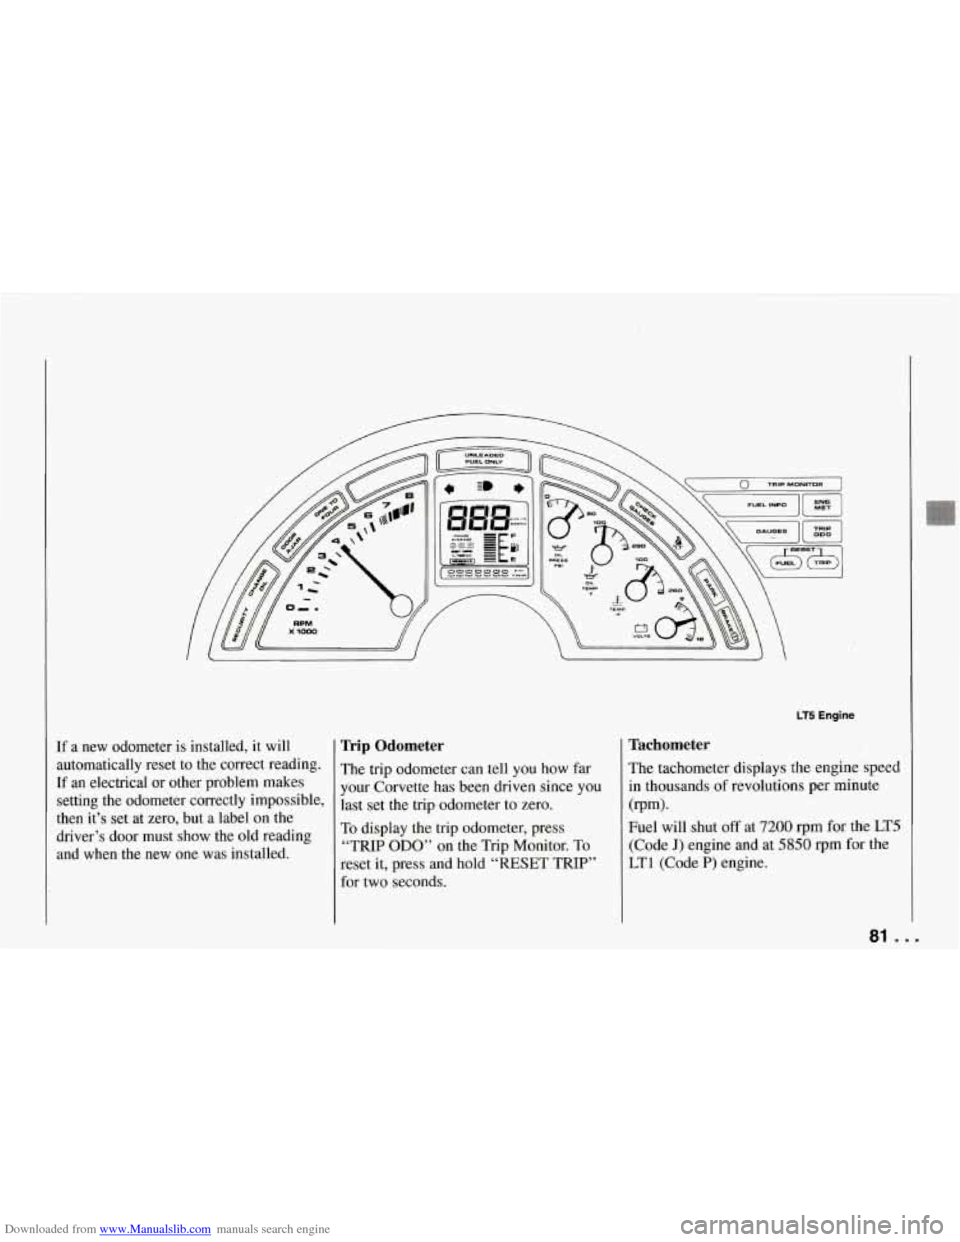
Trip Odometer
The trip odometer can tell you how far
your Corvette has been driven since you
last set the trip odometer to zero.
To display the trip odometer, press
“TRIP ODO” on the Trip Monitor. To
reset it, press and hold “RESET TRIP”
for two seconds.
LT5 Engine
Tachometer
The tachometer displays the engine speed
in thousands
of revolutions per minute
Fuel will shut
off at 7200 rpm for the LT5
(Code J) engine and at 5850 rpm for the
LTl (Code P) engine.
(rpm).
81 ...
Page 83 of 274
Downloaded from www.Manualslib.com manuals search engine Features and Controls
Warning Lights, Gauges
and Indicators
This section describes the warning lights
and gauges that may be on your vehicle.
The pictures will help you locate them.
Warning lights and gauges can signal that
something is wrong before it becomes
serious enough to cause an expensive
repair or replacement. Paying attention
to your warning lights and gauges could
also save you or others from injury.
Warning lights go on when there may be
or
is a problem with one of your vehicle’s
functions.
As you will see in the details
on the
next few pages, some warning
lights come on briefly when you turn the
ignition key just to let you know they’re
working. If you are familiar with this
section, you should not be alarmed when
this happens.
Gauges can indicate when there may be
or is a problem with one of your vehicle’s
functions. Often gauges and warning
lights work together to
let you know
when there’s a problem with your vehicle.
... 82
When one of the warning lights comes on
and stays on when you are driving, or
when one of the gauges shows there may
be a problem, check the section that tells
you what to do about
it. Please follow the
manual’s advice. Waiting to
do repairs
can be costly
- and even dangerous. So
please get to know your warning lights
and gauges. They’re a big help.
Your vehicle also has a driver information
center that works along with the warning
lights and gauges. See “Driver Information Center’’
in the Index.
System Problems
If “SYS” flashes on the display near your
fuel gauge, there may be a problem with
your Corvette’s electrical system. If the
“SECURITY” light flashes at the same
time, there is a problem with your theft
deterrent system. Have your vehicle
checked by your dealer
if “SYS’ keeps
appearing.
Gauge Markings
The analog gauges provide a quick visual
reference to the actual measurement of
these gauges. However, you must keep in mind that the gauges aren’t linear. This means that the middle mark is not
a
temperature halfway between the top and
bottom temperatures on the gauge. For
example, the middle mark on the coolant
gauge represents 210°F,
not 180°F as you
might expect.
Page 84 of 274
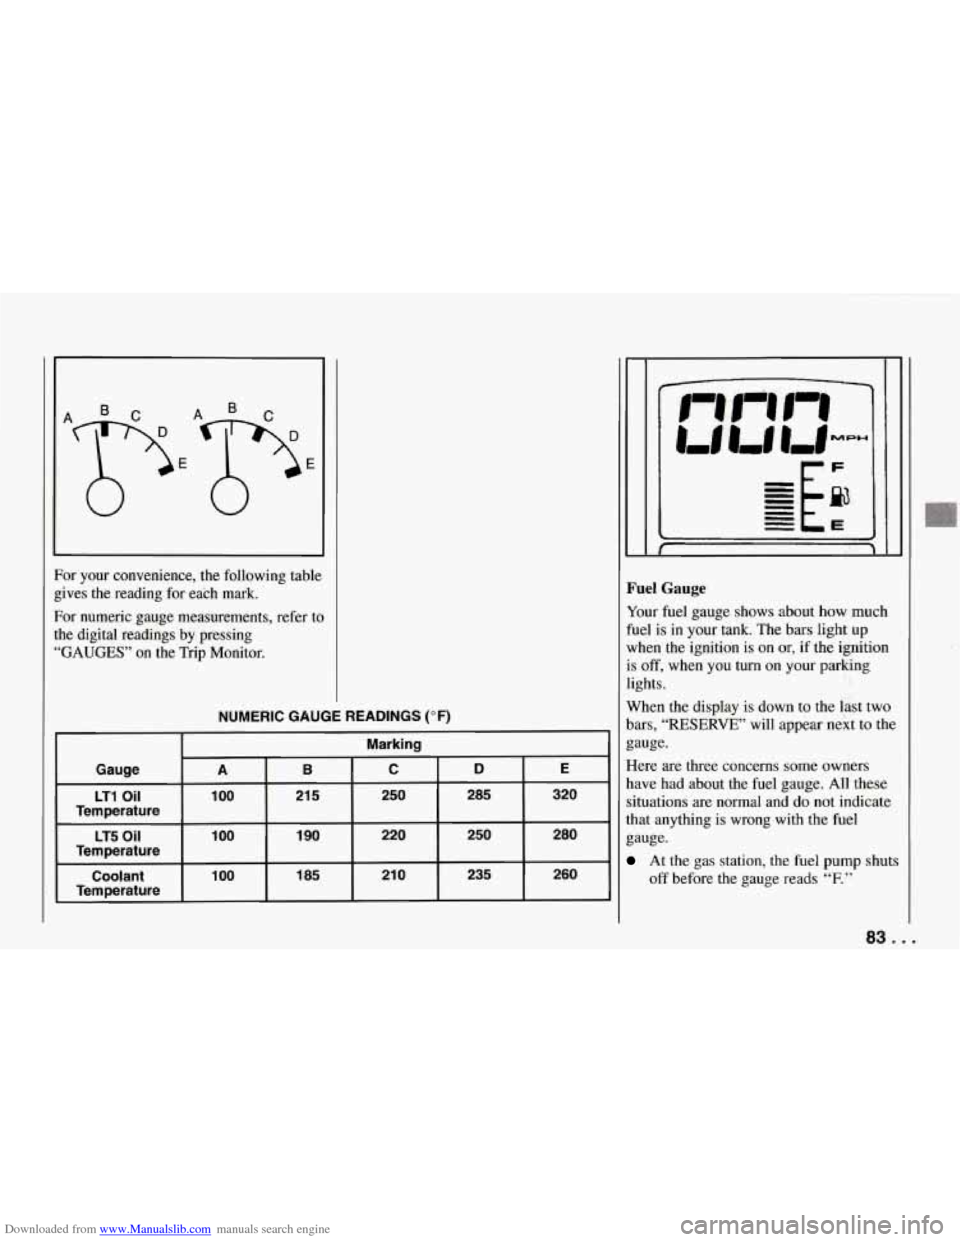
Downloaded from www.Manualslib.com manuals search engine For your convenience, the following table
gives the reading for each mark.
For numeric gauge measurements, refer to
the digital readings by pressing
“GAUGES” on the Trip Monitor.
NUMERIC GAUGE READINGS (OF)
Marking
Gauge
B C D E A
LT1 Oil 100
185 21
0 235 260 100 Coolant 1
90 220 250 280 1 00 LT5 Oil
21 5 250 285 320
Temperature
Temperature
Temperature
Fuel Gauge
Your fuel gauge shows about how much
fuel is in your tank. The bars light up
when the ignition is on or, if the ignition
is
off, when you turn on your parking
lights.
When the display
is down to the last two
bars,
“RESERVE” will appear next to the
gauge.
Here are three concerns some owners
have had about the fuel gauge. All these
situations are normal and do not indicate
that anything is wrong with the fuel
gauge.
At the gas station, the fuel pump shuts
off before the gauge reads
“F.”
83 ...