1993 CHEVROLET ASTRO PASSENGER wheel
[x] Cancel search: wheelPage 234 of 345
Downloaded from www.Manualslib.com manuals search engine Storing the Tire and Jack
Storing the Tire
Put the tire on the ground at the rear of the vehicle, with \
the valve stem
pointed down.
Pull the retaining bar through the center of the wheel, making sure
it is
properly attached. Attach the ratchet, with the
UP side facing you, to the
extension.
Put the flat end of the extension on an angle through the hole in the rear
door frame, above the bumper. Turn the ratchet clockwise until \
the tire is
against the underside of the vehicle.
You will hear
two “clicks” when the tire is up all the way. Try to move the
tire with your hands
to make sure it is securely in place.
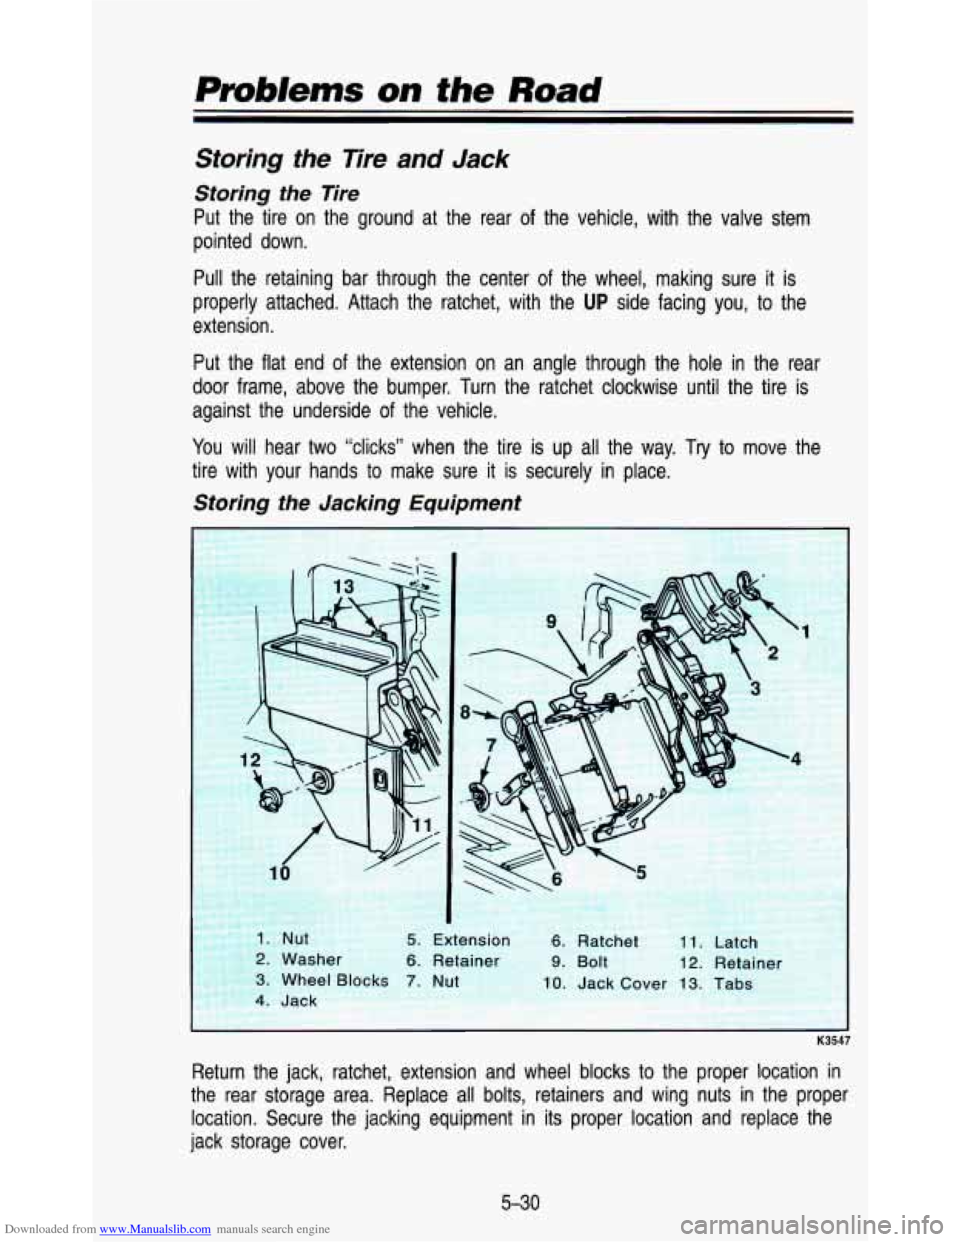
Storing the Jacking Equipment
K35r
Return the jack, ratchet, extension and wheel blocks to the proper location in
the rear storage area. Replace all bolts, retainers and wing nuts in the proper
location. Secure the jacking equipment in its proper location and replace the
jack storage cover.
5-30
Page 235 of 345
Downloaded from www.Manualslib.com manuals search engine I
Storing a jack, a tire, or other equipment in the passenger
b compartment of the vehicle could cause injury. In a sudden stop or
collision, loose equipment could strike someone. Store all these\
in
I the proper place.
Compact Spare Tire
Although the compact spare was fully inflated when your vehicle\
was new, it
can lose air after a time. Check the inflation pressure regula\
rly. It should be
60 psi (420 kPa). The compact spare is made to go up to 3,000 miles
(5000 km), so you can finish your trip and have your full-size tire repaired\
or
replaced where you want. Of course, it’s best
to replace your spare with a
full-size tire as soon as you can. Your spare
will last longer and be in good
shape in case you need
it again.
Don’t use your compact spare on some other vehicle.
And don’t mix your compact spare or wheel with other wheels\
or tires. They
won’t fit. Keep your spare and its wheel together.
Tire chains won’t fit your compact spare. Using them will d\
amage your vehicle and destro) “re chc”? too. Don’t use
ti- chair - 3n your compacl
spare.
A
Storing a jack, a tire, or other equipment in the passenger
compartment
of the vehicle could cause injury. In a sudden stop or
collision, loose equipment could strike someone. Store all these\
in
the proper place.
I
5-3 1
Page 236 of 345
Downloaded from www.Manualslib.com manuals search engine Problems on the Road
If You’m Stuck: In Sand, Mud,
Ice or Snow
What you don’t want to do when your vehicle is stuck is to spin your
wheels. The method known as “rocking” can help you get o\
ut when you’re
stuck, but you must use caution.
I CAUTION
A
If you let your tires spin at high speed, they can explode and \
you or
others could be injured. And, the transmission or other parts of the
vehicle can overheat. That could cause an engine compartment fire
or other damage. When you’re stuck, spin the wheels as
little as
possible. Don’t spin the wheels above
35 mph (55 km/h) as shown
on the speedometer.
NOTICE
Spinning your wheels can destroy parts of your vehicle as well as the
tires.
If you spin the wheels too fast while shifting VOUI ;mission bal
and forth, you can destroy your transmissioi
Rocking your vehicle to get it out:
First, turn your steering wheel left and right. That will clea\
r the area around
your front wheels. Then shift back and forth between
R (Reverse) and a
forward gear, spinning the wheels
as little as possible. Release the
accelerator pedal while you shift, and press lightly on the ac\
celerator pedal
when the transmission is in gear.
If that doesn’t get you out after a few tries,
you may need to be towed out.
If you do need to be towed out, see “Towing Your Vehicle” in the Index.
5-32
Page 237 of 345
Downloaded from www.Manualslib.com manuals search engine Service & Appearance Care
L
......... ..... -&-.A- -
I 5, "9
. .
Here you will find information about the care of your vehicle \
. This Section
begins with service and fuel information. and then
it shows how to check
important fluid and lubricant levels
. There is also technical information about
your vehicle. and a section devoted to its appearance care
.
Service ........................................................................\
........................................... 6-3
Fuel
........................................................................\
................................................ 6-4
Checking Things Under the Hood
....................................................................... \
6-8
Hood Release
........................................................................\
............................ 6-8
Engine
Oil ........................................................................\
.................................. 6-9
Engine Cover
........................................................................\
........................... 6-15
Air Cleaner
........................................................................\
............................... 6-19
Automatic Transmission Fluid
........................................................................\
. 6-20
Rear Axle
........................................................................\
................................. 6-23
All-Wheel Drive
........................................................................\
........................ 6-23
Transfer Case
........................................................................\
.......................... 6-23
Front Axle
........................................................................\
................................. 6-24
Engine Coolant
........................................................................\
........................ 6-26
Power Steering Fluid
........................................................................\
............... 6-30
Windshield Washer Fluid
........................................................................\
......... 6-31
Brake Master Cylinder
........................................................................\
............. 6-32
6-1
Page 259 of 345
Downloaded from www.Manualslib.com manuals search engine Rear Axle
When to Check and Change Lubricant:
Refer to the Maintenance Schedule to determine how often to check the
lubricant and when to change it. See “Scheduled Maintenance Services” in
the Index.
How to Check Lubricant:
1
,. . ..
1
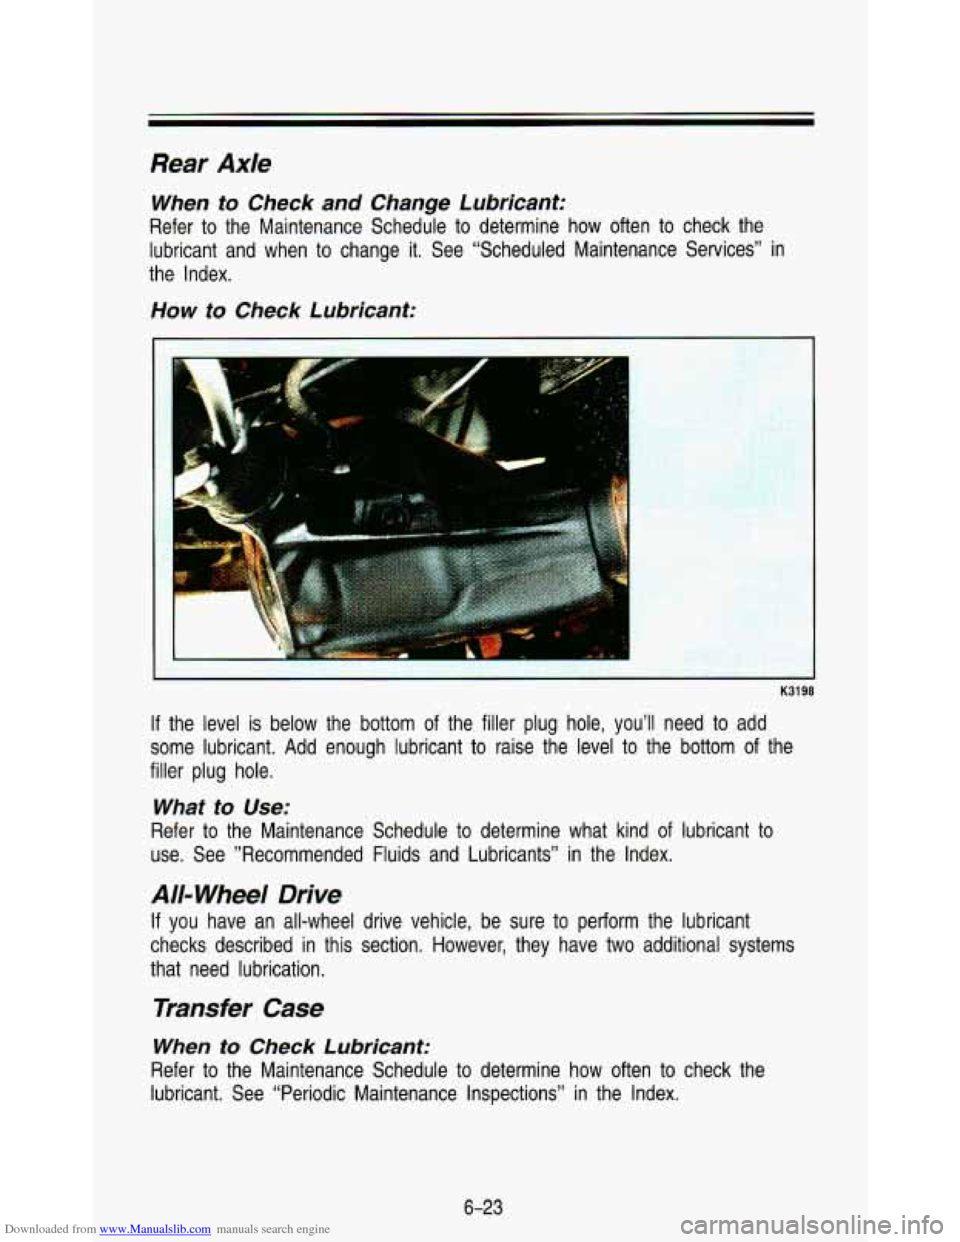
If the level is below the bottom of the filler plug hole, you’ll need to add
some lubricant.
Add enough lubricant to raise the level to the bottom of the
filler plug hole.
What to Use:
Refer to the Maintenance Schedule to determine what kind of lubricant to
use. See ”Recommended Fluids and Lubricants” in the Index.
All= Wheel Drive
If you have an all-wheel drive vehicle, be sure to perform the lubricant
checks described in this section. However, they have two additional systems
that need lubrication.
Transfer Case
When to Check Lubricant:
Refer to the Maintenance Schedule to determine how often to check the
lubricant. See “Periodic Maintenance Inspections” in the Index.
6-23
Page 274 of 345
Downloaded from www.Manualslib.com manuals search engine Service & Appearance Care
PO400
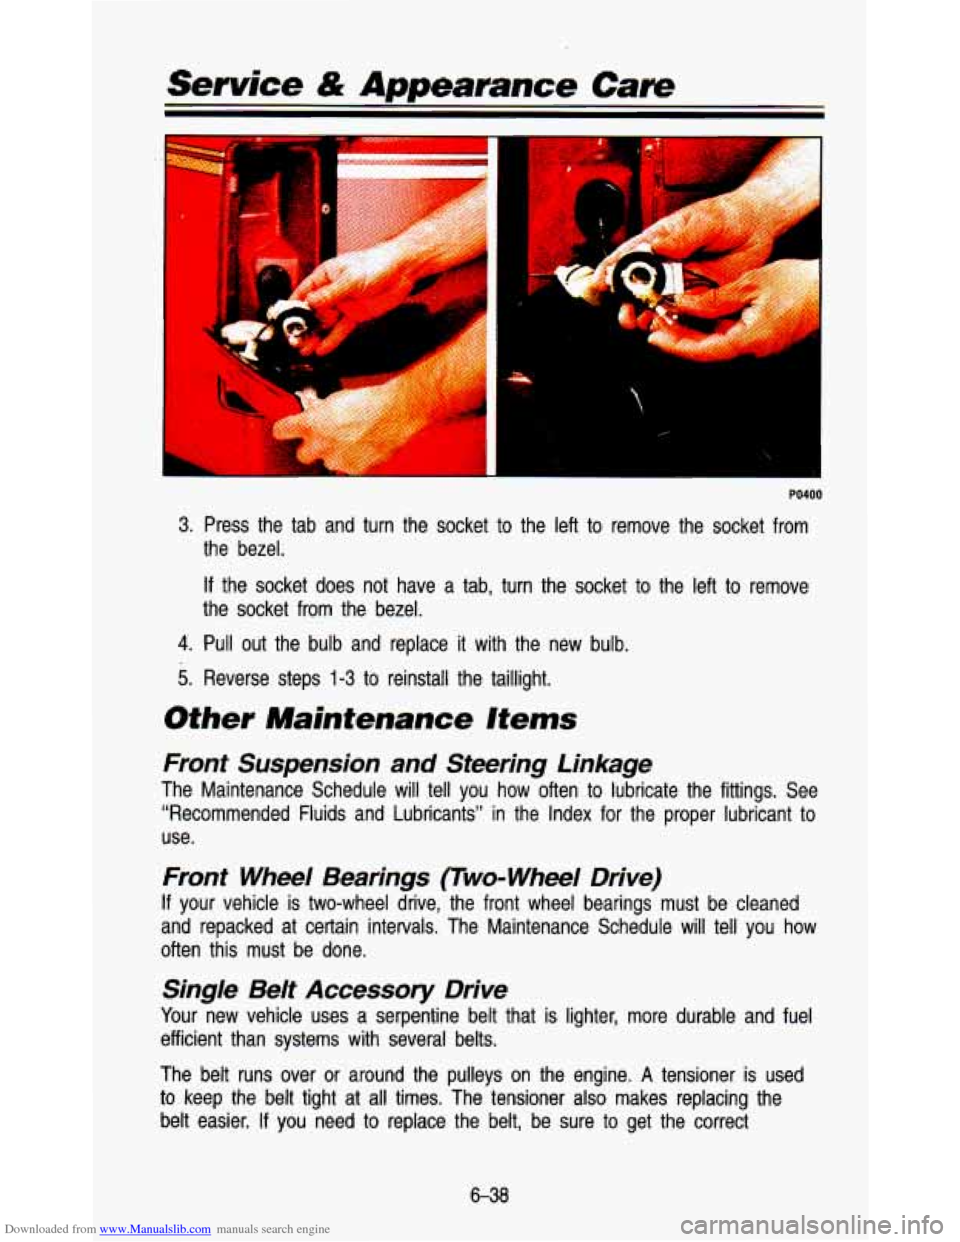
3. Press the tab and turn the socket to the left to remove the socket from
the bezel.
If the socket does not have a tab, turn the socket to the left to remove
the socket from the bezel.
4. Pull out the bulb and replace it with the new bulb.
5. Reverse steps 1-3 to reinstall the taillight.
Other Maintenance Items
Front Suspension and Steering Linkage
The Maintenance Schedule will tell you how often to lubricate the fittings. See
“Recommended Fluids and Lubricants” in the Index for the proper lubricant to
use.
Front Wheel Bearings (Two-Wheel Drive)
If your vehicle is two-wheel drive, the front wheel bearings must \
be cleaned
and repacked at certain intervals. The Maintenance Schedule will tel\
l you how
often this must be done.
Single Belt Accessory Drive
Your new vehicle uses a serpentine belt that is lighter, more durable and fuel
efficient than systems with several belts.
The belt runs over
or around the pulleys on the engine. A tensioner is used
to keep the belt tight at all times. The tensioner also makes replacing the
belt easier.
If you need to replace the belt, be sure to get the correct
6-38
Page 276 of 345
Downloaded from www.Manualslib.com manuals search engine Senrice & Appearance Care
Hood Latches and Hood Hinge
The Maintenance Schedule will tell you how often to lubricate the hood latch
and hood hinge assembly. See “Recommended Fluids and Lubricants”\
in the
Index for the proper lubricant
to use.
Propeller Shaft Slip Splines/Universal Joints
The Maintenance Schedule will tell you how often the slip splines must be
lubricated. See “Recommended Fluids and Lubricants” in the \
Index for the
proper lubricant
to use.
Constant Velocity Joints (All- Wheel Drive Only)
The Maintenance Schedule will tell you how often to lubricate the the
constant velocity joints. See “Recommended Fluids and Lubrican\
ts” in the
Index for the proper lubricant
to use.
Sliding Door Tracks
Your vehicle’s sliding door has three tracks which need lubricatio\
n.
For the upper and lower tracks, open the door, wipe the track\
clean and then
lubricate with Lubriplate@ White Grease.
For the outside middle track, close the door after you finish \
the upper and
lower tracks. Then, wipe the track clean and lubricate with Lu\
briplateB White
Grease.
Body
Normal use of your vehicle will cause metal-to-metal wear at some points \
on
the cab and body
if they are not lubricated.
tor exposed surfaces, such as door checks, door lock bolts, lock s\
triker
plates, dovetail bumper wedges, etc., a thin film
of engine oil should be
applied.
Where oil holes are provided in the body or cab, a dripless \
oil can be used.
The seat adjusters and seat track should be lubricated with chassis grease.
Door weatherstrips and rubber hood bumpers should be lightly coated with
a
rubber lubricant.
Never use
too much of any lubricant and be sure to wipe up any extra
lubricant when you are finished.
Some parts that need lubricating are hard
to get at. Window regulators and
controls are inside the doors. You can get to these by removing the trim
panels.
6-40
Page 283 of 345
Downloaded from www.Manualslib.com manuals search engine Tire Inspection and Rotation
To make your tires last longer, have them inspected and rotated a\
t the
mileages recommended in the Maintenance Schedule. See “Scheduled
Maintenance Services” in the Index.
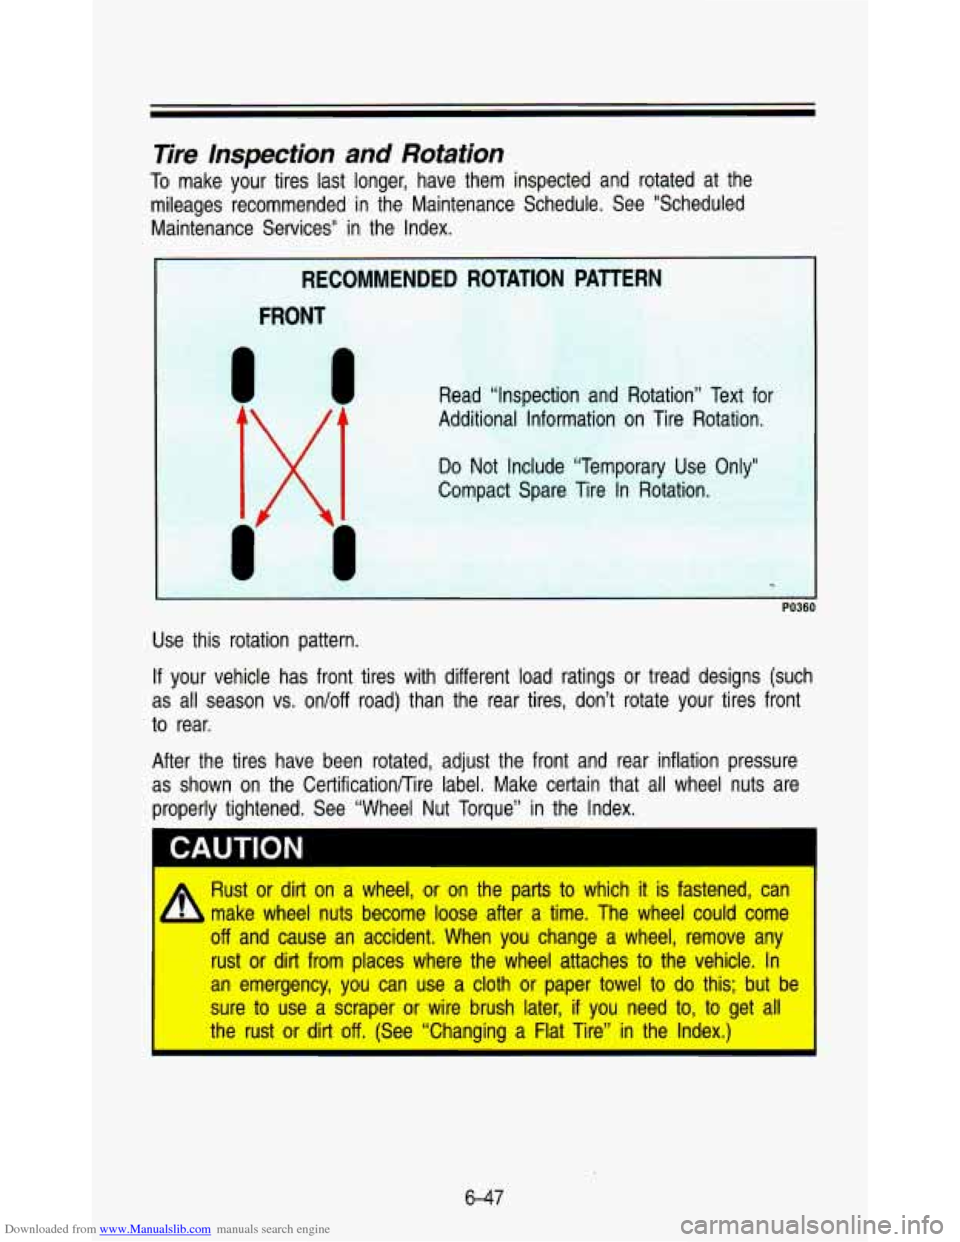
Use this rotation pattern.
If your vehicle has front tires with different load ratings or tread designs (such
as all season vs. on/off road) than the rear tires, don’t \
rotate your tires front
to rear.
After the tires have been rotated, adjust the front and rear inflation pressure
as shown on the CertificationRire label. Make certain that all wheel nuts are
properly tightened. See “Wheel Nut Torque” in the Index.
CAUTION I
Rust or dirt on a wheel, or on the parts to which it is fastened, can
make wheel nuts become loose after a time. The wheel could come
.. off and cause an accident. When you change a wheel, remove an\
y
- - .-..-rust. -o,r dit-.from places where the wheel attaches to the vehicle. In
an emergency, you can use a cloth or paper towel to
do this; but be
sure
to use a scraper or wire brush later, if you need to, to get all
the rust or dirt off. (See “Changing a Flat Tire” in the Index.)
I
6-47