Page 76 of 345
Downloaded from www.Manualslib.com manuals search engine Features & Controls
mud. If the selector lever is put in 1 (First Gear), the transmission won't
shift into
1 (First Gear) until the vehicle is going slowly enough.
NOTICE 1
I
If your rear wheels can't rotate, don't try to drive. This might happen
you were stuck in very deep sand
or mud or were up against a soli(
obiect. You could damage your transmission or transfar case, or hoth
Atso, IT u stop when goir uphill, m't hold your vel ~ -e tl 'e with only
the accelerator pedal. This could overheat and damage the transmission.
Use yo1 "--kes or shift into :Park) hold your vehicle in position o
Loc&hg Rear Axle
If you have this feature, your rear axle can give you additional traction on
snow, mud, ice, sand or gravel. It works like a standard axle most of the
time,
but when one of the rear wheels has no traction and the other does,
the locking feature will allow the wheel with traction to move\
the vehicle.
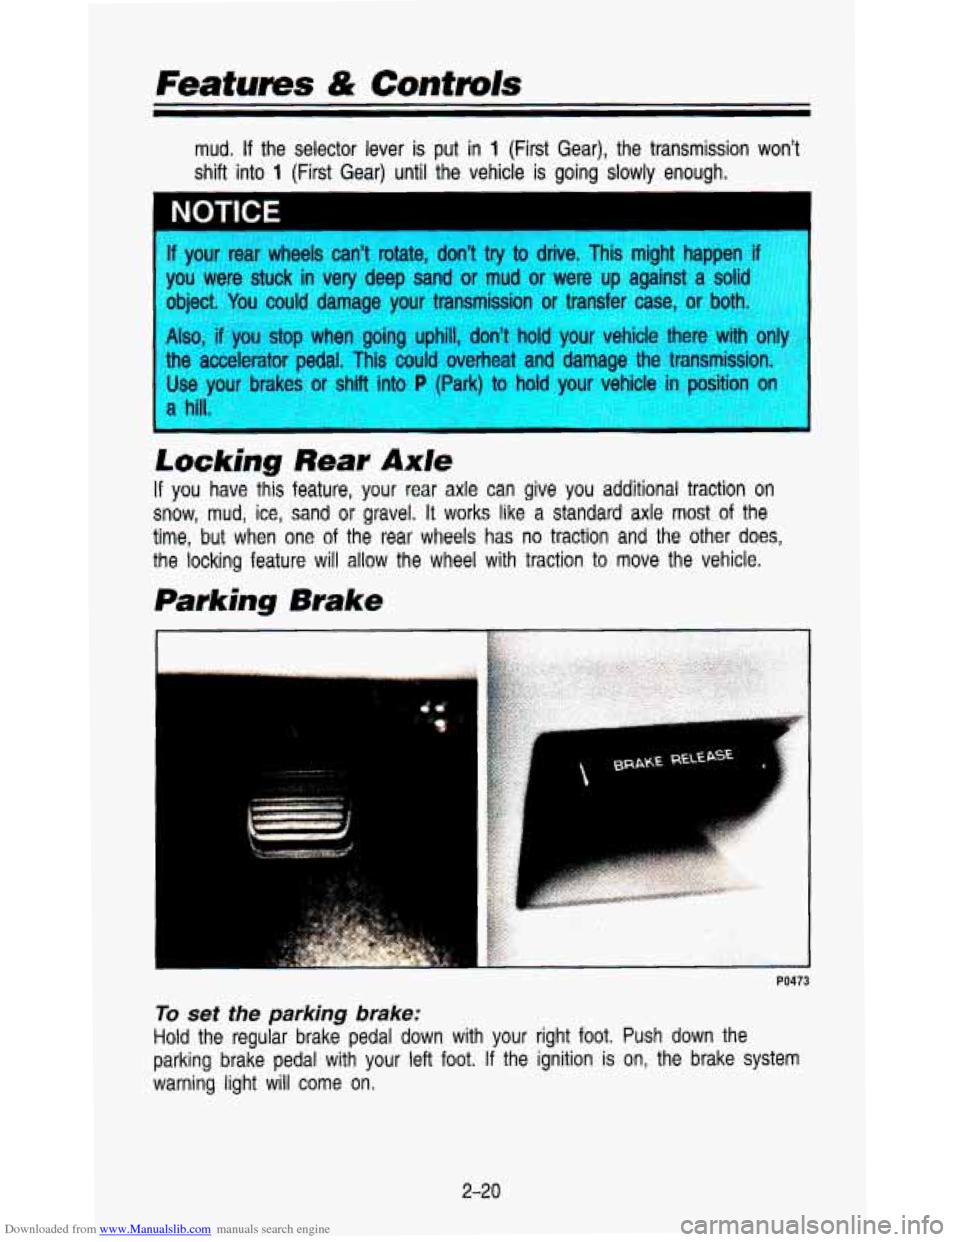
Parking Brake
2-20
Page 77 of 345
Downloaded from www.Manualslib.com manuals search engine To release the parking brake:
Hold the regular brake pedal down. Pull the brake release lever.
I NOTICE -1
, ,arking brakL
in ronlnro thorn ar
hiving .Ah thc , ,Pwe your real ,rakes to nverheal.
‘ou may ha
‘our vehicle.
- -
If you are on a hill: See “Parking on Hills” in the Index. That part shows
how to turn your front wheels.
If you are towing a trailer and are parking on any hill: See “Towing a Trailer”
in the Index. That part shows what to do first to keep the \
trailer from moving.
Shifting Into P (Park)
A It can be dangerous’to get out of your vehicle if the shift lever is not
b fully in P (Park) with the parking brake firmly set. Your vehicle can roll.
If you have left the-engine running, the vehicle can move suddenly.
You or others
could be injured. To be sure your vehicle won’t-:.rnove,
when you’re on
faiily level ground, use the steps that follow. If you
are parking
on $:hi!!, or if you’re pulling’ a trailer, also see “P;a.rking
On Hills” or “Towing a Trailer” in the Index.
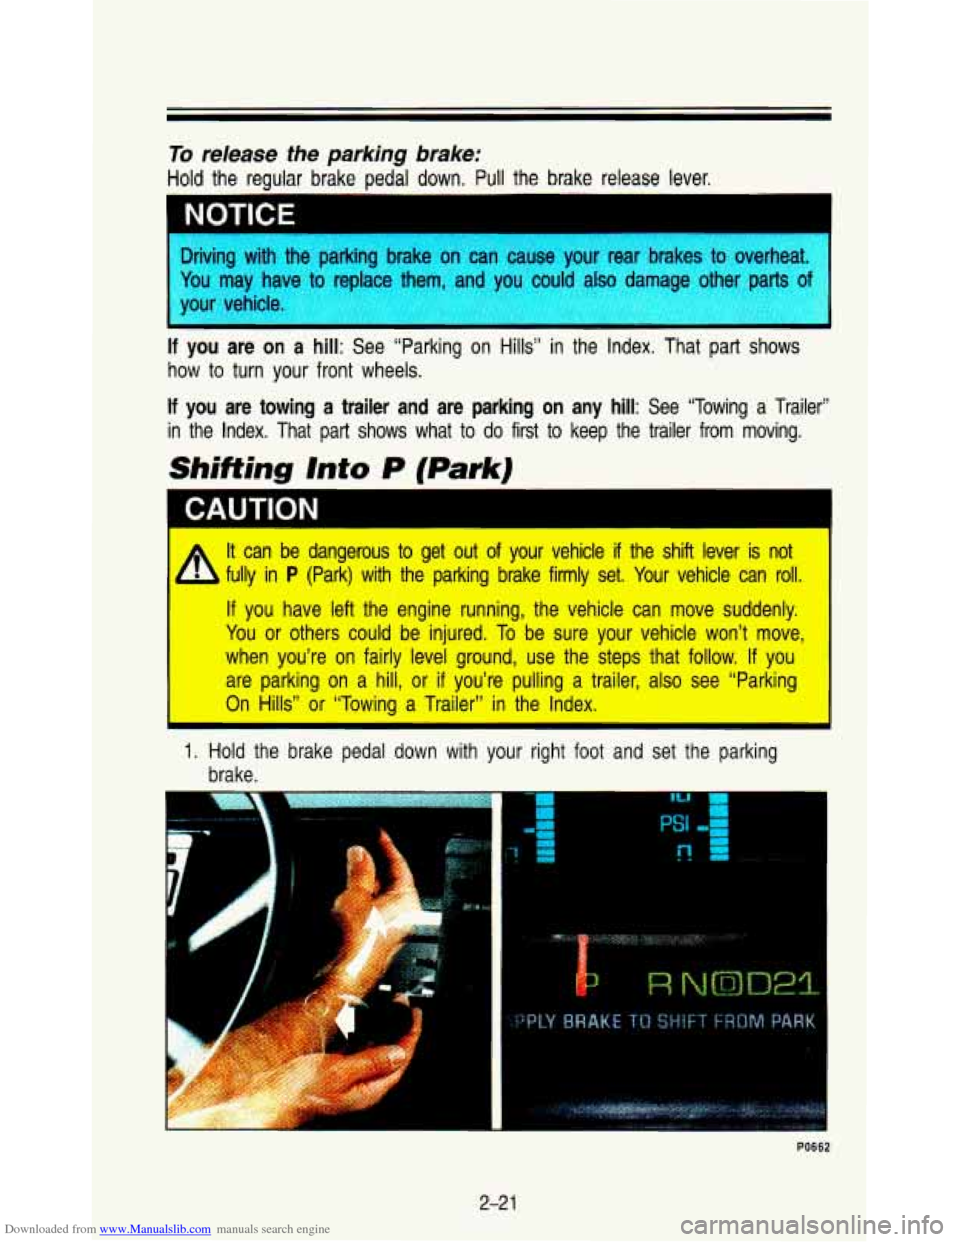
1. Hold the brake pedal down with your right foot and set the parking\
brake.
F“
2-2 1
Page 84 of 345
Downloaded from www.Manualslib.com manuals search engine FeatuEs & Contmls
Horn
NO047
Press the pad in the center of the steering wheel to sound the horn.
Tilt Wheel
NO046
A tilt steering wheel allows you to adjust the steering wheel be\
fore you drive.
You can
also raise it to the highest level to give your legs more room wh\
en
you exit and enter the vehicle.
2-28
Page 85 of 345
Downloaded from www.Manualslib.com manuals search engine To tilt the wheel, hold the steering wheel and pull the lever. Move the
steering wheel
to a comfortable level, then release the lever to lock the wheel
in place.
The 7brn Signal/Multifunction Lever
PO436
The lever on the left side of the steering column includes your:
Turn Signal and Lane Change Indicator
Headlight High-Low Beam & Passing Signal
Windshield Wipers
Windshield Washer
Cruise Control (Optional)
2-29
Page 124 of 345
Downloaded from www.Manualslib.com manuals search engine Features & Contmls
The 5-wire harness is stored on the right side of the van near the rear wheel
well. The harness has no connector, and you should have a qua\
lified service
person wire your harness for you.
The harness must be routed out
of your vehicle between the rear door and the
floor, with enough of the harness
so that the trailer or the body won't pull it.
The 7-wire harness is stored on the right side of the van near the rear wheel
well. This harness has a
30 amp battery feed wire and no connector, and
should be wired by a qualified service person. Attach the harn\
ess
to the
trailer, then tape or strap
it to your vehicle's frame rail. Be sure you leave it
loose enough
so the wiring doesn't bend or break, but not so loose that it
drags on the ground.
The harness must be routed out
of your vehicle between the rear door and
the floor, with enough of the harness left on both sides
so that the trailer or
the body won't pull it.
Store the harness in its original place. Wrap the harness together and tie it
neatly
so it won't be damaged.
Assist Handles
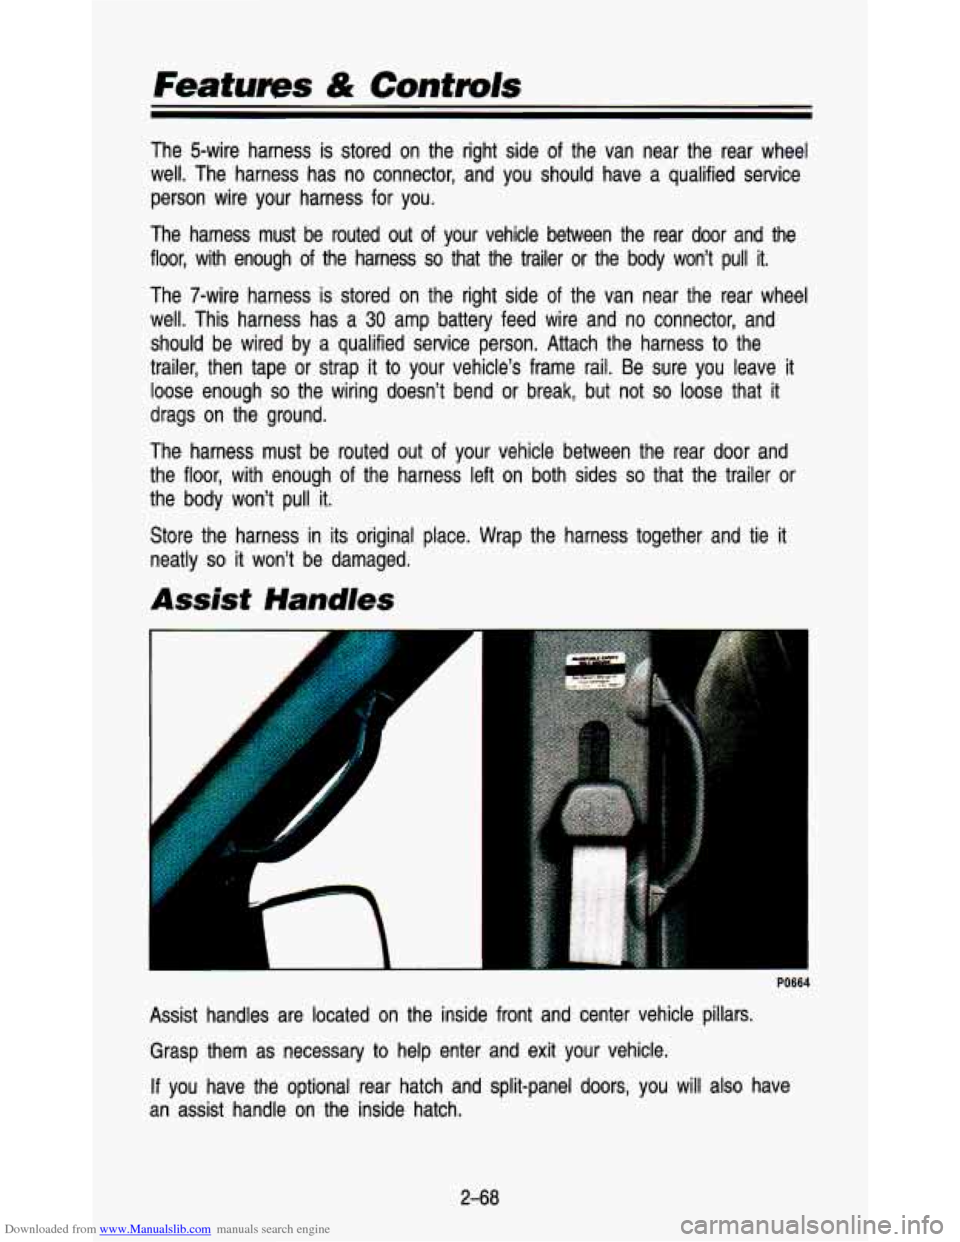
If you have the optional rear hatch and split-panel doors, you will also
an assist handle on the inside hatch.
PO664
have
Assist handles are located on the inside front and center vehi\
cle pillars
Grasp them as necessary to help enter and exit your vehicle.
2-68
Page 168 of 345
Downloaded from www.Manualslib.com manuals search engine If you keep pace with the traffic and allow realistic following distances, you
will eliminate
a lot of unnecessary braking. That means better braking and
longer brake
life.
4 If your engine ever stops while you’re driving, brake normally but don’t
pump your brakes. If you do, the pedal may get harder to push down. If
your engine stops, you will still have some power brake assist. But you
will
use it when you brake, Once the power assist is used up, it may
take longer
to stop and the brake pedal will be harder to push.
Anti-lOCk Brakes (ABS)
Your vehicle has an advanced electronic braking system that can help you
keep
it under control. When you start your vehicle and begin to drive \
away,
you may hear a momentary motor
or clicking noise. This is the ABS system
testing itself.
AM41 501 0
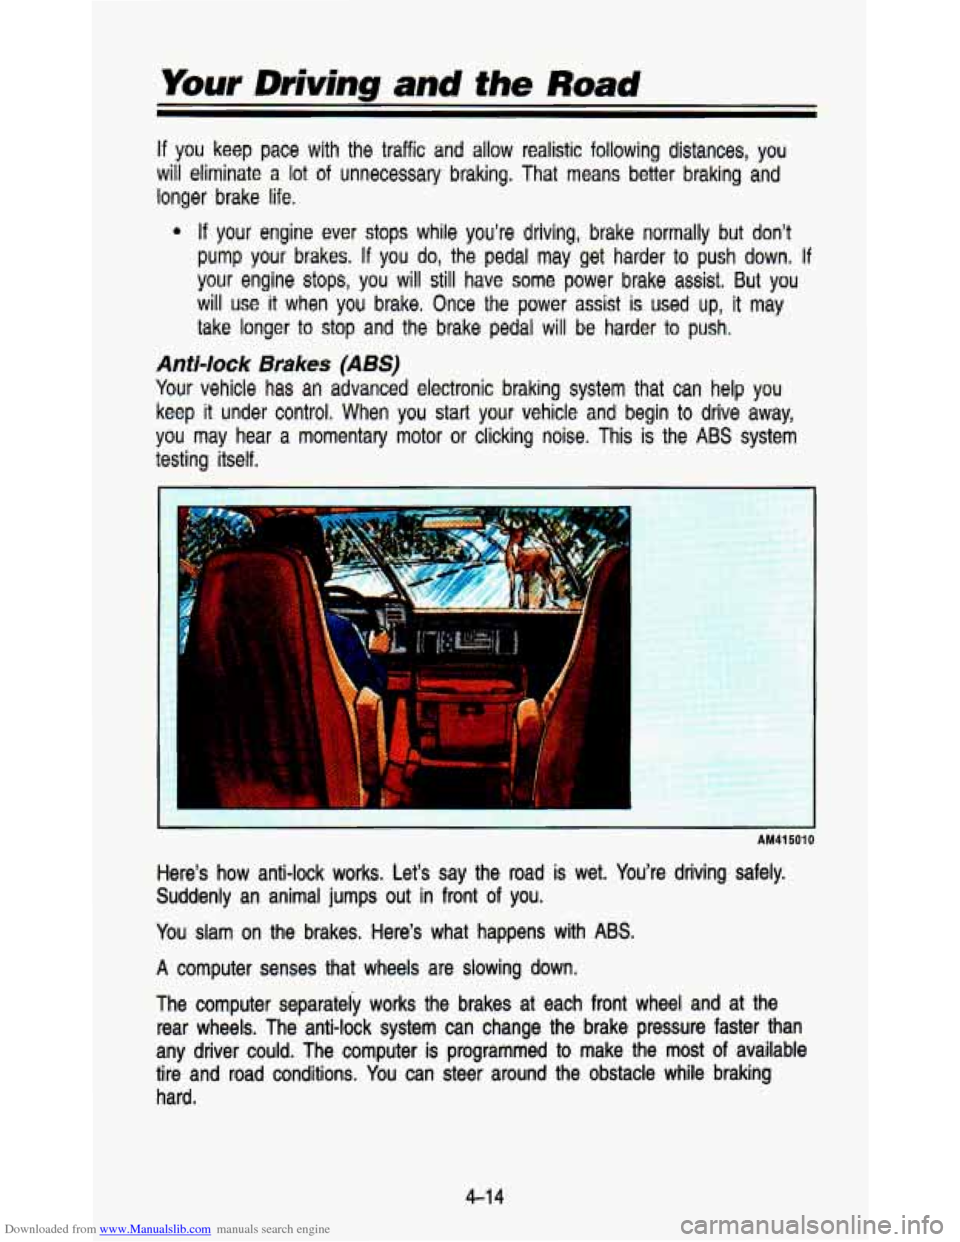
Here’s how anti-lock works. Let’s say the road is wet. You’re driving safely.
Suddenly an animal jumps out in front of you.
You slam on the brakes. Here’s what happens with
ABS.
A computer senses that wheels are slowing down.
The computer separately works the brakes at each front wheel a\
nd
at the
rear wheels. The anti-lock system can change the brake pressure\
faster than
any driver could. The computer is programmed
to make the most of available
tire and road conditions.
You can steer around the obstacle while braking
hard.
4-1 4
Page 169 of 345
Downloaded from www.Manualslib.com manuals search engine ...
AM41 5020
As you brake, your computer keeps receiving updates on wheel speed and
controls braking pressure accordingly.
CAUTION
Anti-lock doesn’t change the time you need to get your foot up to
the brake pedal. If you get too close to the vehicle in front of you,
you
won’t have time to apply your brakes if that vehicle suddenly
slows or stops. Always leave enough room up ahead to stop, even
though
you have anti-lock brakes.
To Use Four-wheel Anti-Lock:
Don’t pump the brakes. Just hold the brake pedal down and let anti-lock work
for you. You may feel the brakes vibrate,
or you may notice some noise, but
this is normal.
4-1 5
Page 172 of 345
Downloaded from www.Manualslib.com manuals search engine Your Driving and the Road
Braking In Emergencies
Use your anti-lock braking system when you need to. With anti-\
lock, you can
steer and brake at the same time. In many emergencies, steering can help
you more than even the very best braking.
Steering
Power Steering
If you lose power steering assist because the engine stops or the\
system
fails
to function, you can steer but it will take much more effort.
Steering Tips
Driving on Curves
It’s important to take curves at a reasonable speed.
A lot of the “driver lost control” accidents mentioned on the news happen on
curves. Here’s why:
Experienced driver or beginner, each of us
is subject to the same laws of
physics when driving on curves. The traction of the tires against the \
road
surface makes it possible for the vehicle
to change its path when you turn
the front wheels.
If there’s no traction, inertia will keep the vehicle going in \
the same direction.
If you’ve ever tried to steer a vehicle on wet ice, you’ll
understand this.
The traction you can get in
a curve depends on the condition of your tires
and the road surface, the angle at which the curve is banked,\
and your
speed. While you’re in a curve, speed is the one factor you can control.
Suppose you’re steering through a sharp curve. Then you suddenly
accelerate. Those two control systems-steering and acceleration-can
overwhelm those places where the tires meet the road and make \
you lose
control.
What should you
do if this ever happens? Let up on the accelerator pedal,
steer the vehicle the way you want it
to go, and slow down.
Speed limit signs near curves warn that you should adjust your\
speed. Of
course, the posted speeds are based on good weather and road \
conditions. Under less favorable conditions you’ll want
to go slower.
If you need to reduce your speed as you approach a curve, do it before you
enter the curve, while your front wheels are straight ahead.
Try to adjust your
speed
so you can “drive” through the curve. Maintain a reasonable, steady
speed. Wait to accelerate until you are out of the curve, and\
then accelerate gently into the straightaway.
4-1 8