1991 HONDA CIVIC Owners Manual
-
 1
1 -
 2
2 -
 3
3 -
 4
4 -
 5
5 -
 6
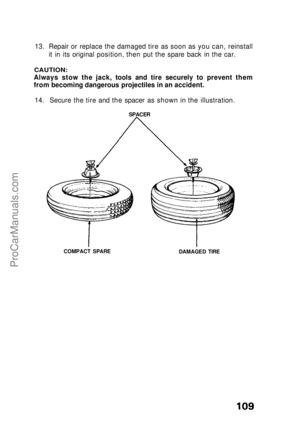
6 -
 7
7 -
 8
8 -
 9
9 -
 10
10 -
 11
11 -
 12
12 -
 13
13 -
 14
14 -
 15
15 -
 16
16 -
 17
17 -
 18
18 -
 19
19 -
 20
20 -
 21
21 -
 22
22 -
 23
23 -
 24
24 -
 25
25 -
 26
26 -
 27
27 -
 28
28 -
 29
29 -
 30
30 -
 31
31 -
 32
32 -
 33
33 -
 34
34 -
 35
35 -
 36
36 -
 37
37 -
 38
38 -
 39
39 -
 40
40 -
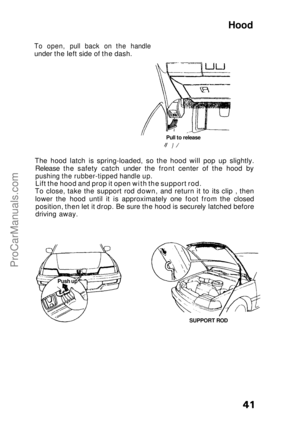
 41
41 -
 42
42 -
 43
43 -
 44
44 -
 45
45 -
 46
46 -
 47
47 -
 48
48 -
 49
49 -
 50
50 -
 51
51 -
 52
52 -
 53
53 -
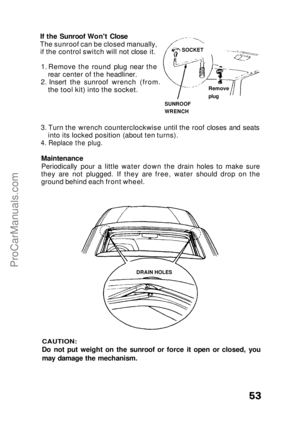 54
54 -
 55
55 -
 56
56 -
 57
57 -
 58
58 -
 59
59 -
 60
60 -
 61
61 -
 62
62 -
 63
63 -
 64
64 -
 65
65 -
 66
66 -
 67
67 -
 68
68 -
 69
69 -
 70
70 -
 71
71 -
 72
72 -
 73
73 -
 74
74 -
 75
75 -
 76
76 -
 77
77 -
 78
78 -
 79
79 -
 80
80 -
 81
81 -
 82
82 -
 83
83 -
 84
84 -
 85
85 -
 86
86 -
 87
87 -
 88
88 -
 89
89 -
 90
90 -
 91
91 -
 92
92 -
 93
93 -
 94
94 -
 95
95 -
 96
96 -
 97
97 -
 98
98 -
 99
99 -
 100
100 -
 101
101 -
 102
102 -
 103
103 -
 104
104 -
 105
105 -
 106
106 -
 107
107 -
 108
108 -
 109
109 -
 110
110 -
 111
111 -
 112
112 -
 113
113 -
 114
114 -
 115
115 -
 116
116 -
 117
117 -
 118
118 -
 119
119 -
 120
120 -
 121
121 -
 122
122 -
 123
123 -
 124
124 -
 125
125 -
 126
126 -
 127
127 -
 128
128 -
 129
129 -
 130
130 -
 131
131 -
 132
132 -
 133
133 -
 134
134 -
 135
135
![HONDA CIVIC 1991 Owners Manual
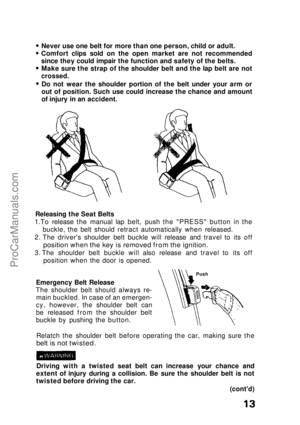
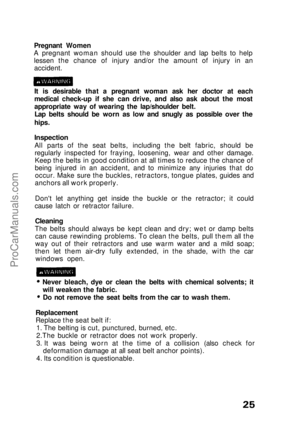
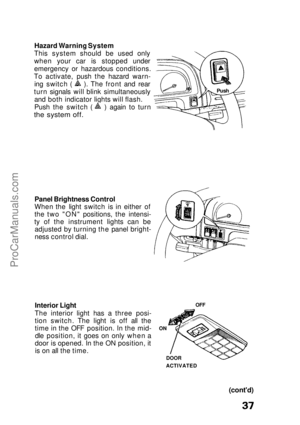
Seat Belts (cont'd)
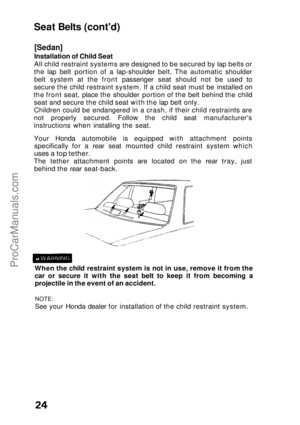
[Sedan]
Installation of Child Seat
All child restraint systems are designed to be secured by lap belts or
the lap belt portion of a lap-shoulder belt. The automatic shoulder](/manual-img/13/57901/w960_57901-24.png "HONDA CIVIC 1991 Owners Manual
Seat Belts (cont'd)
[Sedan]
Installation of Child Seat
All child restraint systems are designed to be secured by lap belts or
the lap belt portion of a lap-shoulder belt. The automatic shoulder")

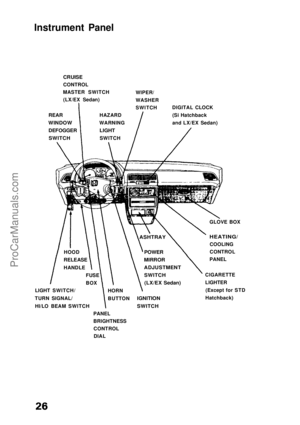
 WIPER/
WASHER
SWITCH
DIGITAL CLOCK
(Si Hatchback
and LX/EX Sedan)
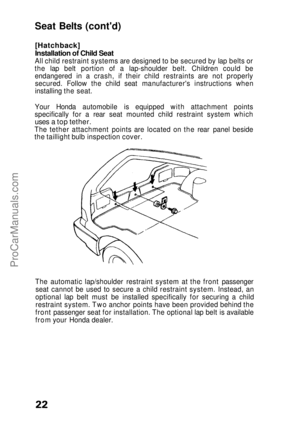
REAR
WINDOW
DEFOGGER
SWITCH
HAZARD
WARNING
LIGHT
SWITCH
GLOVE BOX")
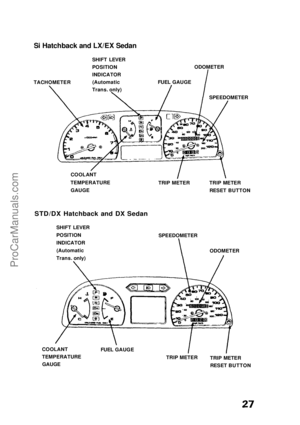
 FUEL GAUGEODOMETER
SPEEDOMETER
TRIP METER TRIP METER
RESET BUTTON
COOLANT")
 and kilometers per hour (inside).
Odometer
The numbers on the odometer indicate miles.
The odometer registers total distance tra")
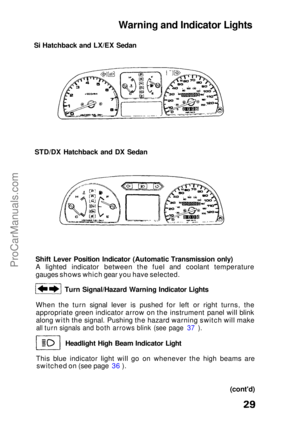
A lighted indicator between the fuel and coolant te")

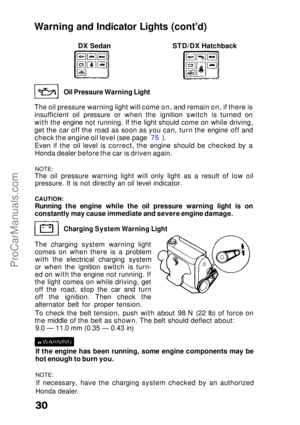
DX Sedan STD/DX Hatchback
Oil Pressure Warning Light
The oil pressure warning light will come on, and remain on, if there is
insufficient oil pressure or whe")
