1991 HONDA CIVIC instrument panel
[x] Cancel search: instrument panelPage 16 of 136
![HONDA CIVIC 1991 Owners Manual [Hatchback]
Wearing the Front Seat Berts The automatic ("passive") lap/shoulder belt systems with emer-
gency locking retractors are designed to lock only during a suddenstop or impact. Other HONDA CIVIC 1991 Owners Manual [Hatchback]
Wearing the Front Seat Berts The automatic ("passive") lap/shoulder belt systems with emer-
gency locking retractors are designed to lock only during a suddenstop or impact. Other](/manual-img/13/57901/w960_57901-15.png)
[Hatchback]
Wearing the Front Seat Berts The automatic ("passive") lap/shoulder belt systems with emer-
gency locking retractors are designed to lock only during a suddenstop or impact. Otherwise, they allow you some freedom of move-ment in the seat. The lap/shoulder belt must remain permanently
latched.
NOTE:
The motion sensing lock mechanisms for the front belts are located in each door. Therefore, if a door is opened too quickly, the belt may
lock and the door cannot be opened further. If this happens, close
the door and open it again more slowly. Enter the car and close the door completely.
If a door is not completely closed, the warning lights in the ceiling
and in the instrument panel will come on and the beeper will
sound when the ignition switch is turned on (see page 17).
The driver's seat should be moved to a comfortable distance from
the steering wheel. Sit straight up and well back in the seat.
The seat belt should fit snugly against your body. The shoulder portion of the belt should go over your shoulder and across your
body to evenly distribute the belt's restraining force. Check that the lap portion of the belt is positioned low on your
hipbone and below your abdomen. This way, if the car is involved
in an accident, you will be less likely to slide under the seat belts.
If the belt is too near your neck and throat, move toward the
center of the seat.
Never drive the car with the doors ajar. The front doors must be
closed completely for the front seat belts to function properly.
(cont'd)ProCarManuals.comMain Menu s t
Page 18 of 136
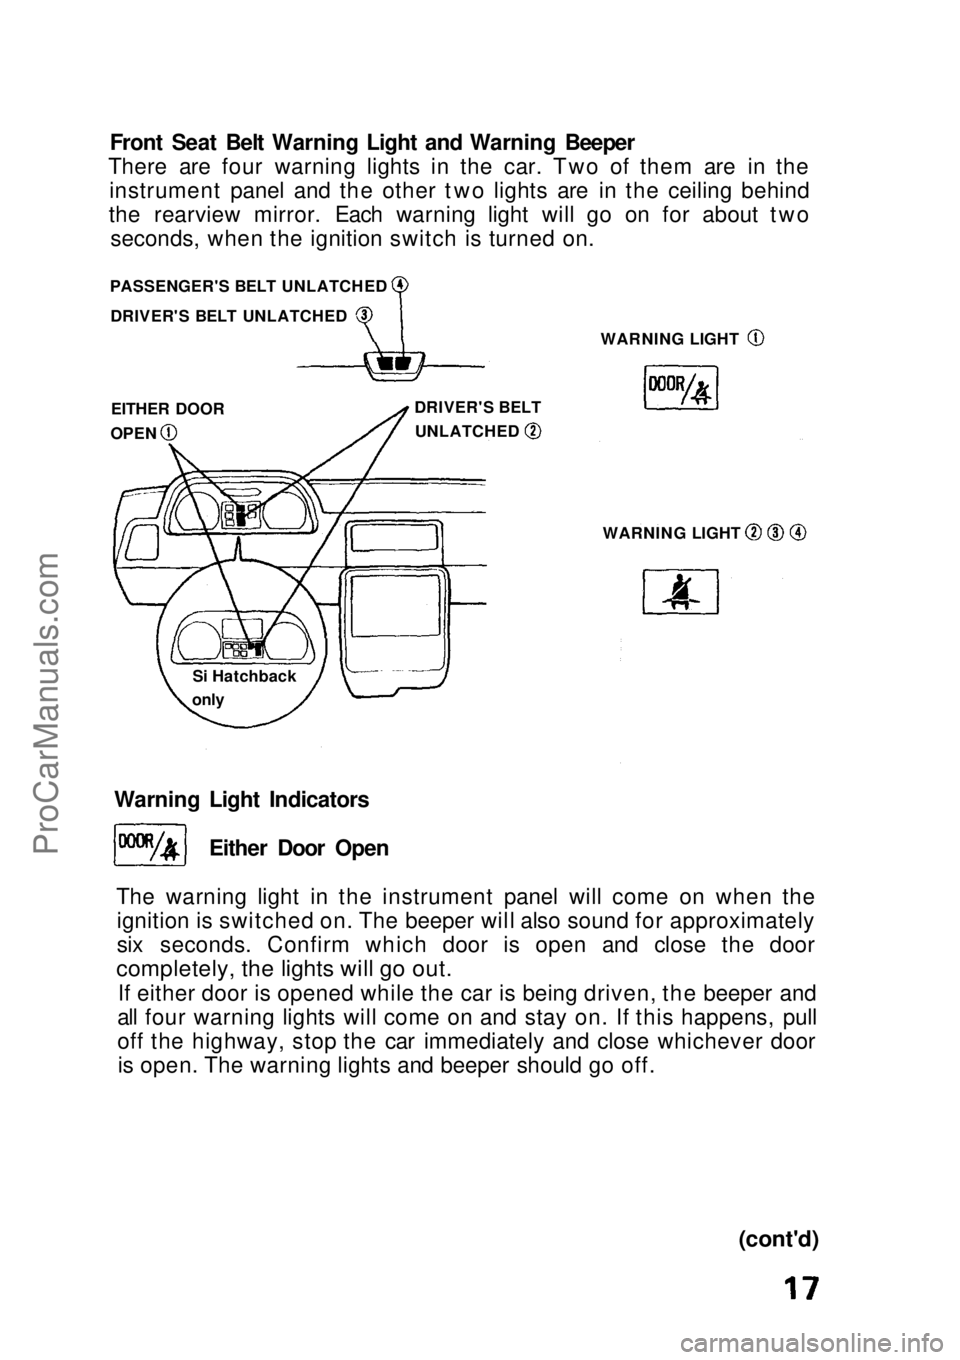
Front Seat Belt Warning Light and Warning Beeper
There are four warning lights in the car. Two of them are in the instrument panel and the other two lights are in the ceiling behind
the rearview mirror. Each warning light will go on for about two seconds, when the ignition switch is turned on.
Warning Light Indicators Either Door Open
The warning light in the instrument panel will come on when the ignition is switched on. The beeper will also sound for approximately
six seconds. Confirm which door is open and close the door
completely, the lights will go out.
If either door is opened while the car is being driven, the beeper and
all four warning lights will come on and stay on. If this happens, pull
off the highway, stop the car immediately and close whichever door is open. The warning lights and beeper should go off.
(cont'd)
PASSENGER'S BELT UNLATCHED
DRIVER'S BELT UNLATCHED WARNING LIGHT
DRIVER'S BELT UNLATCHED
EITHER DOOR
OPEN
WARNING LIGHT
Si Hatchback
onlyProCarManuals.comMain Menu s t
Page 19 of 136
Seat Belts (cont'd)
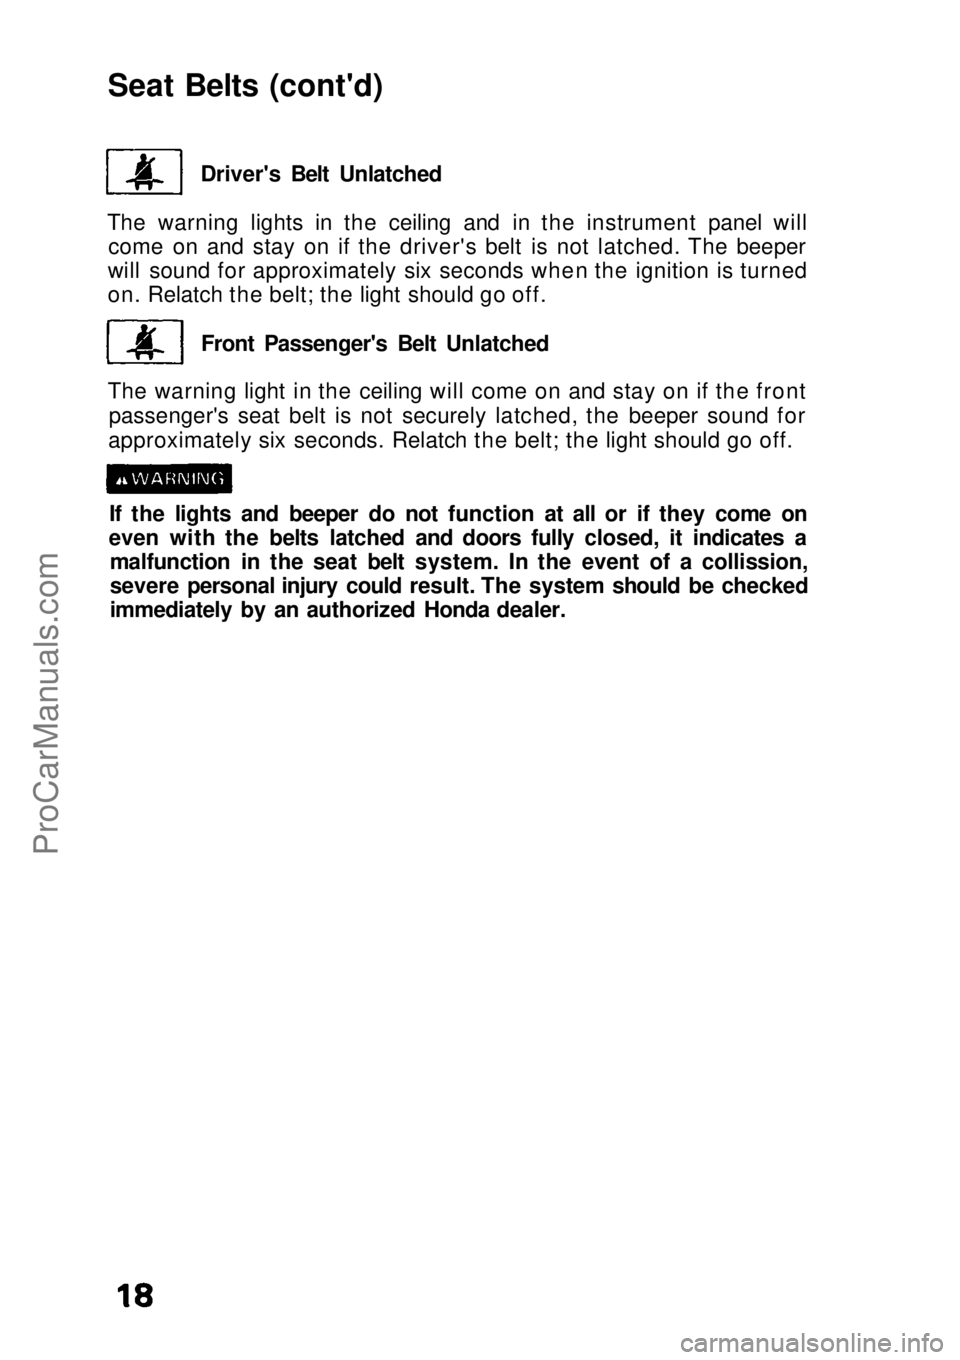
Driver's Belt Unlatched
The warning lights in the ceiling and in the instrument panel will come on and stay on if the driver's belt is not latched. The beeper
will sound for approximately six seconds when the ignition is turned
on. Relatch the belt; the light should go off.
Front Passenger's Belt Unlatched
The warning light in the ceiling will come on and stay on if the front passenger's seat belt is not securely latched, the beeper sound for
approximately six seconds. Relatch the belt; the light should go off.
If the lights and beeper do not function at all or if they come on
even with the belts latched and doors fully closed, it indicates a malfunction in the seat belt system. In the event of a collission,
severe personal injury could result. The system should be checked
immediately by an authorized Honda dealer.ProCarManuals.comMain Menu s t
Page 27 of 136
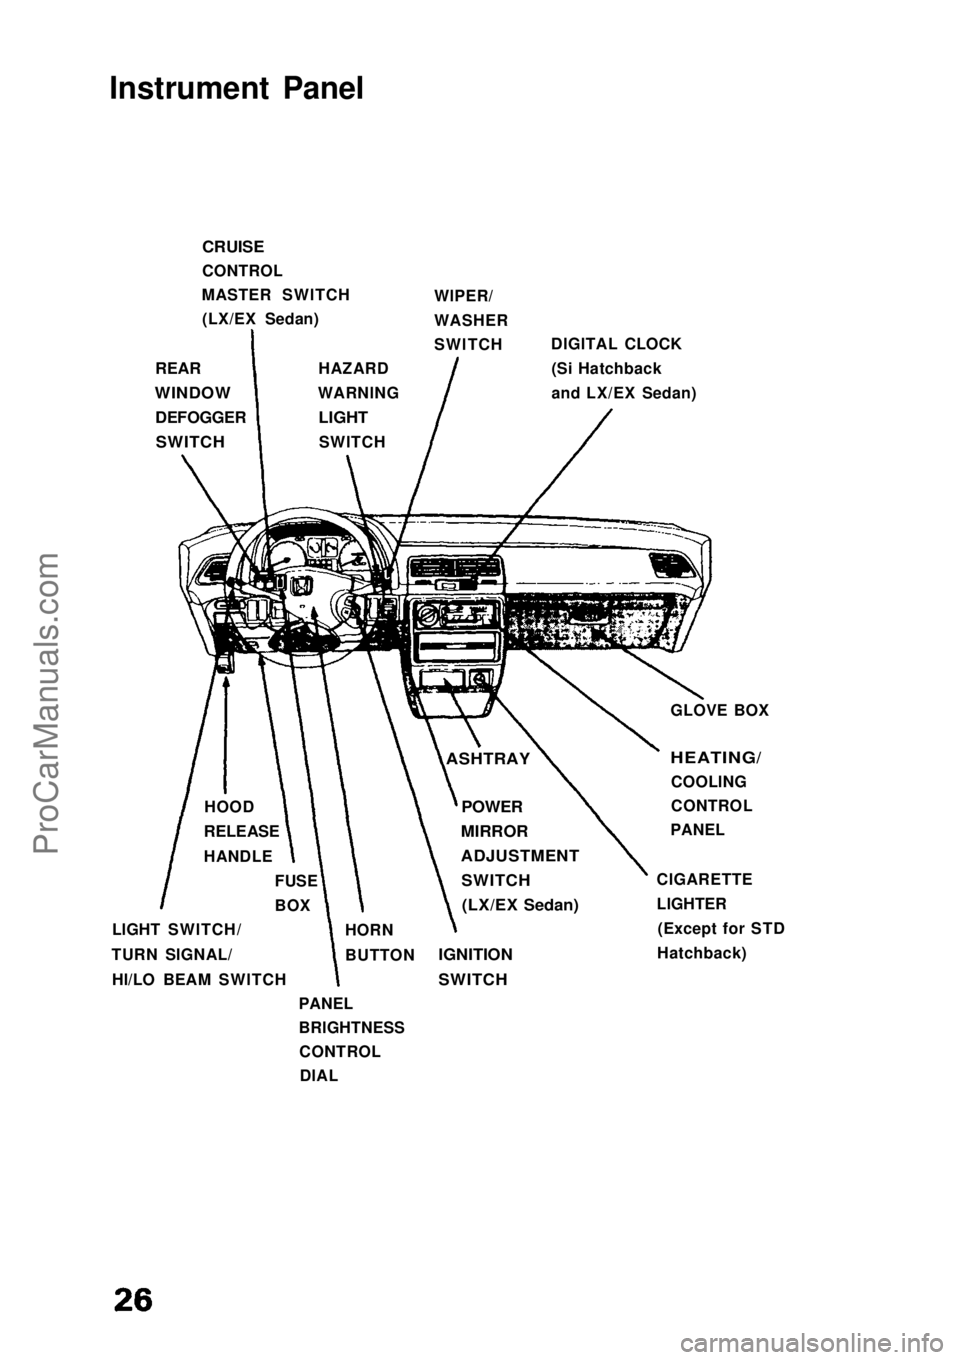
Instrument Panel
CRUISE
CONTROL
MASTER SWITCH (LX/EX Sedan) WIPER/
WASHER
SWITCH
DIGITAL CLOCK
(Si Hatchback
and LX/EX Sedan)
REAR
WINDOW
DEFOGGER
SWITCH
HAZARD
WARNING
LIGHT
SWITCH
GLOVE BOX
ASHTRAY
HEATING/
COOLING
CONTROL
PANEL
CIGARETTE
LIGHTER (Except for STD
Hatchback)
POWER
MIRROR
ADJUSTMENT
SWITCH
(LX/EX Sedan)
IGNITION
SWITCH
HORN
BUTTON
PANEL
BRIGHTNESS CONTROLDIAL
LIGHT SWITCH/
TURN SIGNAL/ HI/LO BEAM SWITCH FUSE
BOX
HOOD
RELEASE
HANDLEProCarManuals.comMain Menu s t
Page 30 of 136
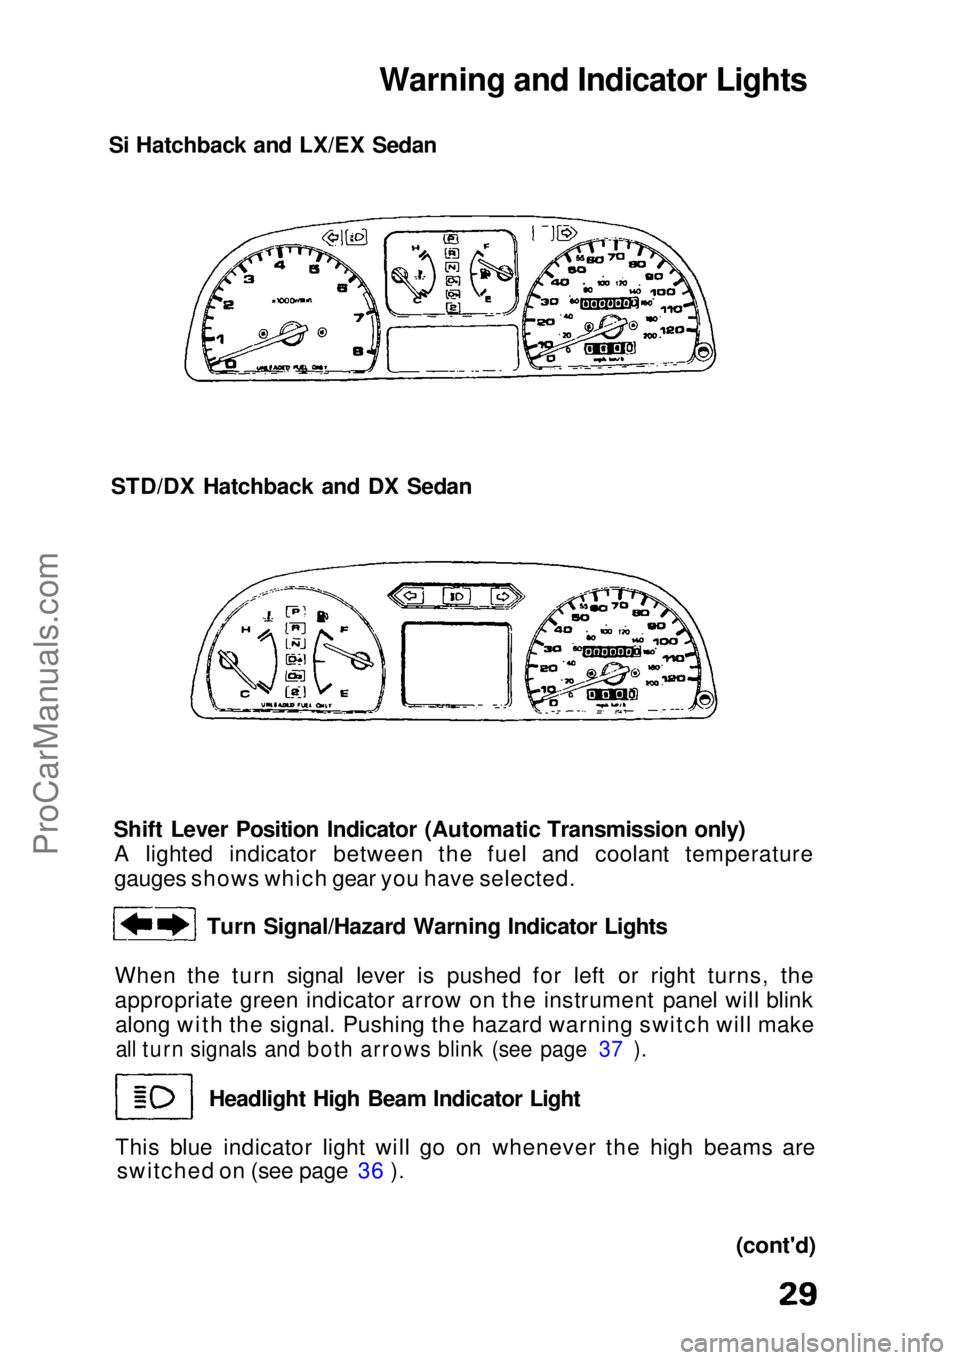
Warning and Indicator Lights
Si Hatchback and LX/EX Sedan
STD/DX Hatchback and DX Sedan
Shift Lever Position Indicator (Automatic Transmission only)A lighted indicator between the fuel and coolant temperature
gauges shows which gear you have selected.
Turn Signal/Hazard Warning Indicator Lights
When the turn signal lever is pushed for left or right turns, the
appropriate green indicator arrow on the instrument panel will blink along with the signal. Pushing the hazard warning switch will make
all turn signals and both arrows blink (see page 37 ).
Headlight High Beam Indicator Light
This blue indicator light will go on whenever the high beams are switched on (see page 36 ).
(cont'd)ProCarManuals.comMain Menu s t
Page 37 of 136
Lights
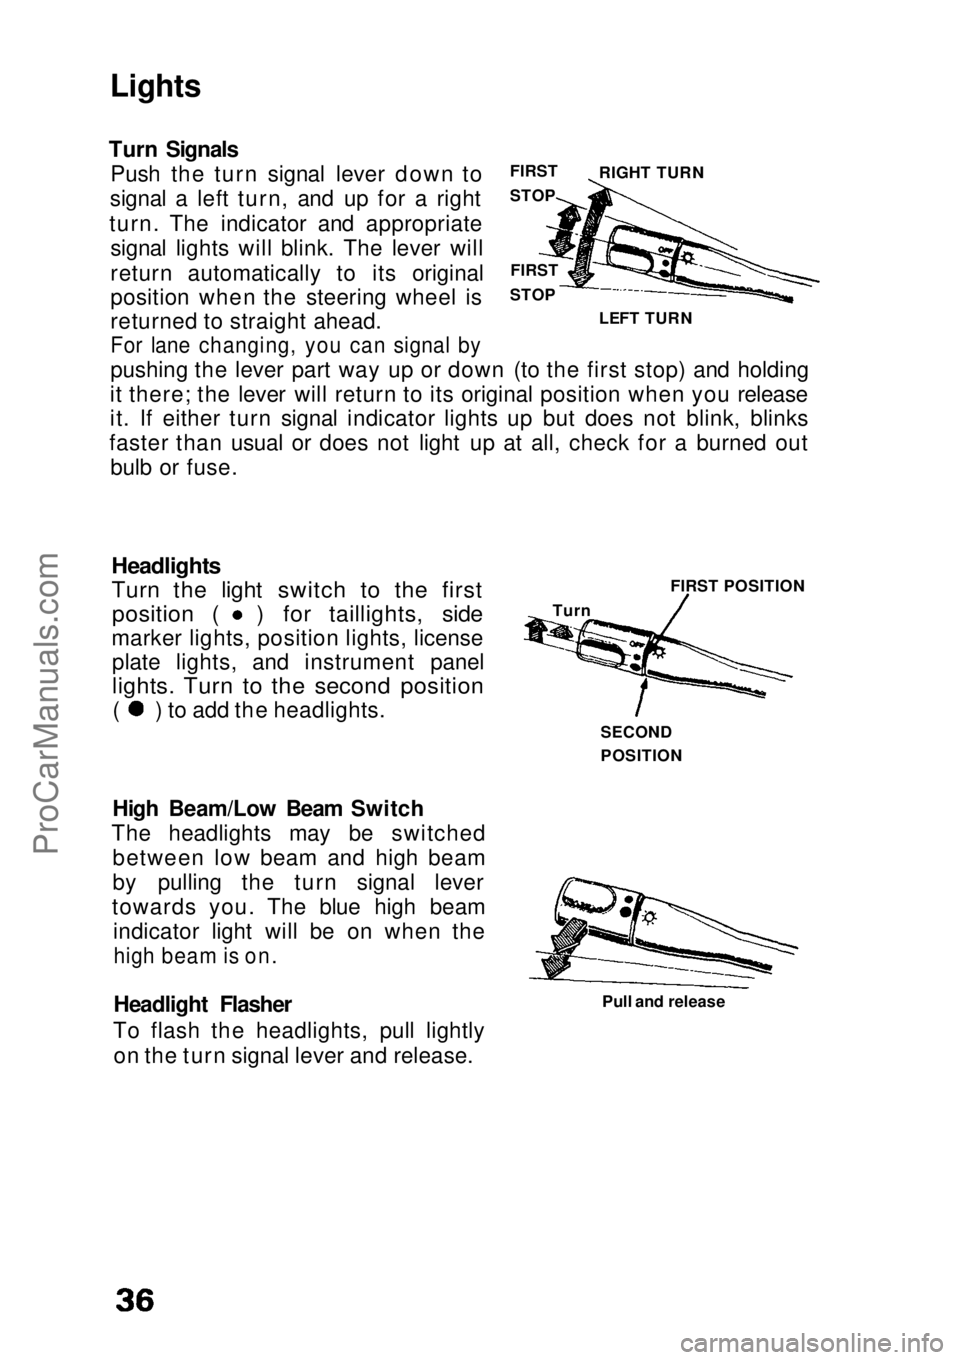
Turn Signals Push the turn signal lever down to
signal a left turn, and up for a right
turn. The indicator and appropriate signal lights will blink. The lever will
return automatically to its original
position when the steering wheel is
returned to straight ahead.
For lane changing, you can signal by
pushing the lever part way up or down (to the first stop) and holding
it there; the lever will return to its original position when you release
it. If either turn signal indicator lights up but does not blink, blinks
faster than usual or does not light up at all, check for a burned out bulb or fuse.
Headlights
Turn the light switch to the first
position ( ) for taillights, side
marker lights, position lights, license plate lights, and instrument panel
lights. Turn to the second position
( ) to add the headlights.
High Beam/Low Beam Switch
The headlights may be switched between low beam and high beam
by pulling the turn signal lever
towards you. The blue high beam indicator light will be on when the
high beam is on.
Headlight Flasher
To flash the headlights, pull lightly on the turn signal lever and release. Pull and release
FIRST
STOP
FIRST
STOP LEFT TURN RIGHT TURN
Turn FIRST POSITION
SECOND
POSITIONProCarManuals.comMain Menu s t
Page 38 of 136
Hazard Warning System
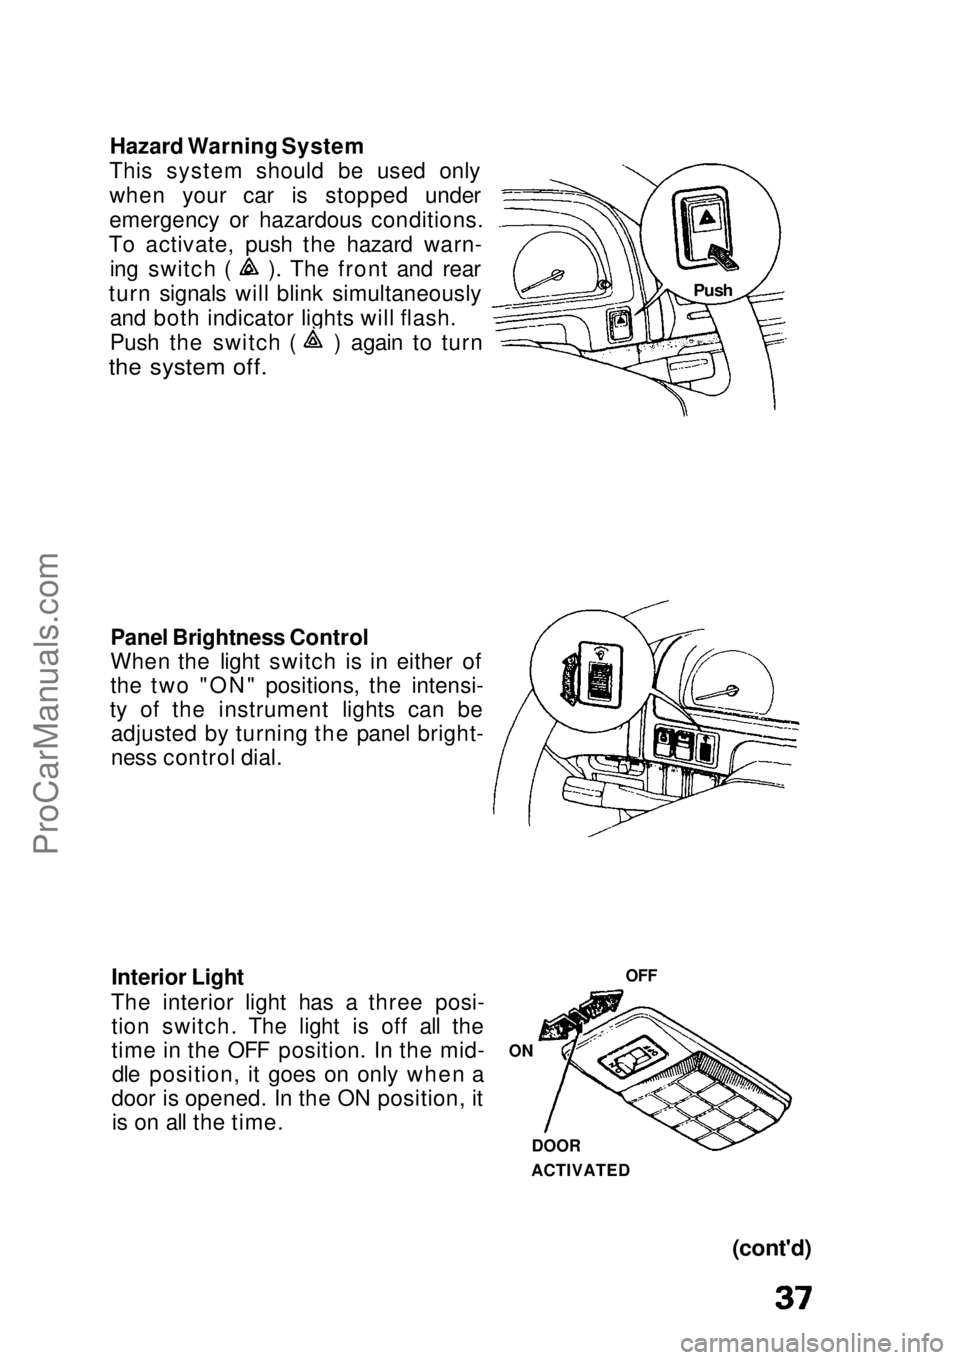
This system should be used only
when your car is stopped under
emergency or hazardous conditions.
To activate, push the hazard warn- ing switch ( ). The front and rear
turn signals will blink simultaneously and both indicator lights will flash. Push the switch ( ) again to turn
the system off.
Panel Brightness Control
When the light switch is in either of
the two "ON" positions, the intensi-
ty of the instrument lights can be adjusted by turning the panel bright-
ness control dial.
Interior Light
The interior light has a three posi- tion switch. The light is off all the
time in the OFF position. In the mid-dle position, it goes on only when a
door is opened. In the ON position, it is on all the time.
(cont'd)
OFF
ON
DOOR
ACTIVATED
PushProCarManuals.comMain Menu s t
Page 130 of 136
Index (cont'd)
Specification (Sedan)............ 119
Engine Exhaust Gas Warning........ 60
Evaporative Emission Control
System.................................... 125
Exterior Care.................................. 99
Filters
Air.............................................. 86
Engine Oil.................................. 76
Fuel........................................... .86
Fluid..................................... See "Oil"
Foreign Countries, Operation in.... 55
Front Seat
Adjustment................................. 6
Fuel
Filler Door and Cap................... 55
Fitter..........................................86
Gasohol..................................... 54
Gasoline .................................... 54
Gauge........................................ 28
Requirement............................. 54
Fuse
Checking and Replacing .......... 91Specification (Hatchback).... 116
Specification (Sedan)............ 119
Hatch................................................. 5
Hatch/Trunk-open Indicator Light
...................................................31
Hazard Warning System............... 37
Headlights
Flasher...................................... 36
High Beam Indicator................. 29High Beam/Low Beam Switch ...............................................36
Switch...................................... 36
Headlight High Beam Indicator Light
...................................................29
Head Restraints................................ 7
Heating............................................. 50 High Beam
Indicator Light.......................... 29
Switch...................................... 36
Hood Latch..................................... 41
Identification Numbers................ 121
Ignition Keys............................................ 3
Switch....................................... 57
Indicator Lights.............................. 29
Inflation Pressures, Tire................ 94 Instrument Panel............................ 26
Instrument Panel Brightness Control ................................................... 37
Interior Light................................... 37
Interior Trim Care .......................... 99
Keys
Door Locks................................. 3
Hatch/Trunk Lid Lock................ 5
Ignition....................................... 57
Keys............................................ 3
Lap/Shoulder Belts .......................... See "Seat Belts"
Light Bulb Replacement.................... 92
Fuse Replacement................... 90
Operation.................................. 36
Warning and Indicator Lights.. 29
Locks
Anti-theft Steering Column Lock...............................................57
Child Proo f
Door Locks ............. 5
Doors........................................... 3
Fuel Filler Door.......................... 55 Hatch/Trunk Lid......................... 5
Power Doors.............................. 4
Luggage Area Light........................ 38
Luggage Cover................................. 9
Gasoline............................ See "Fuel"
Gas Station Information. back cover
Gauges............................................ 28
Glove Box....................................... 42 Jack.............................................. 106
Jump Starting.............................. 110ProCarManuals.comMain Menu s t