Page 132 of 165
Downloaded from www.Manualslib.com manuals search engine
DO-IT-YOURSELF-SERVICE
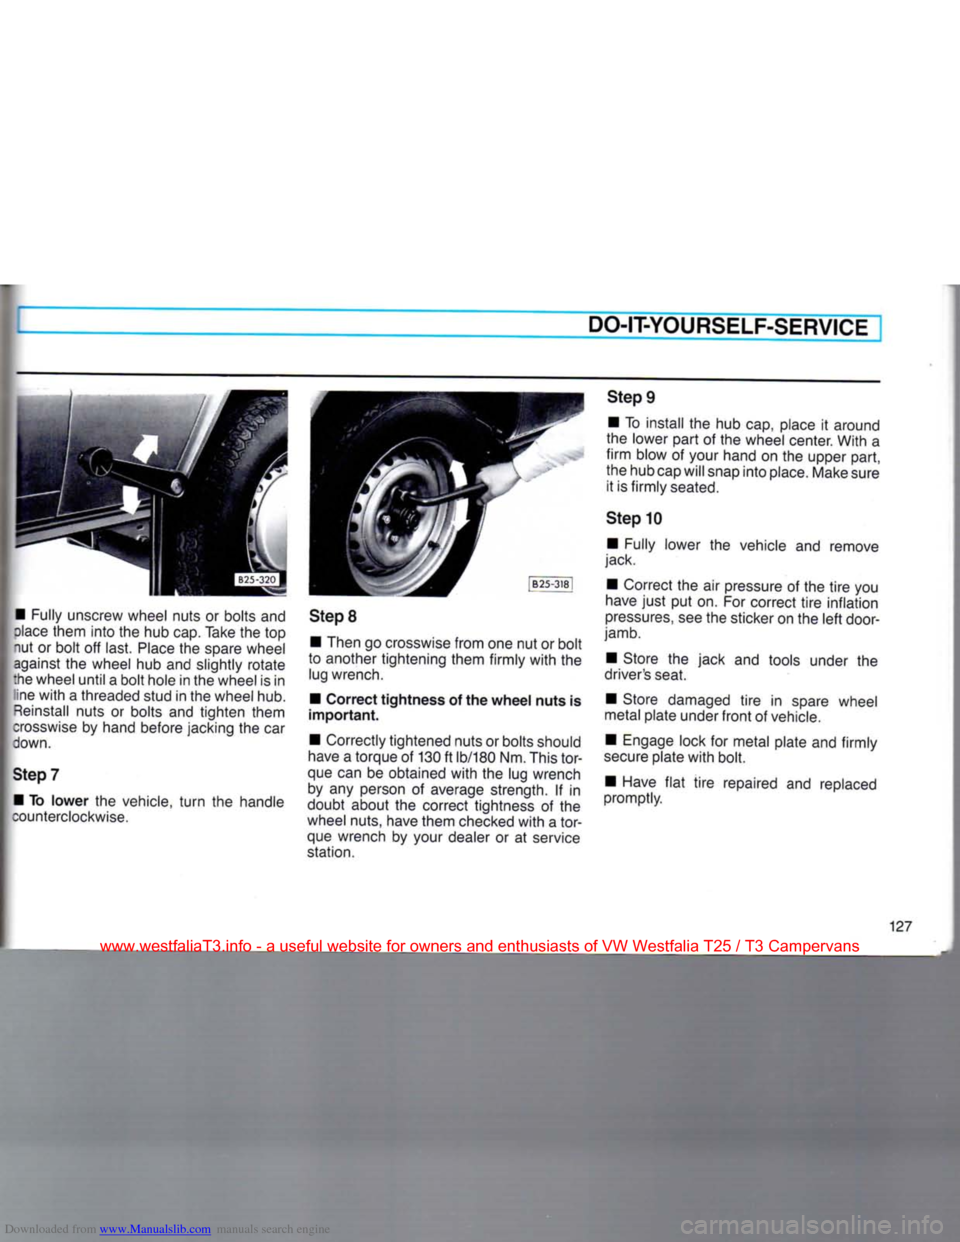
• Fully unscrew wheel nuts or bolts and
dace
them into the hub cap. Take the top
nut or bolt off last.
Place
the spare wheel against the wheel hub and slightly rotate
:he wheel until a bolt hole in the wheel is in ine
with
a threaded stud in the wheel hub.
Reinstall
nuts or bolts and tighten them
crosswise
by hand before jacking the car
down.
Step
7 • To
lower
the vehicle,
turn
the handle
counterclockwise.
Step
8
• Then go crosswise from one nut or bolt
to another tightening them firmly
with
the lug wrench.
• Correct
tightness
of the
wheel
nuts
is
important.
• Correctly tightened nuts or bolts should
have
a torque of 130 ft lb/180 Nm. This
tor
que can be obtained
with
the lug wrench by any person of average strength. If in
doubt about the correct tightness of the
wheel nuts, have them checked
with
a
tor
que wrench by your dealer or at service
station.
Step
9
• To install the hub cap, place it around
the lower part of the wheel center. With a
firm
blow of your hand on the upper part,
the hub cap will snap into place. Make sure it is firmly seated.
Step
10 • Fully lower the vehicle and remove
jack.
• Correct the air pressure of the
tire
you
have
just
put on. For correct
tire
inflation
pressures,
see the sticker on the
left
door-
jamb.
• Store the jack and tools under the
driver's seat.
• Store damaged
tire
in spare wheel
metal plate under
front
of vehicle.
• Engage lock for metal plate and firmly
secure
plate
with
bolt.
• Have
flat
tire
repaired and replaced
promptly.
127
www.westfaliaT3.info - a useful website for owners and enthusiasts of VW Westfalia T25 / T3 Campervans
Page 138 of 165
Downloaded from www.Manualslib.com manuals search engine
DO-IT-YOURSELF-SERVICE
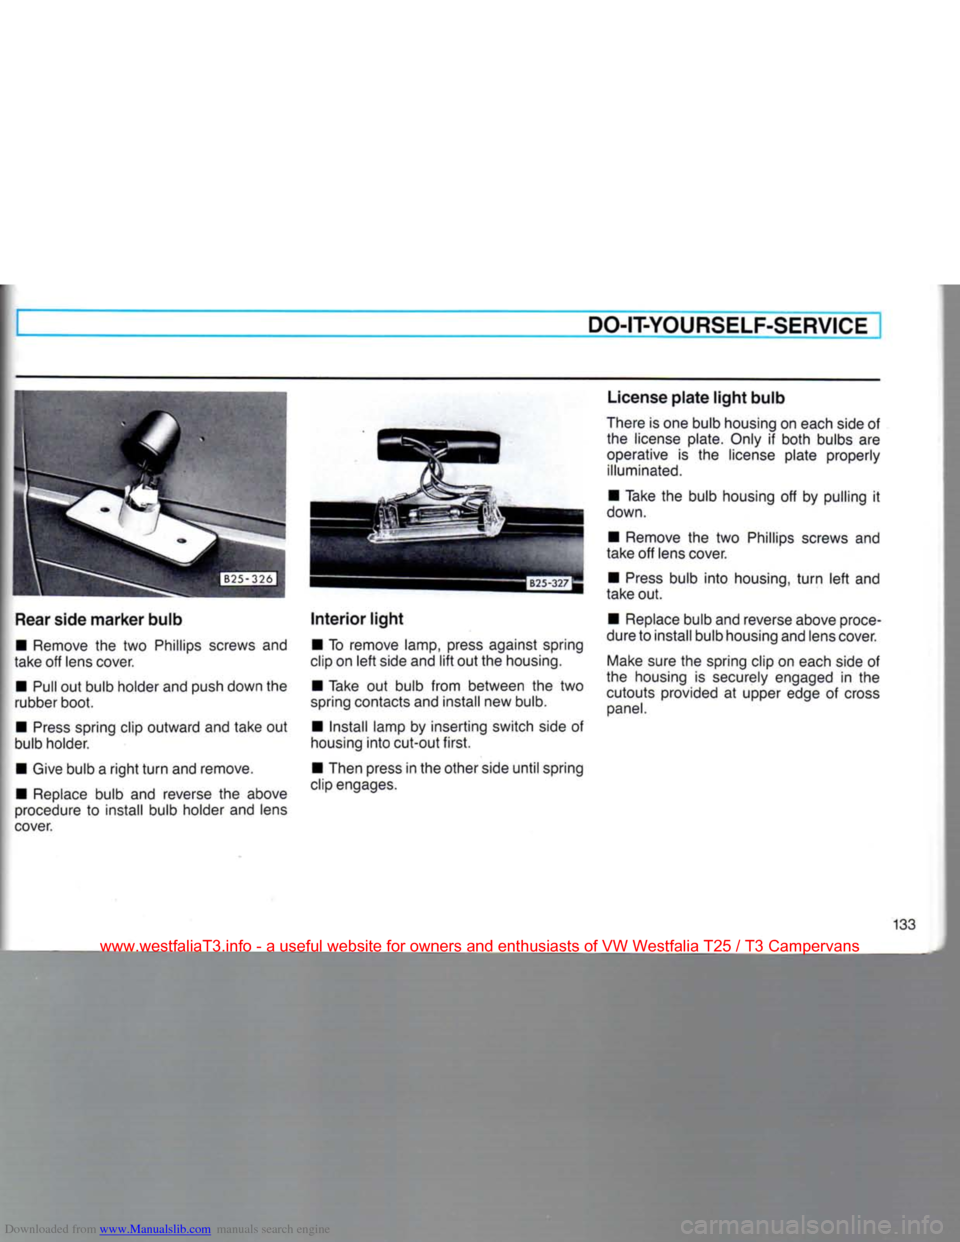
Rear
side
marker
bulb
• Remove the two Phillips screws and
take off lens cover.
• Pull out bulb holder and push down the
rubber boot.
•
Press
spring clip outward and take out
bulb holder.
• Give bulb a
right
turn
and remove. • Replace bulb and reverse the above
procedure to install bulb holder and lens
cover.
Interior
light
• To remove lamp, press against spring
clip on
left
side and
lift
out the housing.
• Take out bulb from between the two
spring contacts and install new bulb.
• Install lamp by inserting switch side of
housing
into
cut-out
first.
• Then press in the other side
until
spring
clip engages. License
plate
light
bulb
There is one bulb housing on each side of the license plate. Only if both bulbs are
operative is the license plate properly illuminated.
• Take the bulb housing off by pulling it
down.
• Remove the two Phillips screws and
take off lens cover.
•
Press
bulb
into
housing,
turn
left
and
take out.
• Replace bulb and reverse above proce
dure to install bulb housing and lens cover.
Make
sure the spring clip on each side of
the housing is securely engaged in the
cutouts provided at upper edge of cross
panel.
133
www.westfaliaT3.info - a useful website for owners and enthusiasts of VW Westfalia T25 / T3 Campervans
Page 142 of 165
Downloaded from www.Manualslib.com manuals search engine
DO-IT-YOURSELF-SERVICE
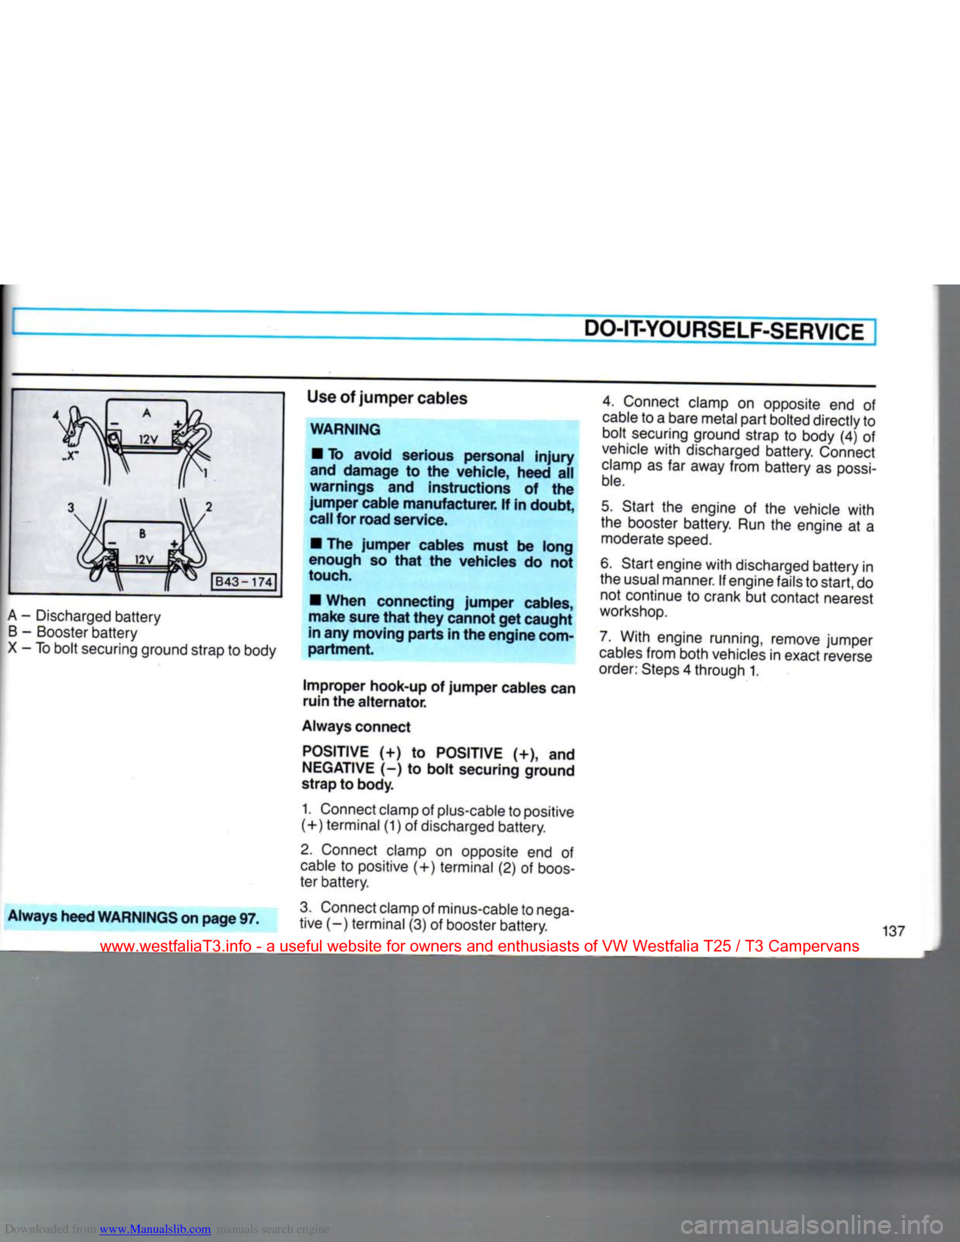
A
-
Discharged battery
B
-
Booster battery
X
-
To bolt securing ground strap
to
body Use
of jumper cables
WARNING
•
To avoid serious personal
injury
and damage to the vehicle, heed all
warnings and instructions of the
jumper cable manufacturer. If in doubt, call for road service.
•
The jumper cables must be long
enough so
that
the vehicles do not
touch.
•
When connecting jumper cables,
make sure
that
they
cannot get caught
in any moving parts in the engine
com
partment.
Improper
hook-up of jumper cables can
ruin the
alternator.
Always connect
POSITIVE (+) to POSITIVE (+), and
NEGATIVE
(-) to bolt securing ground
strap to body.
1. Connect clamp
of
plus-cable
to
positive
(+)
terminal
(1) of
discharged battery.
2.
Connect clamp
on
opposite
end of
cable
to
positive
(+)
terminal
(2) of
boos
ter battery.
4.
Connect clamp
on
opposite
end of
cable
to a
bare metal part bolted directly
to
bolt securing ground strap
to
body
(4) of
vehicle
with
discharged battery. Connect
clamp
as far
away from battery
as
possi
ble.
5.
Start
the
engine
of the
vehicle
with
the booster battery. Run
the
engine
at a
moderate
speed.
6. Start engine
with
discharged battery
in
the usual manner.
If
engine fails to start,
do
not continue
to
crank
but
contact nearest
workshop.
7. With engine running, remove jumper
cables
from both vehicles
in
exact reverse
order: Steps
4
through
1.
Always heed WARNINGS on page 97.
3.
Connect clamp
of
minus-cable
to
nega
tive
(-)
terminal
(3) of
booster battery. 137
www.westfaliaT3.info - a useful website for owners and enthusiasts of VW Westfalia T25 / T3 Campervans