1990 VOLKSWAGEN CORRADO oil change
[x] Cancel search: oil changePage 301 of 906

1.8L 4-CYL 8-VALVE & 1.8L 4-CYL 16-VALVE
Article Text (p. 10)
1990 Volkswagen Corrado
For Volkswagen Technical Site: http://vw.belcom.ru
Copyright © 1998 Mitchell Repair Information Company, LLC
Thursday, March 23, 2000 09:40PM
2) Align crankshaft sprocket mark with mark on lower timing
belt cover. See Fig. 10. Install timing belt around camshaft sprocket.
Rotate tensioner clockwise until Timing Belt Tension Scale (VW 210)
reads 13-14. Rotate crankshaft 2 revolutions and check timing mark
alignment. To complete installation, reverse removal procedure.
CAMSHAFT OIL SEAL R & I
REMOVAL
1) Remove upper timing belt cover. Place crankshaft at TDC
with No. one cylinder on compression stroke. Remove timing belt from
camshaft sprocket. Remove camshaft sprocket. Remove Woodruff key.
Install camshaft sprocket bolt and washer until washer is tight
against camshaft.
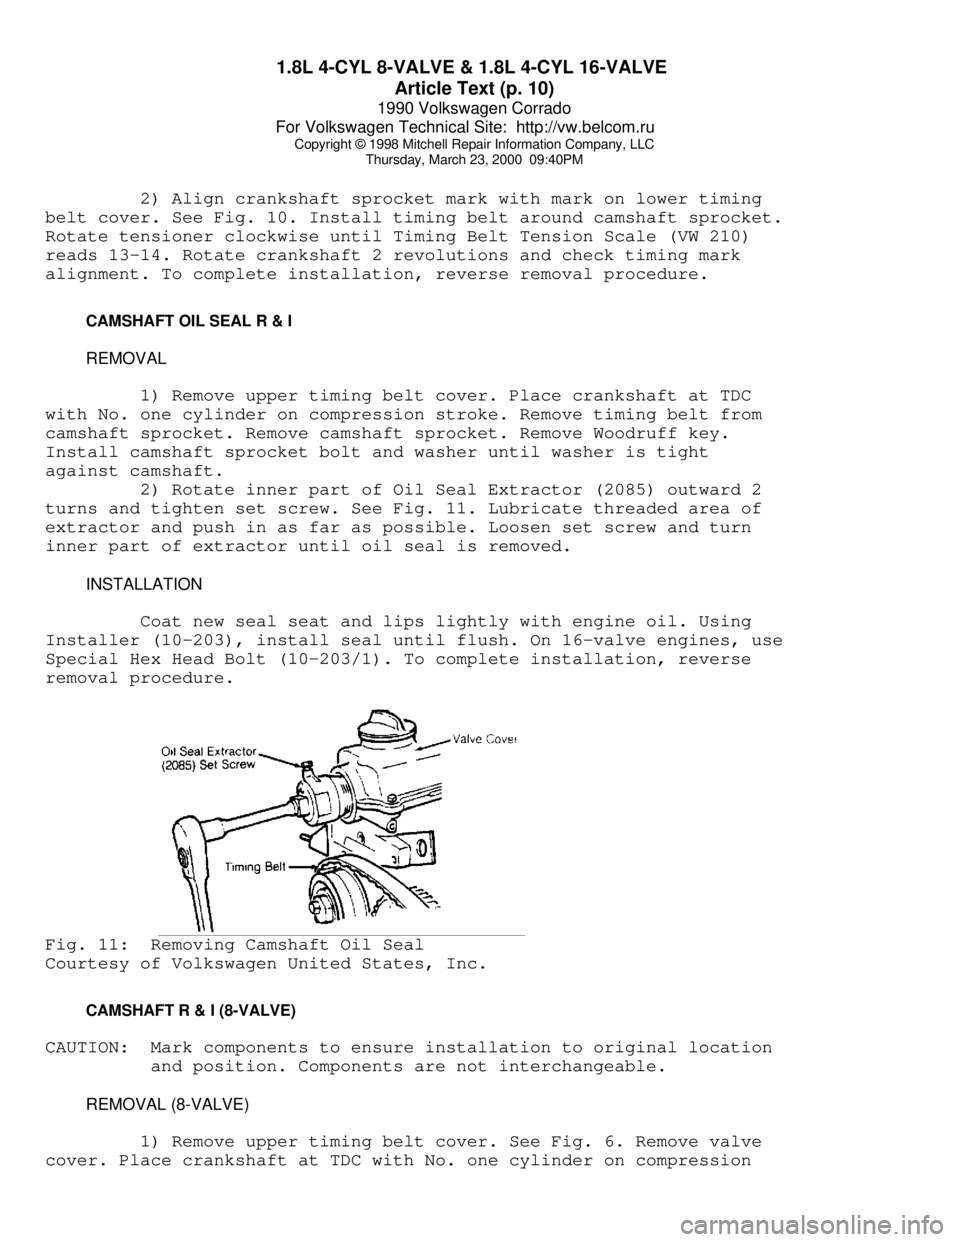
2) Rotate inner part of Oil Seal Extractor (2085) outward 2
turns and tighten set screw. See Fig. 11. Lubricate threaded area of
extractor and push in as far as possible. Loosen set screw and turn
inner part of extractor until oil seal is removed.
INSTALLATION
Coat new seal seat and lips lightly with engine oil. Using
Installer (10-203), install seal until flush. On 16-valve engines, use
Special Hex Head Bolt (10-203/1). To complete installation, reverse
removal procedure.Fig. 11: Removing Camshaft Oil Seal
Courtesy of Volkswagen United States, Inc.
CAMSHAFT R & I (8-VALVE)
CAUTION: Mark components to ensure installation to original location
and position. Components are not interchangeable.
REMOVAL (8-VALVE)
1) Remove upper timing belt cover. See Fig. 6. Remove valve
cover. Place crankshaft at TDC with No. one cylinder on compression
Page 324 of 906

A/C COMPRESSOR OIL CHECKING
Article Text (p. 6)
1990 Volkswagen Corrado
For Volkswagen Technical Site: http://vw.belcom.ru
Copyright © 1998 Mitchell Repair Information Company, LLC
Thursday, March 23, 2000 09:41PM
Discharge system. Remove compressor from vehicle. Drain oil
from compressor through inlet and outlet holes. Refill compressor with
3.4-4.7 ounces of oil through suction port. When replacing evaporator,
add 2 ounces. When replacing other A/C components, add 1.4 ounces per
component replaced.
NIPPONDENSO ROTARY VANE DRAIN & REFILL
1) Before checking and adjusting oil level, operate
compressor at engine idle speed, and set controls at maximum cooling
and high blowing speed for 20-30 minutes to return oil to compressor.
2) Stop engine. Discharge refrigerant and remove compressor
from vehicle. See SERVICING PRECAUTIONS at the beginning of this
article. Drain compressor oil through compressor intake and discharge
ports. Measure amount drained. Oil may be hard to drain if compressor
cool. Drain compressor while compressor is warm.
3) If amount drained is less than 2.4 ounces, conduct leak
tests at system connections. If necessary, repair or replace faulty
parts. Check purity of oil level and adjust oil level as follows.
4) If amount drained is more than 2.4 ounces, oil level is
okay; fill with same amount drained using new oil. If amount drained
is less than 2.4 ounces, pour 2.4 ounces of new refrigerant oil.
5) When replacing condenser, add one ounce. when replacing
other A/C components, add .33 ounce per container replaced.
NIPPONDENSO 6 & 10-CYL DRAIN & REFILL
When inspecting system for oil loss, look for signs of
leaking (shiny, wet spots on components or underside of hood). If oil
leak is noted or component replacement is required, use the following
procedure as indicated:
NO OIL LEAK
Discharge system and change components as necessary. See
SERVICING PRECAUTIONS at the beginning of this article. Add
refrigerant oil to components as necessary.
OIL LEAK
1) Slowly discharge system. Repair or replace faulty
components. If equipped with a drain plug, remove plug, drain and
discard oil. If not equipped with a drain plug, remove compressor from
vehicle and pour oil out suction and discharge ports.
2) Replace drain plug (if equipped). Add 1.5 ounces of new
refrigerant oil through suction port. Use new gaskets or "O" rings
when replacing suction and discharge lines.
COMPRESSOR FAILURE OR SYSTEM CONTAMINATED
If either situation exists, discharge system and remove
Page 524 of 906

ENGINE OVERHAUL PROCEDURES - GENERAL INFORMATION
Article Text (p. 15)
1990 Volkswagen Corrado
For Volkswagen Technical Site: http://vw.belcom.ru
Copyright © 1998 Mitchell Repair Information Company, LLC
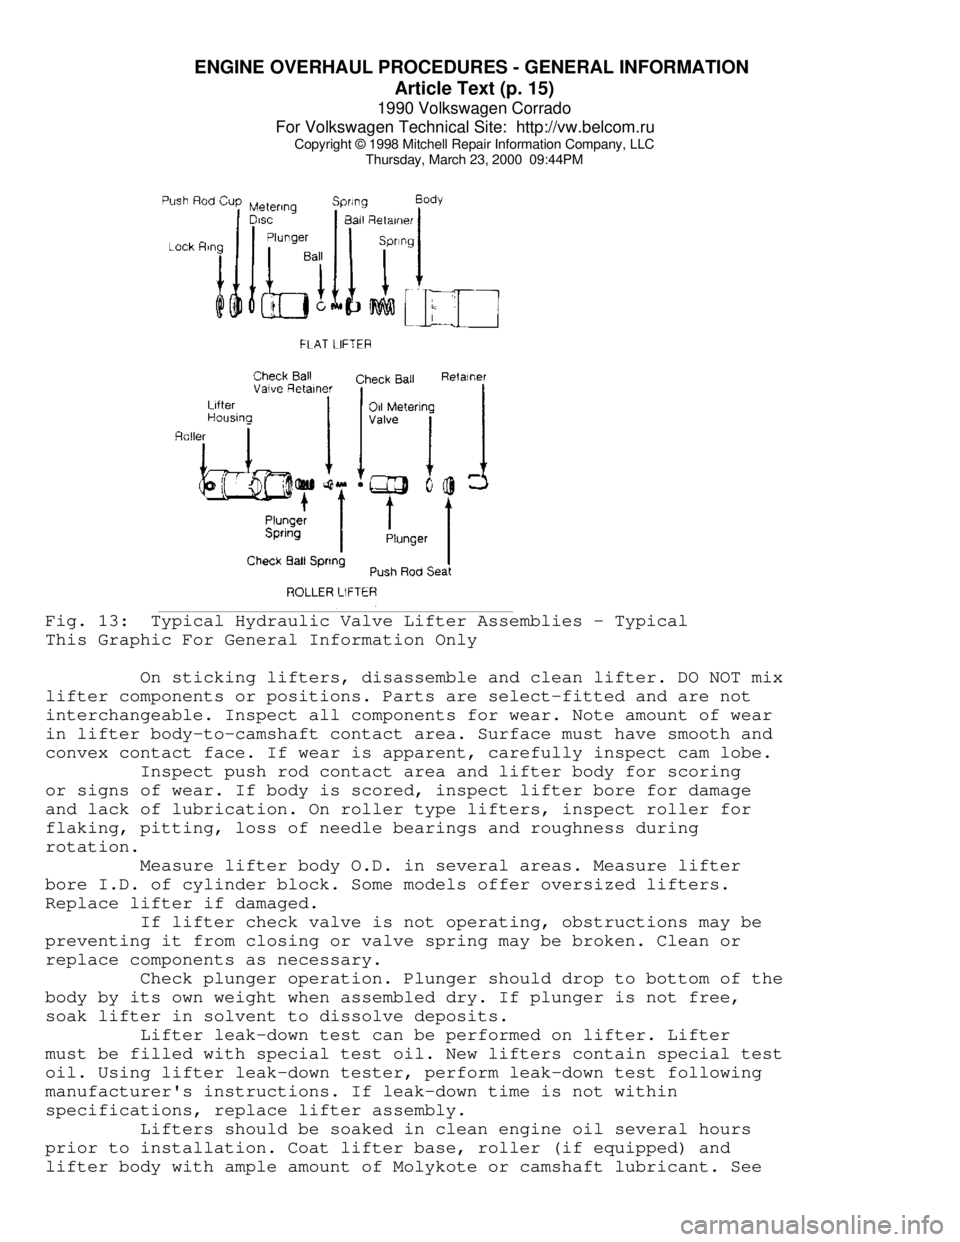
Thursday, March 23, 2000 09:44PMFig. 13: Typical Hydraulic Valve Lifter Assemblies - Typical
This Graphic For General Information Only
On sticking lifters, disassemble and clean lifter. DO NOT mix
lifter components or positions. Parts are select-fitted and are not
interchangeable. Inspect all components for wear. Note amount of wear
in lifter body-to-camshaft contact area. Surface must have smooth and
convex contact face. If wear is apparent, carefully inspect cam lobe.
Inspect push rod contact area and lifter body for scoring
or signs of wear. If body is scored, inspect lifter bore for damage
and lack of lubrication. On roller type lifters, inspect roller for
flaking, pitting, loss of needle bearings and roughness during
rotation.
Measure lifter body O.D. in several areas. Measure lifter
bore I.D. of cylinder block. Some models offer oversized lifters.
Replace lifter if damaged.
If lifter check valve is not operating, obstructions may be
preventing it from closing or valve spring may be broken. Clean or
replace components as necessary.
Check plunger operation. Plunger should drop to bottom of the
body by its own weight when assembled dry. If plunger is not free,
soak lifter in solvent to dissolve deposits.
Lifter leak-down test can be performed on lifter. Lifter
must be filled with special test oil. New lifters contain special test
oil. Using lifter leak-down tester, perform leak-down test following
manufacturer's instructions. If leak-down time is not within
specifications, replace lifter assembly.
Lifters should be soaked in clean engine oil several hours
prior to installation. Coat lifter base, roller (if equipped) and
lifter body with ample amount of Molykote or camshaft lubricant. See
Page 607 of 906

INTERFERENCE VERIFICATION CHECK FOR OHC ENGINE
Article Text
1990 Volkswagen Corrado
For Volkswagen Technical Site: http://vw.belcom.ru
Copyright © 1998 Mitchell Repair Information Company, LLC
Thursday, March 23, 2000 09:46PM
ARTICLE BEGINNING
Maintenance & Service Information
1974-96 Volkswagen - Timing Belt Information
Cabrio, Cabriolet, Corrado, Dasher, Eurovan (Canadian), Fox,
Golf, Golf (Canadian), GTI, GTI (Canadian), Jetta, Jetta GLI,
Passat, Passat (Canadian), Pickup, Quantum, Rabbit, Scirocco,
Scirocco (Canadian), Transporter (Canadian), Vanagon
TIMING BELT INTERFERENCE VERIFICATION INFORMATION
TIMING BELT INTERFERENCE CAUTION
NOTE: CAMSHAFT DRIVE BELTS OR TIMING BELTS - The condition of
camshaft drive belts should always be checked on vehicles
which have more than 50,000 miles. Although some
manufacturers do not recommend replacement at a specified
mileage, others require it at 60,000-100,000 miles. A
camshaft drive belt failure may cause extensive damage to
internal engine components on most engines, although some
designs do not allow piston-to-valve contact. These designs
are often called "Free Wheeling". Many manufacturers changed
their maintenance and warranty schedules in the mid-1980's to
reflect timing belt inspection and/or replacement at
50,000-60,000 miles. Most service interval schedules shown in
this section reflect these changes. Belts or components
should be inspected and replaced if any of the following
conditions exist:
* Crack Or Tears In Belt Surface
* Missing, Damaged, Cracked Or Rounded Teeth
* Oil Contamination
* Damaged Or Faulty Tensioners
* Incorrect Tension Adjustment
TIMING BELT INTERFERENCE CHECK MENU
TIMING BELT INTERFERENCE VERIF. TABLE - PASSENGER CARS (1)ÄÄÄÄÄÄÄÄÄÄÄÄÄÄÄÄÄÄÄÄÄÄÄÄÄÄÄÄÄÄÄÄÄÄÄÄÄÄÄÄÄÄÄÄÄÄÄÄÄÄÄÄÄÄÄÄÄÄÄÄ Replacement Interval
Application Engine (Miles)
Cabrio
1995-96 .......... 2.0L 4-Cyl. ............ (3) 60,000
Cabriolet
1985-89 ....... 1.8L 4-Cyl. (DOHC) ........ (3) 60,000
1.8L 4-Cyl. (SOHC) ........ (3) 60,000
1990-93 .......... 1.8L 4-Cyl. ............ (3) 60,000
Corrado
1990-92 .......... 1.8L 4-Cyl. ............ (3) 60,000
Dasher
Page 638 of 906

MAINTENANCE INFORMATION
Article Text (p. 3)
1990 Volkswagen Corrado
For Volkswagen Technical Site: http://vw.belcom.ru
Copyright © 1998 Mitchell Repair Information Company, LLC
Thursday, March 23, 2000 09:48PM
Severe Service (Unique Driving Conditions)
* Short Trips In Freezing Temperatures
* Towing Or Heavily Loaded
* Severe Dust Conditions
* Hot Weather, Stop-And-Go Driving
* Extensive Idling
CAMSHAFT TIMING BELT
CAUTION: Failure to replace a faulty camshaft timing belt may result
in serious engine damage.
The condition of camshaft drive belts should always be
checked on vehicles which have more than 50,000 miles. Although some
manufacturers do not recommend belt replacement at a specified
mileage, others require it at 60,000-100,000 miles. A camshaft drive
belt failure may cause extensive damage to internal engine components
on most engines, although some designs do not allow piston-to-valve
contact. These designs are often called "Free Wheeling".
Many manufacturers changed their maintenance and warranty
schedules in the mid-1980's to reflect timing belt inspection and/or
replacement at 50,000-60,000 miles. Most service interval schedules in
this manual reflect these changes.
Belts or components should be inspected and replaced if any
of the following conditions exist:
* Cracks Or Tears In Belt Surface
* Missing, Damaged, Cracked Or Rounded Teeth
* Oil Contamination
* Damaged Or Faulty Tensioners
* Incorrect Tension Adjustment
Inspect camshaft timing belt condition every 20,000 miles.
Replace belt as necessary.
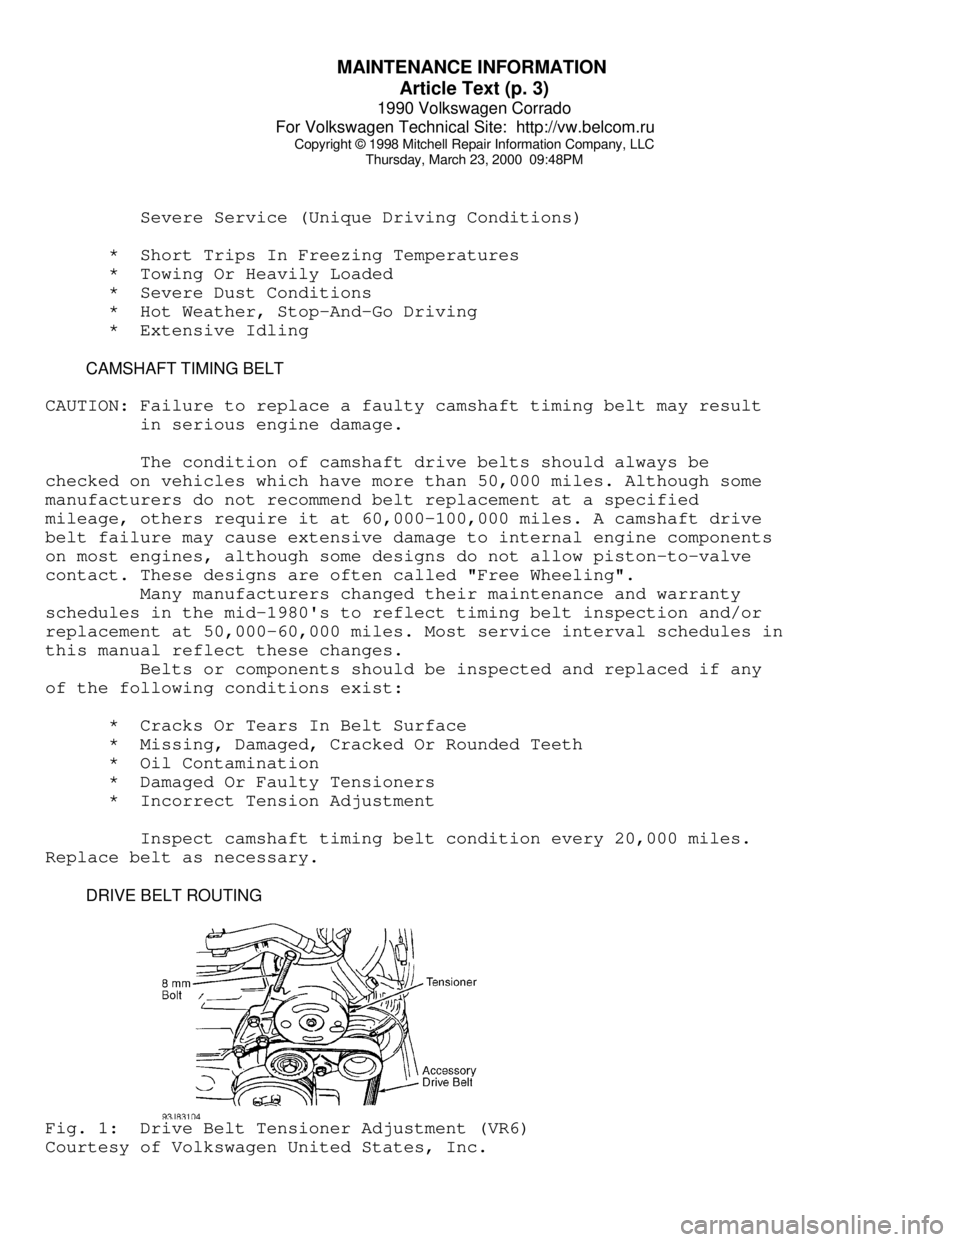
DRIVE BELT ROUTINGFig. 1: Drive Belt Tensioner Adjustment (VR6)
Courtesy of Volkswagen United States, Inc.
Page 646 of 906

MAINTENANCE INFORMATION
Article Text (p. 11)
1990 Volkswagen Corrado
For Volkswagen Technical Site: http://vw.belcom.ru
Copyright © 1998 Mitchell Repair Information Company, LLC
Thursday, March 23, 2000 09:48PM
Application Quantity (1)
A/C System R-12 Refrigerant
1990-92 (up to 7/92) ............................. 37-40 Ozs.
A/C System R-134a Refrigerant (2)
1993-94 (from 7/92) ........................... 28.2-31.8 Ozs.
Cooling System
4-Cyl. ...................................... 6.8 Qts. (6.5L)
V6 .......................................... 9.1 Qts. (8.6L)
Engine Oil (3)
4-Cyl. ...................................... 4.3 Qts. (4.0L)
V6 .......................................... 6.3 Qts. (6.0L)
Fuel Tank
4-Cyl. ..................................... 14.5 Gals. (55L)
V6 ......................................... 18.5 Gals. (55L)
Automatic Transmission
Fluid Change ................................ 3.2 Qts. (3.0L)
Overhaul .................................... 5.9 Qts. (5.6L)
Manual Transmission ........................... 2.1 Qts. (2.0L)
Final Drive
Differential (A/T) (4) ....................... 0.8 Qt. (.75L)
(1) - Capacities are recommended or calculated levels. Always use
dipstick (if available) to measure level.
(2) - Use of R-12 in a R134a system will result in SEVERE DAMAGE.
(3) - Includes oil filter change.
(4) - Lifetime fill.ÄÄÄÄÄÄÄÄÄÄÄÄÄÄÄÄÄÄÄÄÄÄÄÄÄÄÄÄÄÄÄÄÄÄÄÄÄÄÄÄÄÄÄÄÄÄÄÄÄÄÄÄÄÄÄÄÄÄÄÄÄÄÄÄÄ WHEEL & TIRE SPECIFICATIONS
Wheel and tire sizes vary according to vehicle and equipment
and can be found on tire information label on each vehicle. Wheel and
tire specifications and tire inflation pressures are listed on a label
found inside fuel tank flap.
NOTE: Snow chains must be used on drive wheels, in pairs only.
WHEEL TIGHTENING
Tighten all wheel lugs to 80 ft. lbs. (110 N.m).
BATTERY SPECIFICATIONS
CAUTION: When battery is disconnected, vehicles equipped with
computers may lose memory data. When battery power is
restored, driveability problems may exist on some vehicles.
These vehicles may require a relearn procedure. See COMPUTER
RELEARN PROCEDURES article in the GENERAL INFORMATION
section.
All models use BCI group 41 batteries with cold crank rating
Page 658 of 906

MAINTENANCE REMINDER LIGHT RESET PROCEDURES
Article Text (p. 2)
1990 Volkswagen Corrado
For Volkswagen Technical Site: http://vw.belcom.ru
Copyright © 1998 Mitchell Repair Information Company, LLC
Thursday, March 23, 2000 09:48PM
flash for approximately 3 seconds in odometer display window as
ignition is turned on. When servicing becomes due (every 7500 miles),
appropriate service code will flash for approximately 60 seconds. The
four service codes available for display are as follows:
* IN 00 (No Service Necessary)
* OEL (Oil Change Service) Every 7500 Miles
* IN 01 (Inspection Service) Every 15,000 Miles
* IN 02 (Additional Servicing Work) Every 30,000 Miles
2) After performing required maintenance, each effected
service code displayed must be reset individually. For example, at 15,
000 miles service codes OEL and IN 01 will both need to be reset.
3) To reset service codes, turn ignition on. Press and hold
odometer reset button located below speedometer. While holding button,
press clock reset button (lower button for digital clock) located to
left of fuel gauge. Release buttons. Programming mode is now
activated. Service code OEL1.S (distance counter) should be displayed.
4) Press clock reset button once more. 7500 miles should now
be indicated on display. Desired mileage for reset may be attained by
pressing clock reset button. Mileage displayed will decrease in
increments of 500 miles each time button is pressed. This feature
should only be used to calibrate mileage when instrument cluster is
replaced. When desired mileage is displayed, press odometer reset
button.
5) Service code OEL2.S (time counter) should be displayed.
Press clock reset button. 6 (months) will be indicated on display.
Time counter for next oil change may be set by pressing clock reset
button if instrument cluster was replaced. When desired time is
displayed, press odometer reset button.
6) Service code IN 01.S (time counter) should be displayed.
Press clock reset button. 12 (months) will be indicated on display.
Time counter for next maintenance interval may be set by pressing
clock reset button if instrument cluster was replaced. When desired
time is displayed, press odometer reset button.
7) Service code IN 02.S (distance counter) should be
displayed. Press clock reset button. 30,000 (miles) will be indicated
on display. Desired mileage for reset may be attained by pressing
clock reset button. Mileage displayed will decrease in increments of
500 miles each time button is pressed. This feature should only be
used to calibrate mileage when instrument cluster is replaced. When
desired mileage is displayed, turn ignition off. Programming is now
stored in memory.
END OF ARTICLE
Page 692 of 906

SCHEDULED SERVICES
Article Text (p. 9)
1990 Volkswagen Corrado
For Volkswagen Technical Site: http://vw.belcom.ru
Copyright © 1998 Mitchell Repair Information Company, LLC
Thursday, March 23, 2000 09:49PM
CAMSHAFT TIMING BELT REPLACEMENT INFORMATION
CAUTION: Failure to replace a faulty camshaft timing belt may result
in serious engine damage.
The condition of camshaft drive belts should always be
checked on vehicles which have more than 50,000 miles. Although some
manufacturers do not recommend belt replacement at a specified
mileage, others require it at 60,000-100,000 miles. A camshaft drive
belt failure may cause extensive damage to internal engine components
on most engines, although some designs do not allow piston-to-valve
contact. These designs are often called "Free Wheeling".
Many manufacturers changed their maintenance and warranty
schedules in the mid-1980's to reflect timing belt inspection and/or
replacement at 50,000-60,000 miles. Most service interval schedules in
this manual reflect these changes.
Belts or components should be inspected and replaced if any
of the following conditions exist:
* Cracks Or Tears In Belt Surface
* Missing, Damaged, Cracked Or Rounded Teeth
* Oil Contamination
* Damaged Or Faulty Tensioners
* Incorrect Tension Adjustment
Inspect camshaft timing belt condition every 20,000 miles.
Replace belt as necessary.
SEVERE & NORMAL SERVICE DEFINITIONS
NOTE: Use the Severe Service schedule if the vehicle to be serviced
is operated under ANY (one or more) of these conditions:
Service is recommended at mileage intervals based on vehicle
operation. Service schedules are based on the following primary
operating conditions:
Normal Service
* Driven More Than 10 Miles Daily
* No Operating Conditions From Severe Service Schedule
Severe Service (Unique Driving Conditions)
* Short Trips In Freezing Temperatures
* Towing Or Heavily Loaded
* Severe Dust Conditions
* Hot Weather, Stop-And-Go Driving
* Extensive Idling
SEVERE SERVICE REQUIREMENTS (PERFORM W/SERVICE SCHEDULES)