1988 OPEL VECTRA air condition
[x] Cancel search: air conditionPage 157 of 525
31This engine is also fitted with an EGR
(exhaust gas recirculation) valve and
secondary air injection (AIR - Air Injection
Reactor), to conform to the latest European
exhaust emission limits (as from 1996). The
EGR returns a specific amount of exhaust gas
into the combustion process. This in turn
reduces the formation of nitrogen oxides
(No
x). The secondary air injection system has
an electrically driven air pump that injects air
into the exhaust manifold, reducing the
amount of CO and HC emissions.
2Fuel injection system -
precautions
The fuel injection system is pressurised,
therefore extra care must be taken when
disconnecting fuel lines. When disconnecting
a fuel line union, loosen the union slowly, to
avoid a sudden release of pressure that may
cause fuel to spray out.
Fuel pressure checking must be entrusted
to a Vauxhall dealer, or other specialist, who
has the necessary special equipment.
3System testing - general
3
General
1Apart from basic electrical tests, there is
nothing that can be done by the owner to test
individual fuel system components.2If a fault arises, check first that it is not due
to poor maintenance. Check that the air
cleaner filter element is clean, the spark plugs
are in good condition and correctly gapped.
Check also that the engine breather hoses are
clear and undamaged and that the throttle
cable is correctly adjusted. If the engine is
running very roughly, check the compression
pressures (Chapter 1) and remember the
possibility that one of the hydraulic tappets
might be faulty, producing an incorrect valve
clearance.
3If the fault is thought to be due to a dirty
injector, it is worth trying one of the
established injector-cleaning treatments
before renewing, perhaps unnecessarily, the
injector.
4If the fault persists, check the ignition
system components (as far as possible).
5If the fault is still not eliminated, work
methodically through the system, checking all
fuses, wiring connectors and wiring, looking
for any signs of poor connections, dampness,
corrosion, dirt or other faults.
6Once the system components have been
checked for signs of obvious faults, take the
vehicle to a Vauxhall dealer for the full system
to be tested on special equipment.
7Do not attempt to “test” any component,
but particularly the ECU, with anything other
than the correct test equipment, available at a
Vauxhall dealer. If any of the wires to be
checked lead to a component such as the
ECU, always first unplug the relevant
connector from the system components so
that there is no risk of the component being
damaged by the application of incorrect
voltages from test equipment.
4Air cleaner - removal and
refitting
2
Note:If ‘round type’ air filter is fitted, follow
procedure in Chapter 4A.
Removal
1Unclip the coolant expansion tank hose
from the air cleaner cover, and move it to one
side out of the way.2Loosen the clamp screw and disconnect
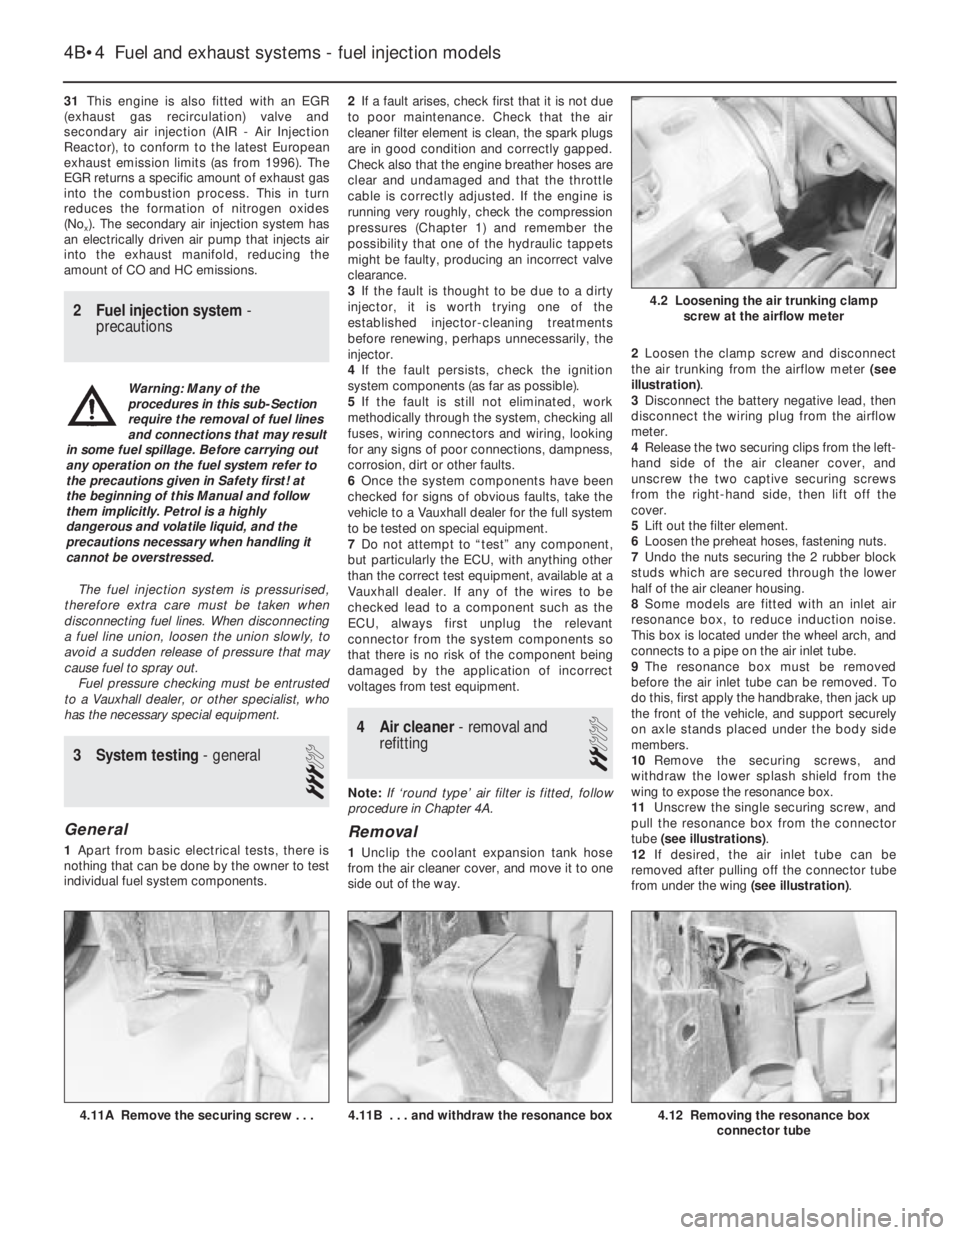
the air trunking from the airflow meter (see
illustration).
3Disconnect the battery negative lead, then
disconnect the wiring plug from the airflow
meter.
4Release the two securing clips from the left-
hand side of the air cleaner cover, and
unscrew the two captive securing screws
from the right-hand side, then lift off the
cover.
5Lift out the filter element.
6Loosen the preheat hoses, fastening nuts.
7Undo the nuts securing the 2 rubber block
studs which are secured through the lower
half of the air cleaner housing.
8Some models are fitted with an inlet air
resonance box, to reduce induction noise.
This box is located under the wheel arch, and
connects to a pipe on the air inlet tube.
9The resonance box must be removed
before the air inlet tube can be removed. To
do this, first apply the handbrake, then jack up
the front of the vehicle, and support securely
on axle stands placed under the body side
members.
10Remove the securing screws, and
withdraw the lower splash shield from the
wing to expose the resonance box.
11Unscrew the single securing screw, and
pull the resonance box from the connector
tube (see illustrations).
12If desired, the air inlet tube can be
removed after pulling off the connector tube
from under the wing (see illustration).
4B•4Fuel and exhaust systems - fuel injection models
4.12 Removing the resonance box
connector tube4.11B . . . and withdraw the resonance box4.11A Remove the securing screw . . .
4.2 Loosening the air trunking clamp
screw at the airflow meter
Warning: Many of the
procedures in this sub-Section
require the removal of fuel lines
and connections that may result
in some fuel spillage. Before carrying out
any operation on the fuel system refer to
the precautions given in Safety first! at
the beginning of this Manual and follow
them implicitly. Petrol is a highly
dangerous and volatile liquid, and the
precautions necessary when handling it
cannot be overstressed.
Page 162 of 525
4B
4Clamp the fuel hoses on either side of the
damper, to minimise fuel loss when the hoses
are disconnected.
5Loosen the clamp screws, and disconnect
the fuel hoses from the damper. Be prepared
for fuel spillage, and take adequate fire
precautions.
6Unscrew the securing nut, and withdraw
the damper from the bracket.
Refitting
7Refitting is a reversal of removal.
8Run the engine and check for leaks on
completion. If leakage is evident; stop the
engine immediately, and rectify the problem
without delay.
19Throttle cable - removal,
refitting and adjustment
3
Removal
1This procedure is basically the same as
described in Chapter 4A, but note the
following.
2Not all models are fitted with an air box.
Ignore references to it, if not applicable.
3For “carburettor” substitute “throttle body”,
and note that the cable bracket is bolted to
the inlet manifold.
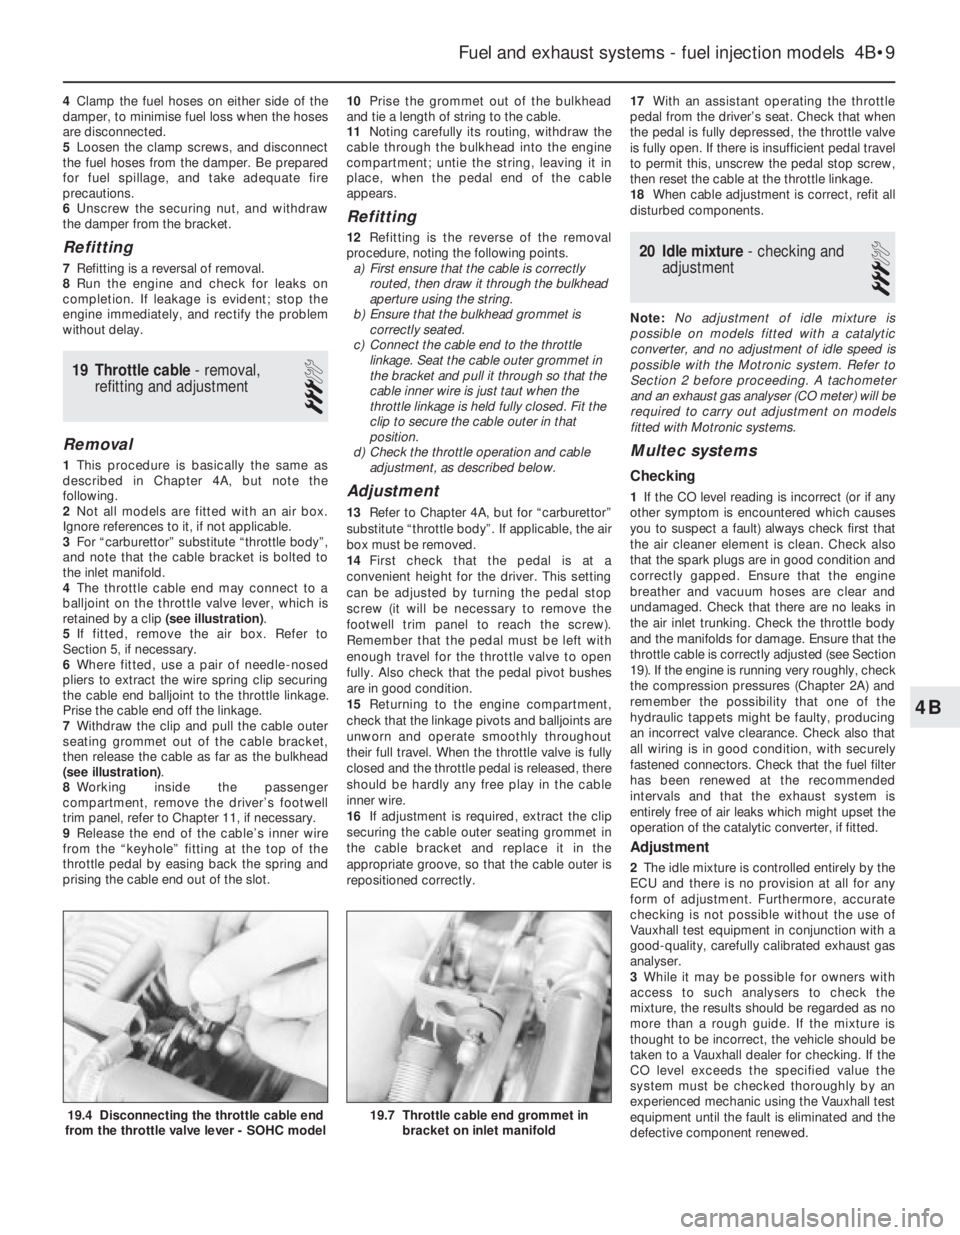
4The throttle cable end may connect to a
balljoint on the throttle valve lever, which is
retained by a clip (see illustration).
5If fitted, remove the air box. Refer to
Section 5, if necessary.
6Where fitted, use a pair of needle-nosed
pliers to extract the wire spring clip securing
the cable end balljoint to the throttle linkage.
Prise the cable end off the linkage.
7Withdraw the clip and pull the cable outer
seating grommet out of the cable bracket,
then release the cable as far as the bulkhead
(see illustration).
8Working inside the passenger
compartment, remove the driver’s footwell
trim panel, refer to Chapter 11, if necessary.
9Release the end of the cable’s inner wire
from the “keyhole” fitting at the top of the
throttle pedal by easing back the spring and
prising the cable end out of the slot.10Prise the grommet out of the bulkhead
and tie a length of string to the cable.
11Noting carefully its routing, withdraw the
cable through the bulkhead into the engine
compartment; untie the string, leaving it in
place, when the pedal end of the cable
appears.
Refitting
12Refitting is the reverse of the removal
procedure, noting the following points.
a)First ensure that the cable is correctly
routed, then draw it through the bulkhead
aperture using the string.
b)Ensure that the bulkhead grommet is
correctly seated.
c)Connect the cable end to the throttle
linkage. Seat the cable outer grommet in
the bracket and pull it through so that the
cable inner wire is just taut when the
throttle linkage is held fully closed. Fit the
clip to secure the cable outer in that
position.
d)Check the throttle operation and cable
adjustment, as described below.
Adjustment
13Refer to Chapter 4A, but for “carburettor”
substitute “throttle body”. If applicable, the air
box must be removed.
14First check that the pedal is at a
convenient height for the driver. This setting
can be adjusted by turning the pedal stop
screw (it will be necessary to remove the
footwell trim panel to reach the screw).
Remember that the pedal must be left with
enough travel for the throttle valve to open
fully. Also check that the pedal pivot bushes
are in good condition.
15Returning to the engine compartment,
check that the linkage pivots and balljoints are
unworn and operate smoothly throughout
their full travel. When the throttle valve is fully
closed and the throttle pedal is released, there
should be hardly any free play in the cable
inner wire.
16If adjustment is required, extract the clip
securing the cable outer seating grommet in
the cable bracket and replace it in the
appropriate groove, so that the cable outer is
repositioned correctly.17With an assistant operating the throttle
pedal from the driver’s seat. Check that when
the pedal is fully depressed, the throttle valve
is fully open. If there is insufficient pedal travel
to permit this, unscrew the pedal stop screw,
then reset the cable at the throttle linkage.
18When cable adjustment is correct, refit all
disturbed components.
20Idle mixture - checking and
adjustment
3
Note: No adjustment of idle mixture is
possible on models fitted with a catalytic
converter, and no adjustment of idle speed is
possible with the Motronic system. Refer to
Section 2 before proceeding. A tachometer
and an exhaust gas analyser (CO meter) will be
required to carry out adjustment on models
fitted with Motronic systems.
Multec systems
Checking
1If the CO level reading is incorrect (or if any
other symptom is encountered which causes
you to suspect a fault) always check first that
the air cleaner element is clean. Check also
that the spark plugs are in good condition and
correctly gapped. Ensure that the engine
breather and vacuum hoses are clear and
undamaged. Check that there are no leaks in
the air inlet trunking. Check the throttle body
and the manifolds for damage. Ensure that the
throttle cable is correctly adjusted (see Section
19). If the engine is running very roughly, check
the compression pressures (Chapter 2A) and
remember the possibility that one of the
hydraulic tappets might be faulty, producing
an incorrect valve clearance. Check also that
all wiring is in good condition, with securely
fastened connectors. Check that the fuel filter
has been renewed at the recommended
intervals and that the exhaust system is
entirely free of air leaks which might upset the
operation of the catalytic converter, if fitted.
Adjustment
2The idle mixture is controlled entirely by the
ECU and there is no provision at all for any
form of adjustment. Furthermore, accurate
checking is not possible without the use of
Vauxhall test equipment in conjunction with a
good-quality, carefully calibrated exhaust gas
analyser.
3While it may be possible for owners with
access to such analysers to check the
mixture, the results should be regarded as no
more than a rough guide. If the mixture is
thought to be incorrect, the vehicle should be
taken to a Vauxhall dealer for checking. If the
CO level exceeds the specified value the
system must be checked thoroughly by an
experienced mechanic using the Vauxhall test
equipment until the fault is eliminated and the
defective component renewed.
Fuel and exhaust systems - fuel injection models 4B•9
19.7 Throttle cable end grommet in
bracket on inlet manifold19.4 Disconnecting the throttle cable end
from the throttle valve lever - SOHC model
Page 163 of 525
4Where applicable, the only test of the
catalytic converter’s efficiency is to check the
level of CO in the exhaust gas. This is
measured at the tailpipe with the engine
running (with no load) at 3000 rpm. If the CO
level exceeds the specified value, the Vauxhall
test equipment must be used to check the
entire fuel injection/ignition system. If the
engine is mechanically sound, once the
system has been eliminated, the fault must lie
in the converter, which must be renewed.
Motronic systems
Checking
5In order to check the idle mixture adjustment,
the following conditions must be met:
a)The engine must be at normal operating
temperature
b)All electrical consumers (cooling fan,
heater blower, headlamps etc.) must be
switched off
c)The spark plug gaps must be correctly
adjusted see Chapter 1
d)The throttle cable free play must be
correctly adjusted - see Section 19
e)The air inlet trunking must be free from
leaks, and the air filter must be clean
Adjustment
6Connect a tachometer and an exhaust gas
analyser to the vehicle in accordance with the
equipment manufacturer’s instructions.
7Start the engine and turn it at 2000 rpm for
approximately 30 seconds, then allow it to
idle. Check that the idle speed is within the
specified limits. No adjustment of idle speed
is possible, and if outside the specified limits,
the problem should be referred to a dealer.
8With the idle speed correct, check the CO
level in the exhaust gas. If it is outside the
specified limits, adjust by means of the idle
mixture adjustment screw in the airflow meter
or air mass meter, as applicable. In
production, the screw is covered by a
tamperproof plug; ensure that no local or
national laws are being broken before
removing the plug.9If the cooling fan cuts in during the
adjustment procedure, stop the adjustments,
and proceed when the cooling fan stops.
10When the idle mixture is correctly set,
stop the engine and disconnect the test
equipment.
Simtec systems
11Adjustment is not possible on these
models.
21Fuel pressure regulator -
removal and refitting
3
Note:Refer to Section 2 before proceeding
Removal
SOHC models (except Multec systems)
1Disconnect the battery negative lead.
2For improved access, remove the idle
speed adjuster as described in Section 22.
Disconnect the wiring harness housing from
the fuel injectors and move it to one side,
taking care not to strain the wiring. Pull up on
the wiring harness housing, and compress the
wiring plug retaining clips to release the
harness housing from the injectors.
3Position a wad of rag beneath the pressure
regulator, to absorb the fuel that will be
released as the regulator is removed.
4Loosen the clamp screws and disconnect
the fuel hoses from the regulator. Be prepared
for fuel spillage, and take adequate fire
precautions.
5Disconnect the vacuum pipe from the top
of the pressure regulator and withdraw the
regulator.
SOHC models (with Multec system)
6Depressurise the fuel system, as described
in Section 8.
7Remove the air box. Refer to Section 5, if
necessary.
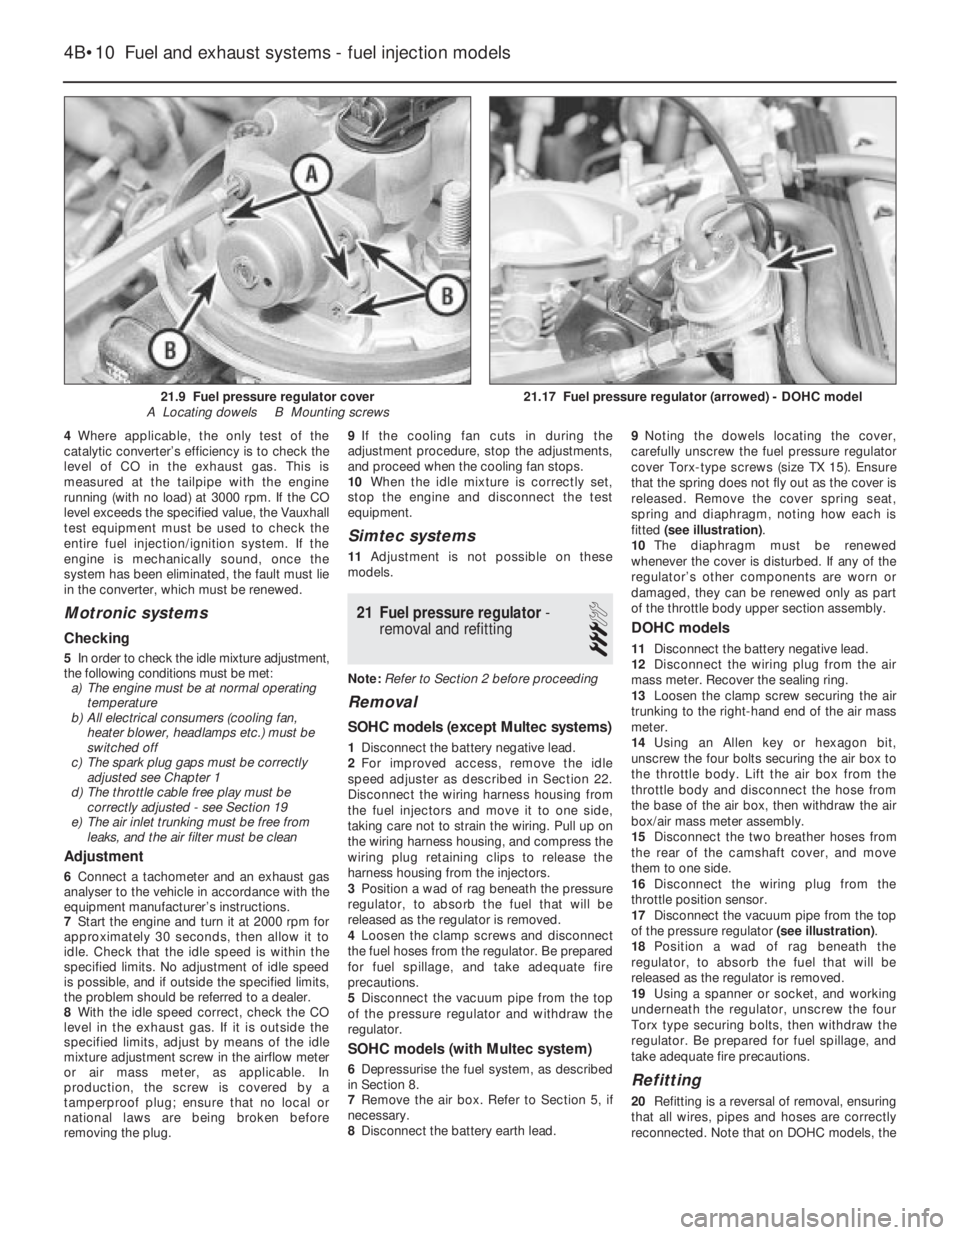
8Disconnect the battery earth lead.9Noting the dowels locating the cover,
carefully unscrew the fuel pressure regulator
cover Torx-type screws (size TX 15). Ensure
that the spring does not fly out as the cover is
released. Remove the cover spring seat,
spring and diaphragm, noting how each is
fitted (see illustration).
10The diaphragm must be renewed
whenever the cover is disturbed. If any of the
regulator’s other components are worn or
damaged, they can be renewed only as part
of the throttle body upper section assembly.
DOHC models
11Disconnect the battery negative lead.
12Disconnect the wiring plug from the air
mass meter. Recover the sealing ring.
13Loosen the clamp screw securing the air
trunking to the right-hand end of the air mass
meter.
14Using an Allen key or hexagon bit,
unscrew the four bolts securing the air box to
the throttle body. Lift the air box from the
throttle body and disconnect the hose from
the base of the air box, then withdraw the air
box/air mass meter assembly.
15Disconnect the two breather hoses from
the rear of the camshaft cover, and move
them to one side.
16Disconnect the wiring plug from the
throttle position sensor.
17Disconnect the vacuum pipe from the top
of the pressure regulator (see illustration).
18Position a wad of rag beneath the
regulator, to absorb the fuel that will be
released as the regulator is removed.
19Using a spanner or socket, and working
underneath the regulator, unscrew the four
Torx type securing bolts, then withdraw the
regulator. Be prepared for fuel spillage, and
take adequate fire precautions.
Refitting
20Refitting is a reversal of removal, ensuring
that all wires, pipes and hoses are correctly
reconnected. Note that on DOHC models, the
4B•10Fuel and exhaust systems - fuel injection models
21.17 Fuel pressure regulator (arrowed) - DOHC model21.9 Fuel pressure regulator cover
A Locating dowels B Mounting screws
Page 167 of 525
23Disconnect the wiring harness housing
from the fuel injectors, and move it to one
side, taking care not to strain the wiring. Pull
up on the wiring harness housing, and
compress the wiring plug retaining clips to
release the housing from the injectors.
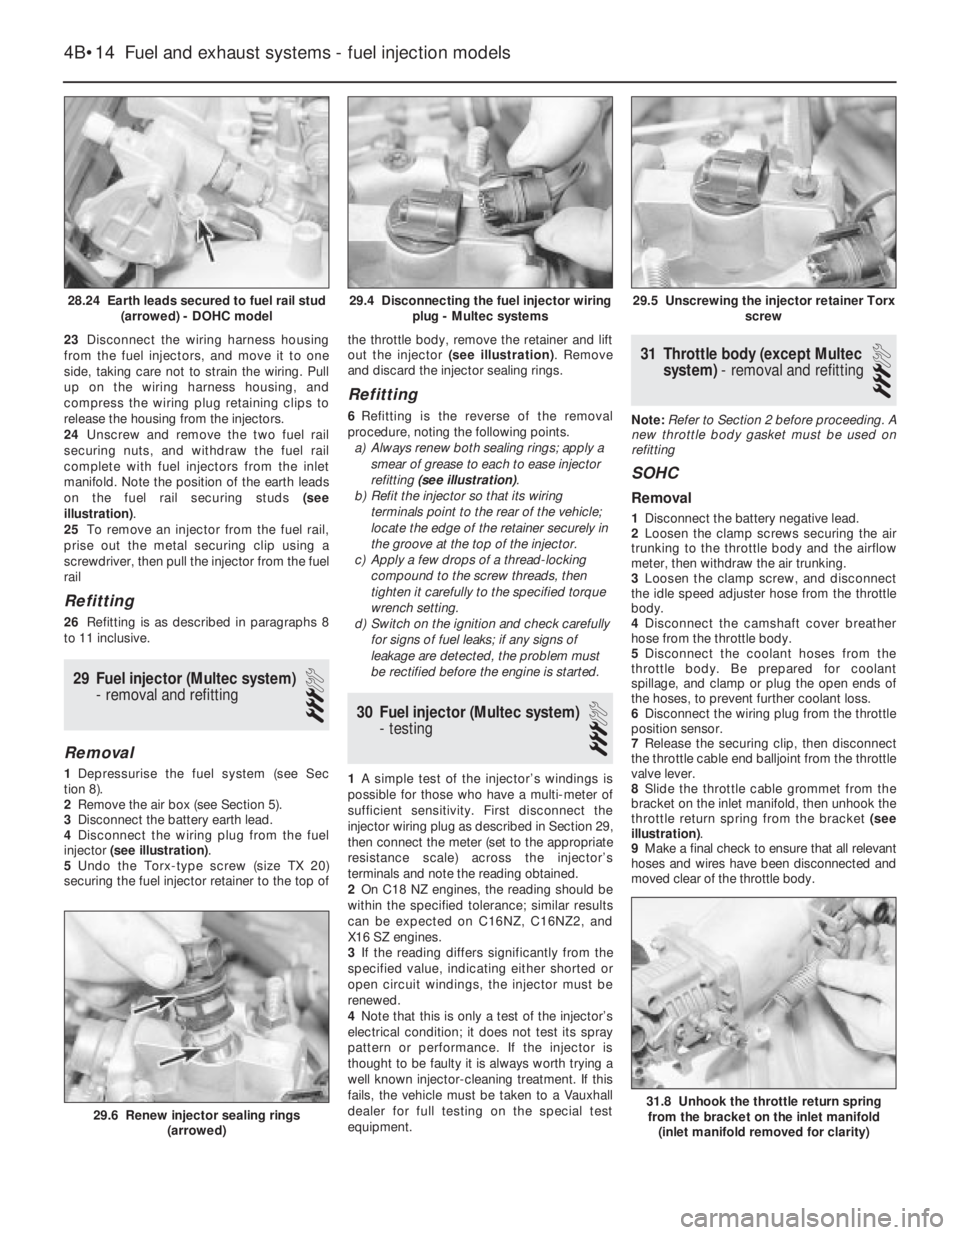
24Unscrew and remove the two fuel rail
securing nuts, and withdraw the fuel rail
complete with fuel injectors from the inlet
manifold. Note the position of the earth leads
on the fuel rail securing studs (see
illustration).
25To remove an injector from the fuel rail,
prise out the metal securing clip using a
screwdriver, then pull the injector from the fuel
rail
Refitting
26Refitting is as described in paragraphs 8
to 11 inclusive.
29Fuel injector (Multec system)
- removal and refitting
3
Removal
1Depressurise the fuel system (see Sec
tion 8).
2Remove the air box (see Section 5).
3Disconnect the battery earth lead.
4Disconnect the wiring plug from the fuel
injector (see illustration).
5Undo the Torx-type screw (size TX 20)
securing the fuel injector retainer to the top ofthe throttle body, remove the retainer and lift
out the injector (see illustration). Remove
and discard the injector sealing rings.
Refitting
6Refitting is the reverse of the removal
procedure, noting the following points.
a)Always renew both sealing rings; apply a
smear of grease to each to ease injector
refitting (see illustration).
b)Refit the injector so that its wiring
terminals point to the rear of the vehicle;
locate the edge of the retainer securely in
the groove at the top of the injector.
c)Apply a few drops of a thread-locking
compound to the screw threads, then
tighten it carefully to the specified torque
wrench setting.
d)Switch on the ignition and check carefully
for signs of fuel leaks; if any signs of
leakage are detected, the problem must
be rectified before the engine is started.
30Fuel injector (Multec system)
- testing
3
1A simple test of the injector’s windings is
possible for those who have a multi-meter of
sufficient sensitivity. First disconnect the
injector wiring plug as described in Section 29,
then connect the meter (set to the appropriate
resistance scale) across the injector’s
terminals and note the reading obtained.
2On C18 NZ engines, the reading should be
within the specified tolerance; similar results
can be expected on C16NZ, C16NZ2, and
X16 SZ engines.
3If the reading differs significantly from the
specified value, indicating either shorted or
open circuit windings, the injector must be
renewed.
4Note that this is only a test of the injector’s
electrical condition; it does not test its spray
pattern or performance. If the injector is
thought to be faulty it is always worth trying a
well known injector-cleaning treatment. If this
fails, the vehicle must be taken to a Vauxhall
dealer for full testing on the special test
equipment.
31Throttle body (except Multec
system) - removal and refitting
3
Note:Refer to Section 2 before proceeding. A
new throttle body gasket must be used on
refitting
SOHC
Removal
1Disconnect the battery negative lead.
2Loosen the clamp screws securing the air
trunking to the throttle body and the airflow
meter, then withdraw the air trunking.
3Loosen the clamp screw, and disconnect
the idle speed adjuster hose from the throttle
body.
4Disconnect the camshaft cover breather
hose from the throttle body.
5Disconnect the coolant hoses from the
throttle body. Be prepared for coolant
spillage, and clamp or plug the open ends of
the hoses, to prevent further coolant loss.
6Disconnect the wiring plug from the throttle
position sensor.
7Release the securing clip, then disconnect
the throttle cable end balljoint from the throttle
valve lever.
8Slide the throttle cable grommet from the
bracket on the inlet manifold, then unhook the
throttle return spring from the bracket (see
illustration).
9Make a final check to ensure that all relevant
hoses and wires have been disconnected and
moved clear of the throttle body.
4B•14Fuel and exhaust systems - fuel injection models
28.24 Earth leads secured to fuel rail stud
(arrowed) - DOHC model29.5 Unscrewing the injector retainer Torx
screw
31.8 Unhook the throttle return spring
from the bracket on the inlet manifold
(inlet manifold removed for clarity)29.6 Renew injector sealing rings
(arrowed)
29.4 Disconnecting the fuel injector wiring
plug - Multec systems
Page 170 of 525
Refitting
5Refitting is a reversal of the removal
procedure, ensuring that the wiring plugs are
correctly reconnected and that the unit is
located securely.
36Knock sensor and module
(X16 SZ models) - removal
and refitting
3
Removal
1The knock sensor fitted to the X16 SZ
engine is located on the cylinder block below
the inlet manifold, between cylinders 2 and 3.
2Disconnect the battery negative lead.
3Remove the wiring and unscrew the unit
from the block.
4The module and control unit are located on
the left-hand side of the engine compartment
behind the battery. To remove, disconnect the
wiring multiplug and remove the retaining
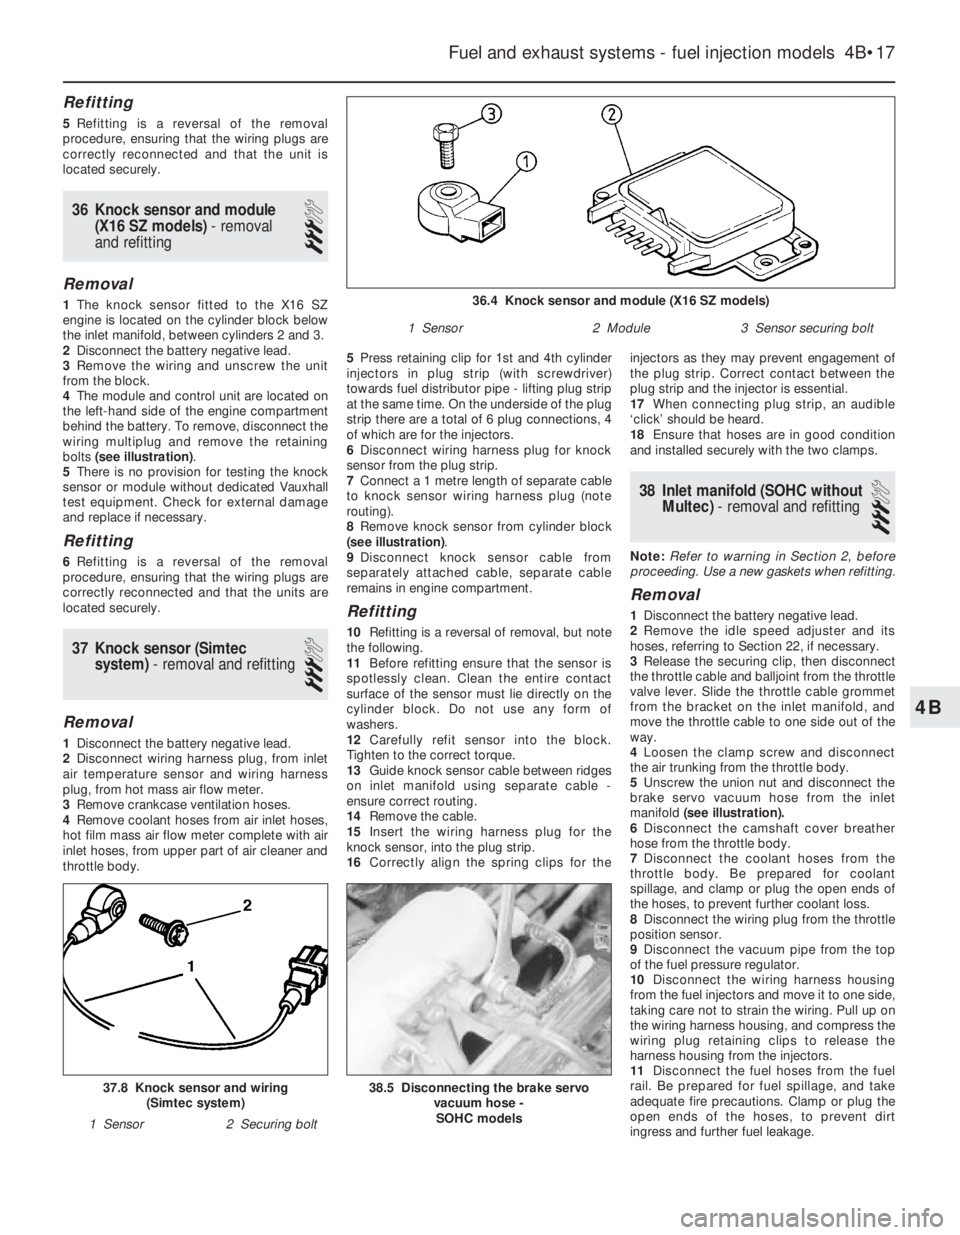
bolts (see illustration).
5There is no provision for testing the knock
sensor or module without dedicated Vauxhall
test equipment. Check for external damage
and replace if necessary.
Refitting
6Refitting is a reversal of the removal
procedure, ensuring that the wiring plugs are
correctly reconnected and that the units are
located securely.
37Knock sensor (Simtec
system) - removal and refitting
3
Removal
1Disconnect the battery negative lead.
2Disconnect wiring harness plug, from inlet
air temperature sensor and wiring harness
plug, from hot mass air flow meter.
3Remove crankcase ventilation hoses.
4Remove coolant hoses from air inlet hoses,
hot film mass air flow meter complete with air
inlet hoses, from upper part of air cleaner and
throttle body.5Press retaining clip for 1st and 4th cylinder
injectors in plug strip (with screwdriver)
towards fuel distributor pipe - lifting plug strip
at the same time. On the underside of the plug
strip there are a total of 6 plug connections, 4
of which are for the injectors.
6Disconnect wiring harness plug for knock
sensor from the plug strip.
7Connect a 1 metre length of separate cable
to knock sensor wiring harness plug (note
routing).
8Remove knock sensor from cylinder block
(see illustration).
9Disconnect knock sensor cable from
separately attached cable, separate cable
remains in engine compartment.
Refitting
10Refitting is a reversal of removal, but note
the following.
11Before refitting ensure that the sensor is
spotlessly clean. Clean the entire contact
surface of the sensor must lie directly on the
cylinder block. Do not use any form of
washers.
12Carefully refit sensor into the block.
Tighten to the correct torque.
13Guide knock sensor cable between ridges
on inlet manifold using separate cable -
ensure correct routing.
14Remove the cable.
15Insert the wiring harness plug for the
knock sensor, into the plug strip.
16Correctly align the spring clips for theinjectors as they may prevent engagement of
the plug strip. Correct contact between the
plug strip and the injector is essential.
17When connecting plug strip, an audible
‘click’ should be heard.
18Ensure that hoses are in good condition
and installed securely with the two clamps.
38Inlet manifold (SOHC without
Multec) - removal and refitting
3
Note:Refer to warning in Section 2, before
proceeding. Use a new gaskets when refitting.
Removal
1Disconnect the battery negative lead.
2Remove the idle speed adjuster and its
hoses, referring to Section 22, if necessary.
3Release the securing clip, then disconnect
the throttle cable and balljoint from the throttle
valve lever. Slide the throttle cable grommet
from the bracket on the inlet manifold, and
move the throttle cable to one side out of the
way.
4Loosen the clamp screw and disconnect
the air trunking from the throttle body.
5Unscrew the union nut and disconnect the
brake servo vacuum hose from the inlet
manifold(see illustration).
6Disconnect the camshaft cover breather
hose from the throttle body.
7Disconnect the coolant hoses from the
throttle body. Be prepared for coolant
spillage, and clamp or plug the open ends of
the hoses, to prevent further coolant loss.
8Disconnect the wiring plug from the throttle
position sensor.
9Disconnect the vacuum pipe from the top
of the fuel pressure regulator.
10Disconnect the wiring harness housing
from the fuel injectors and move it to one side,
taking care not to strain the wiring. Pull up on
the wiring harness housing, and compress the
wiring plug retaining clips to release the
harness housing from the injectors.
11Disconnect the fuel hoses from the fuel
rail. Be prepared for fuel spillage, and take
adequate fire precautions. Clamp or plug the
open ends of the hoses, to prevent dirt
ingress and further fuel leakage.
Fuel and exhaust systems - fuel injection models 4B•17
38.5 Disconnecting the brake servo
vacuum hose -
SOHC models37.8 Knock sensor and wiring
(Simtec system)
1 Sensor2 Securing bolt
36.4 Knock sensor and module (X16 SZ models)
1 Sensor2 Module3 Sensor securing bolt
4B
Page 174 of 525
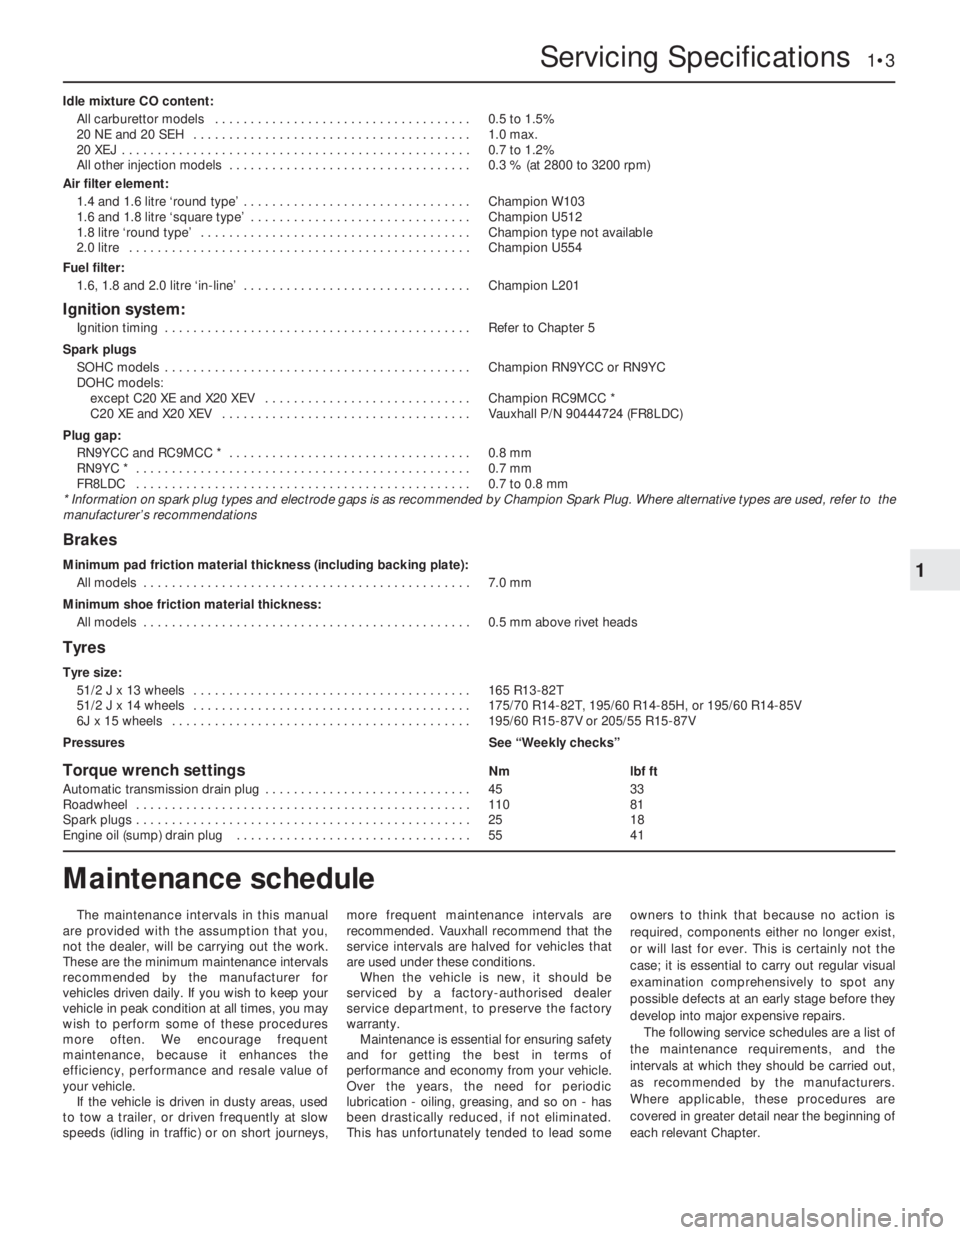
Idle mixture CO content:
All carburettor models . . . . . . . . . . . . . . . . . . . . . . . . . . . . . . . . . . . .0.5 to 1.5%
20 NE and 20 SEH . . . . . . . . . . . . . . . . . . . . . . . . . . . . . . . . . . . . . . .1.0 max.
20 XEJ . . . . . . . . . . . . . . . . . . . . . . . . . . . . . . . . . . . . . . . . . . . . . . . . .0.7 to 1.2%
All other injection models . . . . . . . . . . . . . . . . . . . . . . . . . . . . . . . . . .0.3 % (at 2800 to 3200 rpm)
Air filter element:
1.4 and 1.6 litre ‘round type’ . . . . . . . . . . . . . . . . . . . . . . . . . . . . . . . .Champion W103
1.6 and 1.8 litre ‘square type’ . . . . . . . . . . . . . . . . . . . . . . . . . . . . . . .Champion U512
1.8 litre ‘round type’ . . . . . . . . . . . . . . . . . . . . . . . . . . . . . . . . . . . . . .Champion type not available
2.0 litre . . . . . . . . . . . . . . . . . . . . . . . . . . . . . . . . . . . . . . . . . . . . . . . .Champion U554
Fuel filter:
1.6, 1.8 and 2.0 litre ‘in-line’ . . . . . . . . . . . . . . . . . . . . . . . . . . . . . . . .Champion L201
Ignition system:
Ignition timing . . . . . . . . . . . . . . . . . . . . . . . . . . . . . . . . . . . . . . . . . . .Refer to Chapter 5
Spark plugs
SOHC models . . . . . . . . . . . . . . . . . . . . . . . . . . . . . . . . . . . . . . . . . . .Champion RN9YCC or RN9YC
DOHC models:
except C20 XE and X20 XEV . . . . . . . . . . . . . . . . . . . . . . . . . . . . .Champion RC9MCC *
C20 XE and X20 XEV . . . . . . . . . . . . . . . . . . . . . . . . . . . . . . . . . . .Vauxhall P/N 90444724 (FR8LDC)
Plug gap:
RN9YCC and RC9MCC * . . . . . . . . . . . . . . . . . . . . . . . . . . . . . . . . . .0.8 mm
RN9YC * . . . . . . . . . . . . . . . . . . . . . . . . . . . . . . . . . . . . . . . . . . . . . . .0.7 mm
FR8LDC . . . . . . . . . . . . . . . . . . . . . . . . . . . . . . . . . . . . . . . . . . . . . . .0.7 to 0.8 mm
* Information on spark plug types and electrode gaps is as recommended by Champion Spark Plug. Where alternative types are used, refer to the
manufacturer’s recommendations
Brakes
Minimum pad friction material thickness (including backing plate):
All models . . . . . . . . . . . . . . . . . . . . . . . . . . . . . . . . . . . . . . . . . . . . . .7.0 mm
Minimum shoe friction material thickness:
All models . . . . . . . . . . . . . . . . . . . . . . . . . . . . . . . . . . . . . . . . . . . . . .0.5 mm above rivet heads
Tyres
Tyre size:
51/2 J x 13 wheels . . . . . . . . . . . . . . . . . . . . . . . . . . . . . . . . . . . . . . .165 R13-82T
51/2 J x 14 wheels . . . . . . . . . . . . . . . . . . . . . . . . . . . . . . . . . . . . . . .175/70 R14-82T, 195/60 R14-85H, or 195/60 R14-85V
6J x 15 wheels . . . . . . . . . . . . . . . . . . . . . . . . . . . . . . . . . . . . . . . . . .195/60 R15-87V or 205/55 R15-87V
PressuresSee “Weekly checks”
Torque wrench settingsNmlbf ft
Automatic transmission drain plug . . . . . . . . . . . . . . . . . . . . . . . . . . . . .4533
Roadwheel . . . . . . . . . . . . . . . . . . . . . . . . . . . . . . . . . . . . . . . . . . . . . . .11081
Spark plugs . . . . . . . . . . . . . . . . . . . . . . . . . . . . . . . . . . . . . . . . . . . . . . .2518
Engine oil (sump) drain plug . . . . . . . . . . . . . . . . . . . . . . . . . . . . . . . . .5541
Servicing Specifications 1•3
1
The maintenance intervals in this manual
are provided with the assumption that you,
not the dealer, will be carrying out the work.
These are the minimum maintenance intervals
recommended by the manufacturer for
vehicles driven daily. If you wish to keep your
vehicle in peak condition at all times, you may
wish to perform some of these procedures
more often. We encourage frequent
maintenance, because it enhances the
efficiency, performance and resale value of
your vehicle.
If the vehicle is driven in dusty areas, used
to tow a trailer, or driven frequently at slow
speeds (idling in traffic) or on short journeys,more frequent maintenance intervals are
recommended. Vauxhall recommend that the
service intervals are halved for vehicles that
are used under these conditions.
When the vehicle is new, it should be
serviced by a factory-authorised dealer
service department, to preserve the factory
warranty.
Maintenance is essential for ensuring safety
and for getting the best in terms of
performance and economy from your vehicle.
Over the years, the need for periodic
lubrication -oiling, greasing, and so on -has
been drastically reduced, if not eliminated.
This has unfortunately tended to lead someowners to think that because no action is
required, components either no longer exist,
or will last for ever. This is certainly not the
case; it is essential to carry out regular visual
examination comprehensively to spot any
possible defects at an early stage before they
develop into major expensive repairs.
The following service schedules are a list of
the maintenance requirements, and the
intervals at which they should be carried out,
as recommended by the manufacturers.
Where applicable, these procedures are
covered in greater detail near the beginning of
each relevant Chapter.
Maintenance schedule
Page 175 of 525
1•4Maintenance schedule
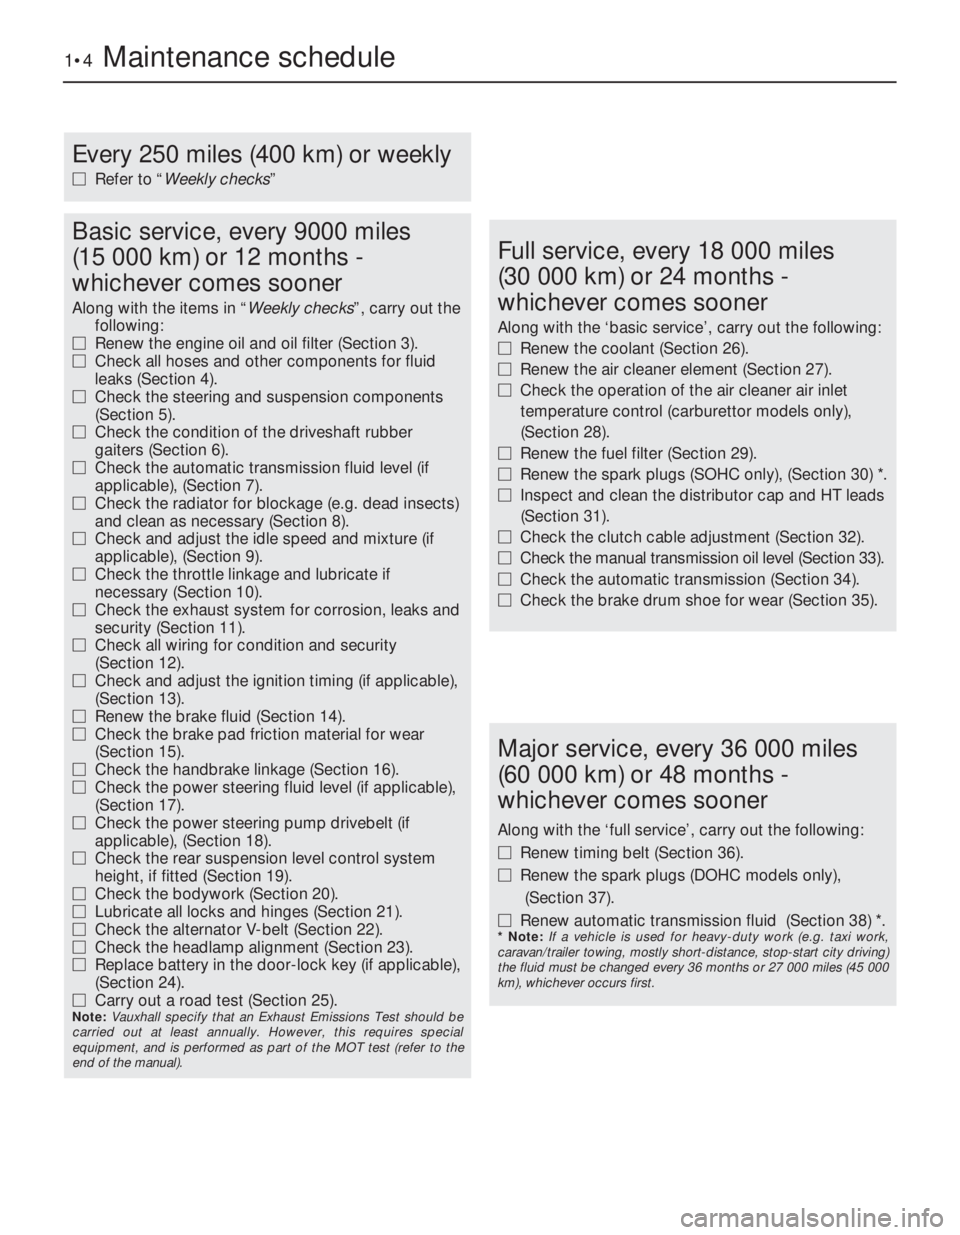
Every 250 miles (400 km) or weekly
MRefer to “Weekly checks”
Basic service, every 9000 miles
(15 000 km) or 12 months -
whichever comes sooner
Along with the items in “Weekly checks”, carry out the
following:
MRenew the engine oil and oil filter (Section 3).
MCheck all hoses and other components for fluid
leaks (Section 4).
MCheck the steering and suspension components
(Section 5).
MCheck the condition of the driveshaft rubber
gaiters (Section 6).
MCheck the automatic transmission fluid level (if
applicable), (Section 7).
MCheck the radiator for blockage (e.g. dead insects)
and clean as necessary (Section 8).
MCheck and adjust the idle speed and mixture (if
applicable), (Section 9).
MCheck the throttle linkage and lubricate if
necessary (Section 10).
MCheck the exhaust system for corrosion, leaks and
security (Section 11).
MCheck all wiring for condition and security
(Section 12).
MCheck and adjust the ignition timing (if applicable),
(Section 13).
MRenew the brake fluid (Section 14).
MCheck the brake pad friction material for wear
(Section 15).
MCheck the handbrake linkage (Section 16).
MCheck the power steering fluid level (if applicable),
(Section 17).
MCheck the power steering pump drivebelt (if
applicable), (Section 18).
MCheck the rear suspension level control system
height, if fitted (Section 19).
MCheck the bodywork (Section 20).
MLubricate all locks and hinges (Section 21).
MCheck the alternator V-belt (Section 22).
MCheck the headlamp alignment (Section 23).
MReplace battery in the door-lock key (if applicable),
(Section 24).
MCarry out a road test (Section 25).
Note: Vauxhall specify that an Exhaust Emissions Test should be
carried out at least annually. However, this requires special
equipment, and is performed as part of the MOT test (refer to the
end of the manual).
Full service, every 18 000 miles
(30 000 km) or 24 months -
whichever comes sooner
Along with the ‘basic service’, carry out the following:
MRenew the coolant (Section 26).
MRenew the air cleaner element (Section 27).
MCheck the operation of the air cleaner air inlet
temperature control (carburettor models only),
(Section 28).
MRenew the fuel filter (Section 29).
MRenew the spark plugs (SOHC only), (Section 30) *.
MInspect and clean the distributor cap and HT leads
(Section 31).
MCheck the clutch cable adjustment (Section 32).
MCheck the manual transmission oil level (Section 33).
MCheck the automatic transmission (Section 34).
MCheck the brake drum shoe for wear (Section 35).
Major service, every 36 000 miles
(60 000 km) or 48 months -
whichever comes sooner
Along with the ‘full service’, carry out the following:
MRenew timing belt (Section 36).
MRenew the spark plugs (DOHC models only),
(Section 37).
MRenew automatic transmission fluid (Section 38) *.
* Note: If a vehicle is used for heavy-duty work (e.g. taxi work,
caravan/trailer towing, mostly short-distance, stop-start city driving)
the fluid must be changed every 36 months or 27 000 miles (45 000
km), whichever occurs first.
Page 180 of 525
test (refer to Chapter 2A) will provide valuable
information regarding the overall performance
of the main internal components. Such a test
can be used as a basis to decide on the
extent of the work to be carried out. If, for
example, a compression test indicates serious
internal engine wear, conventional
maintenance as described in this Chapter will
not greatly improve the performance of the
engine. It may also prove a waste of time and
money, unless extensive overhaul work is
carried out first.
The following series of operations are those
most often required to improve the
performance of a generally poor-running
engine:Primary operations
a)Clean, inspect and test the battery (See
“Weekly Checks”)
b)Check all the engine related fluids (See
“Weekly Checks”)
c)Check the condition and tension of the
auxiliary drivebelt (Sections 18 and 22, as
appropriate).
d)Renew the spark plugs (Sections 30 and
37, as appropriate).
e)Inspect the distributor cap, rotor arm and
HT leads, as applicable (Section 31).
f)Check the condition of the air filter, and
renew if necessary (Section 27).
g)Check the fuel filter (Section 29).
h)Check the condition of all hoses, and
check for fluid leaks (Section 4).i)Check the idle speed and mixture
settings, as applicable (Section 9).
5If the above operations do not prove fully
effective, carry out the following secondary
operations:
Secondary operations
All items listed under “Primary operations”,
plus the following:
a)Check the charging system (Chapter 5).
b)Check the ignition system (Chapter 5).
c)Check the fuel system (Chapters 4A and
4B).
d)Renew the distributor cap and rotor arm
(Section 31).
e)Renew the ignition HT leads (Section 31).
3Engine oil and filter - renewal
2
1Ideally, the oil should be drained with the
engine hot, just after the vehicle has been
driven.
2On DOHC models, remove the engine
undershield to expose the sump drain plug
and the oil filter.
3Place a container beneath the oil drain plug
at the rear of the sump.
4Remove the oil filler cap from the camshaft
cover, then using a socket or spanner,
unscrew the oil drain plug, and allow the oil to
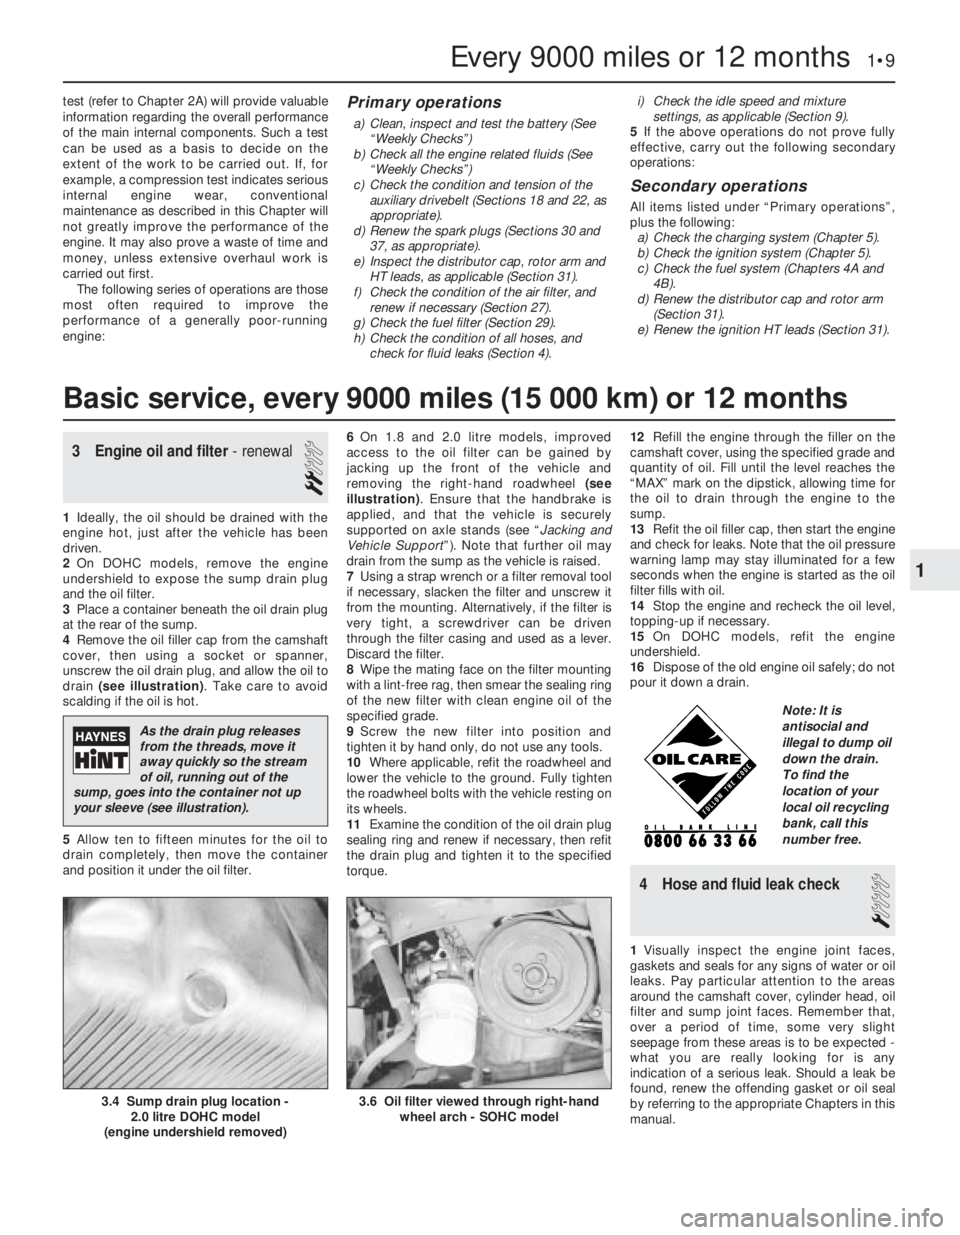
drain (see illustration). Take care to avoid
scalding if the oil is hot.
5Allow ten to fifteen minutes for the oil to
drain completely, then move the container
and position it under the oil filter.6On 1.8 and 2.0 litre models, improved
access to the oil filter can be gained by
jacking up the front of the vehicle and
removing the right-hand roadwheel (see
illustration). Ensure that the handbrake is
applied, and that the vehicle is securely
supported on axle stands (see “Jacking and
Vehicle Support”). Note that further oil may
drain from the sump as the vehicle is raised.
7Using a strap wrench or a filter removal tool
if necessary, slacken the filter and unscrew it
from the mounting. Alternatively, if the filter is
very tight, a screwdriver can be driven
through the filter casing and used as a lever.
Discard the filter.
8Wipe the mating face on the filter mounting
with a lint-free rag, then smear the sealing ring
of the new filter with clean engine oil of the
specified grade.
9Screw the new filter into position and
tighten it by hand only, do not use any tools.
10Where applicable, refit the roadwheel and
lower the vehicle to the ground. Fully tighten
the roadwheel bolts with the vehicle resting on
its wheels.
11Examine the condition of the oil drain plug
sealing ring and renew if necessary, then refit
the drain plug and tighten it to the specified
torque. 12Refill the engine through the filler on the
camshaft cover, using the specified grade and
quantity of oil. Fill until the level reaches the
“MAX” mark on the dipstick, allowing time for
the oil to drain through the engine to the
sump.
13Refit the oil filler cap, then start the engine
and check for leaks. Note that the oil pressure
warning lamp may stay illuminated for a few
seconds when the engine is started as the oil
filter fills with oil.
14Stop the engine and recheck the oil level,
topping-up if necessary.
15On DOHC models, refit the engine
undershield.
16Dispose of the old engine oil safely; do not
pour it down a drain.
4Hose and fluid leak check
1
1Visually inspect the engine joint faces,
gaskets and seals for any signs of water or oil
leaks. Pay particular attention to the areas
around the camshaft cover, cylinder head, oil
filter and sump joint faces. Remember that,
over a period of time, some very slight
seepage from these areas is to be expected -
what you are really looking for is any
indication of a serious leak. Should a leak be
found, renew the offending gasket or oil seal
by referring to the appropriate Chapters in this
manual.
Every 9000 miles or 12 months 1•9
3.6 Oil filter viewed through right-hand
wheel arch - SOHC model3.4 Sump drain plug location -
2.0 litre DOHC model
(engine undershield removed)
1
Basic service, every 9000 miles (15 000 km) or 12 months
As the drain plug releases
from the threads, move it
away quickly so the stream
of oil, running out of the
sump, goes into the container not up
your sleeve (see illustration).
Note: It is
antisocial and
illegal to dump oil
down the drain.
To find the
location of your
local oil recycling
bank, call this
number free.