1988 FIAT TEMPRA light
[x] Cancel search: lightPage 107 of 171
Job 6. Hatchback wiper motor -
replacement.
• Step 3: Disconnect the drive cable from the back of
speedometer.
• Step 4: From under the bonnet, uncouple the two cable
halves
from the centre connector and withdraw the
speedometer section through the bulkhead.
Q Step 5: Disconnect the lower end of the cable from the
gearbox drive and remove it.
G Step 6: Follow the reverse procedure to refit the cable,
being
careful to run the cable as straight as possible, avoiding
sharp bends.
Job 5. Windscreen wiper motor -
replacement.
Q Step 1: Disconnect the battery negative (earth) terminal.
Q Step 2: Note the position of the wiper blades on the
screen. Remove the two windscreen wiper arms and then the
grille
cover.
Q Step 3: Unplug the electrical connector and undo the
four mounting screws (arrowed). Remove the complete
assembly.
Q Step 4: Uncouple the linkage rods from the motor
(arrowed).
Q Step 5: Remove the motor by undoing the three
mounting bolts.
Q Step 6: Note the location of
-
and wiring for
-
these
components.
Q Step 7: Refitting is the reverse of removal, but take care
to position
the wiper arms as you found them after first
making
sure the motor is 'parked'.
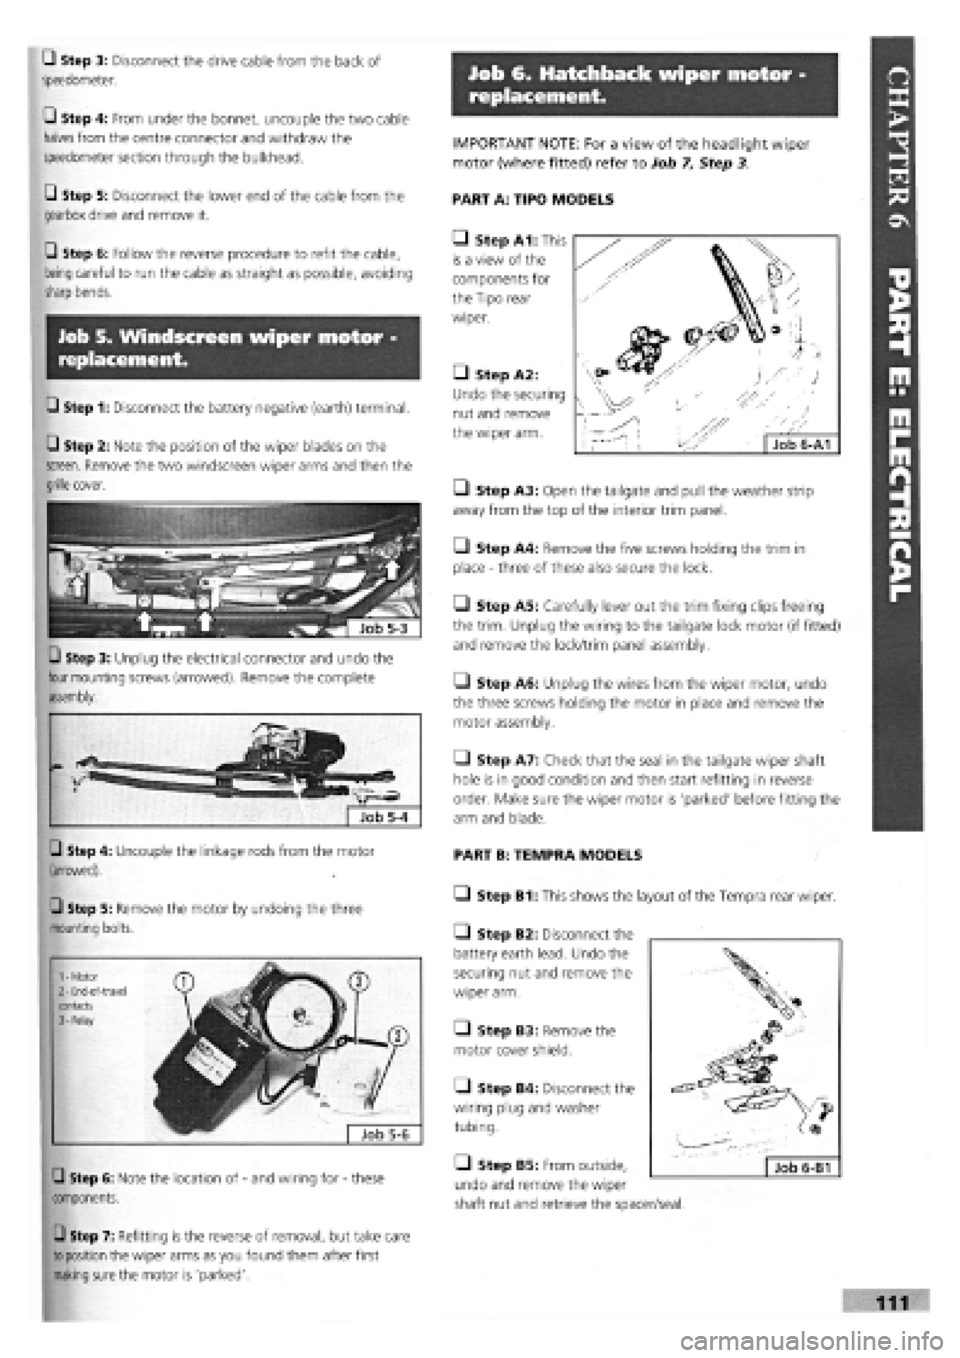
IMPORTANT NOTE: For a view of the headlight wiper
motor (where fitted) refer to Job 7. Step 3.
PART A: TIPO MODELS
• Step A1: This
is a view of the
components for
the Tipo rear
wiper.
• Step A2:
Undo the securing
nut and remove
the wiper arm.
• Step A3: Open the tailgate and pull the weather strip
away from the top of the interior trim panel.
• Step A4: Remove the five screws holding the trim in
place
-
three of these also secure the lock.
Q Step A5: Carefully lever out the trim fixing clips freeing
the trim. Unplug the wiring to the tailgate lock motor (if fitted)
and remove the lock/trim panel assembly.
• Step A6: Unplug the wires from the wiper motor, undo
the three screws holding the motor in place and remove the
motor assembly.
• Step A7: Check that the seal in the tailgate wiper shaft
hole is in good condition and then start refitting in reverse
order. Make sure the wiper motor is 'parked' before fitting the
arm and blade.
PART B: TEMPRA MODELS
• Step B1: This shows the layout of the Tempra rear wiper.
Q Step B2: Disconnect the
battery earth lead. Undo the
securing nut and remove the
wiper arm.
Q Step B3: Remove the
motor cover shield.
Q Step B4: Disconnect the
wiring plug and washer
tubing.
• Step B5: From outside,
undo and remove the wiper
shaft nut and retrieve the spacer/seal.
Page 108 of 171
Job
9-2
Job 7. Windscreen washer pump -
replacement.
Job 10. Rear light cluster
replacement.
Job 8. Radio aerial - replacement.
• Step 1: Refer to Job 13 and remove the interior light.
Q Step 2: Now disconnect the aerial lead from the exposed
base and undo the securing nut.
• Step 3: Remove the aerial from outside the car.
Q Step 4: Reverse the process to refit but ensure that the
seal is good between the aerial and the roof to prevent water
ingress.
Job 9. Headlight cluster -
replacement.
• Step 1: Remove the radiator grille
-
see PARTI: BODY
AND INTERIOR
PART A: TIPO MODELS
O Step A1: Disconnect the
battery.
• Step A2: Raise the
tailgate and undo the fixing
screws (arrowed).
• Step A3: Withdraw the
cluster and disconnect the
wiring plug.
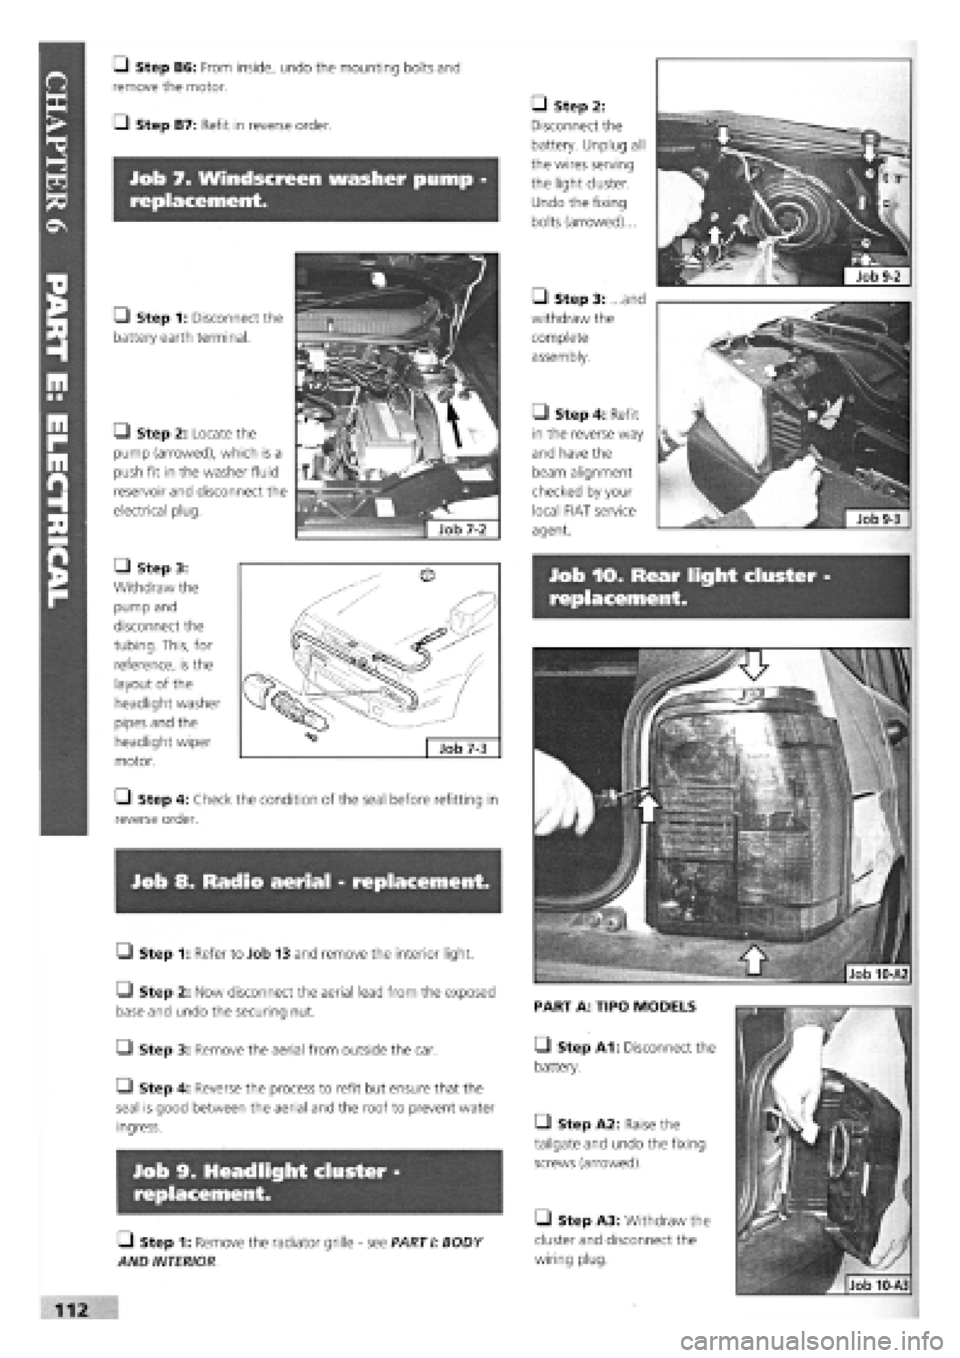
• Step 2:
Disconnect the
battery. Unplug all
the wires serving
the light cluster.
Undo the fixing
bolts (arrowed)...
• Step 3: ...and
withdraw the
complete
assembly.
Q Step B6: From inside, undo the mounting bolts and
remove the motor.
Q Step B7: Refit in reverse order.
O Step 1: Disconnect the
battery earth terminal.
• Step 2: Locate the
pump (arrowed), which is a
push fit in the washer fluid
reservoir and disconnect the
electrical plug.
• Step 4: Refit
in the reverse way
and have the
beam alignment
checked by your
local FIAT service
agent.
• Step 3:
Withdraw the
pump and
disconnect the
tubing. This, for
reference, is the
layout of the
headlight washer
pipes and the
headlight wiper
motor.
• Step 4: Check the condition of the seal before refitting in
reverse order.
Page 109 of 171

Job 12. Number plate light -
replacement.
lob 11. Side repeater indicators -
replacement. Job 13. Interior/courtesy light -
removal and refitting.
Job 11-2 |
G Step 1: Remove the
protective cover from under the
wing
to gain access to the back
of the
light unit.
G Step 2: Twist and remove
the
light lens.
G Step 3: Release the two
retaining clips on the light unit
body (arrowed). Withdraw the
light unit and unplug the
connector.
G Step 4: Refit in reverse
order.
PART A: TIPO MODELS
G Step A4:
Undo the two
screws to detach
the printed
circuit/bulb holder
(2) from
the
cluster (1).
G Step A5:
Reverse these
operations to refit.
PART B: TEMPRA MODELS
G Step B1: Disconnect the battery earth lead.
G Step B2: Undo the screw at the top and remove the lens.
IMPORTANT
NOTE: Some
types are held in
place with
screws, found
beneath the
G Step B3:
SALOON MODELS.
This is
the layout of
the
components.
See
Step B4.
G Step B4:
ESTATE MODELS.
Unplug the wiring
connector. Undo
the
three screws
(positions arrowed)
and
withdraw the
light
cluster.
G Step B5: Refit
in
reverse order.
Q Step 1: Remove
the battery earth
lead. Use a screw-
driver and carefully
prise off the interior
light lens.
Job 10-B3
Job 10-B4
• Step A1: Undo the six fixing screws (arrowed)...
• Step A3:
Unplug the wires
from the bulb
holders
(1)
and
the unit becomes
free.
PART B: TEMPRA MODELS
• Step B1: Release the number plate light securing clips
and withdraw the lights.
IG Step B2: Disconnect the wiring plug and remove the
lights.
O Step B3: Refit in reverse order.
• Step A2:
...and withdraw
the unit.
Job 10-A4
• Step 2: Release
the press clips, two
on each end
(arrowed) unplug
the connector and
withdraw the light.
Page 110 of 171
Job 15. Central locking -
replacement off components.
Job 14. Fuel gauge sender unit
removal and refitting.
SAFETY FIRST!
• Carry out this work out of doors, away from sources
of ignition.
• Make the open aperture on top of the fuel tank air
tight as quickly as possible.
• You should carry out this job when the fuel is at a
low level.
VEHICLES WITH ELECTRIC FUEL PUMPS
(NOT ENGINE MOUNTED)
Job 16. Electric windows -
replacement of components.
courtesy light lens and/or panel. The connectors are on
the rear of the unit.
• Step 3: The estate car has a rear courtesy light which is
removed as in Step 1 and 2
LJ Step 4: Refit in the reverse order.
PART A: ELECTRONIC CONTROL UNIT
• Step A1: You
will find the
electronic control
unit
(1)
mounted
beside the
junction unit...
PART A: ELECTRONIC CONTROL UNIT
• Step A1: Disconnect the battery at the earth terminal.
• Step A2: The
electronic control unit
(1) is mounted directly
on the junction unit to
the left of the foot
pedals. To change it,
simply unplug it and
plug the new one in.
• Step A3:
Reconnect the battery.
PART B: DOOR LOCK SWITCHES AND MOTORS
• Step B1: Both door lock switches and motors are an
integral part of the lock assembly. Therefore, if a fault
develops in either, the complete unit will have to be changed.
See PARTI: BODYWORK AND INTERIOR
• Step A2: ...while the
circuit fuse (2) is on the
junction unit holder. First,
disconnect the battery
earth lead.
• Step A3: Disconnect
the electrical plugs, undo
the securing screws and
withdraw the unit.
• Step A4: Refit in
reverse order.
Q Step 1: Disconnect the battery earth lead.
Q Step 2: Lift the luggage compartment floor covering and
prise the round plastic cover from the floor to expose the
sender unit.
Q Step 3: Unplug the sender unit wires and position them
out of the way.
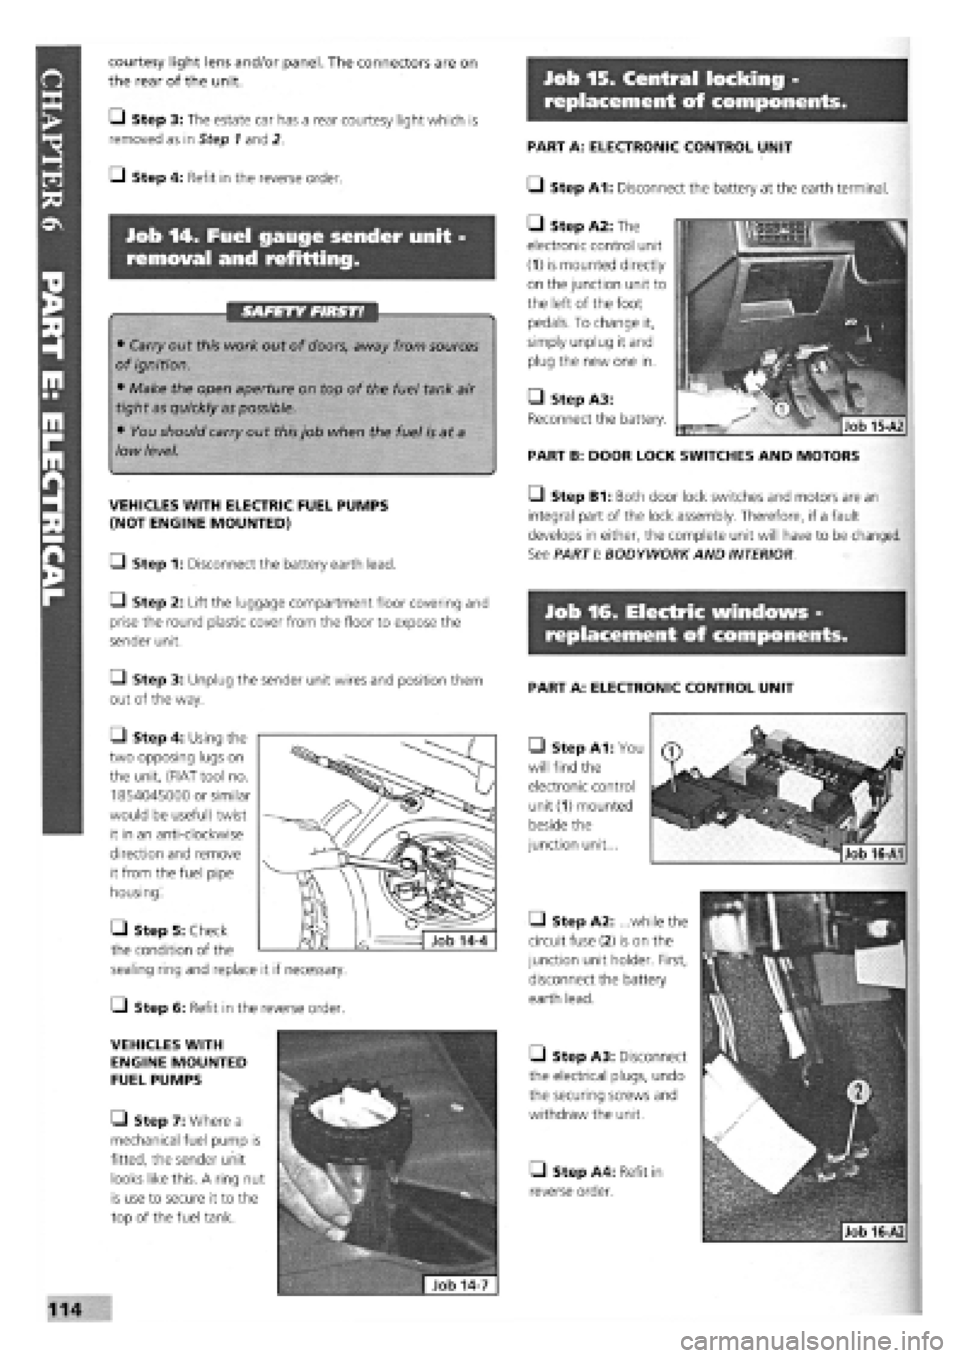
• Step 4: Using the
two opposing lugs on
the unit, (FIAT tool no.
1854045000 or similar
would be useful) twist
it in an anti-clockwise
direction and remove
it from the fuel pipe
housing.
C-) Step 6: Refit in the reverse order.
VEHICLES WITH
ENGINE MOUNTED
FUEL PUMPS
• Step 7: Where a
mechanical fuel pump is
fitted, the sender unit
looks like this. A ring nut
is use to secure it to the
top of the fuel tank.
• Step 5: Check
the condition of the
sealing ring and replace it if necessary.
Job 16-A1
Page 111 of 171
Job 17. Diesel engines - Glow
plugs, checking and replacement.
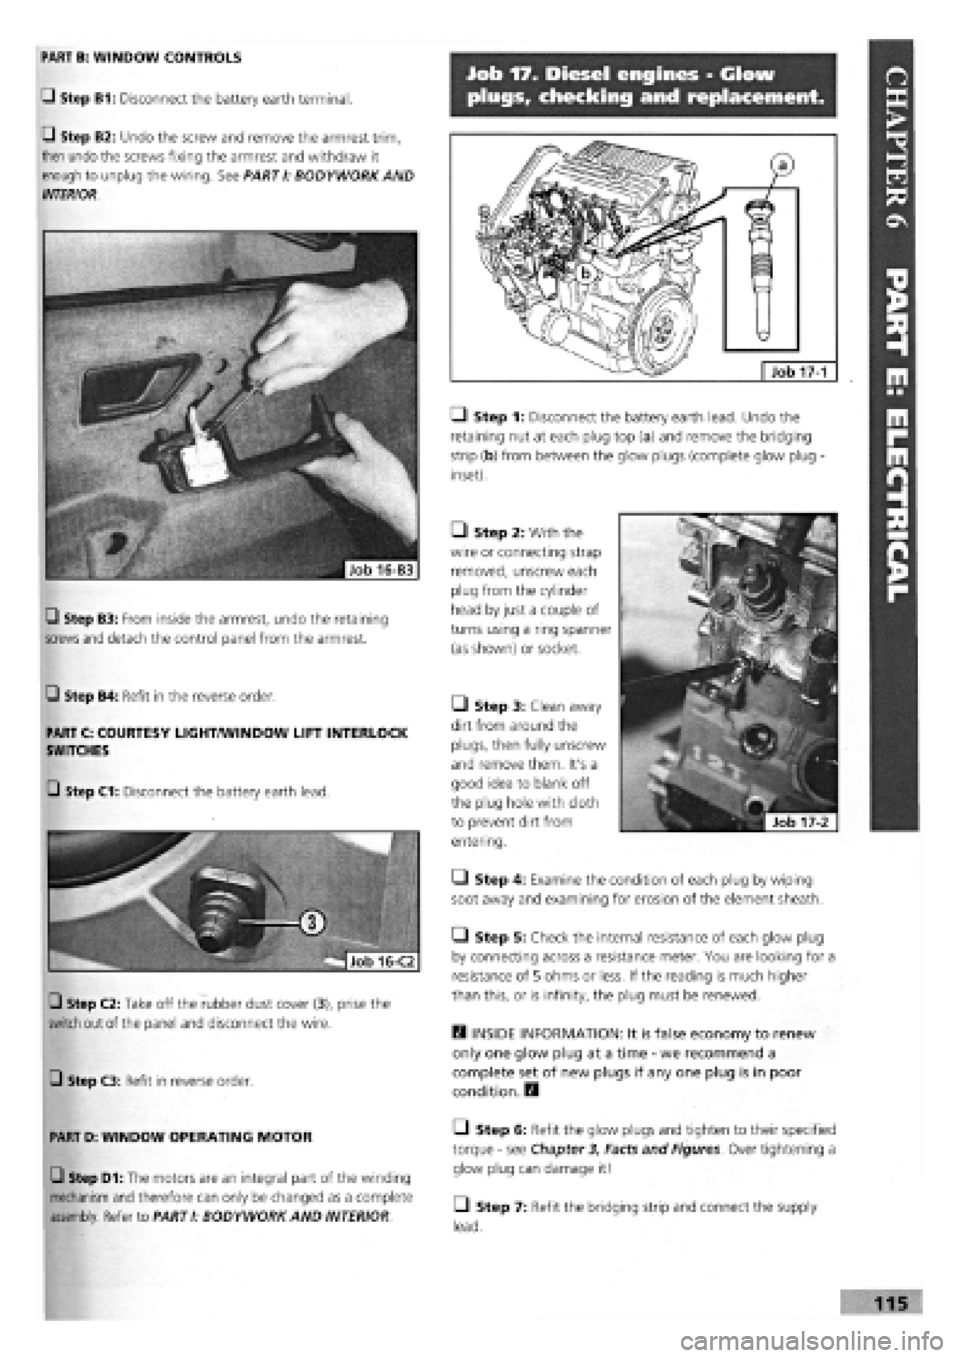
LI Step 1: Disconnect the battery earth lead. Undo the
retaining nut at each plug top (a) and remove the bridging
strip (b) from between the glow plugs (complete glow plug -
inset).
• Step 2: With the
wire or connecting strap
removed, unscrew each
plug from the cylinder
head by just a couple of
turns using a ring spanner
(as shown) or socket.
H INSIDE INFORMATION: It is false economy to renew
only one glow plug at a time
-
we recommend a
complete set of new plugs if any one plug is in poor
condition. E9
• Step 6: Refit the glow plugs and tighten to their specified
torque
-
see Chapter 3, Facts and Figures. Over tightening a
glow plug can damage it!
• Step 7: Refit the bridging strip and connect the supply
lead.
17-1
PART B: WINDOW CONTROLS
Q Step B1: Disconnect the battery earth terminal.
Q Step B2: Undo the screw and remove the armrest trim,
then undo the screws fixing the armrest and withdraw it
enough to unplug the wiring. See PARTI: BODYWORK AND
INTERIOR.
• Step 3: Clean away
dirt from around the
plugs, then fully unscrew
and remove them. It's a
good idea to blank off
the plug hole with cloth
to prevent dirt from
entering.
• Step 4: Examine the condition of each plug by wiping
soot away and examining for erosion of the element sheath.
• Step 5: Check the internal resistance of each glow plug
by connecting across a resistance meter. You are looking for a
resistance of 5 ohms or less. If the reading is much higher
than this, or is infinity, the plug must be renewed.
Q Step B4: Refit in the reverse order.
PART C: COURTESY LIGHT/WINDOW LIFT INTERLOCK
SWITCHES
Q Step C3: Refit in reverse order.
PART D: WINDOW OPERATING MOTOR
Q Step D1: The motors are an integral part of the winding
mechanism and therefore can only be changed as a complete
assembly. Refer to PART I: BODYWORK AND INTERIOR
Q Step B3: From inside the armrest, undo the retaining
screws and
detach the control panel from the armrest.
G Step C1: Disconnect the battery earth lead.
Q Step C2: Take off the rubber dust cover (3), prise the
switch out of the panel and disconnect the wire.
Page 114 of 171
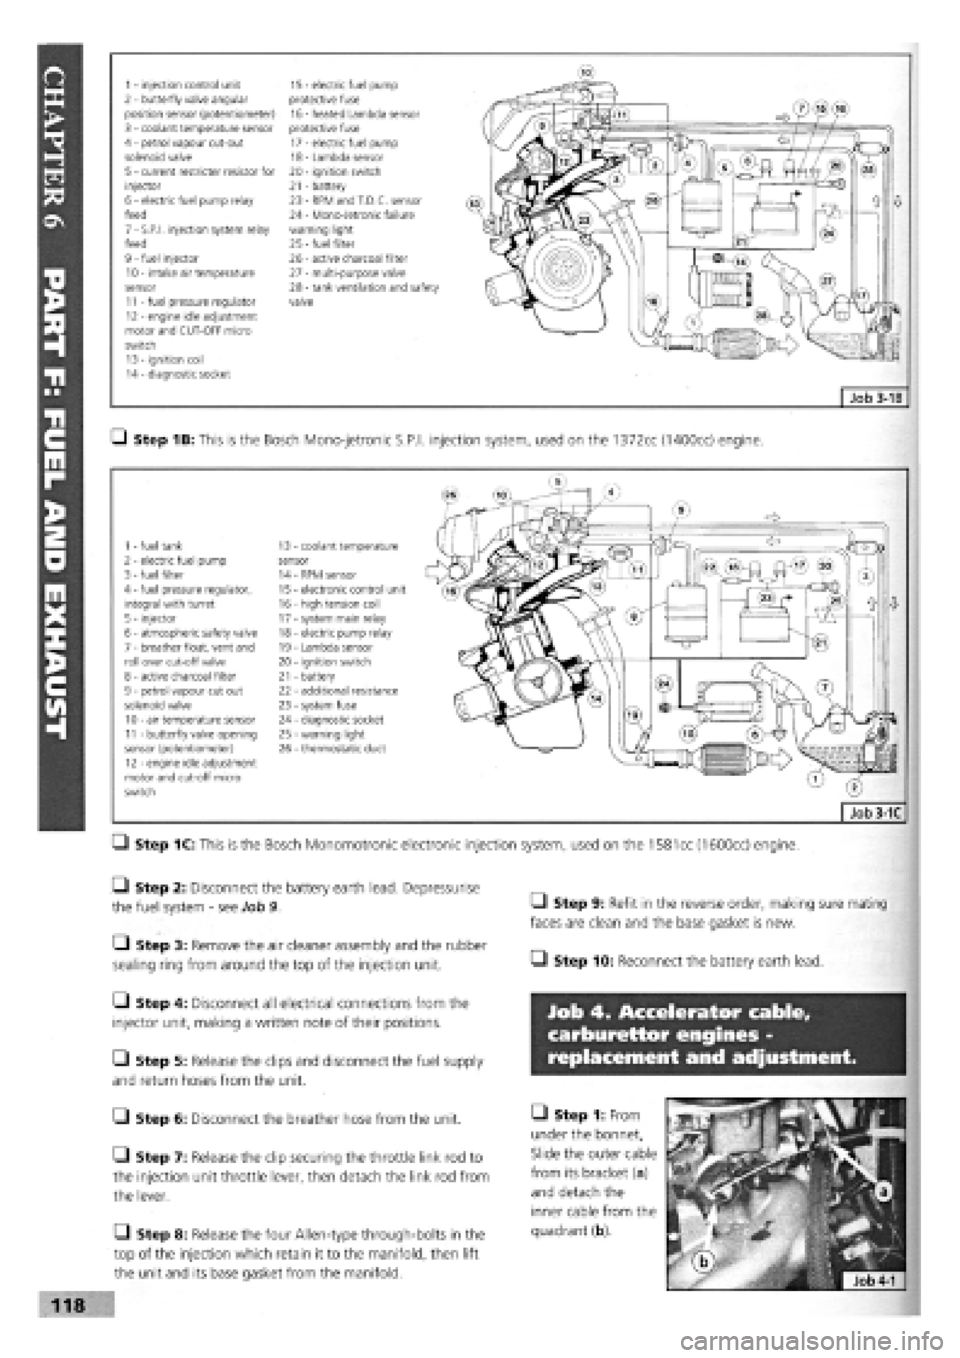
1 - injection control unit 15 - electric fuel pump 2 - butterfly valve angular protective fuse position sensor (potentiometer) 16 - heated Lambda sensor 3 - coolant temperature sensor protective fuse 4 - petrol vapour cut-out 17 - electric fuel pump solenoid valve 18 - Lambda sensor 5 - current restricter resistor for 20 - ignition switch injector 21 - battery 6 - electric fuel pump relay 23 - RPM and T.D.C. sensor feed 24 - Mono-Jetronic failure 7 - S.P.I, injection system relay warning light feed 25
-
fuel filter 9 - fuel injector 26 - active charcoal filter 10 - intake air temperature 27 - multi-purpose valve sensor 28 - tank ventilation and safety 11 - fuel pressure regulator valve 12 - engine idle adjustment motor and CUT-OFF micro switch 13 - ignition coil 14 - diagnostic socket
Q Step 1B: This is the Bosch Mono-jetronic S.P.I, injection system, used on the 1372cc (1400cc) engine.
1 - fuel tank 13 coolant temperature 2 - electric fuel pump sensor 3 - fuel filter 14 RPM sensor 4 - fuel pressure regulator, 15 electronic control unit integral with turret 16 - high tension coil 5 - injector 17 - system main relay 6 - atmospheric safety valve 18 - electric pump relay 7 - breather float, vent and 19 - Lambda sensor roll over cut-off valve 20 - ignition switch 8 - active charcoal filter 21 - battery 9 - petrol vapour cut out 22 - additional resistance solenoid valve 23 - system fuse 10 - air temperature sensor 24 - diagnostic socket 11 - butterfly valve opening 25 - warning light sensor (potentiometer) 26 - thermostatic duct 12 - engine idle adjustment motor and cut-off micro switch
Q Step 1C: This is the Bosch Monomotronic electronic injection system, used on the
1581
cc (1600cc) engine.
• Step 2: Disconnect the battery earth lead. Depressurise
the fuel system
-
see Job 9.
• Step 3: Remove the air cleaner assembly and the rubber
sealing ring from around the top of the injection unit.
Q Step 4: Disconnect all electrical connections from the
injector unit, making a written note of their positions.
Q Step 5: Release the clips and disconnect the fuel supply
and return hoses from the unit.
G Step 6: Disconnect the breather hose from the unit.
• Step 7: Release the clip securing the throttle link rod to
the injection unit throttle lever, then detach the link rod from
the lever.
Q Step 8: Release the four Allen-type through-bolts in the
top of the injection which retain it to the manifold, then lift
the unit and its base gasket from the manifold.
• Step 9: Refit in the reverse order, making sure mating
faces are clean and the base gasket is new.
• Step 10: Reconnect the battery earth lead.
Job 4. Accelerator cable,
carburettor engines -
replacement and adjustment.
• Step 1: From
under the bonnet,
Slide the outer cable
from its bracket (a)
and detach the
inner cable from the
quadrant (b).
118
Page 115 of 171
Job 6. Accelerator cable, petrol
injection engines - replacement
and adjustment.
Q Step 2: From inside the car,
unhook the cable nipple from the
fork (arrowed) at the top of the
pedal arm.
• Step 3: Pull out the bulkhead
grommet and release the cable.
^ • There are many different
cables, so take your old
cable as a pattern when
buying a replacement to make sure the new one is
exactly
the same.
Q Step 4: Refit in the reverse order
-
not forgetting the
grommet in the bulkhead!
Q Step 5: Check that, when the new cable is fitted:
• there
is
just the slightest amount of free-play in the cable
with the throttle closed.
• the carburettor lever is back against its stop with the throttle
fully open.
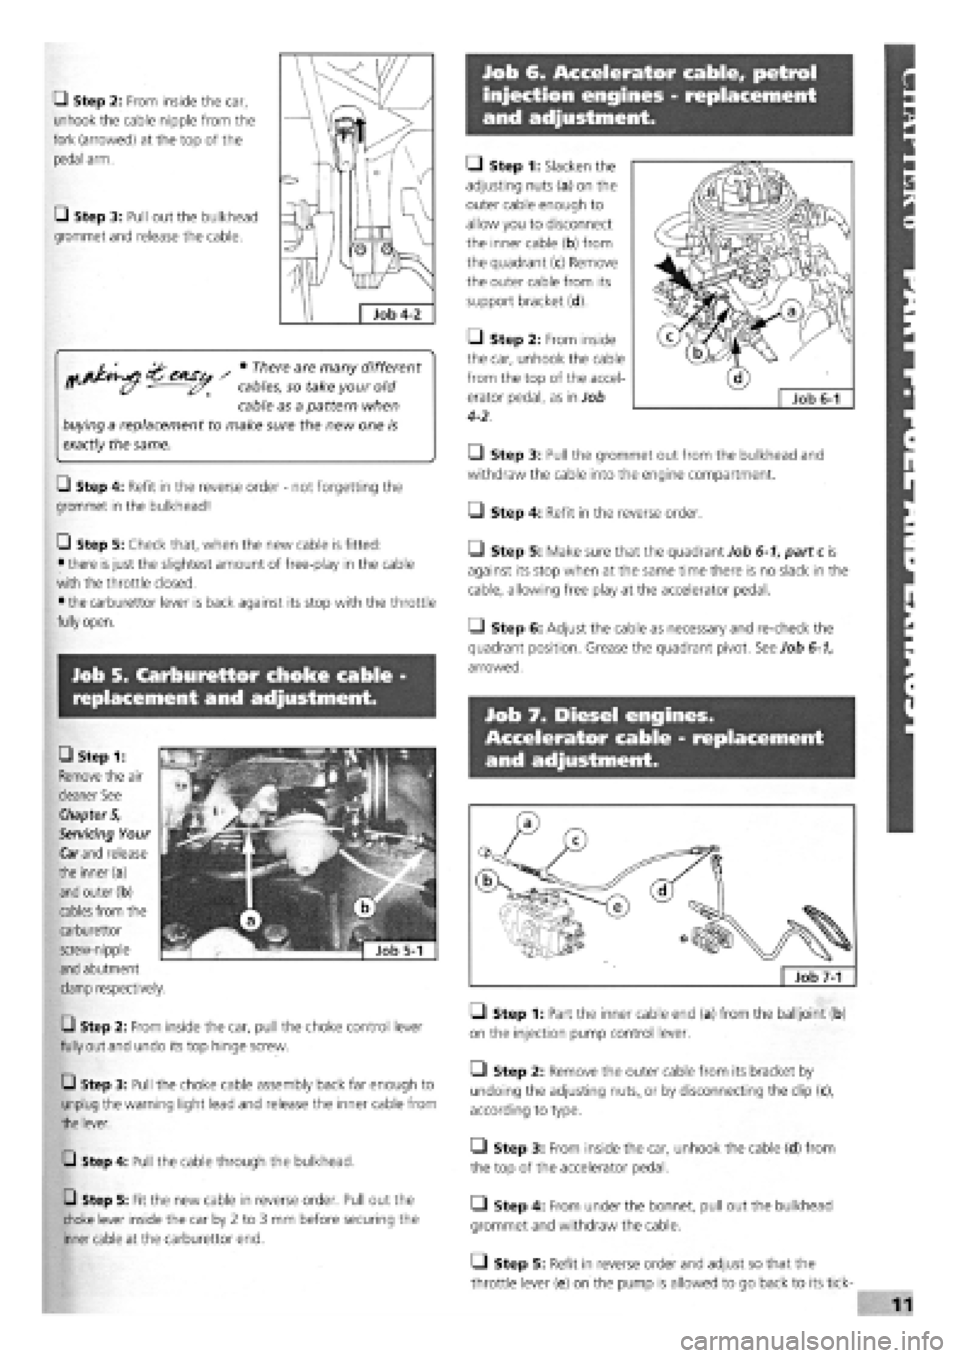
• Step 1: Slacken the
adjusting nuts (a) on the
outer cable enough to
allow you to disconnect
the inner cable (b) from
the quadrant (c) Remove
the outer cable from its
support bracket (d).
Q Step 2: From inside
the car, unhook the cable
from the top of the accel-
erator pedal, as in Job
4-2.
• Step 3: Pull the grommet out from the bulkhead and
withdraw the cable into the engine compartment.
O Step 4: Refit in the reverse order.
• Step 5: Make sure that the quadrant Job 6-1, part c is
against its stop when at the same time there is no slack in the
cable, allowing free play at the accelerator pedal.
• Step 6: Adjust the cable as necessary and re-check the
quadrant position. Grease the quadrant pivot. See Job 6-1,
arrowed.
Job 7. Diesel engines.
Accelerator cable - replacement
and adjustment.
Job 5. Carburettor choke cable -
replacement and adjustment.
Q Step 2: From inside the car, pull the choke control lever
fully out and undo its top hinge screw.
Q Step 3: Pull the choke cable assembly back far enough to
unplug the warning light lead and release the inner cable from
the lever.
Q Step 4: Pull the cable through the bulkhead.
Q Step 5: Fit the new cable in reverse order. Pull out the
choke lever inside the car by 2 to 3 mm before securing the
inner cable at the carburettor end.
Q Step 1: Part the inner cable end (a) from the balljoint (b)
on the injection pump control lever.
• Step 2: Remove the outer cable from its bracket by
undoing the adjusting
nuts,,
or by disconnecting the clip (c),
according to type.
• Step 3: From inside the car, unhook the cable (d) from
the top of the accelerator pedal.
• Step 4: From under the bonnet, pull out the bulkhead
grommet and withdraw the cable.
Q Step 5: Refit in reverse order and adjust so that the
throttle lever (e) on the pump is allowed to go back to its tick-
CD Step 1:
Remove the air
cleaner See
Chapter 5,
Servicing Your
Car
and
release
the inner(a)
and outer (b)
cables from the
carburettor
screw-nipple
and abutment
clamp respectively.
Page 119 of 171

• Step 3: Undo
clips securing the air
intake pipe (a) and
the crankcase
breather pipe (b)
and unbolt the
securing bracket (d).
Unbolt the pipe
mounting (c) and
remove the intake
pipe.
• Step 4:
Remove the excess
pressure pipe bolt
(a)
and
unplug the
wire from
the high
pressure warning
light
switch (b).
• Step 5: Undo
the
bolts (arrowed)
and
remove the
power steering belt
shield.
• Step 6: Slacken
the
power steering
pump
bolts
(arrowed), remove
the
drive belt from
the
pulley and lay it
clear.
7"
e
L Job 15-5
• Step 7:
Remove the two
mounting bolts (a)
and the adjusting
bolts (b) and lay the
pump clear
-
the
hydraulic pipes
should remain
connected.
• Step 8: Undo
the clips and
remove the
compressed air
supply pipe (inset)
from between the
turbocharger and
intercooler.
• Step 9: Undo
the three exhaust
flange bolts (a) and
lower the pipe
enough to clear the
manifold.
• Step 10:
Release the clip
(illustration Job
15-9, part fa) and
remove the oil
return pipe from the
turbocharger.
• Step 11: Undo
the bolts (arrowed)
and remove the
bracket between
the exhaust
manifold and
crankcase.
• Step 12:
Remove the inlet
manifold by
undoing the
securing nuts
(arrowed).
O)
T'
123