1987 PORSCHE 944 maintenance
[x] Cancel search: maintenancePage 2 of 66
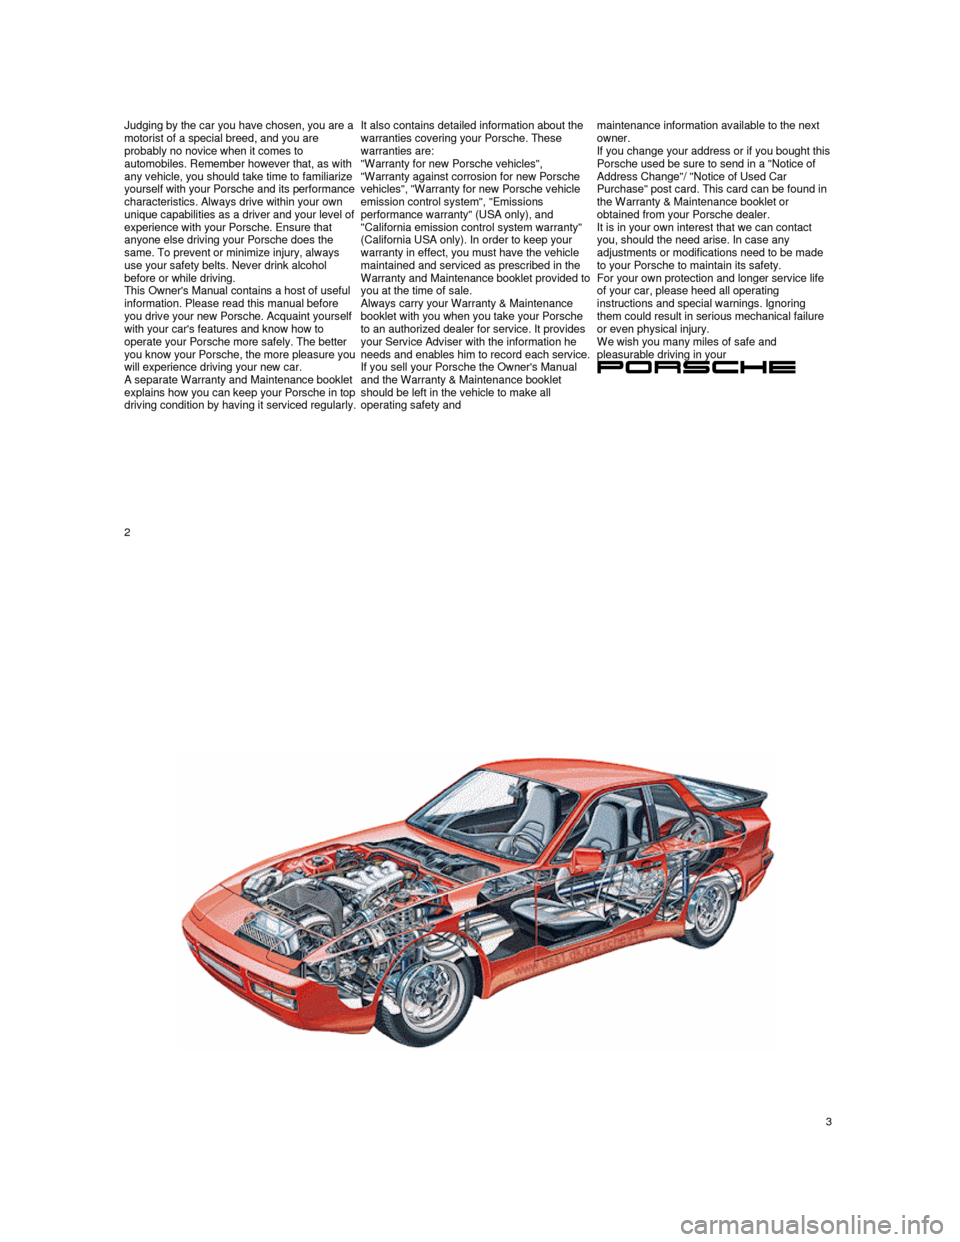
Judging by the car you have chosen, you are a
motorist of a special breed, and you are
probably no novice when it comes to
automobiles. Remember however that, as with
any vehicle, you should take time to familiarize
yourself with your Porsche and its performance characteristics. Always drive within your own
unique capabilities as a driver and your level of
experience with your Porsche. Ensure that
anyone else driving your Porsche does the
same. To prevent or minimize injury, always
use your safety belts. Never drink alcohol
before or while driving.
This Owner's Manual contains a host of useful
information. Please read this manual before
you drive your new Porsche. Acquaint yourself
with your car's features and know how to operate your Porsche more safely. The better
you know your Porsche, the more pleasure you will experience driving your new car. A separate Warranty and Maintenance booklet explains how you can keep your Porsche in top driving condition by having it serviced regularly.
It also contains detailed information about the warranties covering your Porsche. These warranties are:
"Warranty for new Porsche vehicles",
"Warranty against corrosion for new Porsche
vehicles", "Warranty for new Porsche vehicle
emission control system", "Emissions
performance warranty" (USA only), and
"California emission control system warranty"
(California USA only). In order to keep your
warranty in effect, you must have the vehicle maintained and serviced as prescribed in the
Warranty and Maintenance booklet provided to
you at the time of sale.
Always carry your Warranty & Maintenance
booklet with you when you take your Porsche
to an authorized dealer for service. It provides
your Service Adviser with the information he
needs and enables him to record each service.
If you sell your Porsche the Owner's Manual
and the Warranty & Maintenance booklet
should be left in the vehicle to make all
operating safety and maintenance information available to the next
owner.
If you change your address or if you bought this Porsche used be sure to send in a "Notice of Address Change"/ "Notice of Used Car Purchase" post card. This card can be found in
the Warranty & Maintenance booklet or
obtained from your Porsche dealer.
It is in your own interest that we can contact
you, should the need arise. In case any
adjustments or modifications need to be made
to your Porsche to maintain its safety.
For your own protection and longer service life
of your car, please heed all operating
instructions and special warnings. Ignoring
them could result in serious mechanical failure
or even physical injury.
We wish you many miles of safe and
pleasurable driving in your
2
3
Page 4 of 66
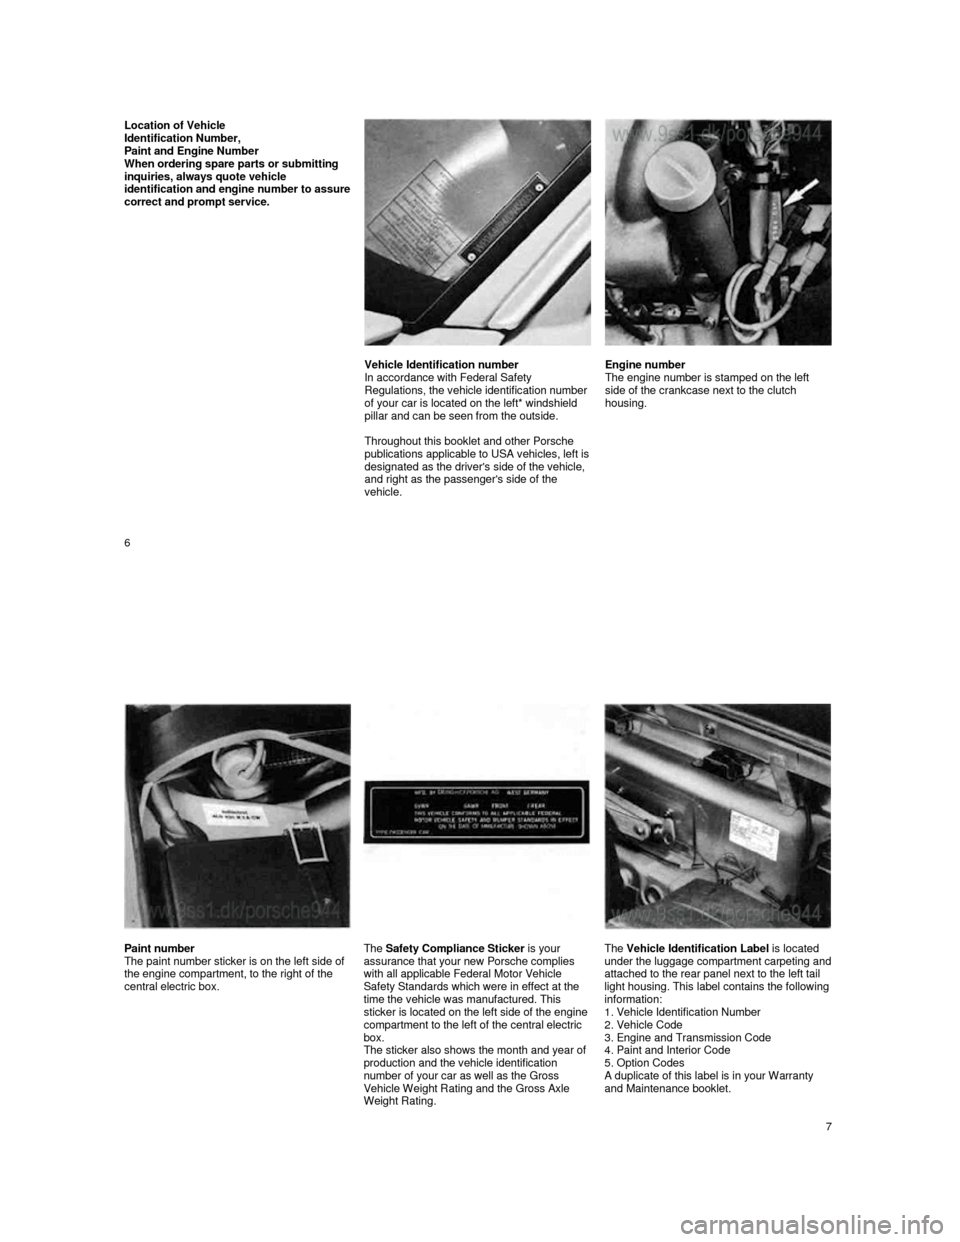
Location of Vehicle Identification Number,
Paint and Engine Number
When ordering spare parts or submitting
inquiries, always quote vehicle
identification and
engine number to assure correct and prompt service.
Vehicle Identification number
In accordance with Federal Safety
Regulations, the vehicle identification number
of your car is located on the left* windshield
pillar and can be seen from the outside.
Throughout this booklet and other Porsche
publications applicable to USA vehicles, left is
designated as the driver's side of the vehicle,
and right as the passenger's side of the
vehicle. Engine number
The engine number is stamped on the left
side of the crankcase next to the clutch
housing.
6
Paint number
The paint number sticker is on the left side of
the engine compartment, to the right of the
central electric box.
The Safety Compliance Sticker is your
assurance that your new Porsche complies
with all applicable Federal Motor Vehicle Safety Standards which were in effect at the
time the vehicle was manufactured. This
sticker is located on the left side of the engine
compartment to the left of the central electric
box.
The sticker also shows the month and year of
production and the vehicle identification
number of your car as well as the Gross
Vehicle Weight Rating and the Gross Axle
Weight Rating.
The Vehicle Identification Label is located
under the luggage compartment carpeting and attached to the rear panel next to the left tail
light housing. This label contains the following
information:
1. Vehicle Identification Number
2. Vehicle Code
3. Engine and Transmission Code
4. Paint and Interior Code
5. Option Codes
A duplicate of this label is in your Warranty and Maintenance booklet.
7
Page 11 of 66
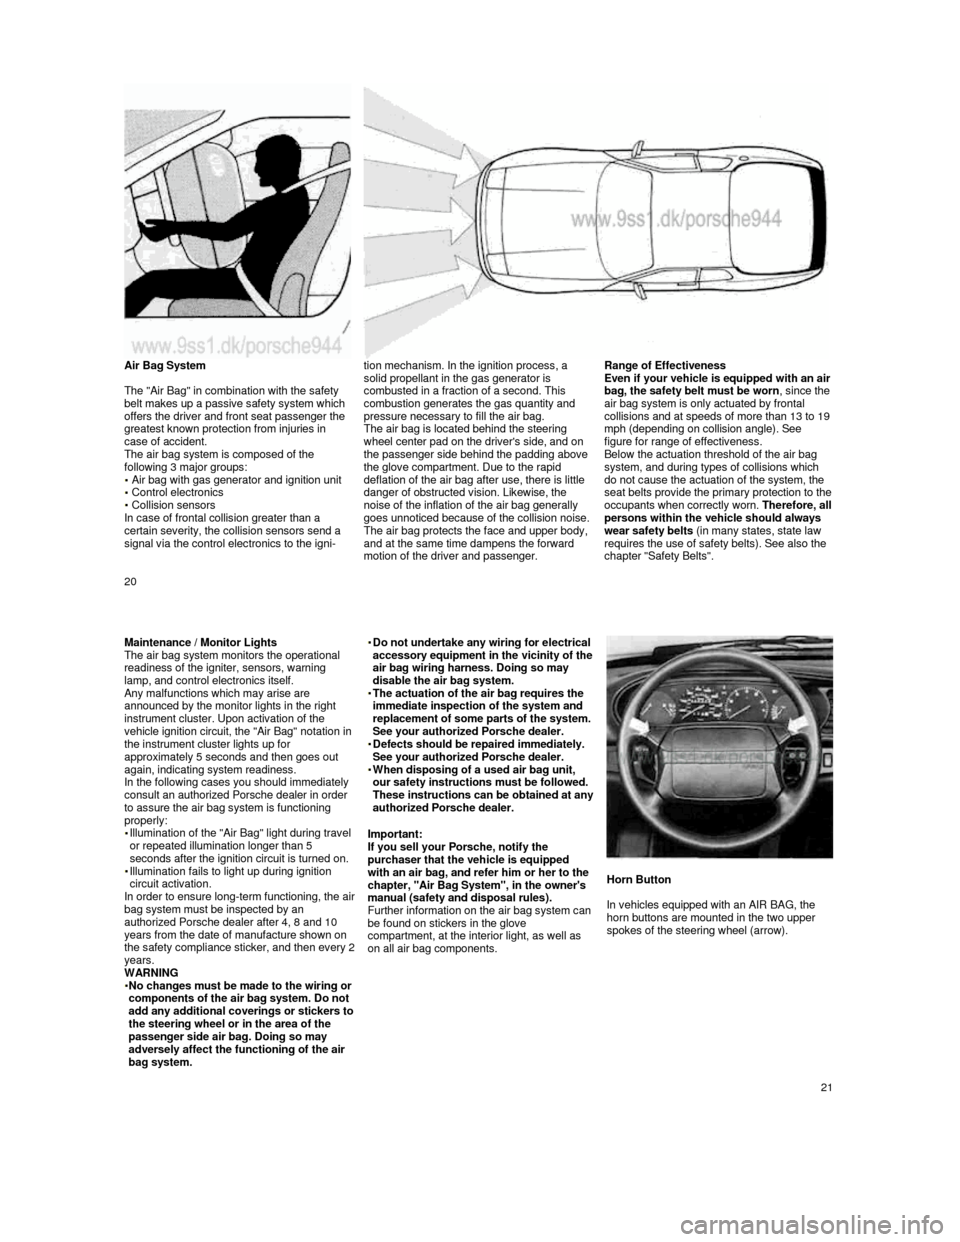
Air Bag System
The "Air Bag" in combination with the safety
belt makes up a passive safety system which
offers the driver and front seat passenger the
greatest known protection from injuries in
case of accident.
The air bag system is composed of the
following 3 major groups:
Air bag with gas generator and ignition unit Control electronics Collision sensors
In case of frontal collision greater than a
certain severity, the collision sensors send a
signal via the control electronics to the igni- tion mechanism. In the ignition process, a
solid propellant in the gas generator is
combusted in a fraction of a second. This
combustion generates the gas quantity and
pressure necessary to fill the air bag.
The air bag is located behind the steering
wheel center pad on the driver's side, and on the passenger side behind the padding above
the glove compartment. Due to the rapid
deflation of the air bag after use, there is little
danger of obstructed vision. Likewise, the
noise of the inflation of the air bag generally
goes unnoticed because of the collision noise. The air bag protects the face and upper body,
and at the same time dampens the forward
motion of the driver and passenger.
Range of Effectiveness Even if your vehicle is equipped with an air bag, the safety belt must be worn, since the air bag system is only actuated by frontal collisions and at speeds of more than 13 to 19 mph (depending on collision angle). See
figure for range of effectiveness.
Below the actuation threshold of the air bag
system, and during types of collisions which
do not cause the actuation of the system, the
seat belts provide the primary protection to the occupants when correctly worn. Therefore, all persons within the vehicle should always
wear safety belts (in many states, state law
requires the use of safety belts). See also the
chapter "Safety Belts".
20
Maintenance / Monitor Lights
The air bag system monitors the operational
readiness of the igniter, sensors, warning
lamp, and control electronics itself.
Any malfunctions which may arise are announced by the monitor lights in the right
instrument cluster. Upon activation of the
vehicle ignition circuit, the "Air Bag" notation in
the instrument cluster lights up for
approximately 5 seconds and then goes out
again, indicating system readiness.
In the following cases you should immediately
consult an authorized Porsche dealer in order
to assure the air bag system is functioning
properly:
Illumination of the "Air Bag" light during travel
or repeated illumination longer than 5
seconds after the ignition circuit is turned on.
Illumination fails to light up during ignition
circuit activation.
In order to ensure long-
term functioning, the air bag system must be inspected by an
authorized Porsche dealer after 4, 8 and 10
years from the date of manufacture shown on
the safety compliance sticker, and then every 2 years.
WARNING
No changes must be made to the wiring or components of the air bag system. Do not
add any additional coverings or stickers to the steering wheel or in the area of the
passenger side air bag. Doing so may
adversely affect the functioning of the air
bag system.
Do not undertake any wiring for electrical accessory equipment in the vicinity of the air bag wiring harness. Doing so may
disable the air bag system.
The actuation of the air bag requires the immediate inspection of the system and
replacement of some parts of the system.
See your authorized Porsche dealer.
Defects should be repaired immediately. See your authorized Porsche dealer. When disposing of a used air bag unit, our safety instructions must be followed. These instructions can be obtained at any authorized Porsche dealer.
Important:
If you sell your Porsche, notify the
purchaser that the vehicle is equipped
with an air bag, and refer him or her to the
chapter, "Air Bag System", in the owner's
manual (safety and disposal rules).
Further information on the air bag system can
be found on stickers in the glove
compartment, at the interior light, as well as
on all air bag components.
Horn Button
In vehicles equipped with an AIR BAG, the
horn buttons are mounted in the two upper
spokes of the steering wheel (arrow).
21
Page 14 of 66
The brake warning light on the dashboard will go out after the engine is started and the
parking brake is fully released.
WARNING
Release the parking brake fully. A partially engaged brake will overheat the rear
brakes, reduce their effectiveness and
cause excessive wear.
Always set the parking brake when parking your car. Move the selector lever
to "P" (Automatic transmission) or move
the gearshift lever to reverse or first gear
(Manual transmission). On hills also turn
the wheels toward the curb.
WARNING Failure of one brake circuit will impair the
braking capability resulting in an
increased stopping distance.
If one brake circuit has failed, the other will
still operate. However, you will notice an
increased pedal travel when you step on the
brake. Should you encounter such
experience, bring your vehicle safely to a full
stop.
Avoid driving the vehicle and instead have it towed to the nearest authorized Porsche
dealer.
Brake Pedal
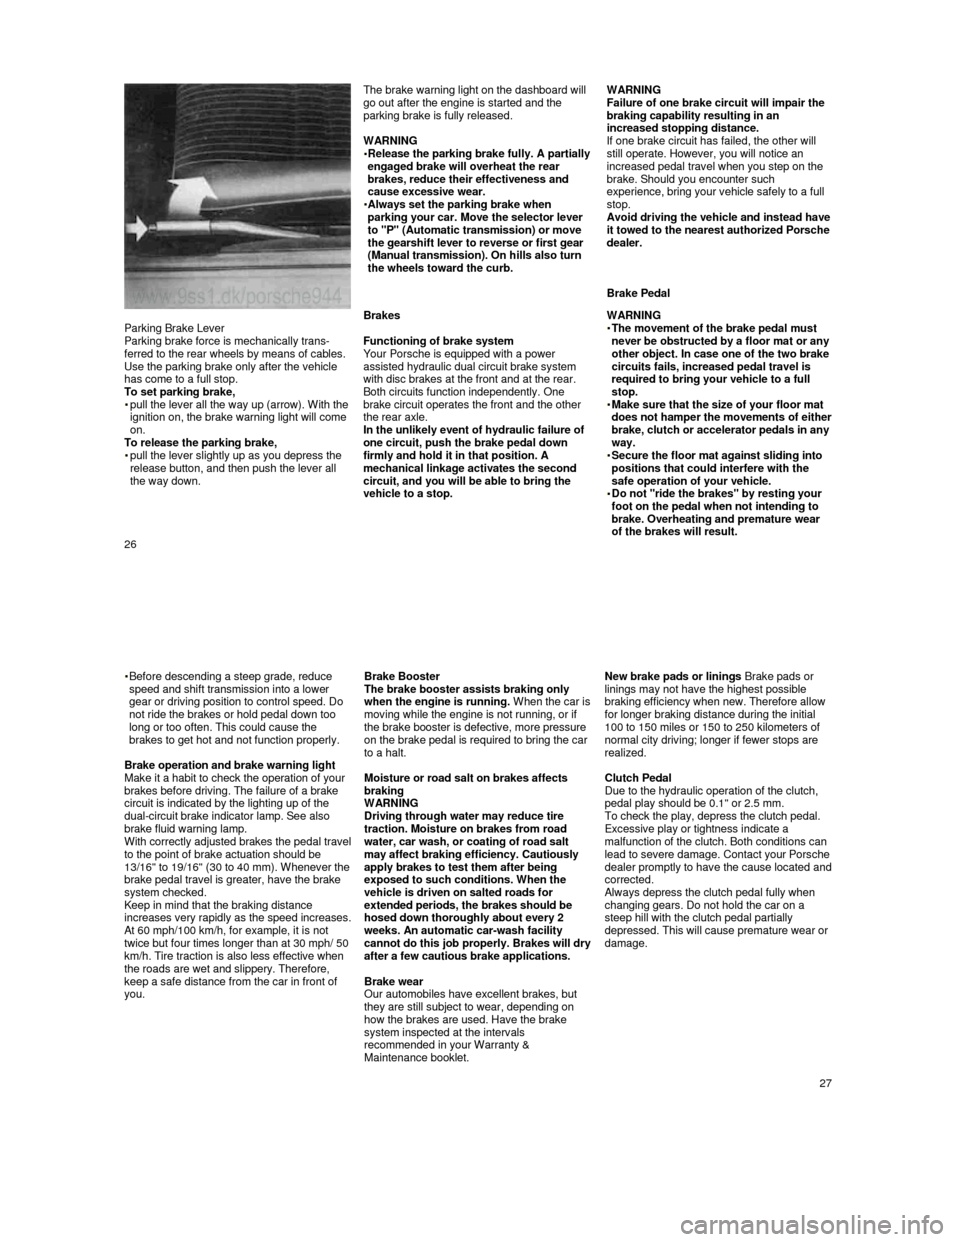
Parking Brake Lever
Parking brake force is mechanically trans-
ferred to the rear wheels by means of cables.
Use the parking brake only after the vehicle
has come to a full stop.
To set parking brake,
pull the lever all the way up (arrow). With the ignition on, the brake warning light will come
on.
To release the parking brake,
pull the lever slightly up as you depress the
release button, and then push the lever all
the way down.
Brakes
Functioning of brake system
Your Porsche is equipped with a power
assisted hydraulic dual circuit brake system
with disc brakes at the front and at the rear. Both circuits function independently. One
brake circuit operates the front and the other
the rear axle.
In the unlikely event of hydraulic failure of
one circuit, push the brake pedal down
firmly and hold it in that position. A
mechanical linkage activates the second
circuit, and you will be able to bring the
vehicle to a stop.
WARNING
The movement of the brake pedal must never be obstructed by a floor mat or any
other object. In case one of the two brake
circuits fails, increased pedal travel is
required to bring your vehicle to a full
stop.
Make sure that the size of your floor mat does not hamper the movements of either brake, clutch or accelerator pedals in any
way.
Secure the floor mat against sliding into positions that could interfere with the
safe operation of your vehicle.
Do not "ride the brakes" by resting your foot on the pedal when not intending to
brake. Overheating and premature wear
of the brakes will result.
26
Before descending a steep grade, reduce
speed and shift transmission into a lower
gear or driving position to control speed. Do
not ride the brakes or hold pedal down too
long or too often. This could cause the
brakes to get hot and not function properly.
Brake operation and brake warning light
Make it a habit to check the operation of your
brakes before driving. The failure of a brake
circuit is indicated by the lighting up of the
dual-circuit brake indicator lamp. See also
brake fluid warning lamp.
With correctly adjusted brakes the pedal travel to the point of brake actuation should be
13/16" to 19/16" (30 to 40 mm). Whenever the brake pedal travel is greater, have the brake
system checked.
Keep in mind that the braking distance
increases very rapidly as the speed increases. At 60 mph/100 km/h, for example, it is not twice but four times longer than at 30 mph/ 50
km/h. Tire traction is also less effective when
the roads are wet and slippery. Therefore,
keep a safe distance from the car in front of
you.
Brake Booster The brake booster assists braking only
when the engine is running. When the car is moving while the engine is not running, or if
the brake booster is defective, more pressure
on the brake pedal is required to bring the car
to a halt.
Moisture or road salt on brakes affects
braking
WARNING
Driving through water may reduce tire
traction. Moisture on brakes from road
water, car wash, or coating of road salt
may affect braking efficiency. Cautiously
apply brakes to test them after being
exposed to such conditions. When the
vehicle is driven on salted roads for
extended periods, the brakes should be
hosed down thoroughly about every 2
weeks. An automatic car-wash facility
cannot do this job properly. Brakes will dry after a few cautious brake applications.
Brake wear
Our automobiles have excellent brakes, but
they are still subject to wear, depending on
how the brakes are used. Have the brake
system inspected at the intervals
recommended in your Warranty &
Maintenance booklet.
New brake pads or linings Brake pads or
linings may not have the highest possible
braking efficiency when new. Therefore allow
for longer braking distance during the initial
100 to 150 miles or 150 to 250 kilometers of
normal city driving; longer if fewer stops are
realized.
Clutch Pedal
Due to the hydraulic operation of the clutch,
pedal play should be 0.1" or 2.5 mm.
To check the play, depress the clutch pedal.
Excessive play or tightness indicate a
malfunction of the clutch. Both conditions can
lead to severe damage. Contact your Po
rsche dealer promptly to have the cause located and corrected. Always depress the clutch pedal fully when changing gears. Do not hold the car on a
steep hill with the clutch pedal partially
depressed. This will cause premature wear or
damage.
27
Page 24 of 66
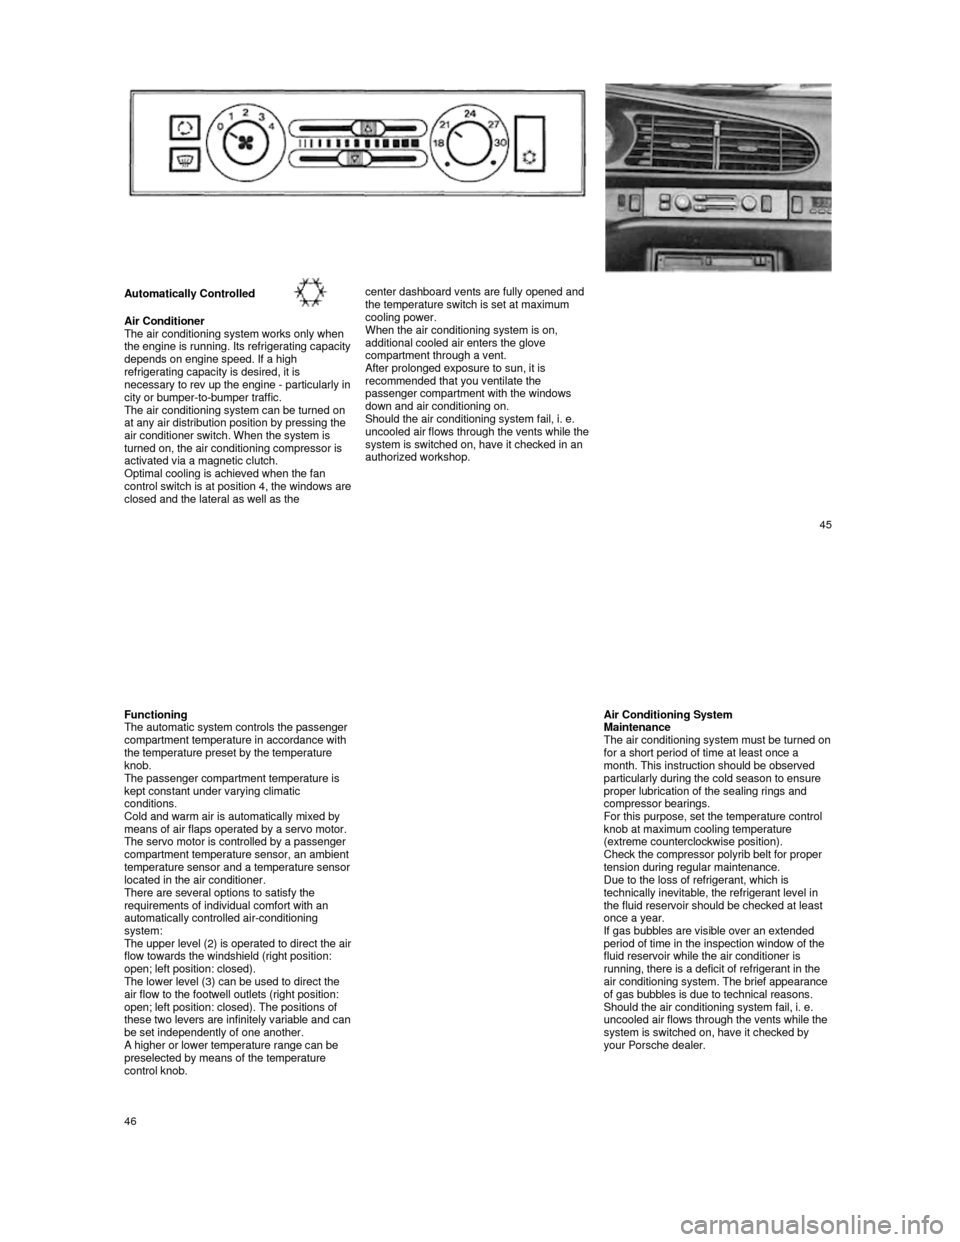
Automatically Controlled
Air Conditioner
The air conditioning system works only when
the engine is running. Its refrigerating capacity depends on engine speed. If a high
refrigerating capacity is desired, it is
necessary to rev up the engine -
particularly in city or bumper-to-bumper traffic.
The air conditioning system can be turned on
at any air distribution position by pressing the
air conditioner switch. When the system is
turned on, the air conditioning compressor is
activated via a magnetic clutch.
Optimal cooling is achieved when the fan
control switch is at position 4, the windows are closed and the lateral as well as the
center dashboard vents are fully opened and
the temperature switch is set at maximum
cooling power.
When the air conditioning system is on,
additional cooled air enters the glove
compartment through a vent.
After prolonged exposure to sun, it is recommended that you ventilate the
passenger compartment with the windows
down and air conditioning on.
Should the air conditioning system fail, i. e.
uncooled air flows through the vents while the
system is switched on, have it checked in an
authorized workshop.
45
Functioning
The automatic system controls the passenger
compartment temperature in accordance with
the temperature preset by the temperature
knob.
The passenger compartment temperature is
kept constant under varying climatic
conditions.
Cold and warm air is automatically mixed by
means of air flaps operated by a servo motor.
The servo motor is controlled by a passenger
compartment temperature sensor, an ambient
temperature sensor and a temperature sensor located in the air conditioner.
There are several options to satisfy the
requirements of individual comfort with an
automatically controlled air-conditioning
system:
The upper level (2) is operated to direct the air flow towards the windshield (right position:
open; left position: closed).
The lower level (3) can be used to direct the
air flow to the footwell outlets (right position:
open; left position: closed). The positions of
these two levers are infinitely variable and can be set independently of one another. A higher or lower temperature range can be preselected by means of the temperature
control knob.
Air Conditioning System Maintenance The air conditioning system must be turned on for a short period of time at least once a
month. This instruction should be observed
particularly during the cold season to ensure
proper lubrication of the sealing rings and
compressor bearings.
For this purpose, set the temperature control
knob at maximum cooling temperature
(extreme counterclockwise position).
Check the compressor polyrib belt for proper
tension during regular maintenance.
Due to the loss of refrigerant, which is
technically inevitable, the refrigerant level in
the fluid reservoir should be checked at least
once a year.
If gas bubbles are visible over an extended
period of time in the inspection window of the
fluid reservoir while the air conditioner is
running, there is a deficit of refrigerant in the
air conditioning system. The brief appearance
of gas bubbles is due to technical reasons.
Should the air conditioning system fail, i. e.
uncooled air flows through the vents while the
system is switched on, have it checked by
your Porsche dealer.
46
Page 35 of 66
Exercise Extreme Caution when Working under the
Engine Hood
The engine compartment of any motor vehicle is a potentially hazardous area. If you are not
fully familiar with proper repair procedures, do
not attempt the adjustments described on the
following pages. This caution applies to the
entire vehicle.
Only work on your vehicle outdoors or in a well ventilated area. Ensure that there are no open flames in the
area of your vehicles at any time when
gasoline fumes might be present. Be
especially cautious of such devices such as
hot water heaters which ignite a flame
intermittently.
Before working on any part in the engine
compartment, turn the engine off and let it
cool down sufficiently. Hot engine
compartment components can burn skin on
contact.
Even after the engine has stopped the
radiator fan may continue running until the
temperature of the coolant has dropped to a
certain level. Therefore, never touch the fan
blades as they will rotate spontaneously
when the thermostat turns the fan on, even with ignition off. Be alert and cautious around engine at all
times while the engine is running.
If work has to be done with the engine
running, always set the parking brake, and
make sure the shift lever is in either Neutral
or Park.
Exercise extreme caution to prevent
neckties, jewelry or long hair from getting
caught in the fan blades, the drive belts, or
any other moving engine parts.
Your Porsche is equipped with a
transistorized ignition system with
breakerless distributor. When the ignition is
on, high voltage is present in all wires
connected with the ignition system; therefore
exercise extreme caution when working on
any part of the engine while the ignition is on
or the engine is running.
Always support your car with safety stands if it is necessary to work underneath the car.
The jack supplied with the car is not
adequate for this purpose.
When working underneath the car without
safety stands but with the wheels on the
ground, make sure the car is on level ground, that the wheels are blocked, and that the
engine cannot be started. REMOVE THE
IGNITION KEY.
Do not smoke or allow an open flame around the battery or gasoline. Keep a fire extinguisher in close reach.
Incomplete or improper servicing may cause
problems in the operation of the car. If in
doubt about any servicing, have it done by
your authorized Porsche dealer or any other
properly equipped and qualified workshop.
Improper maintenance during the warranty
period may affect your warranty coverage.
67
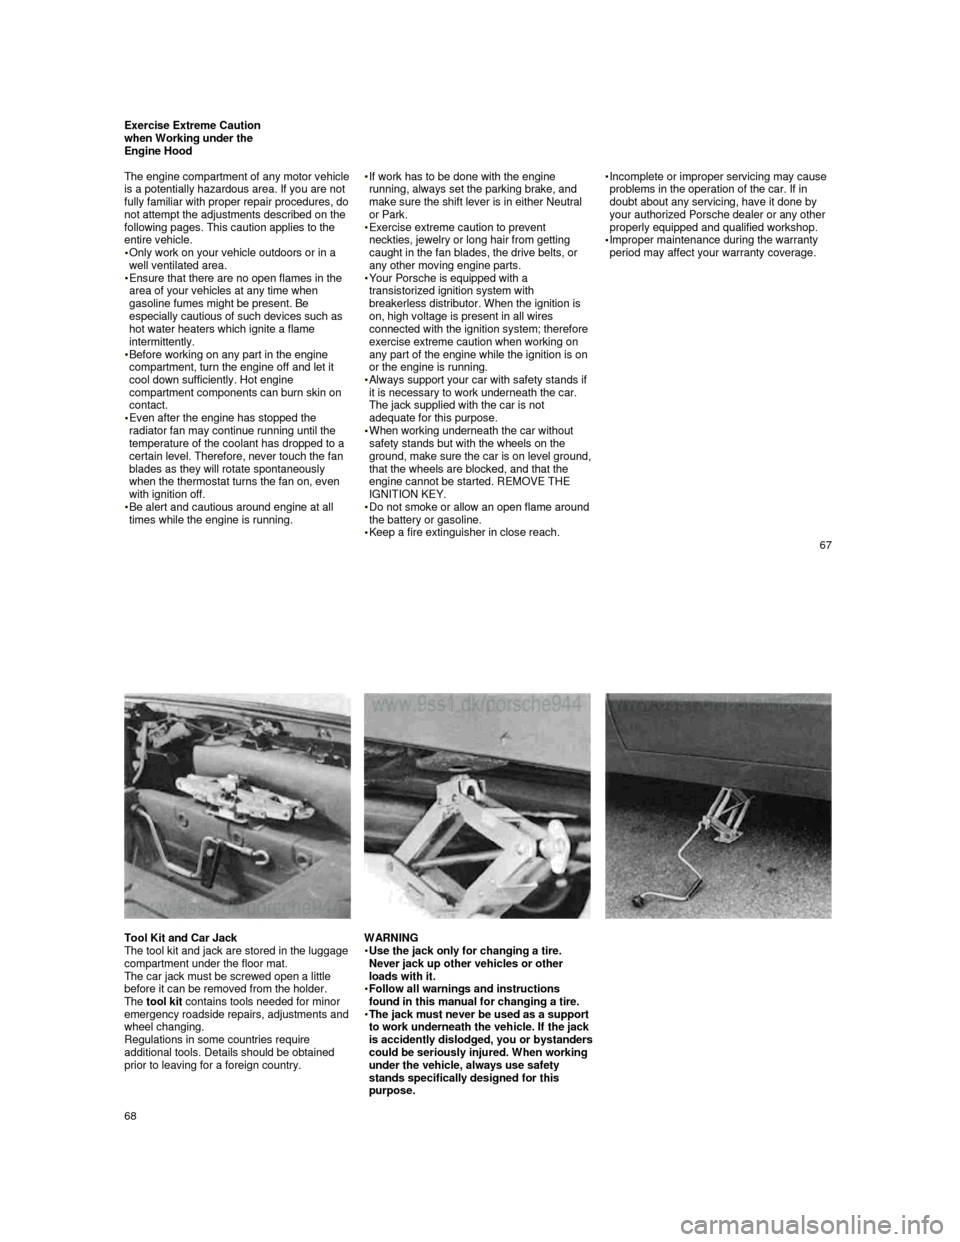
Tool Kit and Car Jack
The tool kit and jack are stored in the luggage
compartment under the floor mat.
The car jack must be screwed open a little
before it can be removed from the holder.
The tool kit contains tools needed for minor
emergency roadside repairs, adjustments and
wheel changing.
Regulations in some countries require
additional tools. Details should be obtained
prior to leaving for a foreign country.
WARNING
Use the jack only for changing a tire. Never jack up other vehicles or other loads with it. Follow all warnings and instructions found in this manual for changing a tire. The jack must never be used as a support to work underneath the vehicle. If the jack is accidently dislodged, you or bystanders could be seriously injured. When working
under the vehicle, always use safety
stands specifically designed for this
purpose.
68
Page 37 of 66
Changing Engine Oil
and Filter
High quality-multi-
grade oils are suitable for all year round driving. Seasonal oil changes are
therefore not necessary. Only if multi-grade
oils are not readily available, a single-
grade oil of the correct viscosity can be used.
Specifications of the various oils to be used
are detailed under "Filling Capacities and
Engine Oil". The use of oil additives is not
recommended by Porsche.
WARNING
When removing oil drain plug with your fingers, keep your arms as high as
possible. This will prevent hot oil from
running down your arm. Wear eye
protection.
Always use a new gasket when reinstalling the plug. Do not overtighten
the plug.
Before changing the engine oil yourself,
make sure that the disposal of the engine
oil and the oil filter, as special wastes, can
be carried out in the proper manner. Under absolutely no circumstance should used
oil find its way into the sewage system,
soil, rivers, ponds, or other
environmentally damaging areas. If there is no possibility of disposing of used oil in the proper manner
(when in doubt, consult local authorities),
please have the oil changed by your dealer or a service station.
Oil change intervals specified in the Warranty
& Maintenance booklet accompanying the
vehicle apply to normal operating conditions
and must be adhered to, including intervals for oil filter change.
If you drive mostly short distances, or if you
operate the vehicle in dusty areas, or under
predominantly stop-and-go traffic conditions,
or when temperatures remain below freezing
for extended periods, the engine oil should be
changed more frequently.
When chang
ing the engine oil and the oil filter, the splash shield under the car has to be
removed first.
Drain the oil when the engine is still warm.
71
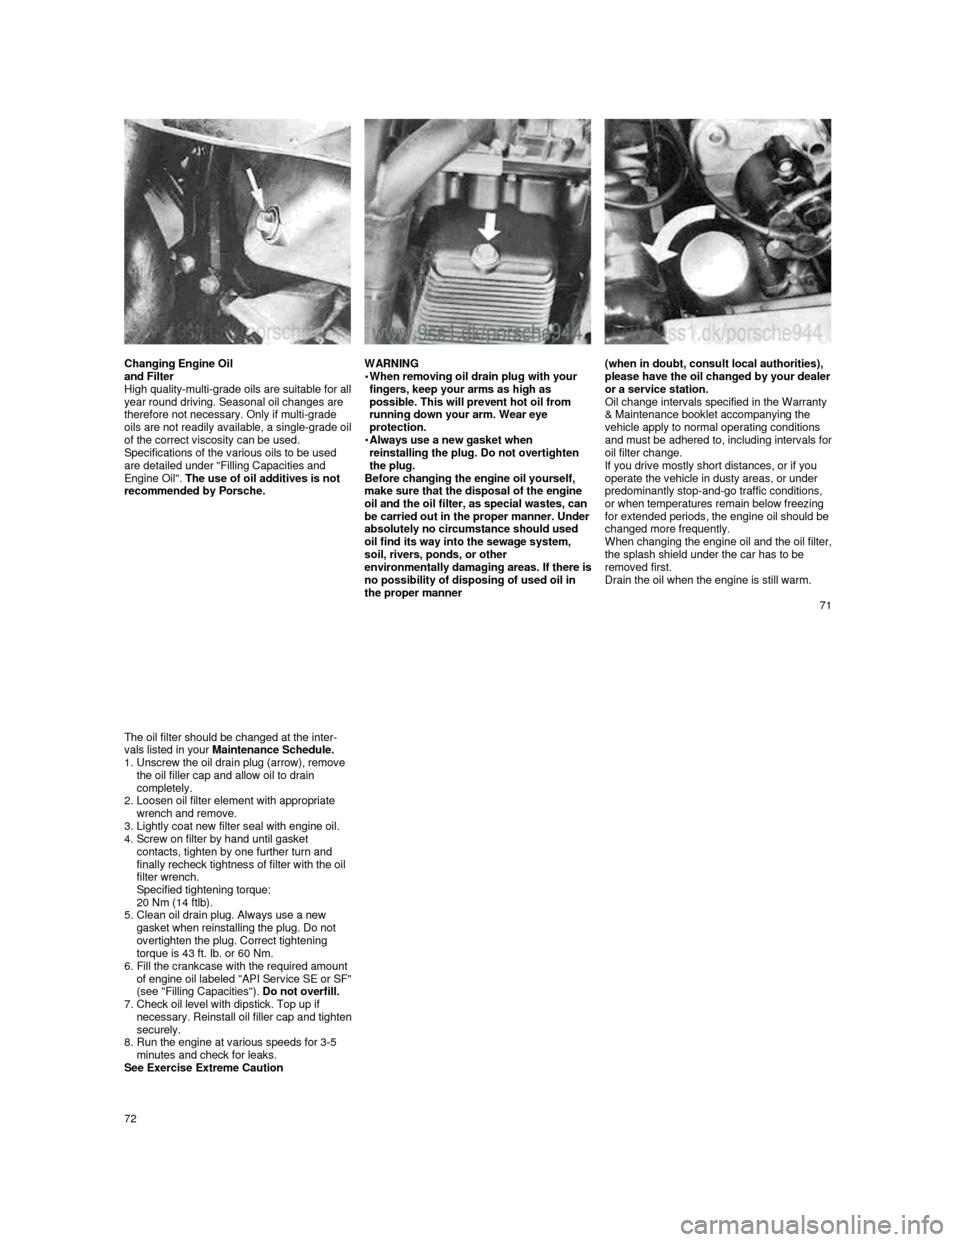
The oil filter should be changed at the inter-
vals listed in your Maintenance Schedule.
1. Unscrew the oil drain plug (arrow), remove the oil filler cap and allow oil to drain
completely.
2.
Loosen oil filter element with appropriate wrench and remove.
3. Lightly coat new filter seal with engine oil.
4. Screw on filter by hand until gasket
contacts, tighten by one further turn and
finally recheck tightness of filter with the oil
filter wrench.
Specified tightening torque:
20 Nm (14 ftlb).
5.
Clean oil drain plug. Always use a new
gasket when reinstalling the plug. Do not
overtighten the plug. Correct tightening
torque is 43 ft. Ib. or 60 Nm.
6.
Fill the crankcase with the required amount of engine oil labeled "API Service SE or SF" (see "Filling Capacities"). Do not overfill.
7. Check oil level with dipstick. Top up if necessary. Reinstall oil filler cap and tighten securely.
8. Run the engine at various speeds for 3-5
minutes and check for leaks.
See Exercise Extreme Caution
72
Page 40 of 66
944 S
944 Turbo
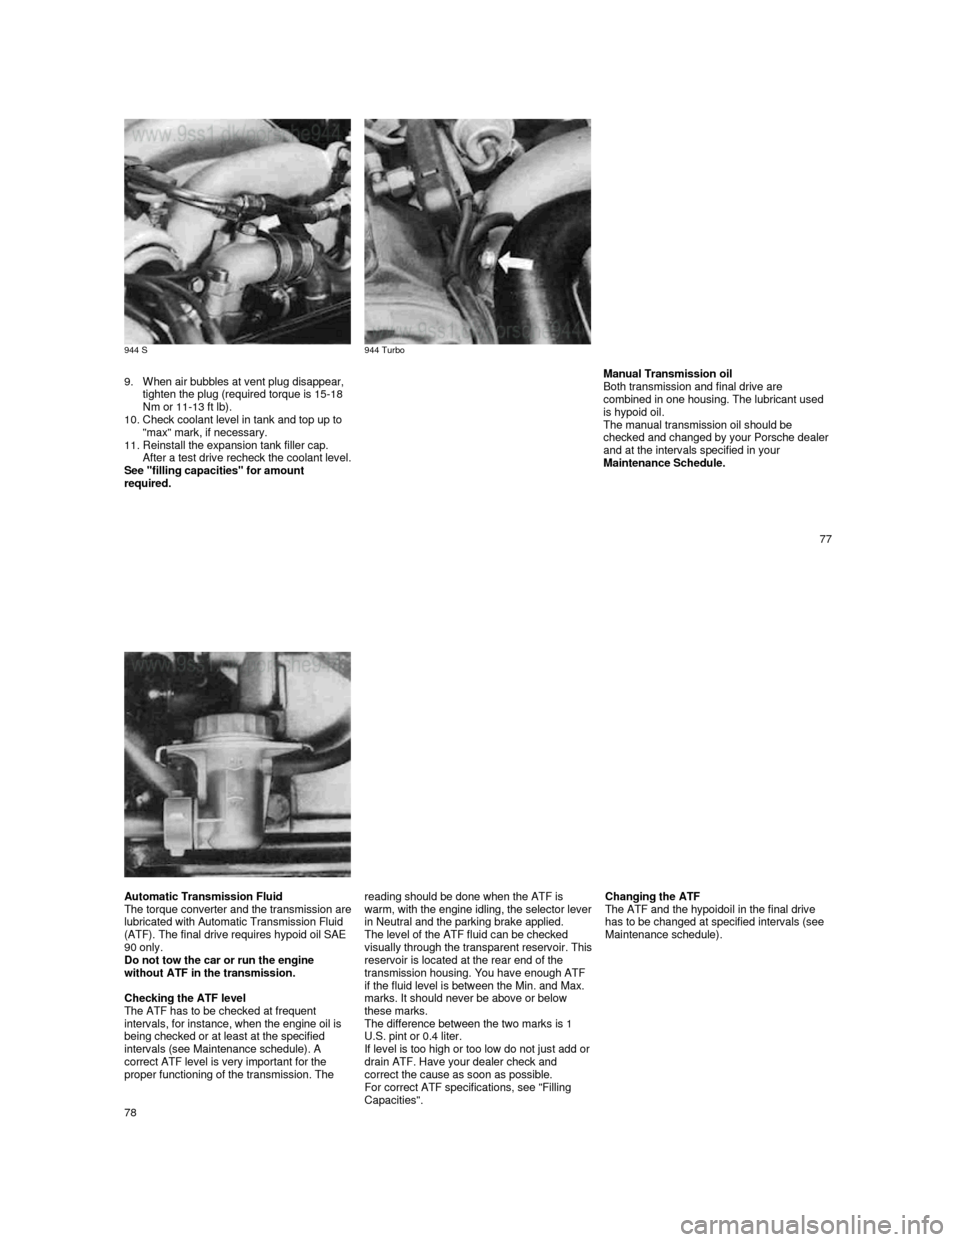
9. When air bubbles at vent plug disappear, tighten the plug (required torque is 15-18
Nm or 11-13 ft lb).
10.
Check coolant level in tank and top up to
"max" mark, if necessary.
11.
Reinstall the expansion tank filler cap. After a test drive recheck the coolant level. See "filling capacities" for amount
required.
Manual Transmission oil
Both transmission and final drive are
combined in one housing. The lubricant used
is hypoid oil.
The manual transmission oil should be
checked and changed by your Porsche dealer
and at the intervals specified in your
Maintenance Schedule.
77
Automatic Transmission Fluid The torque converter and the transmission are lubricated with Automatic Transmission Fluid
(ATF). The final drive requires hypoid oil SAE
90 only.
Do not tow the car or run the engine
without ATF in the transmission.
Checking the ATF level
The ATF has to be checked at frequent
intervals, for instance, when the engine oil is
being checked or at least at the specified
intervals (see Maintenance schedule). A
correct ATF level is very important for the
proper functioning of the transmission. The
reading should be done when the ATF is warm, with the engine idling, the selector lever in Neutral and the parking brake applied.
The level of the ATF fluid can be checked
visually through the transparent reservoir. This reservoir is located at the rear end of the
transmission housing. You have enough ATF
if the fluid level is between the Min. and Max.
marks. It should never be above or below
these marks.
The difference between the two marks is 1
U.S. pint or 0.4 liter.
If level is too high or too low do not just add or
drain ATF. Have your dealer check and
correct the cause as soon as possible.
For correct ATF specifications, see "Filling
Capacities".
Changing the ATF
The ATF and the hypoidoil in the final drive
has to be changed at specified intervals (see
Maintenance schedule).
78