1984 CHEVROLET CAVALIER ESP
[x] Cancel search: ESPPage 49 of 105
Downloaded from www.Manualslib.com manuals search engine To listen to an earlier selection, slide EJECT button to the right ("REV") until it locks. When the tape reaches the end, the EJECT button will automatically
return to center position and the tape will resume playing.
To stop reverse at any time, return the EJECT button to its center position.
NOTE: Belore turning off ignition, eject the cassette tape. Insertion 01 the
cassette tape cartridge overrides the radio and the time-ol-day
will be
displayed continuously.
For best results, use only cassettes which are 30 to 60 minutes in length.
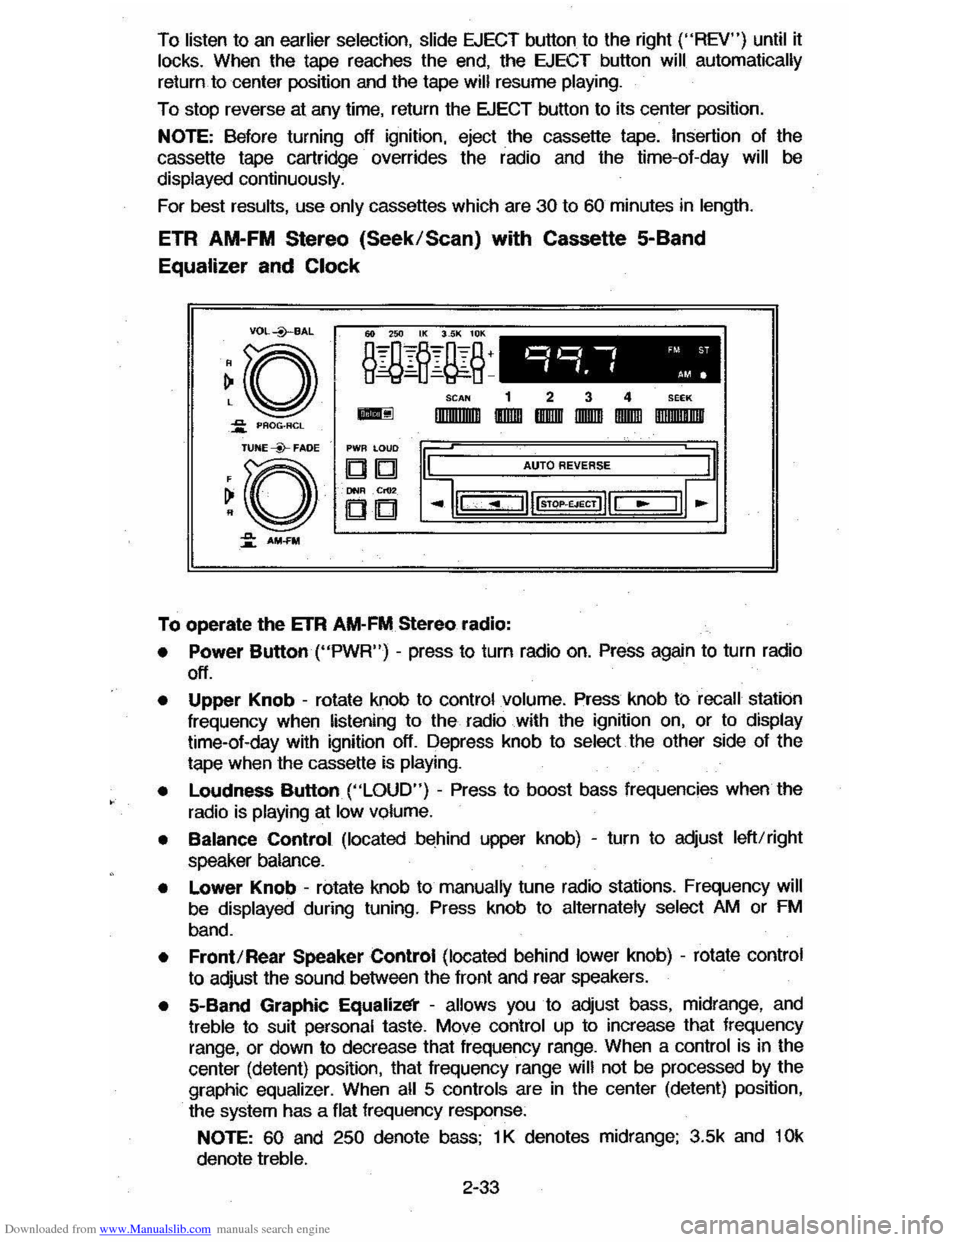
ETR AM-FM Stereo (Seek/Scan) with Cassette 5-Band
Equalizer and Clock
VDL+BAL
~o ~ PAOG·ACL
TUNE --Y-FADE
~O
~ AM-FM
o,~ -, 'M ST
".f AM.
SCAN 1 2 3 4 SEEK
-IlIIIIIIlIIIII IIDIDI IBIIIIII IIDDID IDIDID DIIIIIII!IIIII
PWR LOUD
DIb! AUTO REVERSE
DNIl .Cr02
CD
To operate the ETR AM-FM Stereo radio:
• Power Button ("PWR") -press to turn radio on. Press again to turn radio
off.
• Upper Knob -rotate knob to control volume. Press knob ti:> recall station
frequency when listening to the radio with the ignition on, or to display time-ol-day with ignition off. Depress knob to select the other side 01 the
tape when the cassette
is playing.
•
Loudness Button ("LOUD") - Press to boost bass frequencies when the
radio is
playing at low volume.
• Balance Control (located behind upper knob) -turn to adjust left/right
speaker balance.
• Lower Knob -rotate knob to manually tune radio stations. Frequency will
be displayed during tuning. Press knob to alternately select AM or FM
band.
• Front/Rear Speaker Control (located behind lower knob) -rotate control
to adjust the sound between the lront and rear speakers.
• 5-Band Graphic Equalizl!i' -allows you to adjust bass, midrange, and treble to suit personal taste. Move control up to increase that frequency
range, or down to decrease that frequency range. When a control is in the
center (detent) position, that
Irequency range will not be processed by the
graphic equalizer. When all 5 controls are in the center (detent) position,
the system has a flat frequency response:
NOTE: 60 and 250 denote bass; 1 K denotes midrange; 3.5k and 10k
denote treble.
2-33
Page 51 of 105
Downloaded from www.Manualslib.com manuals search engine Insertion of the cassette tape cartridge overrides the radio and the time-of-day will be displayed continuously .
Press the Dynamic Noise Reduction (DNRTM) button to rerrove high
frequency background
hiss on AM. FM. FM stereo. and tape.
Select the setting
fO( proper tape equalization(CrO .)as follows:
1. Select 70 usec (push button in).
2. Select 120 usec (button is out).
The
equalization setting which is desired will vary according to the type of tape
being used. Chrome and metal tapes have 70 usec equalization. while Iron tapes have 120 usec equalization .
The tape bias is often indicated on the cassette label or case .
For best
resu~s. use only tapes which are 30 to 60 minutes in length.
MOBILE RADIO SYSTEMS
Mobile two-way radiO units and mobile telephone equipment are subject to federal rules and must be installed by trained personnel. Certain such
equipment or the manner of its installation may
possibly adversely affect
vehicle operation. Expenses incurred to protect the vehicle systems from the interaclion of these added mobile communication systems are not the
responsibiWty of Chevrolet Motor Division.
Citizen Band (CB)
racios and garage door openers normally will not affect
vehicle
operation.
Fixed Mast Antenna
The fixed mast antenna is designed to withstand most car washes without
damage .
It cannot be adjusted up or down. If the mast becomes slightly bent.
you can straighten it by hand . The mast antenna can be replaced
if severely
bent (by vandalism . etc .) . Mast antennas must be kept clean for good
performance .
OTHER CONTROLS AND FEATURES
HATCHBACK LID
To open the hatchback lid. use the oval-head key in the lock at the rear of the
car .
Close the lid firmly to be sure it locks.
LlFTGATE OPERATION (STATION WAGONS)
To open the liftgate. use the oval-head key in the outside . lock. (Two gas
support struts. one at
each side of the glass . are designed to help hold the
gate open.)
CAUTION: TIle Ilftg" or hatchback lid should be claed while driving to help avoid
drawing dangerous exhaust S .... Into the eIIr. (8M "Engine Extulust GuCautlon (Carbon Monoxide)" at the 'beginning of "Starting and Operating," Section 2 of thl, manual.)
If you have to drive with the liftgate or hatchback lid open. these precautions
should be observed :
• Close all other windows .
2-35
Page 62 of 105
Downloaded from www.Manualslib.com manuals search engine coolant level in the see-through recovery tank. The coolant level should be at
or above the
"FULL HOT" mark on the recovery tank.
CAUTION: Keep hand., toots and clothing -away from the engine COOling fa", to help prevent personIl intUry. lhiIlan is electric and can come on whether Or not the engine Is rUnning. 111. tan can start automatically In .respon .. to a heat sensor when the ignition Is in "Run."
Make sure the water pu"",, belts are not broken, or off the pulleys , and that the fan runs when the engine is running and there is an indication on the instrument panel of an overheat condition.
If the coolant level in the recovery tank is low, look for leaks at the radiator
hoses and connections, heater hoses and connections, radiator I and water pump. If you find major leaks, or spot other problems that may have caused
the engine to overheat,
do not run the engine untilthese problems have been
corrected. If you do not find a leak or other problem, caretully add coolant to
the recovery tank. (Coolant is a mixture of ethylene glycol antifreeze and water; see "Engine Cooling System" in "'Service and Maintenance," Section 5, for the proper antifreeze and mixture.) .
CAUTION: Under: some:' conditione, the ethylen~ glycol In engine coolant Is . combustible. -To help avoid being burned, DO NOT spill antifreeze or coolant on the exhauat system or hot engine parts..
If the coolant level in the recovery tank is at the correct level but there is still
an indication on the instrument panel of an overheat condition:
•
You may add coolant directly to the radiator. YOU MUST LET ENGINE COOL FIRST. See "Coolant Replacement" under "Engine Cooling
System"
in Section 5, "Service and Maintenance" in this manual. Follow steps t through 3 for the correct way to remove the radiator
cap
and add coolant.
Once the Engine Coolant Temperature light has gone out (or the Engine Coolant Temperature gage no longer signals an overheat condition), you can
resume
driving at a reduced speed. Return to normal driving after about ten
minutes If the light does not come back on (or the gage pointer does not again
show
ao overheat condition).
tf no cause for the overheat condition was found, see a qualified service technician.
JACKING
CAUTION
To help avoid personal injury:
• FollOW all jacking and stowage instructions .
• Use jack only for lifting this vehicle during wheel change.
• Never get beneath the vehicle, start or run engine while vehicle is
supported by jack.
• Always securely restow spare tire (or flat tire) and all jacking equipment.
3-4
Page 76 of 105
Downloaded from www.Manualslib.com manuals search engine most cases the vehicle is drivable, and does not require towing, see your
authorized dealer as soon as possible for service of the system.
Continued
driving without having the Computer Command Control system serviced could eventually cause damage to the emission control system. It
could
also affect fuel economy and drivability .
ENGINE OIL AND FILTER RECOMMENDATIONS
The following engine oil recommendations are based upon the operation . of your engine with the fuels recommended under "Fuel Requirements" in Section 2 of this manual.
Checking Oil Level
The engine oil must be kepi at the right level to help assure proper lubrication
of your vehicle's engine. n Is normal for an engine to use some oil, and some
engines may use more oil when they are new.
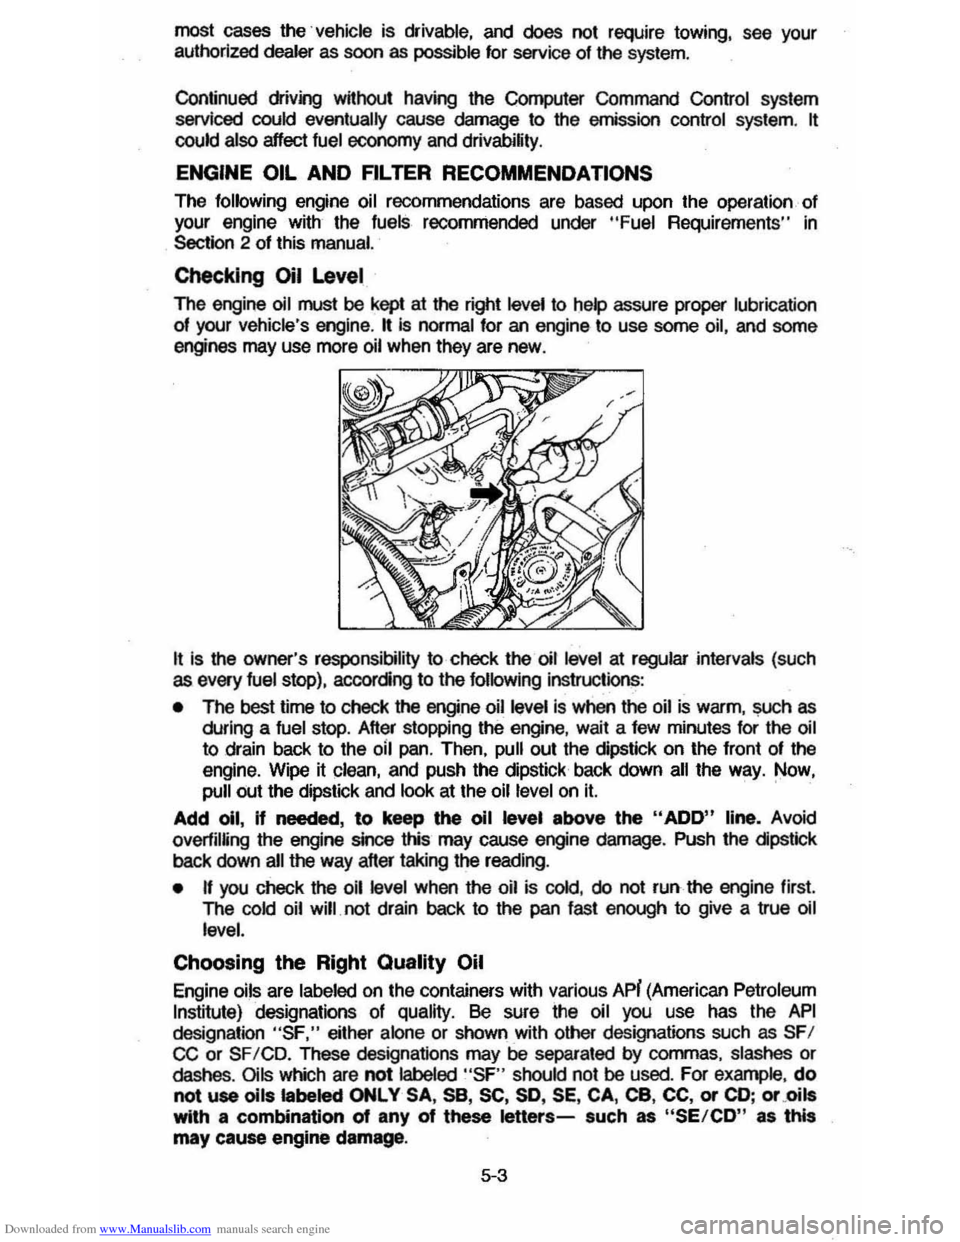
It is the owner's responsibility to check the oil level at regular intervals (such as every fuel stop), accorcing to the following instructions:
• The best time to check the engine oil level is when the oil is warm, ~h as
during a fuel stop. After stopping the engine, wait a few minutes for the oil
to drain back to the oil pan. Then, pull out the dipstick on the front of the
engine. Wipe it clean, and push the dipstick back down
all the way. Now, pull out the dipstick and look at the oil level on It. '
Add 011, If needed, to keep the 011 level above the "ADD" line, Avoid
overfilUng
the engine since this may cause engine damage. Push the cipstlck
back down all the way after taking the reading.
• n you check the oil level when the oil is cold, do not run the engine first.
The
cold oil will. not drain back to the pan fast enough to give a true oil
level.
Choosing the Right Quality Oil
Engine oils are labeled on the containers with various APi (American Petroleum
Institute) designations of quality. Be sure the oil you use has the API
designation "SF," either alone or shown with other designations such as SFI CC or SF ICD. These designations may be separated by commas. slashes or dashes. Oils which are not labeled "SF " should not be used. For example , do
not use oils labeled ONLY SA, sa, SC, SO, SE, CA, ca, CC, or CD; or .oils with a combination of any of these letters-such as "SE/CD" as this
may cause engine damage.
5·3
Page 80 of 105
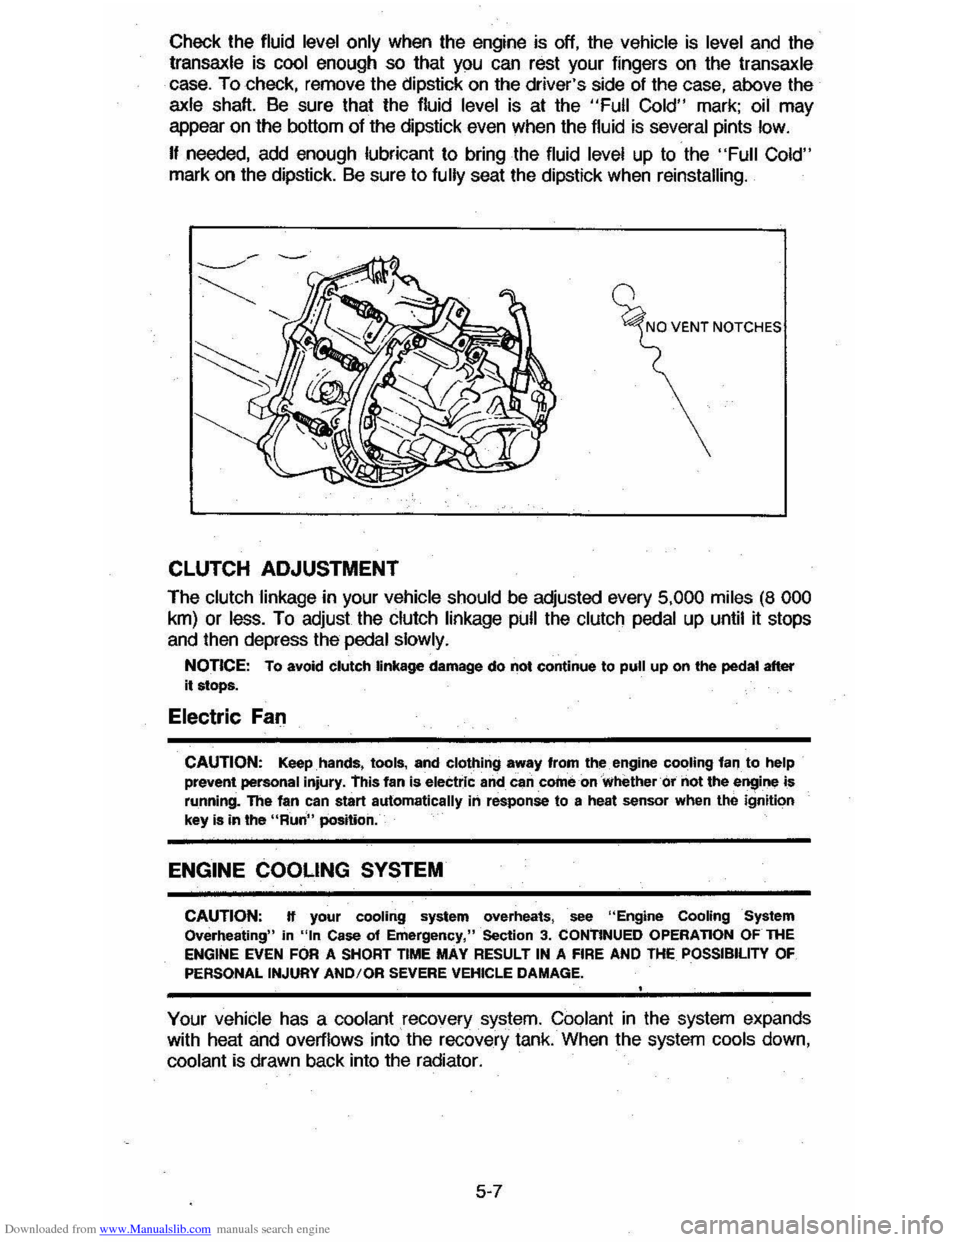
Downloaded from www.Manualslib.com manuals search engine Check the fluid level only when the engine is off, the vehicle is level and the transaxle is cool enough so that you can rest your fingers on the transaxle
case. To check, remove the dipstick on the driver's side of the case, above the
axle shaft, Be sure that the fluid level is at the "Full Cold" mark; oil may
appear on the bottom of the dipstick even when the fluid is several pints low.
I! needed, add enough lubricant to bring the fluid level up to the "Full Cold" mark on the dipstick. Be sure to fully seat the dipstick when reinstalling.
CLUTCH ADJUSTMENT
The clutch linkage in your vehicle should be adjusted every 5,000 miles (8 000
km) or less. To adjust the clutch linkage pull the clutch pedal up until it stops
and then depress the
pedal slowly.
NOTICE: To avoid clutch linkage damage do not continue to pull up on the pedal after
it stops.
Electric Fan
CAUTION: Keep hands, tools, and clothing away fr,om th~engine cooUng lanto help prevent personal injury. this fan is electric and can corne on whether or not the engine is
running. The fan can start automatically in response to a heat sensor when the ignition
key is in the "Run" position.
ENGINE COOLING SYSTEM
CAUTION: H your cooling system overheats, see "Engine Cooling System Overheating" in "In Case of Emergency," Section 3. CONTINUED OPERATION OFTHE ENGINE EVEN FOR A SHORT TIME MAY RESULT IN A FIRE AND THE POSSIBILITY OF
PERSONAL INJURY ANDIOR SEVERE VEHICLE DAMAGE.
Your vehicle has a coolant recovery.system. Coolant in the system expands with heat and overflows into the recovery tank. When the system cools down,
coolant is drawn back into the radiator.
5-7
Page 82 of 105
Downloaded from www.Manualslib.com manuals search engine If you have to add coolant more than four times a year (either to the recovery
tank or to the radiator), or if
coolant is dirty or discolored, see your dealer for a cooling system check.
NOTICE: rr you use the proper quality antifreeze, there is no need to add extra inhibitors or additives which claim to improve the system. They may be harmful to the proper operation of the system.
Adding Coolant
CAUTION: To help avoid the danger of being burned, do not remove the radiator cap while the engine and radiator are stili hot. Scalding fluid and steam can be blown out under pressure if the cap is taken off too soon.
1. When the engine is cool, remove the radiator cap.
• Turn the cap slowly to the left until it reaches a "stop." Do not press
down
while turning the cap.
• Wait until any remaining pressure (indicated by a hissing sound) is relieved, then press down on the cap and continue turning it to the left.
2. Add enough water and ethylene glycol anmreeze (meeting GM Specification 1825-M) to provide the required cooling, freezing and
corrosion protection. Use a solution that is at least 50 percent antifreeze
but no more than 70 percent antHreeze. Fill the radiator to the base of the
filler neck and fill the coolahUocave,y lank to at or above the "Full Hot" mark. Put the recovery tank cap back on.
3. Run the engine, with the radiator cap removed, until the upper radiator
hose is
hot. With the engine idling, add coolant to the radiator until it
reaches
the bottom of the filler neck. Install the radiator cap, making sure
the arrows on the cap line up with the overflow tube on the radiator filler
neck.
II is Ihe owner's responsibility 10:
• Maintain cooling system freeze protection at -37°G (-34°F) to ensUre
protection against corrosion and loss of coolant from boiling. (A SO/SO mixture of water and ethylene glycol antifreeze will provide freeze
protection to -37°G or -34°F.) You should do this even if you don't
expect freezing temperatures. Periodic
replacement of coolant is needed to replace the anti-corrosion additives that wear out with use. Coolant that
has become dark in color shows that it needs to be changed for this reason.
• Add ethylene glycol base antifreeze that meets GM SpecHication 1825-M
when antifreeze has to be added because of coolant loss or for more
protection against freezing at temperatures less than stated.
NOTICE: Do not use methanol-base antifreeze, or alcohol, . or plain water alone, in your vehicle at anytime. They will boil ata lower point than that at which the "TEMP" light (or temperature gage) will warn of overheating, and they do not provide proper protection against corrosion.
Thermostat
The engine coolant temperature is controlled by a thermostat. It stops coolant
flow through the radiator until a preset temperature is reached. This thermostat
is installed in the engine coolant oullet on the engine block. The same
thermostat is used in both winter and summer. When a replacement is needed, AG-Oelco paris are recommended.
5-9
Page 87 of 105
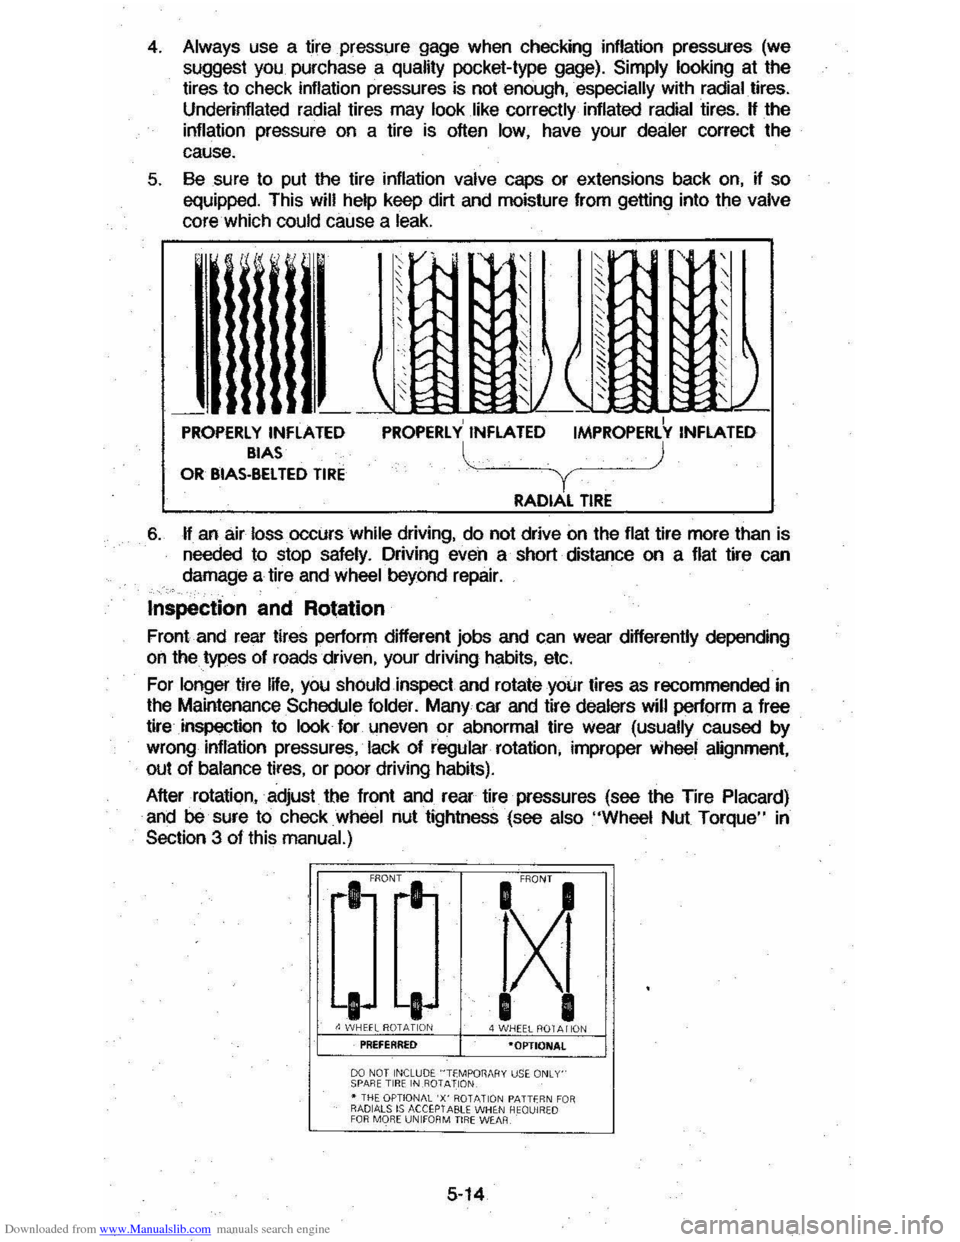
Downloaded from www.Manualslib.com manuals search engine 4. Always use a tire pressure gage when checking inflation pressures (we
suggest you purchase a
quality pocket-type gage). Simply looking at the tires to check inflation pressures is not enough, . especially with radial. tires.
Underinflated radial tires may look like correctly inflated radial tires. H the
inflation pressure on a tire is often low, have your dealer correct the
cause.
5. Sesure to put the tire inflation valve caps or extensions back on, if so
equipped. This will help keep dirt and moisture from getting into the valve core which could cause a leak.
't! [' V-. , ,-',/ ,
~v"
, " ,
, ,,-I"-v " I'V " ' v-I'-,
" "
,/ " I~ ~::;: ~ ~, ,/
~ J ( " ~ ~ ~ r;S ) :::: ~ ~ t;: ~/ 2~ t: ,
\' , --I PROPERLY INflATED PROPERLY INFLATED IMPROPERLY INFLATED BIAS l ) OR BIAS-BelTED TIRE Y RADIAL TIRE
6. H an air loss. occurs while driving, do not drive on the flat tire more than is
needed to stop safely. Driving even a short distance on a flat tire can
damage a tire and
wheel beyond repair.
Inspection and Rotation
Front and rear tires perform different jobs and can wear differently depending
on the types of roads driven, your driving habits, etc.
For
longer tire IHe, you shOuld inspect and rotate your tires as recommended in
the Maintenance Schedule folder. Many car and tire dealers will perform a free
tire
inspection to look for \meven or abnormal tire Wear (usually caused by
wrong inflation pressures, lack of regular rotation, improper wheel alignment,
out of bslance tires, or poor driving habits).
After rotation, adjust the front and rear tire pressures (see the Tire
Placard)
and be sure to check wheel nut tightness (see also "Wheel Nut Torque" in
Section 3 of this manual.)
fXi
I I 4 WHEEL ROT A I iON ·OPTIONAl
00 NOT INCLUDE "TfMPOT1MIY uS~ ONLY' SPARE TIR E IN .R01 AllON • THE OPTIONAL 'X' ROTATIO N PATTfR N FO R RADIALS IS ACCEPTABU WHE N HEQUIRW
FOR MO RE UNIfOR M TIRE WEAR
5-14
Page 90 of 105
Downloaded from www.Manualslib.com manuals search engine ,
Temperature -A, B, C
The temperature grades are A (the highest), B, and C, representing the tire's
resistance 10 the generation of heat and its ability 10 dissipate heat when tested
under controlled conditions on a specified indoor laboratory test wheel.
Sustained high temperature can cause the material of the tire to degenerate
and reduce tire life, and excessive temperature can lead to sudden tire failure .
The grade
C corresponds 10 a level of performance which all passenger car
tires must meet under the Federal Motor
Vehicle Safety Standard No. 109. Grades B and A represent higher levels of performance on the laboratory lest
wheel than the ",nimum required by law.
Warning : The temperature grade forlhis tire is established for a tire that is properly inflated and not overloaded . . Excessive speed, underinflation, or
excessive loading, either separately or in combination , can cause heal buildup and possible tire failure .
These grades are molded on the sidewalls 01 passenger car tires.
While
the tires available as 'standard or optional equipment .on General
Motors vehicles may vary with respect to these grades, all such tires meet General Motors performance s!andards and have been approved for
use on General Motors vehicles. All passenger car tires must conform to Federal safety requirements in addition to these grades.
You
should replace your tires when:
1 . The tires are worn to a point where 1.6
milHmeters (2/ 32 inch) or less t.read remains, or the cord or fabric is showing. '.
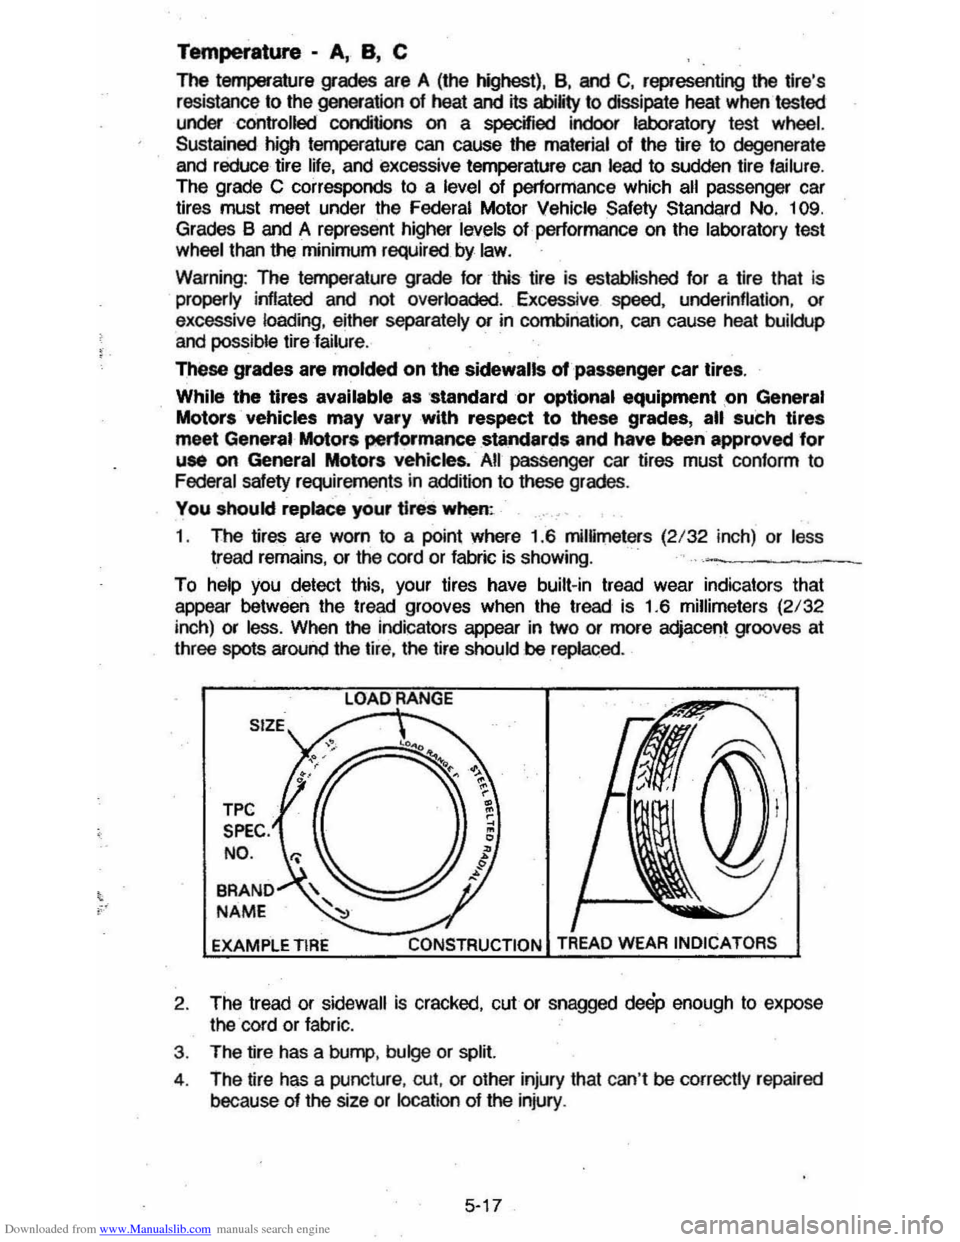
To help you detect this, your tires have built-in tread wear indicators that
appear between the tread grooves when the tread is 1.6 millimeters
(2/32
inch) or less. When the indicators appear in two or more adjacent grooves at
three spots around the tire, the tire should be replaced.
TPC
SPEC. NO .
BRAND
NAME
EXAMPLE TIRE LOAD
RANGE
CONSTRUCTION
2
. The tread or sidewall is cracked, cut or snagged deep enough to expose
the cord or fabric.
3. The tire has a bump , bulge or split.
4 . The tire has a puncture , cut, or other injury thai can 't
be correctly repaired
because of the size or
location of the injury .
5-17