1982 CHEVROLET CAMARO parking brake
[x] Cancel search: parking brakePage 54 of 875

GM – CAMARO 1982-1992 – Repair Guide (Checked by WxMax) 54
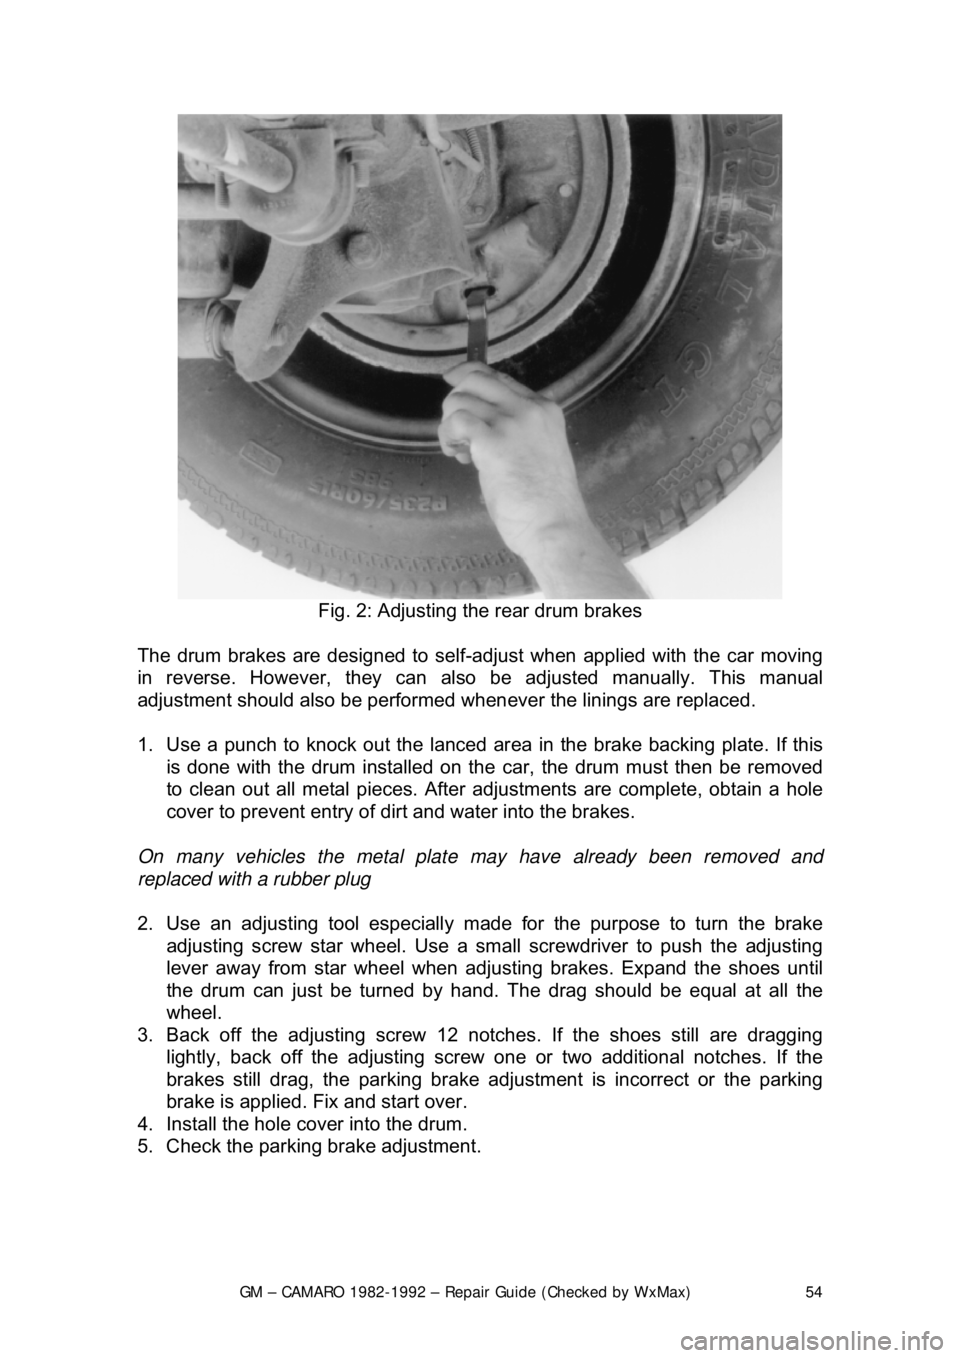
Fig. 2: Adjusting the rear drum brakes
The drum brakes are designed to self -adjust when applied with the car moving
in reverse. However, they can al so be adjusted manually. This manual
adjustment should also be performed when ever the linings are replaced.
1. Use a punch to knock out the lanced ar ea in the brake backing plate. If this
is done with the drum installed on the car, the drum must then be removed
to clean out all metal pieces. After adj ustments are complete, obtain a hole
cover to prevent entry of dirt and water into the brakes.
On many vehicles the metal plat e may have already been removed and
replaced with a rubber plug
2. Use an adjusting tool especially m ade for the purpose to turn the brake
adjusting screw star wheel. Use a smal l screwdriver to push the adjusting
lever away from star wheel when adj usting brakes. Expand the shoes until
the drum can just be turned by hand. The drag should be equal at all the
wheel.
3. Back off the adjusting screw 12 notches. If the shoes still are dragging
lightly, back off the adjusting screw one or two additional notches. If the
brakes still drag, the par king brake adjustment is in correct or the parking
brake is applied. Fi x and start over.
4. Install the hole cover into the drum.
5. Check the parking brake adjustment.
Page 95 of 875

GM – CAMARO 1982-1992 – Repair Guide (Checked by WxMax) 95
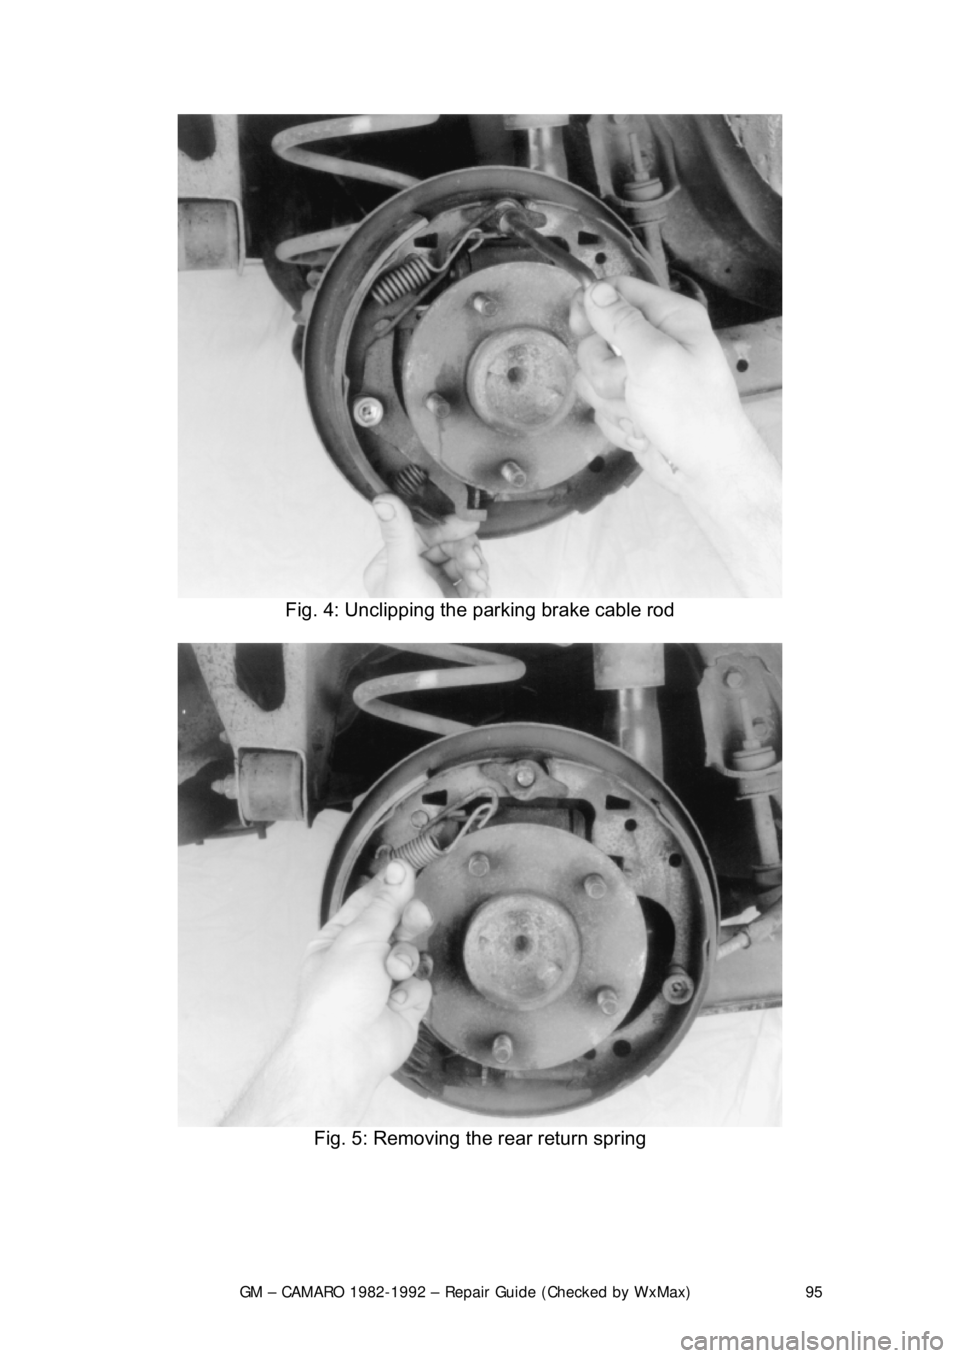
Fig. 4: Unclipping the parking brake cable rod
Fig. 5: Removing the rear return spring
Page 96 of 875

GM – CAMARO 1982-1992 – Repair Guide (Checked by WxMax) 96
Fig. 6: Removing the parking brake rod
Fig. 7: Removing the shoe guide plate
Page 99 of 875

GM – CAMARO 1982-1992 – Repair Guide (Checked by WxMax) 99
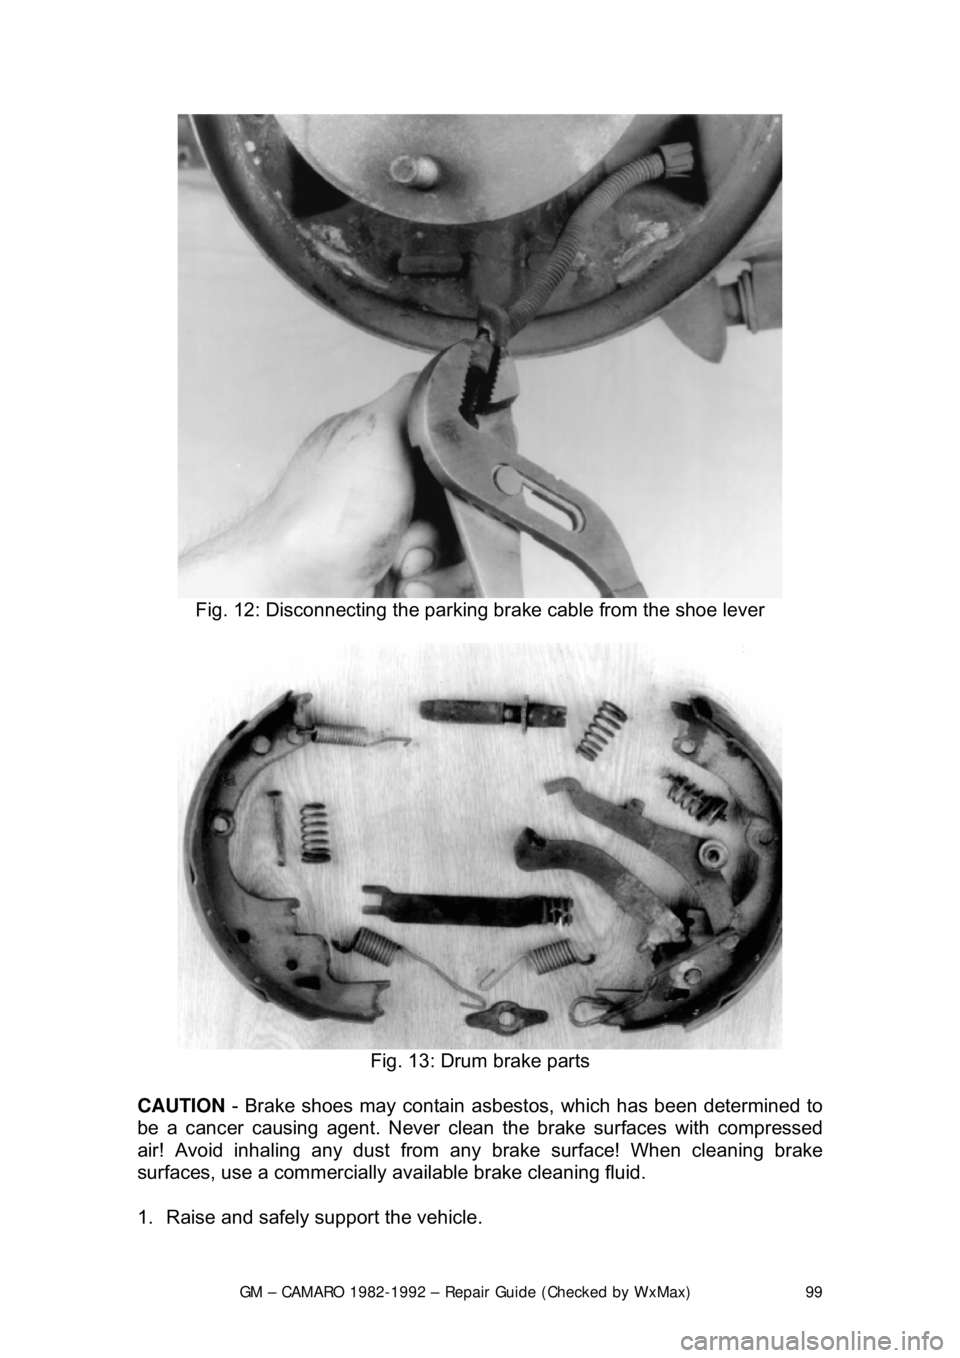
Fig. 12: Disconnecting the parking br ake cable from the shoe lever
Fig. 13: Drum brake parts
CAUTION - Brake shoes may contain asbest os, which has been determined to
be a cancer causing agent. Never clean the brake surfaces with compressed
air! Avoid inhaling any dust from any brake surface! When cleaning brake
surfaces, use a commercially available brake cleaning fluid.
1. Raise and safely support the vehicle.
Page 100 of 875

GM – CAMARO 1982-1992 – Repair Guide (Checked by WxMax) 100
2. Remove the wheel and tire assemblies.
3. Remove the brake drum.
4. Remove the return springs.
5. Remove the hold-down springs and
pins. Remove the lever pivot.
6. Remove the actuator link whil e lifting up on the actuator lever.
7. Remove the actuator lever and lever return spring.
8. Remove the shoe guide, parking brake strut and strut spring.
9. Remove the brake shoes and disc onnect the parking brake lever from the
shoe.
10. Remove the adjusting screw assemb ly and spring. Remove the retaining
ring, pin from the secondary shoe.
To install:
Any part or spring which may appear worn should be replace. The short shoe
(primary) should be installed to the fr ont of the vehicle and the long shoe
(secondary) should be installed to the rear . After complete installation of the
brake shoes a clicking sound should be heard when turning the adjusting screw
or self-adjuster. Do not switch parts fr om the left or right brake assembly, the
adjusters are designated Left and Right.
11. Clean dirt from all parts and wire brush raised pads on backing plate.
Lubricate backing plate pads and adjus ting screw with brake grease.
12. Install the parking brake lever on the secondary shoe with the pin and new
retaining ring.
13. Install the adjusting screw and spring. Lubricate the adjusting screw with
brake (white) grease.
14. Clean and lubricate the contact points of the backing plate. Install the brake
shoe assemblies after installing the parking brake cable on the shoe.
15. Install the parking brake strut and st rut spring by spreading the shoes apart.
16. Install the shoe guide, actuator lever and lever return spring.
17. Install the hold-down pins, lever pivo t and springs. Install the actuator link on
the anchor pin.
18. Install the actuator link into the act uator lever while holding up on the lever.
19. Install the shoe return springs. Inst all the brake drum. Install the wheel and
tire assemblies.
20. Adjust the brake and lower the vehi cle. Check emergency brake for proper
adjustment.
Page 112 of 875

GM – CAMARO 1982-1992 – Repair Guide (Checked by WxMax) 112
4. Position a C-clamp a
nd tighten until the piston bottoms in the base of the
caliper housing. Make sure 1 end of the C-clamp rests on the inlet fitting bolt
and the other against the outboard disc brake pad.
It is not necessary to remove the parki ng brake caliper lever return spring to
replace the disc brake pads.
5. Remove the upper caliper guide pin bolt and discard.
6. Rotate the caliper housing. Be careful not to strain the hose or cable conduit.
7. Remove the disc brake pads.
To install:
8. Clean all residue from the pad guide surfaces on the mounting bracket and
caliper housing. Inspect the guide pins for free movement in the mounting
bracket. Replace the guide pins or boot s, if they are corroded or damaged.
9. Install the disc brake pads. The out board pad with insulator is installed
toward the caliper housing. The inboard pad with the w ear sensor is installed
nearest the caliper piston. The wear sens or must be in the trailing position
with forward wheel rotation.
10. Rotate the caliper housing into it 's operating position. The springs on the
outboard brake pad must not stick through the inspection hole in the caliper
housing. If the springs are sticking thr ough the inspection hole in the caliper
housing, lift the caliper housing and make the necessary corrections to the
outboard brake pad positions.
11. Install a new upper cali per guide pin bolt and tight en to 26 ft. lbs. (35 Nm).
Tighten the lower caliper guide pin bolt to 16 ft. lbs. (22 Nm).
12. With the engine runni ng, pump the brake pedal slo wly and firmly to seat the
brake pads.
13. Check the caliper parking brake levers to make sure they are against the
stops on the caliper housing. If the leve rs are not on their stops, check the
parking brake adjustment.
14. Remove the 2 wheel nuts from t he rotor and install the wheel and tire
assembly.
15. Lower the vehicle, che ck the master cylinder fluid level and road test the
vehicle.
BRAKE CALIPER
REMOVAL & INSTALLATION
CAUTION - Brake pads contain asbestos, which has been determined to be a
cancer causing agent. Never clean the brake surfaces with compressed air!
Avoid inhaling any dust from any brake surface! When cleaning brake surfaces,
use a commercially available brake cleaning fluid.
1982-88 MODELS
Page 113 of 875

GM – CAMARO 1982-1992 – Repair Guide (Checked by WxMax) 113
1. Remove 2/3 of the brake fluid from the ma
ster cylinder. Raise the car.
Remove the wheel. Reinstall a wheel nut, with the flat side toward the rotor,
to hold the rotor in place.
2. Loosen the parking brake cable at the equalizer. At the caliper, remove the
parking brake cable, damper and spring from the lever.
3. Hold the parking brake lever and re move the lock nut. Remove the lever,
seal and anti-friction washer.
4. Position a C-clamp ov er the caliper and force the piston into its bore.
Remove the C-clamp. Rein stall the lever, seal and nut to the caliper.
5. Loosen the brake tube nut and disc onnect the brake tube from the caliper.
Plug the tube to prevent t he loss of brake fluid.
At the right rear wheel, it may be necessary to remove the rear bolt from the
lower control arm to allow the lower caliper mounting bolt to be removed.
6. Remove the mounting bolts using a
3/8 in. Allen head socket. Remove the
caliper and inspect the mounting bolts for corrosion. If necessary, replace
the mounting bolts.
To install:
7. Place the caliper onto the rotor and install the m ounting bolts. Torque the
mounting bolts to 30-45 ft . lbs. (40.7-61 Nm).
8. Install a new anti-friction washer and lubricate the lever with silicone brake
lube. Install the lever on the actuator with the lever pointing down. Rotate the
lever toward the front of the car and hol d while installing the nut. Torque the
nut to 30-40 ft. lbs. (40.7-54.2 Nm), then rotate the lever back against the
stop on the caliper.
9. Install damper and spring. Connect the parking brake cable. Tighten the
cable at the equalizer until the lever starts to move off the stop on the
caliper, then loosen the adjustment unt il the lever moves back against the
stop.
10. Remove the nut holding the rotor in place and install the wheel. Lower the
car and fill the master cylin der with brake fluid.
1989-92 MODELS
1. Raise and safely support the vehicle.
2. Loosen the parking brake cable at the equalizer.
3. Remove the wheel and tire assembly. Inst all 2 wheel nuts to retain the rotor.
4. Remove the bolt, inlet fitting and was hers from the caliper housing. Plug the
holes in the caliper housing and inlet fitting.
5. Remove the caliper lever return spri ng only if it is defective. Discard the
spring if the coils are opened.
6. Disconnect the parking brake cable from the caliper lever and caliper
bracket.
7. Remove the 2 caliper guide pin holes.
8. Remove the caliper housing from the rotor and mounting bracket.
To install:
Page 114 of 875

GM – CAMARO 1982-1992 – Repair Guide (Checked by WxMax) 114
9. Inspect the guide pins and boots and re
place if corroded, worn or damaged.
Check the inlet fitting bolt for blockage.
10. Install the caliper housing over t he rotor and into the mounting bracket.
Install the 2 caliper guide pin bolts. Tighten the upper caliper guide pin bolt
to 26 ft. lbs. (35 Nm) and the lower gui de pin bolt to 16 ft. lbs. (22 Nm).
11. Connect the parking brake cable to t he caliper bracket and caliper lever.
Install the caliper lever return spring, if removed.
12. Install the inlet fitting, bolt and 2 new washers to the caliper housing. Tighten
the bolt to 22 ft. lbs. (30 Nm).
13. Bleed the brake system.
14. Adjust the parking brake free trav el if the caliper was overhauled.
15. Lower the vehicle and cycle the parking brake.
16. Raise and safely support the vehicle.
17. Inspect the caliper parking brake levers and ensure they are against the
stops on the caliper housing. If the levers are not on their stop, refer to the
parking brake adjustment.
18. Remove the 2 nuts securing the roto r and then install the wheel and tire
assembly. Lower the vehicle.
19. With the engine running, pump the br ake pedal slowly and firmly 3 times to
seat the disc brake pads. Check the hydraulic system for leaks.
OVERHAUL
1982-88 MODELS
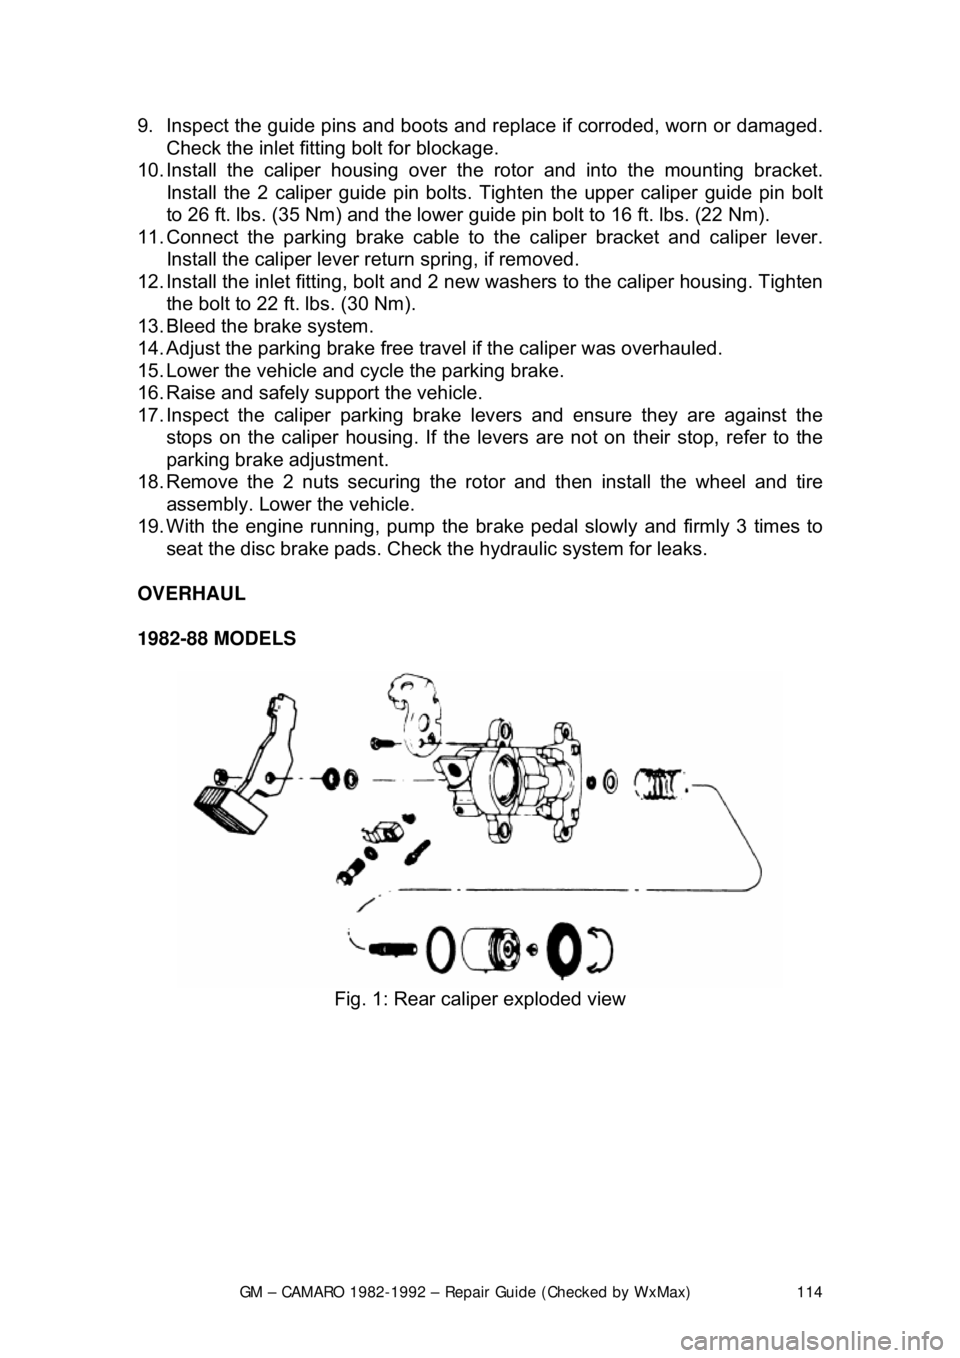
Fig. 1: Rear caliper exploded view