1980 CHEVROLET CITATION fuel pressure
[x] Cancel search: fuel pressurePage 5 of 95
Downloaded from www.Manualslib.com manuals search engine SECTION 1
BEFORE DRIVING YOUR
CHEVROLET
DRIVER DAILY CHECKLIST
Be sure you know your vehicle and its, equipment and how to use it safely.
Before Entering the Vehicle
1. See that windows, mirrors, and lights are clean and unobstructed.
2. Check whether any tire is low or flat. (If any tire looks different from nonnal,
we recommend you check
it with a tire pressure gage.)
3. Check that all lights work.
4. Look for fluid leaks.
5. Be sure everything is properly stowed.
6. Check the area behind the vehicle if you are about to back up.
Before Driving Off
1. Lock all doors.
2. Adjust seat.
3. Adjust inside and outside mirrors.
4. Fasten seat belts.
5. Check that all the warning lights work as the key is turned to "'Start."
6. Check all gages (including the fuel gage).
7. Release the parking brake (and see that the "Brake" light turns om.
Seerelated topics in this manual, or the Maintenance Schedule folder, if problems
are found.
Guard Against Theft
For tips on how to protect your vehicle and its contents, see "Starting and
Operating" in section 2 of this manuaL
KEYS
Two different keys are· provided for the locks on your vehicle. The key code is
stamped on the "knock out" plug in each key head.
• Key with square head (letter "A" or "e") -for ignition lock only.
• Key with oval head (letter "8" or "0") ~ for all other locks.,
For vehicle security:
• Record the key code numbers; then knock the plugs out of the keys.
• Keep the key codes in a safe place (such as your wallet), NOT IN THE
VEHICLE.
If the original keys are lost, duplicates can
be made using the key codes. Contact
any
OM dealer or a locksmith.
If yO~i park in an attended lot, leave only your square-head ignition key.
1-1
Page 22 of 95
Downloaded from www.Manualslib.com manuals search engine Air Conditioner
If your vehicle has an optional air cOnditioner , use the "Economy;' (" Vent" or
"Heater") position s whenever possible, The air conditioner compr essor is not on in these positions and the reduced engine load can improve fuel eco nomy.
Engine Maintenance
An engine that is properly maintained wjJl provide better fuel economy than .one
thai is not . One misfirin g spa rk plu g will cut fuel economy quite a bit , and will
make a difference in the amount of pollution _emitted fro m your vehicle .
Excess Weight
Fuel economy is related to the work the engine must do. The heavier the load,
the more fuel
it takes to run your vehicle. Keep weight to a minimum by taking o~t any luggage or cargo when it is not needed. .
Tire Inflation
Underinflation not only causes needLess wear of the tires, but can also waste fuel. It's a good idea to check tire pressures often and, for the best fuel econ omy, keep
your tires inflated to the highest
pr~suresshown on the Tire Placard on'the left
front doo r of your car.
Wheel Alignment
Improper toe alignment will cause the tires to roll at an angle, which will result
in faster tire wear.
It takes power to ove rcome this improper alignment which,
in tum, wastes fuel.
STEERING COLUMN CONTROLS
ANTI-THEFT STEERING COLUMN LOCK
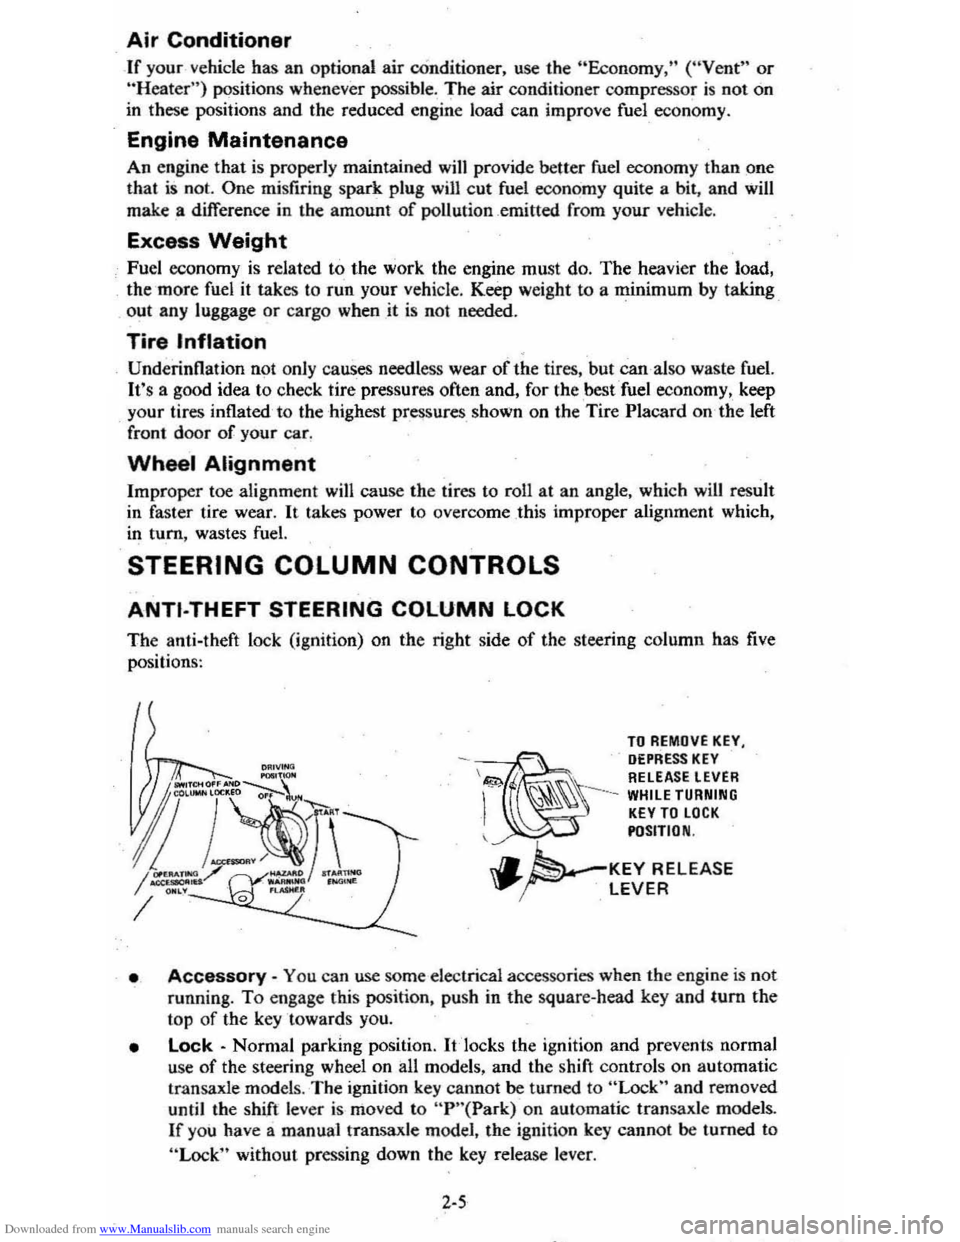
The anti-theft lock (ignition) on the right side of the steering column has five
positi on
s:
TO REMOVE KEY, DEPRESS KEY \&!;;>. RELEASE LEVER
-~ I
~~~ --WHILE TURNING KEY TO LOCK POSITION
.. ~'-KEY RELEASE "..~ LEVER
• Accessory -You ca n use some elec trical a ccessories when the e ngin e is not
running.
To engage this position, push in the square-head key and tum the
top of the key towards you.
• Lock -Norm al parking position. It 'locks the ignition and prev en ts normal
use
of the steering wheel on all models, and the shift controls on automatic
transaxl e model
s. The ignition key canno t be turned to "Lock" and removed
until the shift lever is mo ved to "P "( Park) on automatic transaxle mode1s .
If you have a manual transaxle model, the ignition key cannot be turned to
"Lock" without pressing down the key release leve r.
2-5
Page 27 of 95
Downloaded from www.Manualslib.com manuals search engine AUTOMATIC TRANSAXLES
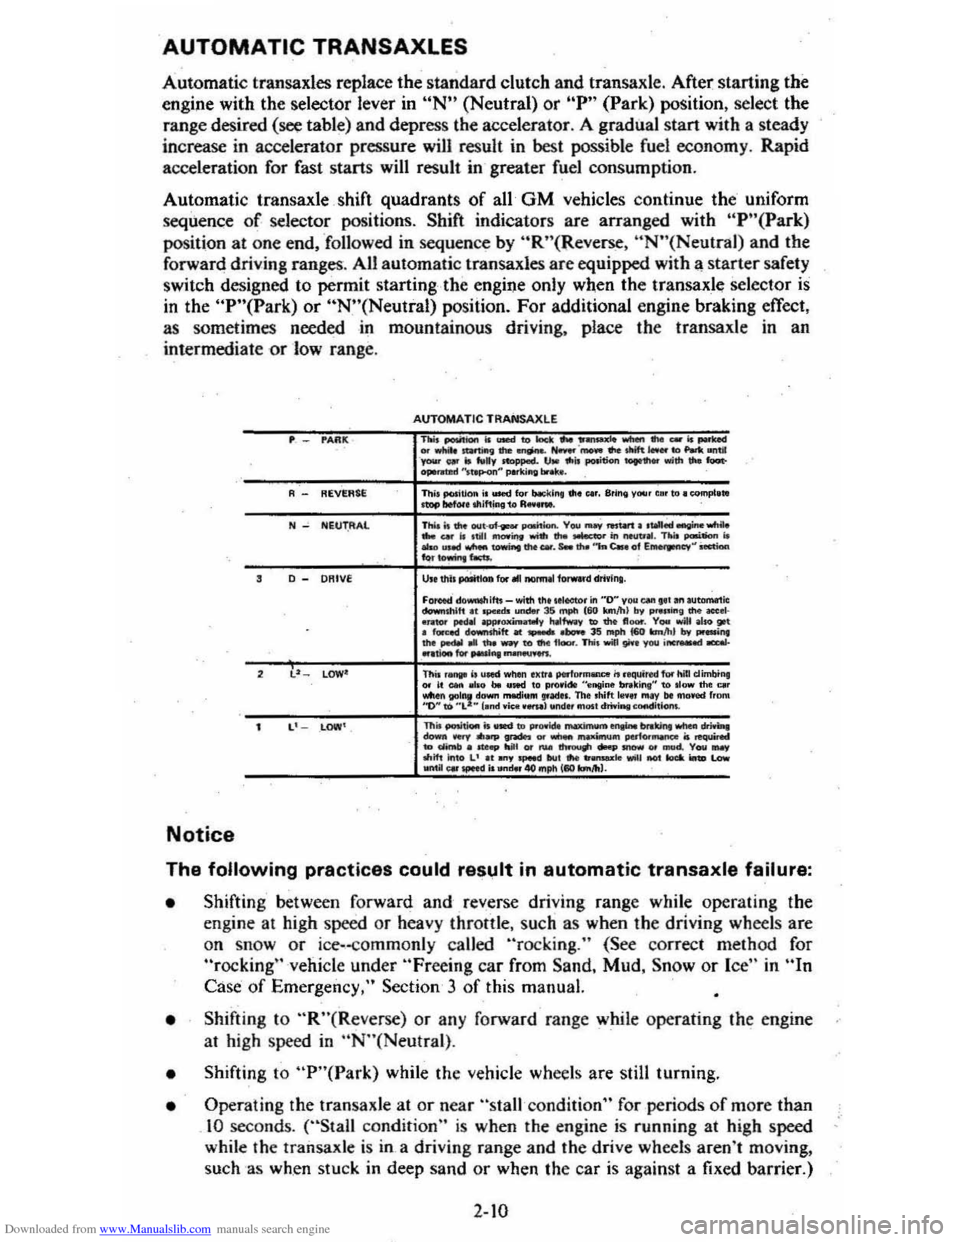
Automatic transaxles replace the standard clutch and transaxlc. After starting the
engine with the selector lever in
uN" (Neutral) or "P" (Park) position, select the
rang e desired (see table) and depress the accelerator. A gradual start with a steady
increase in accelerator pressure will resuh in best possible fuel economy. Rapid
acceleration for fast starts will result in greater fuel consumption.
Automatic transaxle
. shift quadrants of all· GM vehicles continue the' u nifo rm sequence of selector positions. Shift indicators are arranged with "P"(Park)
position at one end . "followed in sequen ce by "R"(Reverse . "N"(Neutral) and the
forward driving ranges. All automatic transaxles are equipped with a starter safety
s witch designed to permit
starting -the engine only when the transaxle selector is in the "P"(Park) or "N"(Neutral) posiiion. For additional engine braking effect,
as sometimes needed in mountainous driving, place the transaxle in an
intermediate
or low range.
"Afll(
REVf.AU
N NEUT.AAl
D _ DRIVE
l' lOW'
Notice
AUTOMATIC TRAHSA XlE TIoit PMitIotn Is ..... to> Iudc ... 11...-10 _ ... _ is ....-....... ~II'e..,.;.,a.'""'·_ ... tItif ...... "' ........ 1iI _ \@ Is .... v """""",. IJM Ito;, pooition .......... "';111 Oo to«-ope...ud "'hp<>n~ pMkiftll br .....
Th .. ,....ltIon i ...... for bocl\lft. III. Clr. Sring y .... r elf to. complnl mop bel .... mifting 1" 1'1,,"_ Thi.o;' die _"' __ paoi'I ..... V .... ..., .... W1 •.......... wItiIo .... "" 10 ,till _irlti ..... !he ....... in ",,",II. TN ...--. is _ uMCI_.--. .... _. s.. .... ',,",c.. "I E~~ Oect;oa ..... owW>e , ......
U .. thl . ~OII for III""nnai f{orwud driYinl. Foroecl do...w.ifto _ .. ith.1'>o III ........ in "D" you ....... ' ."au_ic ......... "'111 ... pcodo undw 35 mpIo (60 konlll) try P .... inl .... _01· ... 101' peOoI _-V Io.fI"...., to .... n_. V .... wiN aloo go! o fur-.cl "-shit! till .-IlooooI 3S .-ph 160 """"'. Iry ......... "",..... .... .....,. ....... ,'-.n.n ..... pyoui __ ,,"Iiooo ............ "'-'"". This ,_ I, u"" .. hili Ixtr. PtrfDfrnonce it roqui red lothill dimbin, .,.. I. _ 01'0 bo U"" '0 pro.l ... "'''IIio& mking" to .Iow tho Clr ~n.r.!rt~~;::: =~':.~::~. ~:~::.::"!=I=.~O_ frDIW
TIl. ~ is ........... 00i6t....,.;,-. ....... ""' ..... _ ....... ...... ...., ... _..-. ... _ --..... .... '.,.._ ir. __ "' ..... _ ....... ""' .............. ..-... .-d. Yow_ ""if! iftlO L' It....,"-" kI' .... -'e "'""..o! .... ionD ~ ___ ~ it """', "I) mph 1110 .... ", •.
The following practices could result in automatic transaxle failure:
• Shifting ' between forward and reverse driving range while operating the
engine at high speed or heav y throttle . such as when the driving wheels are
on
snOw or ice-
• Shifting to "R"(Reverse) or any forwa rd range while operating the engin e
al high speed in "N"(Neulral) .
• Shifting to "P"(Park) while the vehicle wheels are still turning.
• Oper ating the transaxle at or near "stall condition" for periods of more than 10 seconds. ("Stall condition" is when the engine is runnin g at high speed
while the
trailsaxle is in a driving range and the drive wheels aren't moving,
such
as when stuck in deep sand or when the car is against a fixed barrier.)
2-10
Page 53 of 95
Downloaded from www.Manualslib.com manuals search engine JACKING
CAUTION
To help avoid personal injury:
• Follow all jackin g and stowag e instructions.
• Use jack only fo r liftin g this venicle du -rin g wheel c h a ng e.
• Nev er ge t ben eath th e vehiCle, start or run en g in e while vehicle is supported b y jac k.
• Always securely res tow spare tire (o r flat tire ) an d all jackin g equipment.
Wheel Nut Torque
CAUTION: As soon as possible after Installing 8 wheel-and at the intervals shown on the chart-in the Maintenance Schedule foldet-han 8 m.chanic tighten whe&l nuta with II torque wrench to the specifications shown in "SpeCifications ," Section 7 of this manual. Wheel nuts should be tightened alternately and evenly to the correct torque. Never us. oil or grease on studs or nuts. Improperly tightened wheel nuts could eventually allow the wheel to come off while the vehicle is moving, possibty causing loss of control.IAlso see the Caution in "Service and Maintenance," Seetion 5 of this manual regarding the danger of mixing metric and customary fasteners.)
Stowage of Tire and Jack
CAUTION:·AlwaYs MOurely restow the spare tire assembty (or flat tire). all jacking equipment. and the cover, using the means provided. When driving the car with the compact spare installed and the reer seat folded down, stow the wheel cover flat on the rear floor behind the-right front seat. When the rear seat is up (or If It does not fold), stow the wheel cover in the trunk area. This will help keep such things from being thrown about and injuring peopla In the car in an accident.
Compact Spare
The compa ct sp are is des ig ned to save space in yo ur trunk, and its lighler weig ht
m ak es
it easi er to in stall if a flat tire occurs. The light~r weig ht als o helps improve fuel eco no my.
If you have a flat tire, follow the jack ing in struction s in this manual while keeping
t h ese point s in min d:
• Chec k inflati on press ure as soo n as practical after in sta llin g the s pa re ( use of a pocke t type: high pressure inflatio n gage is adv ised) and adjust to 415
k Pa (60 psi). The tire pressur e sh o uld be checked at least monthl y and kept at 415 kPa (60 ps i) while the tire is s tored.
• Co ntinuou s use at spe eds over 50 mph (80 km/h) is not re c omme nded .
NOTICE: Because this tire is amaUer than the standar d tire, vehicle ground clearance is reduced, Avoid driving over obstacles, and do not take your car U,rough an automatic car wash whila the spare is installed. The car may get caught possibly resulting in property damage.
• A trea d life of up to 3,000 mil es (4 800 kilomet ers) ca n b e expe cted, depe nding
on roa d condi tions and you r
driv ing habits . T o co nserve tire t read life. return the spar e to the sto rage area as soo n as the sta nd ard tir e ca n be repa ir ed -or
r
epl ac ed .
• Beca use the co mpac t spare was spec ifica lly designe d for your car, it s hould
no t be used on any other vehicle.
3-6
Page 62 of 95
Downloaded from www.Manualslib.com manuals search engine Section 5
SERVICE AND MAINTENANCE
CAUTION: As with any machine, take care when making any check, doing any maintenance. or making any repair. t6ayoid being injured. Note that some of the materials in this vehicle may be hazardous if used, serviced, or handled improperly. Improper or incomplete serVice could also lead to the vehicle itself not working properly which may result in personal injury, or damage to the vehicle or its equipment. If you have any question about carrying out some service, have the service done by 8 skilled mechanic.
REPLACEMENT FASTENERS
During car maintenance, any fasteners used to replace older ones must have the
same measurements and strength as those removed, whether metric or customary. (The numbers on the heads of metric bolts and on the surfaces of metric nuts show
their strength. Customary bolts use radial lines to show this, while most customary
nuts
do not have strength markings.) Fasteners taken from the car should be saved
for re-use in the same spot when possible. Where a fastener cannot be used again,
take care to choose a replacement that matches the old one.
For information and help, see your Chevrolet dealer.
CAUTION: This vehicle is primarily dimensioned in the metric system, Most fasteners are i'neti'icand many lire vary closein dimension to well-known customary fasteners in the inch system. Mismatched or incorrect fasteners can result in damage to the car or possibly personal injury.
MAINTENANCE SCHEDULE
For owner convenience , a separate folder has been provided with your vehicle
which contains a complete maintenance schedule. It also briefly describes the
safety, emission control, lubrication and general service your vehicle requires.
The Maintenance Schedule folder is supplemented by this section of the Owner's
Manual, as well as a Warranty Information folder also furnished with your vehicle.
Read all three publications for a full understanding
of your vehicle's maintenance
needs.
You can get a replacement Maintenance Schedule from your dealer or send the VIN(or serial) number of your vehicle to Consumer Relations, Chevrolet Central
Office, Chevrolet Motor Division, Detroit, Michigan 48202.
Fuel Cap
The fuel tank filler cap has a "screw-on ratcheting type" feature. To·remove:
•
Rotate cap counterclockwise to clear the inside of the filler neck. This
will allow any residual pressure
to escape.
• To install, reverse this procedure and tighten cap securely until a "ratcheting", clicking sound is heard indicating cap is on properly.
NOTICE: If you need to replace the fuel cap, use only a cap with these same features as specified for your model. An incorrect fuel cap can result in a serious malfunction of the fuel system or emission control system. You can get a correct replacement cap from your dealer.
5-1
Page 72 of 95
Downloaded from www.Manualslib.com manuals search engine LUGGAGE/CARGO LOAO CAPACITY
Maximum Luggage Compartment Load
Coupe 155 Pounds/70.2 Kilograms
Sedan 142 Pounds/64.5 Kilograms
NOTICE: Total combined weight of luggage compartment
load, luggage rack load (when-equipped) •. and passengers must not exceed the vehicle capacity weight (shown on the Tire Placard lOcated on the.left front door).
Inflation Pressure
The: cold inflation pressures listed on the Tire Placard provide for the best balance
of tire life, riding comfort. and vehicle handling under normal driving conditions.
If only one inflation pressure is recommended on the Tire Placard, this pressure
should be used for aU vehicle loading conditions. If your vehicle has two inflation
pressures listed on the placard, the "Max LDad" pressures can be used any time,
but must be used when you carry more passengers and cargo than is allowed in
the "Optional Pressures" section. The "Optional Pressures" can be used in lightly
loaded conditions by
'those who prefer the utmost in comfort. In all loading
conditions, use of the "Max Load" pressures will result in improved fuel economy.
Incorrect tire inflation pressures
can have adverse effects on tire life and_vehicle performance. Too Iowan" air pressure·"causes increased tire flexing and heat
build-up. This weakens the tire and increases the chance of damage or failure. It
can result in tire overloading, abnormal tire wear, adverse vehicle handling, and
reduced fuel mileage. 'I'oohigh
an air pressure can result in abnormal wear, harsh
ride, and also increase the chance of dar:nage from road hazards.
Tire inflation pressures should be checked (this includes the spare tire, unless it
is a stowaway spare) and whenever your vehicle is serviced. Always checJ<.,tire
inflation pressures when tires are "cold."
1. The "cold" tire inflation pressure applies to the tire pressure when a vehicle
has
not· been driven more than-one mile (1.6 kilometers) after sitting for three
hours or more.
2. It is normal for tire pressures to increase 30 to 60 kilopascals (4 to 8 pounds
per square inch)
or more when the tires become hot from driving. Do not "bleed" or reduce tire inflation pressures after driving your vehicle. Bleeding
reduces the
"cold" inflation pressure and increase tire flexing, which can
result in tire damage and failure.
3. FOr sustained driving at speeds of 75 mph to 85 mph (120 km/h to 140 km/h),in countries where such speeds are permitted by law, cold
inflation pressures must be increased
30 kPa (4 psi) above the cold inflation
pressures stated on the Tire Placard up to the maximum for each load
range stated in
the_ chart below.
Sustained speeds of 75 mph to 85 mph (120 km/h to 140 km/h) ARE
NOT ADVISED when the 30 kPa (4 psi) adjustment would require pressures greater than the maximum for each load range stated on the chart. Sustained
driving at speeds over 85 mph (140 km/h), where permitted by law. IS NOT ADVISED unless your vehicle is equipped with special high speed tires
available from many tire dealers.
4. Forproper inflation pressures when towing trailers, see page 1-11 in this
manuat
5-11
Page 90 of 95
Downloaded from www.Manualslib.com manuals search engine Switch Headlights .... TEMP (Temperature) .. Locks Door ...
2~19 2-17 1-2
Ignition ............................................. .. 2-5 1-1 2-2
2-25 Keys .. Theft Protection .. Lowering Seats .. Love Seat, Child & Infant: .. Lugglige/Cargo Capacity ... Luggage Rack ... Maintenance Record .. Maintenance Schedule .. Manual Transaxle Clutch Adjustment. .. .
1-10 5-11 2·29 7-12 5-.1
Maintenance ........................................... . 5-8
5-8
2-11
2· 10 2-12 4-1 4-5
1-3
Operating Tips .. Operation .. Shift Speeds. Metal Cleaners .. Metal Damage, Body ... Mirrors, Rearview .. Mobile Radios-. Monoxide Caution, Carbon .. . 2-25 2-1
2-1 2-2
2-2
2-15 Muffler ............................................... . New Car Break-In Period Octane Rating, Gasoline ... Odometer Oil, Engine Capacity .. Change Interval.. Dipstick ... Filter ... PreSsure Gage .. Pressure Light... Recommendation (Gas) .. OIL Light.. Openings, Roof... Opening The Hatchback ... Hood .. Windows ..
6-.1 5-3 (inside Back Cover) 5-3,7·1 2·1-9 2-17
5-3
2-17 (See "Roofs")
2·26 (Inside Back Cover) 1-5 Operating Speeds, New Car... 2-2 Operating Tips Fuel Economy.. 2-4 Trailer Towing.. 1-13 Transaxle... 2-9 Ventilation System.. 2.20 Operation in Foreign Countries.. 2"3 Outside Rearview Mirror.. 1.3 Overheating, Engine.. 3-3 Overseas Operation.. 2.3 Owner Assistance.. 6-1 Owner's Record... 7-11 Oxygen Sensor., 5.2 Paint Care.. 4-4
Paint Damage .. Parking;. Parking Brake .. Parking Lights .. PCV Valve & Filter .. Peda'·TI"avel, Brake ... Pedal Travel, Clutch .. Polishing & Waxing .. Pollution Control Power
4-' 2-. 2-14 7-3 7·2 2-14 5~8
.-. (See "Emission Contron
7-8
Antennas Brakes .. Door Locks .... Seats ... Steering Pressure, Oil Light ... Pressure. Tire Inflation ... Pulse Wiper ...
2-25
2-14
1-2 1-' 2·12
2-15
5-11
2-7
Pushing to Start ................................ .. 5-2 Radiator Antifreeze (Coolant) .. Cap, Prassure .. Checking Level .. Overheating .. Thermostat...
Radios & Antennas ... Raising Seats ... Rear Cargo Cover ...................... .. Compartment .. . Window Defogger .. Trailering .. Rearview Mirrors .. Reclining Seats .. Recovery Tank, Coolant .. Release
Hatc.hback
Hood .. Seatback Latch ... Reminder Lights ....
Replacement Fasteners
5-5 5-. 5-5 3-3 5-7
2-23 -2-25
2-25
2-:27
2-2,2-28 2-21 '·11 1-3 1-' 5-5
2-25 (Inside Back Cover)
1-' (See "Lights") 5-1
5-1 Replacement Maintenance Schedule .. Raplacement Owner's·Manual... 7-13 Replacement Parts ............. ....................... 7-2 Restraints .. Rocking Car When Stuck .. Roofs Carrying Cargo On ... Luggage Carrier .. Rack .. Vinyl .. Vista-Vent. ... Rotation, Tire .. Rustproofing .. Rust Protection ... Sefety Belts .. Seats (See
"Seat Belts") 3-7
1-3,2-2,9 2·29 2·29
'-5 2-26 5-12
'-5 '-5 (See "Seat Belts")
Adjustment.. 1-4 Child... 1-10 Folding.. 2-25 Latches..
1-5 Reclining.... . '-4 Seat Belts Care.. 4.3 Child Restraint ............................................ 1.10 Inspection.. 1-10 Lap/Shoulder.. 1-6 Light/Buzzer Reminder... 1;8 Pregn~nt Women .. Rear Seat. ... Self-Adjusting Brakes .. SENSOR Indicator ..
1-8 2-25 2-14 2-18,5-2 Sensor, Oxygen.... 2-18,5-2 Service & Maintenance.. 5-1 Service Station Information (InSide Back Cover) Sheet Metlll Damage... 4-5
Page 95 of 95
Downloaded from www.Manualslib.com manuals search engine SERVICE STATION INFORMATION
Refer to "Service and Maintenance"
Section for Further Details
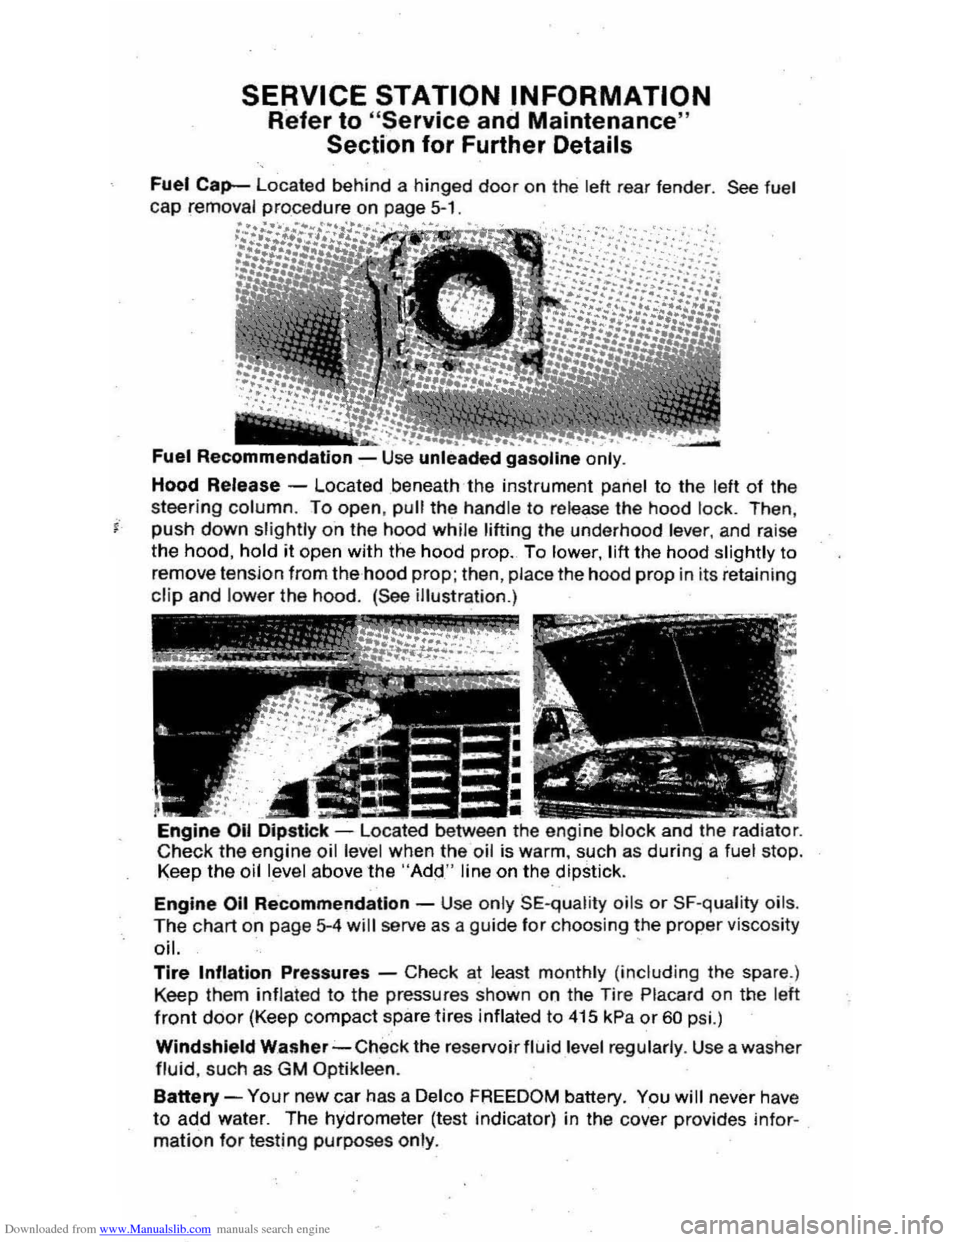
Fuel Cap-Located behind a hinged door on the lett rear fender. See fuel cap removal procedure on page 5-1.
Fuel Recommendation -Use unle~ded gasoline only .
Hood Release -Located beneath the instrument panel to the left of the
steering column. To open, pull the handle to re lease the hood lock . Then ,
j" push down slightly o "n the hood whil e lifting the underhood lever, and raise
the hood, hold it open with the hood prop. To lower, lift the hood slightly to
remove tension from the hood
prop; then , place the hood prop in its retainin g
clip and lower the hood. (See illustration.)
Engine Oil -located between the engine block and the radiator. Check the engine oil level when the oil is warm, such as during a fuel stop. Keep the oil level above the "Add" line on the .dipstick.
Engine Oil Re "commendatlon -Use only SE-q ualit y oils or SF-quality oils .
The chart o n page 5-4 will serve as a gu ide tor choosing the proper viscosity oil. .
Tire Inflation Pressures -Check at least monthly (including the spare .)
Keep them
inflated to the pressures shown on the Tire Placard on the left
front door (Keep compact spare tires inflated to 4t5 kPa or 60 psi.)
Windshield Washer-Check the reservoir fluid level regularly . Use a wa sher
fluid, such as GM Optikleen.
Battery -Your new car has a Delco FREEDOM battery. You will never have
to add water. The hydrometer (test indicator) in the cover provides infor
mation for testing purposes only.