1976 CHEVROLET MONTE CARLO instrument panel
[x] Cancel search: instrument panelPage 14 of 102
Downloaded from www.Manualslib.com manuals search engine Operation Foreign
Countries
.
In
Your car is designed to operate
on unleaded fuel
of approximately
91 reseljl'ch octane number.
If you plan to' operate your car
outs ide . the Continent al limits of
the
U niled States or Canada, there
is .a possibility that the best fuels
available
in some countries are so
low in oclane rating that excessive
knocking and serious engine dam
age may result from their
use. Also,
if leaded fuels are used in vehicles
designed for unleaded fuels, it may result
in the
deactivati on of the
catalytic converter, if the vehicle
is
so equipped , and possibly other
related problems.
The use of leaded
fuel
in a vehicle designed for un
leaded fuel
will require different
maintenance intervals.
To obtain in
formation on the
octan~ rating and
availability of non-leaded fuels
available in the countries in which
you plan to travel , and a mainte
nan ce schedule to
be used when
operating on leaded fuel, write to
Chevrolet Motor Division, Service
Department,Detroit, Michigan
48202, (or in Canada write to
General Motors of Canada Limited,
Owner Relations Department,
Oshawa, Ontario LlJ 5Z6), giving:
1-12
• The vehicle identification num
ber (on plate on instrument
panel ahead of the steering wheel
and vis ible through the wind
shield , or from registration slip
or title)
,.
• The country or countries in which
you plan
to travel.
It is recommended that you not
operate your car in any country not
having fuels meeting the require
ments of your car's engine
as these
may cause engine damage for which
Ch evr olet is not respon sible under
the term s of the Chevrolet New
Vehicle Warranty or Emission
Control Systems Warranty .
Page 15 of 102
Downloaded from www.Manualslib.com manuals search engine STARTING· AND OPERATING
Engine Exhaust Gas Caution (Carbon Monoxide)
Avoid Inhaling exhaust gases because
thay cont./n carbon mODOxlde, which by
1t'811 Is color/e.. and odor/elS. Carbon
monoxIde Is • dangerous gas fh,t can
caus. uneonsC /ousnftu and Is potentially
lelha/.
It at any time you .,u.pect that exhaust _
tumes ., •• nf.rlng'··the passenger com
partment , half' the -cause determined and
co".cfed a. soon as possible. II you must
drlv. under these c6ndltions, drive only
with a/l window. luliy open.
-
The best protection .gainst carbon mon
oxide entry Into the' C81 body Is a properly
maintained' engine exhaust system, car
body and body v.ntllallon syslem. /I Is
recommended tha' the -exhaust system
and body bo Inspecled by a compel"",
mechanic. .
• Each limo rhe vehlcl. I. ralsod lor 011
c"'ng8.
• Whn.If.r " change Is noticed in the
sound 01 IIH1 exhaul' sy~.m.
• Whene"., the ."haust system" 'under
body or TNr ot the .,ehlele is damaged.
S .. 1.0U1 Maintenance Schedule tolder
furn
shed with your .,ehle/. for Inspec
tion procedure .
To allow proper operation ot the car's
ventli.t/on system. keep tront ventilation
Inl.t grme e/hr at .now. I."ves or other
obstruction
.t .11 time,.
SITTING IN A PARKED CAR WITH
ENGINE RUNNING FOR
AN EXTENDED
PERIOD IS NOT RECOMMENDED.
Do not run ,.nglne In confined areas
such as ,garage. ",.iny more than needed
to mOlfe"vehic/. In' or' out of are •. When
v.hlc/ol • • 'opped In an UNCONFINED
ar •• with the engine running tor any more
than a 'short period , adJust he.ting or
cooling sy.tem to toree outside aIr into
car .s tollow,:
1. On cars not equipped with air condi
tioning.
set tan to medium or high
spefKi and upper control lever to any
poslUon oxcepl OFF.
2-1
2. ' On c." equipped with menu.' air call
dltlonlng, 8.t fIn to m.dium or high
speed. upper control lever to any pos;
: tlon except OFF, Ind lower contrOl
I.ver to Iny position except .xtrem •
. ,." COLD.
3. On cara equIpped with automatic a"
conditioning , .et control ,-.,e, to HI
except In hot wNther In .""lch cas.,
set lever In AUTO.
The Irunk lid should be closed while
driving to help prevent Inadvertently draw
Ing exhaust gases Into the car. It I. unwise
to drive .t high speed. for long dUrations
with
the trunk lid open. However, if for
some ,e.son the trunk must remain open
tor a period' whJle moving, or electrical
wiring
or other cabl. connections to a
trailer mu.t PlIS through the seal be
tween trunk lid and bo,dy, the following
precaut~ons shoUld be observed:
• Close all windows.
• Ad/u.t h •• tlng or cooling system to
force outside aIr Into car as described
In nem. 1, 2 and 3 abo,.e but with f.n
.al ., hIgh speod.
• On cats equipped with outside air vents
In or under Instrument panel, open
vonl. lully.
Page 24 of 102
Downloaded from www.Manualslib.com manuals search engine INSTRUMENT PANEL AND CONTROLS
o STANDARD
o OPTIONAL
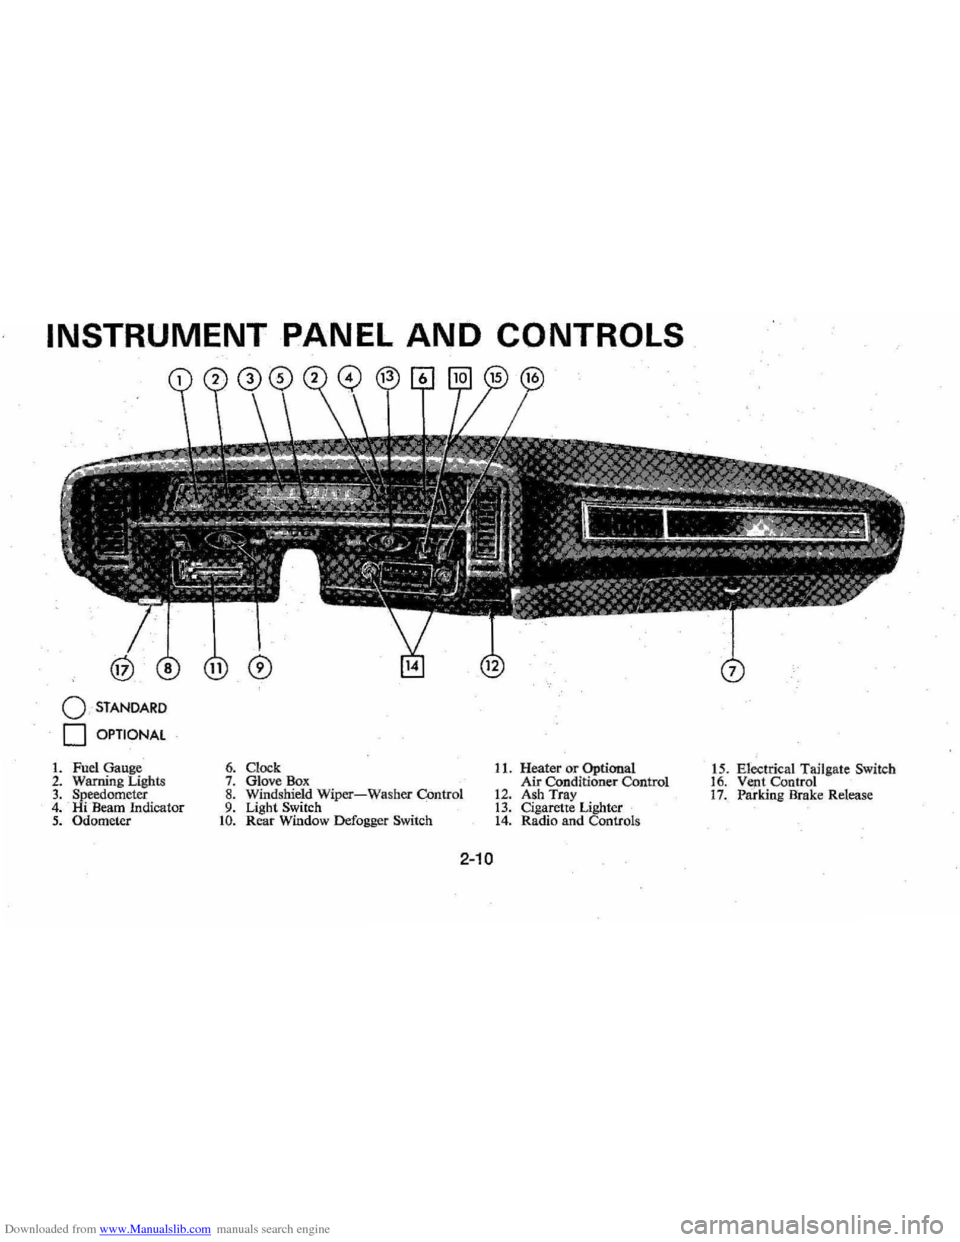
1. Fuel Gauge 2. Warning Lighls 3. Speedometer 4. Hi Beam Indicator 5. Odometer
6. Clock 7. Glove Box 8. Windshield Wiper-Washer COntrol 9. Light Switch to. Rear Window Defogger Switch
11. Heater or Optional
Air Conditioner Control
12. Ash Tray 13. Cigarette Lighter 14. Radio and Controls 1
5 . Electrical Tailgate Switch
16. Vent Control 17. Paridng Brake Release
2-10
Page 29 of 102
Downloaded from www.Manualslib.com manuals search engine I0'ads imp0'sed by .. trlliler hauling.
Cempensatef0'r thes~ l0'wer gauge
readings
resulting frem these heaVy
'Ib ads t0' produce gO'?d fuel ec0'n
emy.
. <,
Engine Temper~'iure. Gauge
This 0'Pti0'n~r',,'gauge indicates
c0'0'lant temperaplre which will
yary with air
teqiperature and 0'P
erating c0'nditi{>,iiS. The ignitien
switch must
be;" 0'n f0'r accurate
,re
the P0'inter to'iim0'vebey0'nd tije
center 0'f the ljimd. Should P0'inter
m0've t0' the line at the "H" end of
the band , stop engine 0'r reduce ,
speed
t0' penllit engine t0' cool.
Headlamp "ON"
Warning Buzzer
The eptienal headlamp reminder
buzzer provides
an audible warn
ing that the main light switch is in
one 0'f the "0'n"P0'siti0'ns ; either
pMking lights Of headlights.
The reminder ,buzzer is actuated
0'nly whenthe igniti0'n switch is
turned
i0' '''OFF'' er "LOCK" posi
ti0'n,
Clock
Reset th~ cl0'ck,if yeur car is S0'
'equipped, by pulling eut the kn0'b
.
and turning the hands cl0'ck\\fise if
slew , c0'unterclockwise if fast. This
will, if the
cl0'ck errer is five min
utes er. m0're,~utematicallyc0'm
pen sate f0'r tim.e' gain 0'r l~g, Sev
eral resettings, sev.eral daysi',apart,
maybe needed te pr0'perl y adjust
the
clOCk mechanism . Have yeur
c
l0'ck cleaned and 'eiled by a cem"
petent .cl0'ck serviceman "at least
every
twe years,
Cigarette Lighter
The cigarette lighter. is I0'cated
en the instrument panel face, T0'
,2-15
operate, push it in, When it be
C0'm.es heated, it aut0'matically P0'PS
eut ready fo r use,
WindshiEild Wiper and
Washer
The windshield wiping system
op(;lratesat tW0' speed s and is de
.
signed t0'wipe clear specific areas
of the windshield under m0'st in
, Clement "''leath
er cenditiens, The
windshielrlwipers w0'rk electri
cally and are not affected ' by en
gineeperatien,
FIlsh . the centrel levetDewn te
start the electric windshie ld wiper,
The
tW0'-speed electric wiper has
botli a' "lew " and a "high" speed
pesitien,
Pressing the centrel will send a
measured
ameunt ef water 0'r ether
cleaning agent ent0' the windshield,
Fill the washer
jar only % full
during the winter
te allew fer eX
pansien if the temperature sh0'uld
Page 31 of 102
Downloaded from www.Manualslib.com manuals search engine -';
val of ten seconds. The maximum
delay . position
is located just below
"Off" and the delay interval de
creases as the lever is moved further
down and into
. the "Low" and
"High" speed pas'itions. If the
"Wash" cycle is activated with the
wiper lever
in an Off, Delay, Low,
or High speed position , wiper op~
eration will return to this same
action after the wash cycle is com
pleted.
2-17
NOTE: For proper operation, the
"Wash" ,button must be fully de
pressed for one or two seconds.
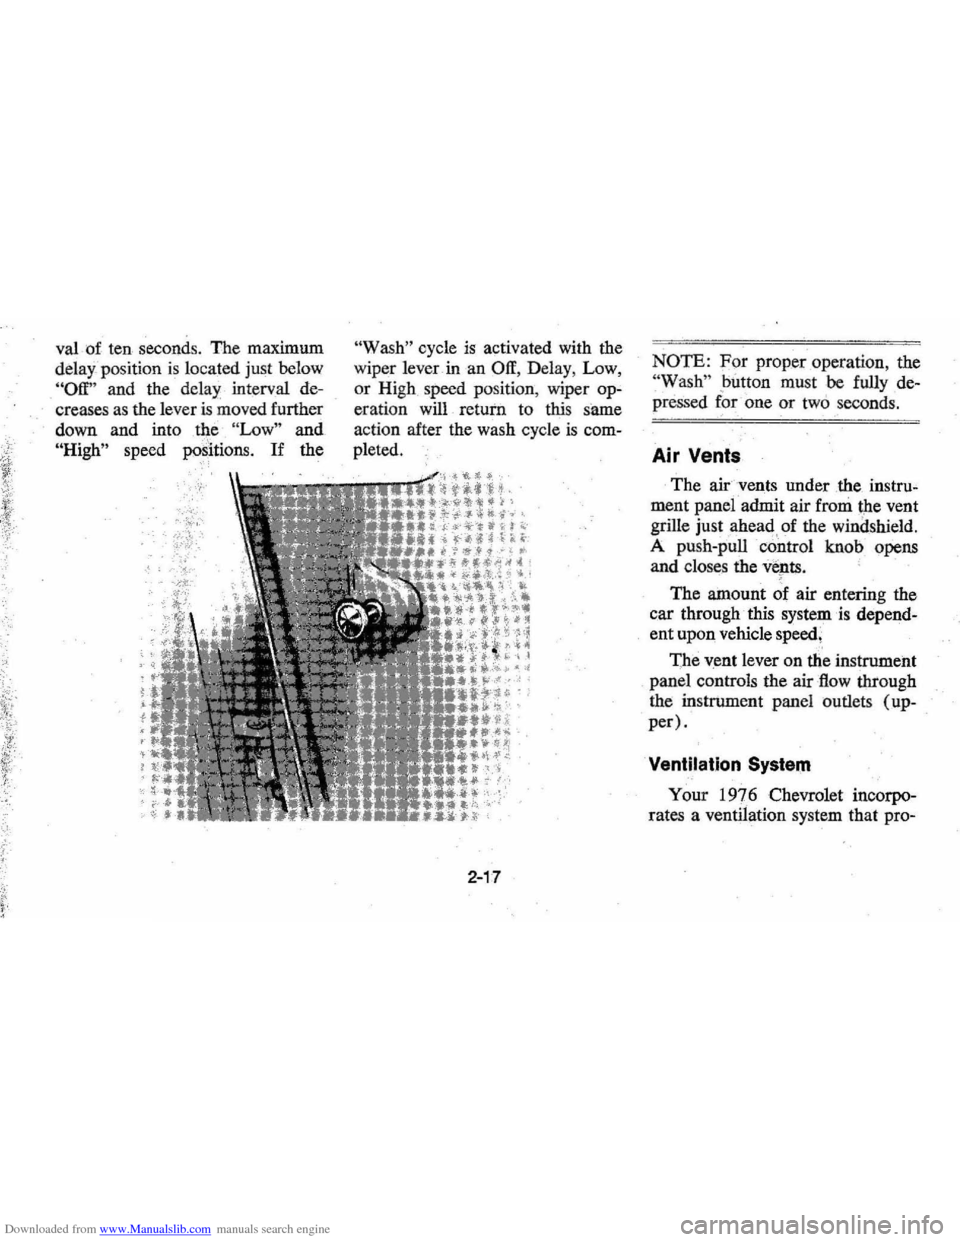
Air Vents
The air vents under .the . instru~
ment panel admit air from the vent
grille just ahead . of the windshield.
A push-pull
control knob opens
and closes the vents.
,
The amount of air entering the
c .ar through this system
is depend
ent upon vehicle speed,
The vent lever on the instrument
. panel controls the air flow ihrough
the instrument panel outlets (up
per).
Ventilation System
Your 197 6 Chevrolet incorpo
rates a ventilation system that pro-
Page 34 of 102
Downloaded from www.Manualslib.com manuals search engine • For most satisfactory heater op
eration and air circulation , oper
ate fan on low or medium speeds
for normal operation and high
s peeds for quick warm -up and
during extremely low
tempera
tures.
• For adeq uate rear sea t he ating,
the area beneath the front seat
mus not be block ed by carpet
ing, rags, paper or oth er mate
rial and fan sh ould operate on
high blower.
Rear Window Defroster
To ensure clear vision through
the rear
window during inclem ent
weather , the Rear Window
De
froster is optionally available. This
unit dr
aws. in air from the pas
senger compart ment and directs it
aga inst the back window to remove
frost or moisture. Its blower h
as a
two-speed control switch on the
instrument panel.
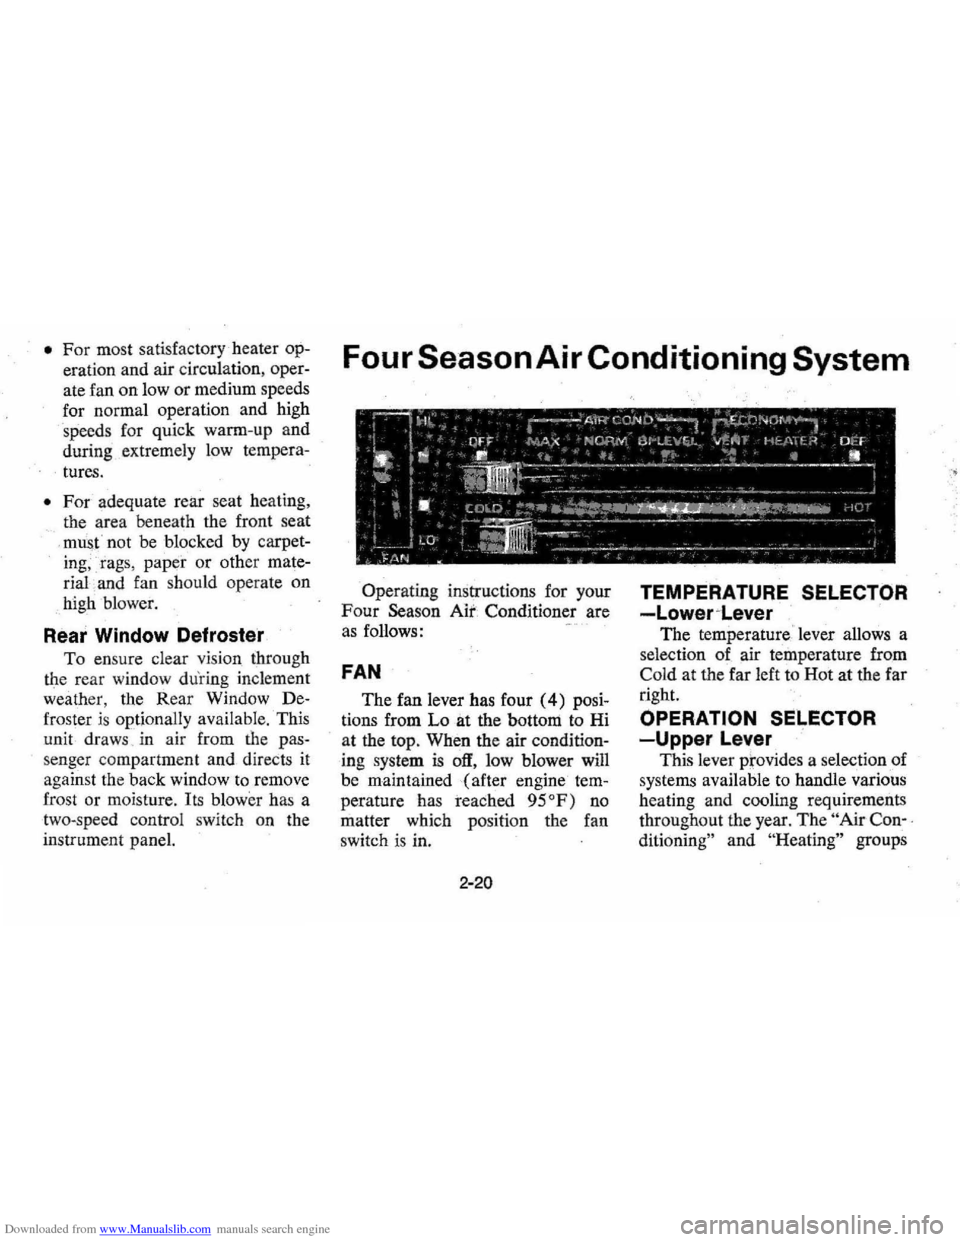
Four Season Air Conditioning System
Operating instructions for your
Four Season Air Conditioner are
a s follows:
FAN
The fan lever has four (4) posi
tions from Lo at the bottom to Hi
at the top. When the air
condition
ing system is off, low blower will
be maintained (after engine
tem
perature has reached 95°F) no
matter which positi on the fan
switch is in.
2-20
TEMPERATURE SELECTOR
-Lower~Lever
The temperature ' lever allows a
selection of air temperature from
Cold at the far left to Hot at the far
right.
OPERATION SELECTOR
-Upper Lever
This lever prov ides a selection of
systems available to handle various
heating and cooling requirements
throughout the year.
The " Air Con-,
ditioning"
an d "He ating" groups
Page 42 of 102

Downloaded from www.Manualslib.com manuals search engine level the car under various loaded
conditions. Air
is added to the
rear shock absorbers,
as needed,
through an air valve located
in the
rear bumper
as shown in the illus
tration. A minimum pressure of
10-\5 psi should be maintained at
all times. After the car is loaded ,
pressure may be increased until the
rear of the vehicle returns to the
normal designed riding height, but
not to exceed
90 psi.
Station Wagon
,t tor some reason, It Is necessary to drive with the tailgat. window open, the
Reclining Seat Back
Caprice
Models .
The passenger seat back can be
reclined rearward approximately
20 degrees from normal position
by lifting the control lever at the
outboard side
of the passenger's
following 'precautions should be observed:
• Close all other windows.
• Adjust heating or cooling system to torce outside air. Into, car 8S follows:
1. On $fatlon Wagons not equipped with' ai' conditlon;ng, set Ian to medium Ot high speed and upper control lever to any position except OFf. 2. On Station Wagons equipped with manua' air conditioning, set 'an to
2-28
seat cushion and. exerting rearward
pressure
or with no pressure on the
seat back
allow seat back to
return forward.
medium or, high sPded, upper control lever to any posWan except OFF, and lower control lever to any position
except extrem~ lett COLD.
3 . On Station Wagons equipped with a.utomaUc .'r conditioning. set ~ontrol lerer to HI except in hot weather, in which cas., set 'ever to AUTO.
• On starlon wagons equipped with ouiside air rents under or In Instrument panel, open venrs fully.
•
Page 46 of 102
Downloaded from www.Manualslib.com manuals search engine ond seat forward for access to
the third seat area.
2. Lift third seat back hinged filler
panel
rearward onto seat back,
then, grasp seat back handle and
lift seat
back. upward until it
locks
in the full "up" position
(see illustration
0).
Keep belt restraints and buckles
clear of mechanism when folding
seats,to prevent damage to these
belt
systems. C·>·i
Retractable Tail Gate
The retractable tail gate is de
signed to
lower into the underbody
and in general follows the body
contour during the opening and
closing cycles. Similarly, the back
window, which
is separate of the
gate, raises upward and into the
space between the roof inner and
outer panels.
TAIL GATE RELEASE~WINGS
'TO CLOSE --C~WINDOW ~ WINDOW-KEY ~:/ OPEN-KEY
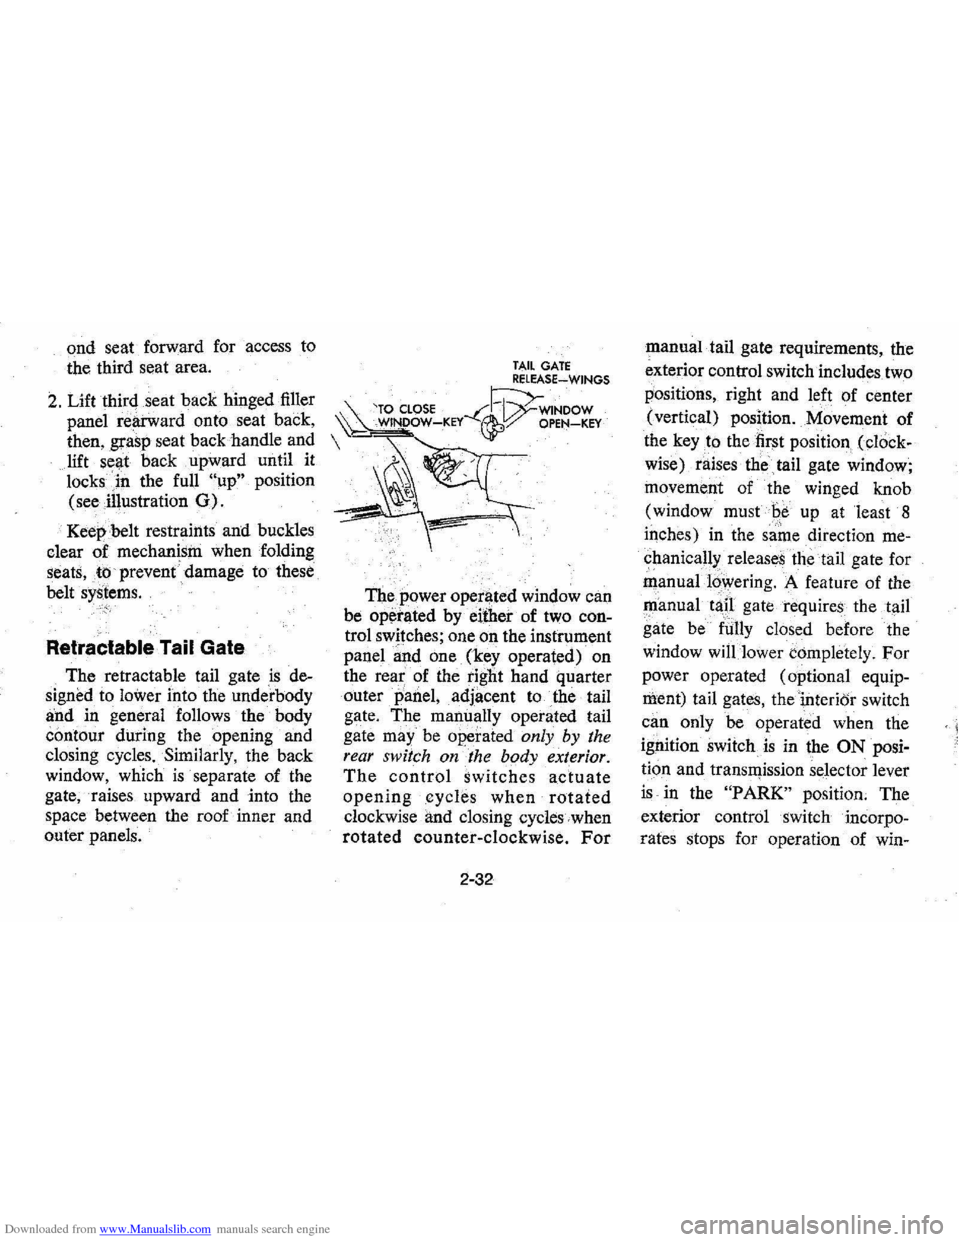
The power operl)ted window can
be
op~rated by either of two con
trol switches; one on the instrument
panel
~nd one (key operated) on
the
rea~ of the tight hand quarter
outer
panel, adjacent to the tail
gate. The manually operated tail
gate
may" be operated only by the
rear switch on the body exterior.
The control switches actuate
openingcycle.s when rotated
clockwise and closing cycles when
rotated counter-clockwise. For
2-32
manual tail gate requirements, the
exterior control switch includes two
positions, right and left of center
(vertical) position. Movement of
the
key to the first position (cl()ck
wise) raises the
tail gate window;
movement of the winged knob
(window must
Be up at least 8
iqches) in the same direction me
chanical!>: releases the tail gate for
manual16wering. A feature of the
~anual tap gate requires the tail
gate be
fUlly closed before the
window
will lower completely. For
power operated (optional equip
ment) tail gates, thei,nterior switch
can only be operated when the
ignition switch
is in the ON posi
tion and transll)ission selector lever
is in the "PARK" position. The
exterior control switch incorpo
rates stops for operation of win-
< I