2024 FORD F650/750 lights
[x] Cancel search: lightsPage 13 of 386

If these modified engine performancecharacteristics persist for an extendedperiod and either the service engine soonor powertrain malfunction, reduced power,electronic throttle control light isilluminated, have the system checked byan authorized dealer.
Service engine soon
Powertrain malfunction, reducedpower, electronic throttle control
Diesel Lubrication System
It is important to change the engine oil atthe recommended service intervals orwhen indicated by the information displayto maintain oil viscosity. Extending the oiland filter change interval beyond therecommended interval can negativelyaffect engine performance, fuel economyand engine life. See Engine Oil Check(page 227).
Engine and secondary cooling system
The cooling system contains a primarycooling loop to cool the engine and asecondary cooling loop to cool thetransmission, charge air, and fuel. Thecoolant serves three primary purposes: toprovide heat transfer, freeze pointprotection, and corrosion protection usingadditives.
Vehicles with diesel engines typically areused to carry heavy loads and accumulatemileage rapidly. These two factors maycause the additives in the coolant to wearout in a shorter time. You can find moreinformation about coolant additives andcoolant change intervals in the coolantchapter. See General MaintenanceInformation (page 325). Operating theengine with insufficient coolant or coolantadditive can cause severe engine damage.
Selective catalytic reduction system
Your vehicle is equipped with a selectivecatalytic reduction system designed toreduce emission levels of nitrogen oxidesfrom the exhaust of your diesel engine. Thissystem relies on the use of Diesel ExhaustFluid (DEF) that you must replenish atcertain intervals. Failure to maintain properDEF levels or if the DEF becomescontaminated will result in vehicle speedlimitations or result in your vehicle enteringan idle-only mode. See SelectiveCatalytic Reductant System (page 120).
Minor Troubleshooting Guide
If the engine won’t crank
WARNING: Battery posts,terminals and related accessoriescontain lead and lead compounds. Washhands after handling.
Turn on the headlights. If the lights are dim,do not go on at all or when the ignition isturned to the start position, the lightsbecome dim or go out, the batteryconnections may be loose or corroded, orthe battery may be discharged. If there isa clicking or stuttering sound coming fromthe engine compartment when you turnthe key to the start position, this may alsoindicate a loose or corroded batteryconnection.
Check the battery connections at thebattery posts, cable connection to theengine grounding point and at the starterconnection.
If you suspect a discharged battery, haveit checked and corrected.
9
2024 F-650/750 (TBC) , enUSA, Edition date: 202210, First-PrintingIntroductionE67028
Page 54 of 386

Autolock repeats when:
•The vehicle is stopped.
•Any door opens and closes while theignition is on.
•The vehicle reaches a speed greaterthan 12 mph (20 km/h).
Autounlock
Autounlock unlocks all the doors when allof the following occur:
•All the doors are closed and yourvehicle is moving at a speed greaterthan 12 mph (20 km/h).
•Your vehicle comes to a stop.
•You open the driver door within 10minutes of switching the ignition off orto the accessory position.
Note:If you open the driver door after 10minutes, autounlock does not unlock allother doors.
Enabling or Disabling Autounlock
You can enable or disable the autounlockfeature in the instrument cluster display oran authorized dealer can do it for you.
To enable or disable autounlock, do thefollowing:
1.Switch the ignition on.
2.Press the power door unlock controlthree times.
3.Switch the ignition off.
4.Press the power door unlock controlthree times.
5.Switch the ignition on. The hornsounds indicating your vehicle is inprogramming mode.
6.Press the power door lock control andwithin five seconds, press the powerdoor unlock control. The horn soundsonce if disabled or twice if enabled.
7.Switch the ignition off. The horn soundsindicating programming is complete.
Note:You can also switch this feature onor off using the instrument cluster display.See Information Displays (page 71).
Illuminated Entry
The interior lamps and select exteriorlamps illuminate when you unlock thedoors with the remote entry system.
The illuminated entry system turns off thelights if:
•The ignition is on.
•You press the remote control lockbutton.
•25 seconds have passed.
The dome lamp does not turn on if thecontrol is in the off position.
The lights do not turn off if:
•You turn them on with the dimmercontrol.
•Any door is open.
Battery Saver
The battery saver turns off the interiorlamps 10 minutes after you switch theignition off if a door is open and the domelamp switch is on. It turns off the interiorlamps after 10 minutes if the dome lampswitch is off.
50
2024 F-650/750 (TBC) , enUSA, Edition date: 202210, First-PrintingDoors and Locks
Page 147 of 386

5.Tighten the nut until the spring is fullycaged and brakes released. Do notloosen or remove the release stud andnut unless you completely assembleand securely clamp the brake chamber.
6.After restoring the air pressure,unscrew and remove the release studand install in the carrying pocket. Installthe access plug.
HILL START ASSIST -
VEHICLES WITH: HYDRAULIC
BRAKES
WARNING: The system does notreplace the parking brake. When youleave your vehicle, always apply theparking brake.
WARNING: You must remain inyour vehicle when the system turns on.At all times you are responsible forcontrolling your vehicle, supervising thesystem, and intervening if required.Failure to follow this instruction couldresult in the loss of control of yourvehicle, personal injury or death.
WARNING: The system will turnoff if a malfunction is apparent or if yourev the engine excessively. Failure to takecare may result in the loss of control ofyour vehicle, serious personal injury ordeath.
The system makes it easier to pull awaywhen your vehicle is on a slope withoutneeding to use the parking brake.
When the system is active, your vehicleremains stationary on the slope for two tothree seconds after you release the brakepedal. This allows time to move your footfrom the brake to the accelerator pedal.The brakes release when the engine has
developed sufficient torque to prevent yourvehicle from rolling down the slope. Thisis an advantage when pulling away on aslope, for example from a car park ramp,traffic lights or when reversing uphill intoa parking space.
When the vehicle is on a slope, the systemwill turn on automatically to preventvehicle rollback.
Note:There is no warning light to indicatethe system is either on or off.
Using Hill Start Assist
1.Press the brake pedal to bring yourvehicle to a complete standstill. Keepthe brake pedal pressed and shift intogear when facing uphill or reverse (R)when facing downhill.
2.If the sensors detect that your vehicleis on a slope, the system automaticallyactivates.
3.When you remove your foot from thebrake pedal, your vehicle remains onthe slope without rolling away forabout two to three seconds. This holdtime automatically extends if you arein the process of driving off.
4.Drive off in the normal manner. Thesystem releases the brakesautomatically.
Note:When you remove your foot from thebrake pedal and press the pedal again whenthe system is active, you will experiencesignificantly reduced brake pedal travel. Thisis normal.
Switching the System On and Off
Vehicles with Manual Transmission
You can switch this feature on or off in theinformation display. The systemremembers the last setting when you startyour vehicle.
143
2024 F-650/750 (TBC) , enUSA, Edition date: 202210, First-PrintingBrakes
Page 168 of 386
In these cases, the system may brake lateor unexpectedly. You should stay alert andtake action when necessary.
If something hits the front end of yourvehicle or damage occurs, theradar-sensing zone may change. This couldcause missed or false vehicle detection.
Optimal system performance requires aclear view of the road by thewindshield-mounted camera.
Optimal performance may not occur if:
•The camera is blocked.
•There is poor visibility or lightingconditions.
•There are bad weather conditions.
System Not Available
Conditions that can cause the system todeactivate or prevent the system fromactivating when requested include:
•A blocked sensor.
•High brake temperature.
•A failure in the system or a relatedsystem.
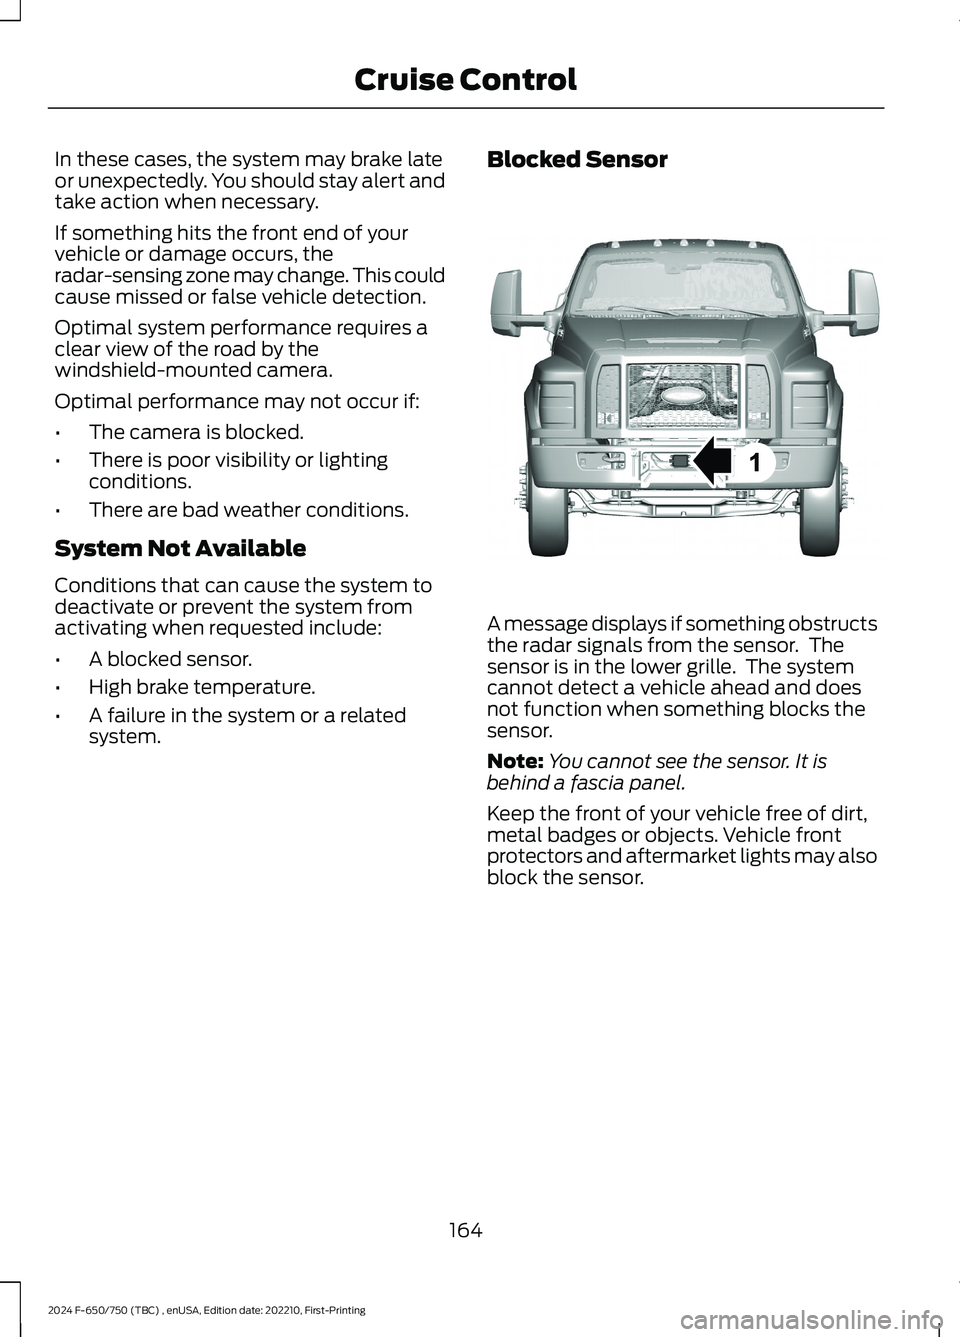
Blocked Sensor
A message displays if something obstructsthe radar signals from the sensor. Thesensor is in the lower grille. The systemcannot detect a vehicle ahead and doesnot function when something blocks thesensor.
Note:You cannot see the sensor. It isbehind a fascia panel.
Keep the front of your vehicle free of dirt,metal badges or objects. Vehicle frontprotectors and aftermarket lights may alsoblock the sensor.
164
2024 F-650/750 (TBC) , enUSA, Edition date: 202210, First-PrintingCruise ControlE312316
Page 187 of 386
ESSENTIAL TOWING CHECKS
See Load limits in the Load Carryingchapter for load specification terms foundon the tire label and Safety Compliancelabel and instructions on calculating yourvehicle's load.
Remember to account for the trailertongue weight as part of your vehicle loadwhen calculating the total vehicle weight.
Hitches
Do not use a hitch that either clamps ontothe bumper or attaches to the axle. Youmust distribute the load in your trailer sothat 10-15% of the total weight of thetrailer is on the tongue.
Safety Chains
Note:Do not attach safety chains to thebumper.
Always connect the safety chains to theframe or hook retainers of your vehiclehitch.
To connect the safety chains, cross thechains under the trailer tongue and allowenough slack for turning tight corners. Donot allow the chains to drag on the ground.
Trailer Brakes
WARNING: Do not connect atrailer's hydraulic brake system directlyto your vehicle's brake system. Yourvehicle may not have enough brakingpower and your chances of having acollision greatly increase.
Electric brakes and manual, automatic orsurge-type trailer brakes are safe if youinstall them properly and adjust them tothe manufacturer's specifications. Thetrailer brakes must meet local and federalregulations.
The rating for the tow vehicle's brakingsystem operation is at the gross vehicleweight rating, not the gross combinedweight rating.
Trailer Lamps
WARNING: Never connect anytrailer lamp wiring to the vehicle's taillamp wiring; this may damage theelectrical system resulting in fire. Contactyour authorized dealer as soon aspossible for assistance in proper trailertow wiring installation. Additionalelectrical equipment may be required.
Trailer lamps are required on most towedvehicles. Make sure all running lights, brakelights, turn signals and hazard lights areworking.
Before Towing a Trailer
Practice turning, stopping and backing upto get the feel of your vehicle-trailercombination before starting on a trip.When turning, make wider turns so thetrailer wheels clear curbs and otherobstacles.
When Towing a Trailer
•Check your hitch, electrical connectionsand trailer wheel lug nuts thoroughlyafter you have traveled 50 mph(80 km/h).
•When stopped in congested or heavytraffic during hot weather, place thetransmission in park (P) or neutral (N)to aid engine and transmission coolingand to help air conditioningperformance.
•Turn off the speed control with heavyloads or in hilly terrain. The speedcontrol may turn off automaticallywhen you are towing on long, steepgrades.
183
2024 F-650/750 (TBC) , enUSA, Edition date: 202210, First-PrintingTowing
Page 188 of 386
•Shift to a lower gear when driving downa long or steep hill. Do not apply thebrakes continuously, as they mayoverheat and become less effective.
•If your transmission is equipped withthe Tow/Haul feature, use this featurewhen towing. This provides enginebraking and helps eliminate excessivetransmission shifting for optimum fueleconomy and transmission cooling.
•Allow more distance for stopping witha trailer attached. Anticipate stops andbrake gradually.
FIFTH WHEEL OPERATION (IF
EQUIPPED)
WARNING: Failure to follow thefifth wheel manufacturer’s instructionsfor hooking and unhooking as well assliding the fifth wheel could result in anaccident, personal injury or death.
WARNING: When the tractor andtrailer are parked unattended, the trailerbrake hand control should never be usedto apply the brake, since air may leakfrom the system, allowing vehiclemovement, resulting in possible propertydamage, personal injury or death.
Before hook-up, make sure:
•The fifth wheel jaws are fully open.
•The fifth wheel is fully tilted back toprevent body damage when the tractoris backed under a trailer.
•You block the trailer wheels and adjustand apply the trailer spring brakes.Never chase a trailer.
•The brake hoses and light cords areclear of the fifth wheel.
Hook-up
1.Back the tractor squarely under thetrailer, engaging the fifth-wheel jawson the kingpin. Always back up slowly;make sure the trailer is neither too highnor too low. Avoid backing under thetrailer from an angle.
2.Connect the service and emergencybrake hoses and trailer light connector.
3.Inspect the jaws of the fifth wheel tobe sure they have fully closed on thetrailer kingpin and the trailer plate isresting securely on the fifth wheel.
4.Make sure the coupler release lever isin the locked position.
5.Charge the trailer brake system. Setthe trailer brakes, with either the handvalve or tractor protection valve. Pullagainst the trailer for an extra check ofproper hook-up. Do not pull hardenough to damage or strain theequipment.
6.Set the tractor parking brakes and fullyraise the trailer landing gear.
7.Check the operation of all trailer lightsand correct any lights that may befaulty.
Un-hook
1.Try to keep the tractor and trailer in astraight line.
2.Apply the parking brakes.
3.Lower the trailer landing gear, makingsure it is on solid, level ground. Theweight of the trailer is to be on thelanding gear.
4.Block the trailer wheels.
5.Disconnect the brake hoses and lightcords. Be sure hoses and cords areclear.
6.Pull coupler release lever to disengagethe fifth wheel jaws.
184
2024 F-650/750 (TBC) , enUSA, Edition date: 202210, First-PrintingTowing
Page 193 of 386
DRIVING THROUGH WATER
WARNING: Do not drive throughflowing or deep water as you may losecontrol of your vehicle.
Note:Driving through standing water cancause vehicle damage.
Note:Engine damage can occur if waterenters the air filter.
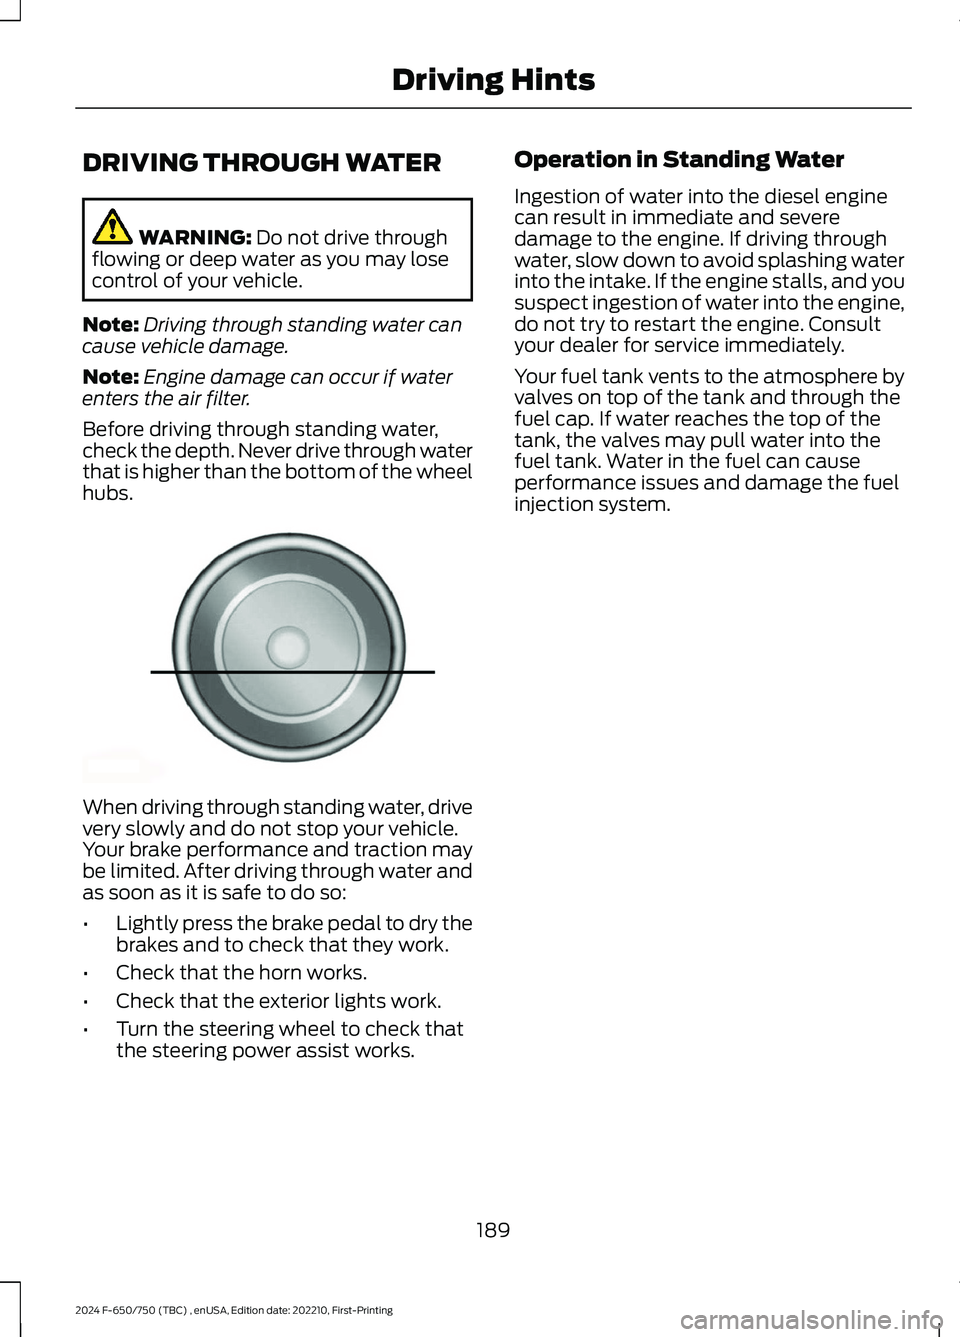
Before driving through standing water,check the depth. Never drive through waterthat is higher than the bottom of the wheelhubs.
When driving through standing water, drivevery slowly and do not stop your vehicle.Your brake performance and traction maybe limited. After driving through water andas soon as it is safe to do so:
•Lightly press the brake pedal to dry thebrakes and to check that they work.
•Check that the horn works.
•Check that the exterior lights work.
•Turn the steering wheel to check thatthe steering power assist works.
Operation in Standing Water
Ingestion of water into the diesel enginecan result in immediate and severedamage to the engine. If driving throughwater, slow down to avoid splashing waterinto the intake. If the engine stalls, and yoususpect ingestion of water into the engine,do not try to restart the engine. Consultyour dealer for service immediately.
Your fuel tank vents to the atmosphere byvalves on top of the tank and through thefuel cap. If water reaches the top of thetank, the valves may pull water into thefuel tank. Water in the fuel can causeperformance issues and damage the fuelinjection system.
189
2024 F-650/750 (TBC) , enUSA, Edition date: 202210, First-PrintingDriving HintsE176913
Page 219 of 386
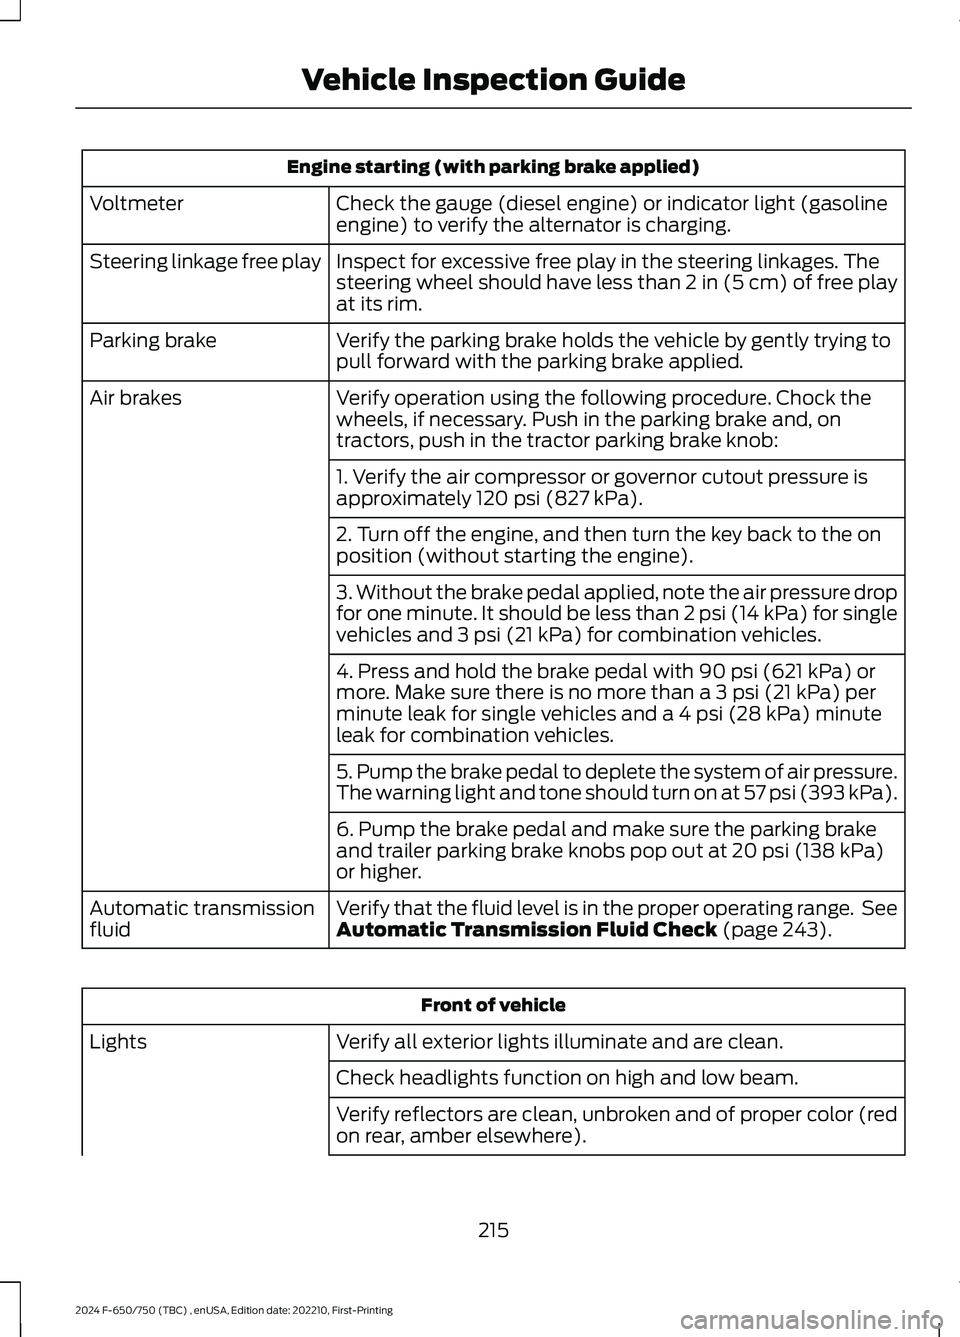
Engine starting (with parking brake applied)
Check the gauge (diesel engine) or indicator light (gasolineengine) to verify the alternator is charging.Voltmeter
Inspect for excessive free play in the steering linkages. Thesteering wheel should have less than 2 in (5 cm) of free playat its rim.
Steering linkage free play
Verify the parking brake holds the vehicle by gently trying topull forward with the parking brake applied.Parking brake
Verify operation using the following procedure. Chock thewheels, if necessary. Push in the parking brake and, ontractors, push in the tractor parking brake knob:
Air brakes
1. Verify the air compressor or governor cutout pressure isapproximately 120 psi (827 kPa).
2. Turn off the engine, and then turn the key back to the onposition (without starting the engine).
3. Without the brake pedal applied, note the air pressure dropfor one minute. It should be less than 2 psi (14 kPa) for singlevehicles and 3 psi (21 kPa) for combination vehicles.
4. Press and hold the brake pedal with 90 psi (621 kPa) ormore. Make sure there is no more than a 3 psi (21 kPa) perminute leak for single vehicles and a 4 psi (28 kPa) minuteleak for combination vehicles.
5. Pump the brake pedal to deplete the system of air pressure.The warning light and tone should turn on at 57 psi (393 kPa).
6. Pump the brake pedal and make sure the parking brakeand trailer parking brake knobs pop out at 20 psi (138 kPa)or higher.
Verify that the fluid level is in the proper operating range. SeeAutomatic Transmission Fluid Check (page 243).Automatic transmissionfluid
Front of vehicle
Verify all exterior lights illuminate and are clean.Lights
Check headlights function on high and low beam.
Verify reflectors are clean, unbroken and of proper color (redon rear, amber elsewhere).
215
2024 F-650/750 (TBC) , enUSA, Edition date: 202210, First-PrintingVehicle Inspection Guide