2024 CHEVROLET SILVERADO EV battery replacement
[x] Cancel search: battery replacementPage 10 of 429
Chevrolet Silverado EV Owner Manual (GMNA-Localizing-U.S./Canada-
16702912) - 2024 - CRC - 1/23/23
Keys, Doors, and Windows 9
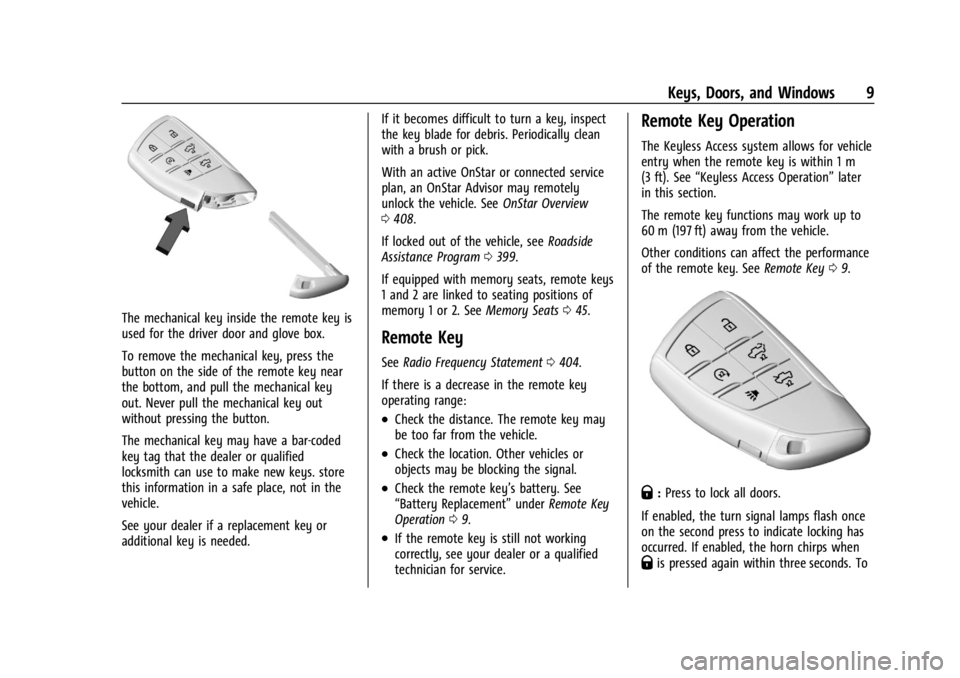
The mechanical key inside the remote key is
used for the driver door and glove box.
To remove the mechanical key, press the
button on the side of the remote key near
the bottom, and pull the mechanical key
out. Never pull the mechanical key out
without pressing the button.
The mechanical key may have a bar-coded
key tag that the dealer or qualified
locksmith can use to make new keys. store
this information in a safe place, not in the
vehicle.
See your dealer if a replacement key or
additional key is needed.If it becomes difficult to turn a key, inspect
the key blade for debris. Periodically clean
with a brush or pick.
With an active OnStar or connected service
plan, an OnStar Advisor may remotely
unlock the vehicle. See
OnStar Overview
0 408.
If locked out of the vehicle, see Roadside
Assistance Program 0399.
If equipped with memory seats, remote keys
1 and 2 are linked to seating positions of
memory 1 or 2. See Memory Seats045.
Remote Key
See Radio Frequency Statement 0404.
If there is a decrease in the remote key
operating range:
.Check the distance. The remote key may
be too far from the vehicle.
.Check the location. Other vehicles or
objects may be blocking the signal.
.Check the remote key’s battery. See
“Battery Replacement” underRemote Key
Operation 09.
.If the remote key is still not working
correctly, see your dealer or a qualified
technician for service.
Remote Key Operation
The Keyless Access system allows for vehicle
entry when the remote key is within 1 m
(3 ft). See “Keyless Access Operation” later
in this section.
The remote key functions may work up to
60 m (197 ft) away from the vehicle.
Other conditions can affect the performance
of the remote key. See Remote Key09.
Q:Press to lock all doors.
If enabled, the turn signal lamps flash once
on the second press to indicate locking has
occurred. If enabled, the horn chirps when
Qis pressed again within three seconds. To
Page 13 of 429
Chevrolet Silverado EV Owner Manual (GMNA-Localizing-U.S./Canada-
16702912) - 2024 - CRC - 1/23/23
12 Keys, Doors, and Windows
To view available settings from the
infotainment screen, touch Settings >
Vehicle > Remote Lock, Unlock, Start.
Temporary Disable of Passive Locking
Temporarily disable passive locking by
pressing and holding
Kon the interior door
switch with a door open for at least
four seconds, or until three chimes are
heard. Passive locking will then remain
disabled until
Qon the interior door is
pressed, or until the vehicle is turned on.
Remote Left In Vehicle Alert
When the vehicle is turned off and a remote
key or digital key is left in the vehicle, the
horn will chirp three times after all doors
are closed. To view available settings from
the infotainment screen, touch Settings >
Vehicle > Remote Lock, Unlock, Start.
Remote Removed From Vehicle Alert
If the vehicle is on with a door open, and
then all doors are closed, the vehicle will
check for remote keys and digital keys
inside. If a remote key or digital key is not
detected, the Driver Information Center (DIC)
will display NO KEY FOUND and the horn
will chirp three times. This occurs only once
each time the vehicle is driven. To view available settings from the infotainment
screen, touch Settings > Vehicle > Remote
Lock, Unlock, Start.
Keyless Tailgate Opening
Press the touchpad on the tailgate to open
the tailgate when all doors are unlocked,
or when the remote key or digital key is
within 1m (3 ft).
See
Tailgate 028.
Keyless Hood Opening
Press the touchpad in the center of the front
fascia once to open the hood when all doors
are unlocked, or when the remote key or
digital key is within 1m (3 ft).
See Hood 019.
Key Access
To access a vehicle with a weak remote key
battery, see Door Locks015.
Programming Remote Keys to the
Vehicle
Only remote keys programmed to the
vehicle will work. If a remote key is lost or
stolen, a replacement can be purchased and
programmed through your dealer. The
vehicle can be reprogrammed so that lost or
stolen remote keys no longer work. Each
vehicle can have up to eight remote keys
programmed to it.
Starting the Vehicle with a Low Remote
Key Battery
For improved vehicle security, the remote
key is equipped with a motion sensor. When
starting the vehicle, if the remote key has
been idle for an extended period of time,
the DIC may display KEY IN SLEEP MODE,
MOVE KEY, THEN START. Move the remote
key slightly and try starting the vehicle.
If the remote key battery is weak or if there
is interference with the signal, the DIC may
display NO KEY FOUND, REPLACE BATTERY IN
KEY or NO REMOTE KEY WAS DETECTED
PLACE KEY IN KEY POCKET THEN START YOUR
VEHICLE when starting the vehicle.
Page 14 of 429
Chevrolet Silverado EV Owner Manual (GMNA-Localizing-U.S./Canada-
16702912) - 2024 - CRC - 1/23/23
Keys, Doors, and Windows 13
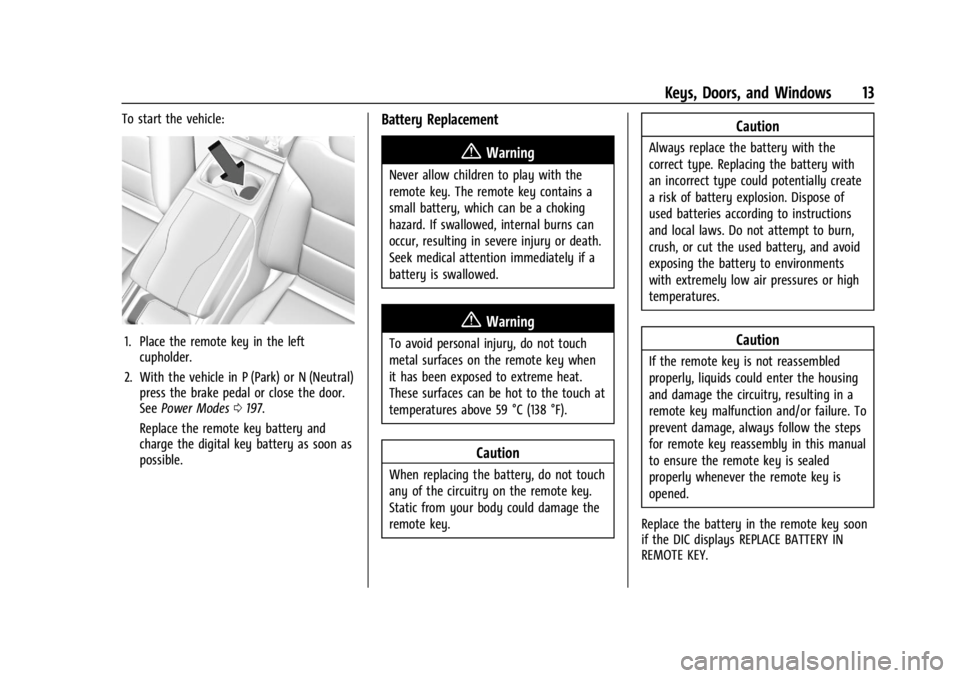
To start the vehicle:
1. Place the remote key in the leftcupholder.
2. With the vehicle in P (Park) or N (Neutral) press the brake pedal or close the door.
See Power Modes 0197.
Replace the remote key battery and
charge the digital key battery as soon as
possible.
Battery Replacement
{Warning
Never allow children to play with the
remote key. The remote key contains a
small battery, which can be a choking
hazard. If swallowed, internal burns can
occur, resulting in severe injury or death.
Seek medical attention immediately if a
battery is swallowed.
{Warning
To avoid personal injury, do not touch
metal surfaces on the remote key when
it has been exposed to extreme heat.
These surfaces can be hot to the touch at
temperatures above 59 °C (138 °F).
Caution
When replacing the battery, do not touch
any of the circuitry on the remote key.
Static from your body could damage the
remote key.
Caution
Always replace the battery with the
correct type. Replacing the battery with
an incorrect type could potentially create
a risk of battery explosion. Dispose of
used batteries according to instructions
and local laws. Do not attempt to burn,
crush, or cut the used battery, and avoid
exposing the battery to environments
with extremely low air pressures or high
temperatures.
Caution
If the remote key is not reassembled
properly, liquids could enter the housing
and damage the circuitry, resulting in a
remote key malfunction and/or failure. To
prevent damage, always follow the steps
for remote key reassembly in this manual
to ensure the remote key is sealed
properly whenever the remote key is
opened.
Replace the battery in the remote key soon
if the DIC displays REPLACE BATTERY IN
REMOTE KEY.
Page 20 of 429
Chevrolet Silverado EV Owner Manual (GMNA-Localizing-U.S./Canada-
16702912) - 2024 - CRC - 1/23/23
Keys, Doors, and Windows 19
Even if PIN to Start is enabled, you can still
start your vehicle without entering a PIN if
a remote key is in the vehicle, or by using
your key card. See“Key Card”later in this
section.
PIN Settings
If you forget your PIN, would like to change
your PIN, or would like to enable/disable
your PIN, you can do so via the Digital Key
menu in your myChevrolet app.
PIN Lockout
If the PIN is entered incorrectly too many
times, you will need to wait several minutes
before attempting to enter your PIN again.
You can still start your vehicle by using a
remote key or key card. You may also reset
your PIN or disable the PIN setting via the
Digital Key menu in your myChevrolet app.
Key Card
Your vehicle may be equipped with a key
card that unlocks, locks, and starts the
vehicle. The key card works by tapping it on
the location of the vehicle shown on the
back of the key card. It is highly recommended to carry a key
card as a back up to the Digital Key in case
the Digital Key battery is weak or there is
interference to the signal.
Only key cards programmed to the vehicle
will work. If a key card is lost or stolen, a
replacement can be purchased and
programmed through your dealer. To
prevent lost or stolen key cards from being
able to operate the vehicle, see your dealer.
Each vehicle can have up to eight key cards
programmed to it.
Unlocking with the Key Card
Tap your key card on the rectangular
symbol on the driver door near the edge of
the window to unlock the driver door. Only
the driver door may be unlocked this way.
See
Door Locks 015 for how to unlock the
other doors and rear compartment.
Locking with the Key Card
With all doors closed, the vehicle off, and
any door unlocked, tap your key card on the
rectangular symbol on the driver door near
the edge of the window to lock all doors. Starting with the Key Card
You can start your vehicle for a short period
after unlocking it with your key card. If the
period has ended, you will need to unlock
the vehicle with the key card again to start
your vehicle.
Doors
Hood
Manual Hood Release
{Warning
Do not drive the vehicle if the hood is
not latched completely. The hood could
open fully, block your vision, and cause a
crash. You or others could be injured.
Always close the hood completely before
driving. When the hood is not closed, the
vehicle will not exceed 42 km/h
(26 mph). Close the hood to drive faster
than 42 km/h (26 mph).
The hood compartment can be accessed in
several ways.
Ensure the hood is clear of any objects
before opening.
Page 108 of 429
Chevrolet Silverado EV Owner Manual (GMNA-Localizing-U.S./Canada-
16702912) - 2024 - CRC - 1/13/23
Instruments and Controls 107
On-Screen Controls
The Controls App organizes the on-screen
controls for many vehicle functions on one
screen. The specific controls available in the
app vary by model.
To access the Controls App, select the
Controls icon from the infotainment home
screen.
Warning Lights, Gauges, and
Indicators
Warning lights and gauges can signal that
something is wrong before it becomes
serious enough to cause an expensive repair
or replacement. Paying attention to the
warning lights and gauges could prevent
injury.
Some warning lights come on briefly when
the propulsion system is started to indicate
they are working. When one of the warning
lights comes on and stays on while driving,
or when one of the gauges shows there
may be a problem, check the section that
explains what to do. Waiting to do repairs
can be costly and even dangerous.
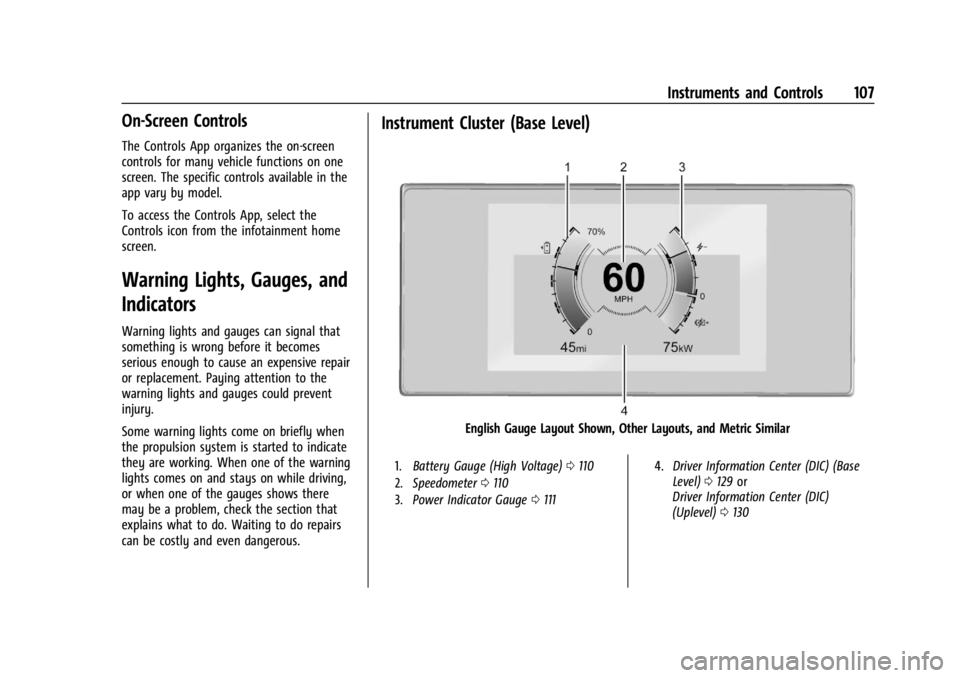
Instrument Cluster (Base Level)
English Gauge Layout Shown, Other Layouts, and Metric Similar
1.Battery Gauge (High Voltage) 0110
2. Speedometer 0110
3. Power Indicator Gauge 0111 4.
Driver Information Center (DIC) (Base
Level) 0129 or
Driver Information Center (DIC)
(Uplevel) 0130
Page 137 of 429
Chevrolet Silverado EV Owner Manual (GMNA-Localizing-U.S./Canada-
16702912) - 2024 - CRC - 1/13/23
136 Instruments and Controls
The messages that do not require
immediate action can be acknowledged and
cleared by pressing
V. The messages that
require immediate action cannot be cleared
until that action is performed.
All messages should be taken seriously;
clearing the message does not correct the
problem.
If a SERVICE message appears, see your
dealer.
Follow the instructions given in the
messages. The system displays messages
regarding the following topics:
.Service Messages
.Fluid Levels
.Vehicle Security
.Brakes
.Ride Control Systems
.Advanced Driver Assistance Systems
.Cruise Control
.Lighting and Bulb Replacement
.Wiper/Washer Systems
.Doors and Windows
.Seat Belts
.Airbag Systems
.Propulsion
.Tire Pressure
.Battery
.Steering
Propulsion Power Messages
REDUCED ACCELERATION DRIVE
WITH CARE
This message displays when the vehicle's
propulsion power is reduced. A reduction in
propulsion power can affect the vehicle's
ability to accelerate. If this message is on,
but there is no observed reduction in
performance, proceed to your destination.
Under certain conditions, the performance
may be reduced the next time the vehicle is
driven. The vehicle may be driven while this
message is on, but maximum acceleration
and speed may be reduced. Anytime this
message stays on, or displays repeatedly,
the vehicle should be taken to your dealer
for service as soon as possible.
This message can be displayed when the
high voltage battery charge level is low. This
is normal behavior as the vehicle is limiting
power due to reduced battery capability. Under certain operating conditions
propulsion will be disabled. Try restarting
after the vehicle has been off for
two minutes.
PROPULSION POWER REDUCED DUE TO
TEMPERATURE
This message displays when the vehicle is
on, the battery temperature is low, and
when the vehicle’s performance is limited.
The duration of the limited vehicle
performance depends, in part, on the high
voltage battery charge level. If the high
voltage battery charge level is relatively
high, as the vehicle is driven, the battery
temperature will increase, and the vehicle
will return to normal operation. If the high
voltage battery charge level is relatively low
the vehicle will not return to normal
operation until charged.
Keep the vehicle plugged in, even when fully
charged, to keep the high voltage battery
temperature ready for the next drive. This is
important when outside temperatures are
extremely hot or cold.
Page 198 of 429
Chevrolet Silverado EV Owner Manual (GMNA-Localizing-U.S./Canada-
16702912) - 2024 - CRC - 1/17/23
Driving and Operating 197
Truck-Camper Loading Information
The vehicle was neither designed nor
intended to carry a slide-in camper.Caution
Adding a slide-in camper or similar
equipment to the vehicle can damage it,
and the repairs would not be covered by
the vehicle warranty. Do not install a
slide-in camper or similar equipment on
the vehicle.
Starting and Operating
New Vehicle Break-In
Caution
Avoid making hard stops for the first
322 km (200 mi). During this time the
new brake linings are not yet broken in.
Hard stops with new linings can mean
premature wear and earlier replacement.
Follow this breaking-in guideline every
time you get new brake linings.
Following break-in, vehicle speed and load
can be gradually increased.
Power Modes
Powering On
This vehicle is equipped with Hands-Free
Start, which automatically starts the vehicle
when you enter with a remote key, press
the brake, or close the driver door.
If a remote key was left in the vehicle after
the last power cycle, closing the driver door
will not turn on the vehicle. The brake pedal
must be pressed to turn the vehicle on.
Driver Information Center (DIC) messages
will display explaining how to turn on the
vehicle.
If the remote key is not in the vehicle or
something is interfering with the remote
key, a message displays in the DIC.
If the vehicle does not turn on due to a low
remote key battery, the vehicle can still be
driven. SeeRemote Key Operation 09.
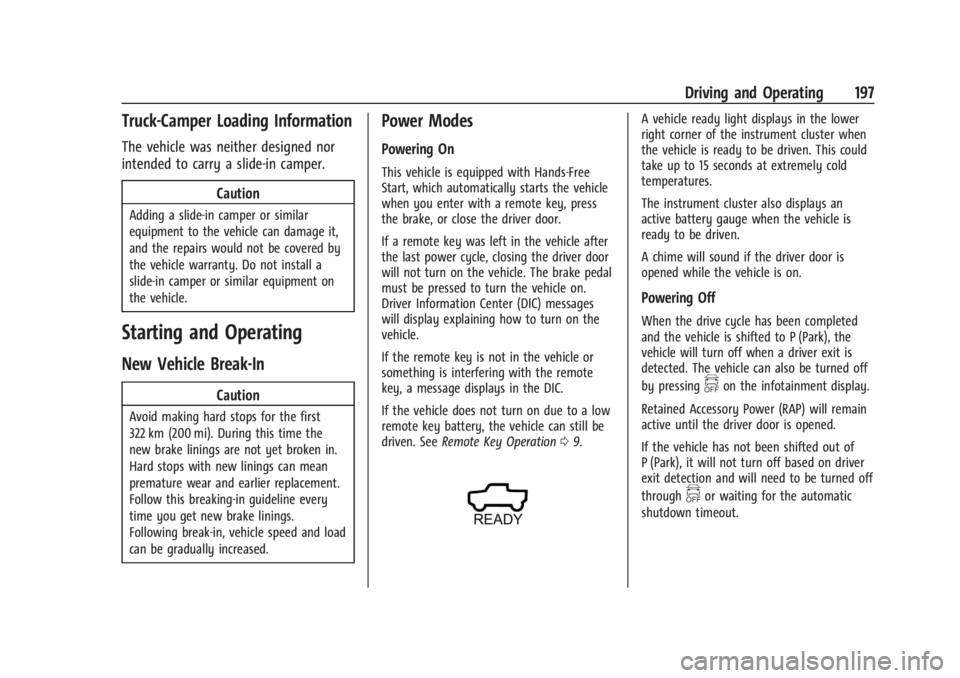
A vehicle ready light displays in the lower
right corner of the instrument cluster when
the vehicle is ready to be driven. This could
take up to 15 seconds at extremely cold
temperatures.
The instrument cluster also displays an
active battery gauge when the vehicle is
ready to be driven.
A chime will sound if the driver door is
opened while the vehicle is on.
Powering Off
When the drive cycle has been completed
and the vehicle is shifted to P (Park), the
vehicle will turn off when a driver exit is
detected. The vehicle can also be turned off
by pressing
fon the infotainment display.
Retained Accessory Power (RAP) will remain
active until the driver door is opened.
If the vehicle has not been shifted out of
P (Park), it will not turn off based on driver
exit detection and will need to be turned off
through
for waiting for the automatic
shutdown timeout.
Page 324 of 429
Chevrolet Silverado EV Owner Manual (GMNA-Localizing-U.S./Canada-
16702912) - 2024 - CRC - 1/13/23
Vehicle Care 323
Vehicle Care
General Information
General Information . . . . . . . . . . . . . . . . . . . 324
California Perchlorate MaterialsRequirements . . . . . . . . . . . . . . . . . . . . . . . . 324
Accessories and Modifications . . . . . . . . . 324
Vehicle Checks
Doing Your Own Service Work . . . . . . . . 324
Underhood Compartment Overview . . . 325
Cooling System . . . . . . . . . . . . . . . . . . . . . . . . 327
Washer Fluid . . . . . . . . . . . . . . . . . . . . . . . . . . 328
Brakes . . . . . . . . . . . . . . . . . . . . . . . . . . . . . . . . . 328
Brake Fluid . . . . . . . . . . . . . . . . . . . . . . . . . . . . 329
Battery - North America . . . . . . . . . . . . . . . 330
Noise Control System (RST Only) . . . . . . 332
Wiper Blade Replacement . . . . . . . . . . . . . 333
Glass Replacement . . . . . . . . . . . . . . . . . . . . . 333
Windshield Replacement . . . . . . . . . . . . . . 334
Gas Strut(s) . . . . . . . . . . . . . . . . . . . . . . . . . . . 334
Headlamp Aiming
Front Headlamp Aiming . . . . . . . . . . . . . . . 335
Bulb Replacement
LED Lighting . . . . . . . . . . . . . . . . . . . . . . . . . . . 335
Electrical System
High Voltage Devices and Wiring . . . . . . 335
Electrical System Overload . . . . . . . . . . . . . 335 Fuses and Circuit Breakers . . . . . . . . . . . . . 337
Underhood Compartment Fuse
Block . . . . . . . . . . . . . . . . . . . . . . . . . . . . . . . . 337
Instrument Panel Fuse Block (Left) . . . . 340
Instrument Panel Fuse Block (Right) . . . 342
Wheels and Tires
Tires . . . . . . . . . . . . . . . . . . . . . . . . . . . . . . . . . . 344
All-Season Tires . . . . . . . . . . . . . . . . . . . . . . . . 345
Winter Tires . . . . . . . . . . . . . . . . . . . . . . . . . . . 345
Tire Sidewall Labeling . . . . . . . . . . . . . . . . . 346
Tire Designations . . . . . . . . . . . . . . . . . . . . . . 347
Tire Terminology and Definitions . . . . . . 347
Tire Pressure . . . . . . . . . . . . . . . . . . . . . . . . . . 349
Tire Pressure for High-Speed Operation . . . . . . . . . . . . . . . . . . . . . . . . . . . 350
Tire Pressure Monitor System . . . . . . . . . . 351
Tire Pressure Monitor Operation . . . . . . . 351
Tire Inspection . . . . . . . . . . . . . . . . . . . . . . . . . 355
Tire Rotation . . . . . . . . . . . . . . . . . . . . . . . . . . 356
When It Is Time for New Tires . . . . . . . . 357
Buying New Tires . . . . . . . . . . . . . . . . . . . . . 358
Different Size Tires and Wheels . . . . . . . 359
Uniform Tire Quality Grading . . . . . . . . . 359
Wheel Alignment and Tire Balance . . . . 360
Wheel Replacement . . . . . . . . . . . . . . . . . . . 360
Tire Chains . . . . . . . . . . . . . . . . . . . . . . . . . . . . 361
If a Tire Goes Flat . . . . . . . . . . . . . . . . . . . . . 362
Tire Sealant and Compressor Kit . . . . . . . 363
Storing the Tire Sealant and
Compressor Kit . . . . . . . . . . . . . . . . . . . . . . 368 Tire Changing . . . . . . . . . . . . . . . . . . . . . . . . . 369
Full-Size Spare Tire . . . . . . . . . . . . . . . . . . . . 374
Jump Starting
Jump Starting - North America . . . . . . . . 375
Towing the Vehicle
Transporting a Disabled Vehicle . . . . . . . 378
Recreational Vehicle Towing . . . . . . . . . . . 379
Appearance Care
Exterior Care . . . . . . . . . . . . . . . . . . . . . . . . . . 379
Interior Care . . . . . . . . . . . . . . . . . . . . . . . . . . 384
Floor Mats . . . . . . . . . . . . . . . . . . . . . . . . . . . . 387