2024 CHEVROLET SILVERADO EV ESP
[x] Cancel search: ESPPage 4 of 429
Chevrolet Silverado EV Owner Manual (GMNA-Localizing-U.S./Canada-
16702912) - 2024 - CRC - 1/17/23
Introduction 3
A circle with a slash through it is a safety
symbol which means“Do not,” “Do not do
this,” or“Do not let this happen.”
Symbols
The vehicle has components and labels that
use symbols instead of text. Symbols are
shown along with the text describing the
operation or information relating to a
specific component, control, message, gauge,
or indicator.
M:Shown when the owner’s manual has
additional instructions or information.
*: Shown when the service manual has
additional instructions or information.
0: Shown when there is more information
on another page — “see page.”
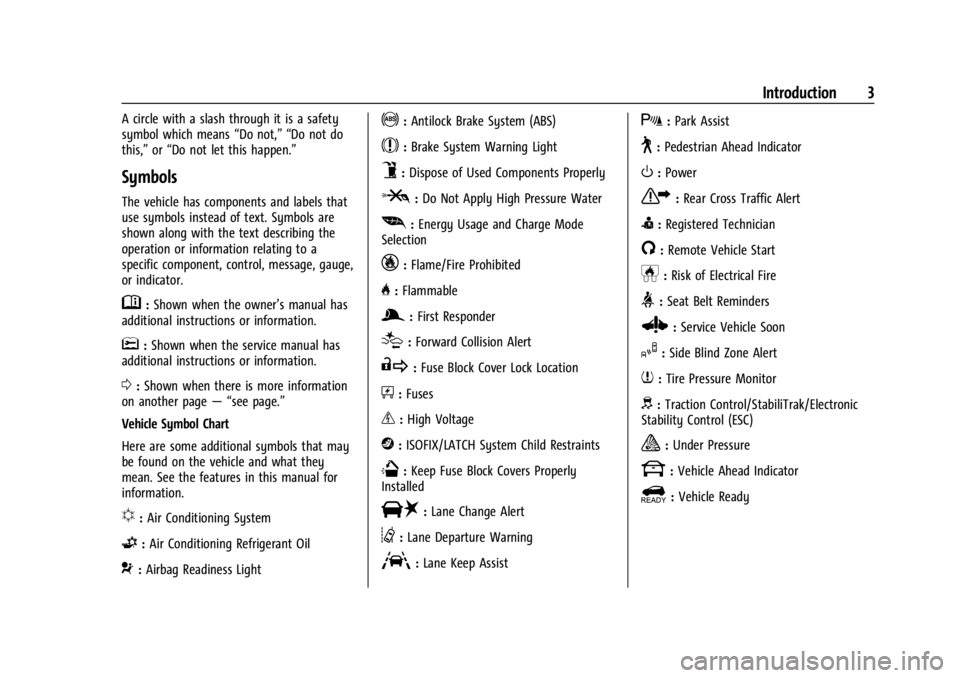
Vehicle Symbol Chart
Here are some additional symbols that may
be found on the vehicle and what they
mean. See the features in this manual for
information.
u: Air Conditioning System
G:Air Conditioning Refrigerant Oil
9:Airbag Readiness Light
!:Antilock Brake System (ABS)
$:Brake System Warning Light
9:Dispose of Used Components Properly
P:Do Not Apply High Pressure Water
[: Energy Usage and Charge Mode
Selection
_: Flame/Fire Prohibited
H: Flammable
g:First Responder
[:Forward Collision Alert
R:Fuse Block Cover Lock Location
+:Fuses
_:High Voltage
j:ISOFIX/LATCH System Child Restraints
Q:Keep Fuse Block Covers Properly
Installed
|: Lane Change Alert
@:Lane Departure Warning
A:Lane Keep Assist
X: Park Assist
~:Pedestrian Ahead Indicator
O:Power
7:Rear Cross Traffic Alert
I:Registered Technician
/:Remote Vehicle Start
h:Risk of Electrical Fire
>:Seat Belt Reminders
Z: Service Vehicle Soon
I:Side Blind Zone Alert
7:Tire Pressure Monitor
d:Traction Control/StabiliTrak/Electronic
Stability Control (ESC)
a: Under Pressure
k: Vehicle Ahead Indicator
]:Vehicle Ready
Page 16 of 429

Chevrolet Silverado EV Owner Manual (GMNA-Localizing-U.S./Canada-
16702912) - 2024 - CRC - 1/23/23
Keys, Doors, and Windows 15
start based on cold ambient conditions. The
rear defog indicator light will not come on
during a remote start.
Laws in some local communities may restrict
the use of remote starters. For example,
some laws require a person using remote
start to have the vehicle in view. Check local
regulations for any requirements.
The vehicle cannot be remote started if:
.The remote key is in the vehicle.
.The hood is open.
.60 minutes of remote start time has
been used.
.The hazard flashers are on.
.The vehicle is not in P (Park).
.The vehicle is already turned on.
If the battery level is low, do not use the
remote start feature. The battery may fully
deplete.
The remote key range may be less while the
vehicle is running.
Other conditions may affect the range and
performance of the remote key. See Remote
Key 09.
Starting the Vehicle Using Remote Start
PressStwice on the remote key. The turn
signal lamps will flash to confirm the
remote start request was received. During
the remote start, the parking lamps will
remain on as long as the vehicle is on.
The vehicle will turn off after 60 minutes,
unless you stop the remote start before
remote start cycle has completed or the
vehicle is turned on.
Press the brake pedal or close the door to
drive the vehicle. See Power Modes0197.
Extending Remote Start Time
Remote start can be used for up to
60 minutes of total remote start time.
After a remote start of 60 minutes,
or multiple shorter time starts totaling
60 minutes have been used, the vehicle
must be started and then turned off before
the remote start can be used again.
Canceling a Remote Start
To cancel a remote start, do one of the
following:
.Press/. The parking lamps will turn off.
.Turn on the hazard warning flashers.
.Turn the vehicle on and then off.
Door Locks
{Warning
Unlocked doors can be dangerous.
.Passengers, especially children, can
easily open the doors and fall out of a
moving vehicle. The doors can be
unlocked and opened while the vehicle
is moving. The chance of being thrown
out of the vehicle in a crash is
increased if the doors are not locked.
So, all passengers should wear seat
belts properly and the doors should be
locked whenever the vehicle is driven.
.Young children who get into unlocked
vehicles may be unable to get out.
A child can be overcome by extreme
heat and can suffer permanent injuries
or even death from heat stroke.
Always lock the vehicle whenever
leaving it.
.Outsiders can easily enter through an
unlocked door when you slow down
or stop the vehicle. Locking the doors
can help prevent this from happening.
Page 29 of 429
Chevrolet Silverado EV Owner Manual (GMNA-Localizing-U.S./Canada-
16702912) - 2024 - CRC - 1/23/23
28 Keys, Doors, and Windows
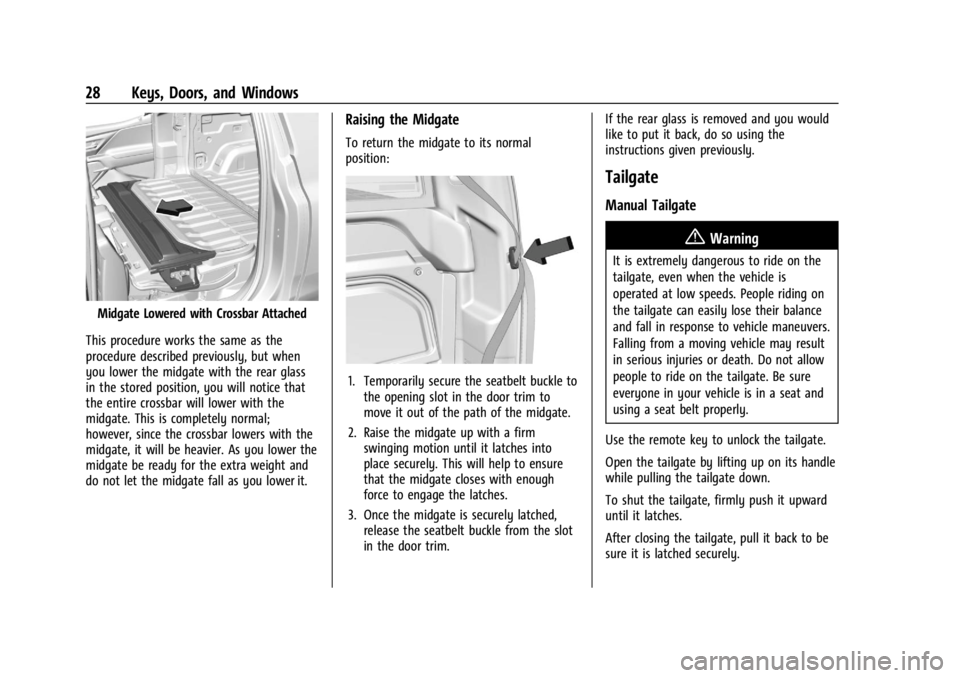
Midgate Lowered with Crossbar Attached
This procedure works the same as the
procedure described previously, but when
you lower the midgate with the rear glass
in the stored position, you will notice that
the entire crossbar will lower with the
midgate. This is completely normal;
however, since the crossbar lowers with the
midgate, it will be heavier. As you lower the
midgate be ready for the extra weight and
do not let the midgate fall as you lower it.
Raising the Midgate
To return the midgate to its normal
position:
1. Temporarily secure the seatbelt buckle to the opening slot in the door trim to
move it out of the path of the midgate.
2. Raise the midgate up with a firm swinging motion until it latches into
place securely. This will help to ensure
that the midgate closes with enough
force to engage the latches.
3. Once the midgate is securely latched, release the seatbelt buckle from the slot
in the door trim. If the rear glass is removed and you would
like to put it back, do so using the
instructions given previously.
Tailgate
Manual Tailgate
{Warning
It is extremely dangerous to ride on the
tailgate, even when the vehicle is
operated at low speeds. People riding on
the tailgate can easily lose their balance
and fall in response to vehicle maneuvers.
Falling from a moving vehicle may result
in serious injuries or death. Do not allow
people to ride on the tailgate. Be sure
everyone in your vehicle is in a seat and
using a seat belt properly.
Use the remote key to unlock the tailgate.
Open the tailgate by lifting up on its handle
while pulling the tailgate down.
To shut the tailgate, firmly push it upward
until it latches.
After closing the tailgate, pull it back to be
sure it is latched securely.
Page 39 of 429
Chevrolet Silverado EV Owner Manual (GMNA-Localizing-U.S./Canada-
16702912) - 2024 - CRC - 1/23/23
38 Keys, Doors, and Windows
{Warning
The Rear Camera Mirror (RCM) has a
limited view. Portions of the road,
vehicles, and other objects may not be
seen. Do not drive or park the vehicle
using only this camera. Objects may
appear closer than they are. Check the
outside mirrors or glance over your
shoulder when making lane changes or
merging. Failure to use proper care may
result in injury, death, or vehicle damage.
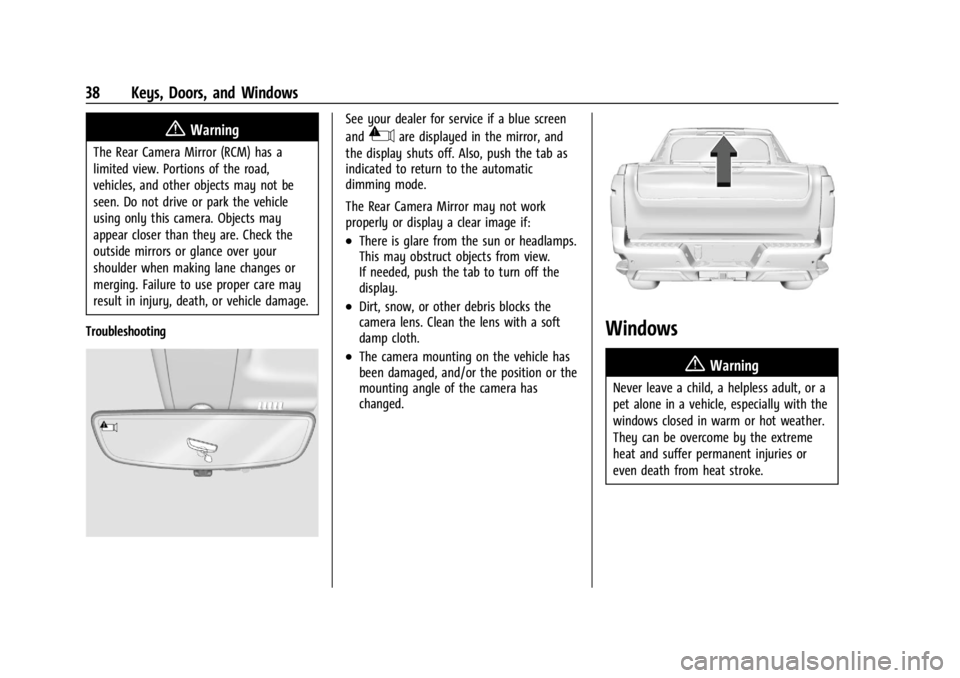
Troubleshooting
See your dealer for service if a blue screen
and
3are displayed in the mirror, and
the display shuts off. Also, push the tab as
indicated to return to the automatic
dimming mode.
The Rear Camera Mirror may not work
properly or display a clear image if:
.There is glare from the sun or headlamps.
This may obstruct objects from view.
If needed, push the tab to turn off the
display.
.Dirt, snow, or other debris blocks the
camera lens. Clean the lens with a soft
damp cloth.
.The camera mounting on the vehicle has
been damaged, and/or the position or the
mounting angle of the camera has
changed.
Windows
{
Warning
Never leave a child, a helpless adult, or a
pet alone in a vehicle, especially with the
windows closed in warm or hot weather.
They can be overcome by the extreme
heat and suffer permanent injuries or
even death from heat stroke.
Page 47 of 429
Chevrolet Silverado EV Owner Manual (GMNA-Localizing-U.S./Canada-
16702912) - 2024 - CRC - 1/13/23
46 Seats and Restraints
3. Start the vehicle with the initial key orremote key. The DIC welcome message
should display the driver number of the
initial remote key.
Saving Seating Positions
Read these instructions completely before
saving memory positions.
To save preferred driving positions to
1 and 2: 1. Turn the vehicle on. A DIC welcome message may indicate the driver number
of the current remote key. See
“Identifying Driver Number” previously in
this section.
2. Adjust all available memory features to the desired driving position.
3. Press and release SET; a beep will sound.
4. Immediately upon releasing SET, press and hold memory button 1 or 2 matching
the current remote key number until two
beeps sound. If too much time passes
between releasing SET and pressing 1 or
2, the two beeps will not sound
indicating memory position were not
saved. Repeat Steps 3 and 4 to try again.
5. Repeat Steps 1–4 for the other remote key 1 or 2 using the other 1 or 2 memory
button. It is recommended to save the preferred
driving positions to both 1 and 2 if you are
the only driver.
To save the common exit seating position to
Bthat is used by all drivers for Manually
Recalling Seating Positions and Auto Seat
Exit Memory Recall features, repeat
Steps 1–4 using
B, the exit button.
Manually Recalling Seating Positions
Press and hold 1, 2, or
Bbutton until the
recall is complete, to recall the positions
previously saved to that button.
Manual Memory recall movement for 1, 2 or
Bbuttons may be initiated and will
complete to the saved memory position if
the vehicle is in or out of P (Park).
Enabling Automatic Recalls
.Seat Entry Memory moves the driver seat
to the selected 1 or 2 position when the
vehicle is started. Select Settings >
Vehicle > Seating Position > Seat Entry
Memory > ON or OFF. See “Auto Seat
Entry Memory Recall” later in this section.
.Seat Exit Memory moves the driver seat
to the preferred exit position of the
B
button when the vehicle is turned off and the door is opened. Select Settings >
Vehicle > Seating Position > Seat Exit
Memory > Select ON or OFF. See
“Auto
Seat Exit Memory Recall” later in this
section.
Auto Seat Entry Memory Recall
Seat Entry Memory will automatically begin
movement to the seating positions of the 1
or 2 button corresponding to remote key
number 1 or 2 detected by the vehicle when:
.The vehicle is turned ON.
.Seating positions have been previously
saved to the same 1 or 2 button. See
“Saving Seating Positions” previously in
this section.
.Seat Entry Memory is enabled. See
“Enabling Automatic Recalls” previously in
this section.
.The vehicle is in P (Park).
Seat Entry Memory Recall will continue if
the vehicle is shifted out of P (Park) prior to
reaching the saved memory position.
If the saved memory seat position does not
automatically recall, verify the recall is
enabled. See “Enabling Automatic Recalls”
previously in this section.
Page 48 of 429
Chevrolet Silverado EV Owner Manual (GMNA-Localizing-U.S./Canada-
16702912) - 2024 - CRC - 1/13/23
Seats and Restraints 47
If the memory seat recalls to the wrong
position, remote key number 1 or 2 may not
match the memory button number positions
they were saved to. Try the other remote
key or try saving the positions to the other
1 or 2 memory button. See“Saving Seating
Positions” previously in this section.
Automatic Seat Entry Memory recalls are
only available for remote key numbers 1 and
2. Remote keys 3–8 will not provide Seat
Entry Memory recalls.
Auto Seat Exit Memory Recall
Seat Exit Memory will begin movement to
the seating position of the
B
button when:
.The vehicle is turned off and the driver
door is open or opened within a
short time.
.A seating position has been previously
been saved to the
Bmemory button.
See “Saving Seating Positions” previously
in this section.
.Seat Exit Memory is enabled. See
“Enabling Automatic Recalls” previously in
this section.
.The vehicle is in P (Park). Seat Exit Memory recall will continue if the
vehicle is shifted out of P (Park) prior to
reaching the saved memory position.
Seat Exit Memory is not linked to a remote
key. The seating position saved to
Bis
used for all drivers.
Cancel Memory Seating Recalls
.During any memory recall:
Press a power seat control
Press SET memory button
.During Manual memory recall:
Release 1, 2, or
Bmemory button
.During Auto Seat Entry Memory Recall:
Turn vehicle off
Press SET, 1, 2, or
Bmemory buttons
.During Auto Seat Exit Memory Recall:
Press SET, 1, 2, or
Bmemory buttons
Obstructions
If something has blocked the seat while
recalling a memory position, the recall may
stop. Remove the obstruction and try the
recall again. If the memory position still
does not recall, see your dealer.
Heated and Ventilated Front
Seats
{Warning
If temperature change or pain to the skin
cannot be felt, the seat heater may cause
burns. To reduce the risk of burns, use
care when using the seat heater,
especially for long periods of time. Do
not place anything on the seat that
insulates against heat, such as a blanket,
cushion, cover, or similar item. This may
cause the seat heater to overheat. An
overheated seat heater may cause a burn
or may damage the seat.
Page 125 of 429
Chevrolet Silverado EV Owner Manual (GMNA-Localizing-U.S./Canada-
16702912) - 2024 - CRC - 1/13/23
124 Instruments and Controls
Charge Now
Charge Now is the default charging mode
for your vehicle. The vehicle begins charging
immediately when it is plugged in and
authenticated at the charging location.
With Charge Now selected, the Charging
screen displays:
.Text explaining that the vehicle will
charge immediately when plugged in.
.Charge Complete by/in: The estimated
time at which the vehicle will reach the
desired Charge Level.
.Target Charge Level Gauge: Sets
the percentage at which the vehicle will
stop charging. The gauge also displays an
estimate of the vehicle's range upon
completing the charging session.
{Warning
Do not charge your vehicle’s battery
above an 80% charge if you are going to
drive down long, steep grades such as
mountain passes. This provides room in
the battery for regenerative braking to
supplement your conventional brakes
during the descent. This is especially
important when towing a trailer, which
puts additional stress on your vehicle’s
braking system.
SeeHill and Mountain Roads 0190 for
important information about driving on
grades.
The default charge level is 100% when
plugged in. To set a different charge level,
drag the circular marker on the Target
Charge Level Gauge to the preferred value.
To lower the desired Charge Level, drag the
Charge Level marker counterclockwise, and
to increase it drag the marker clockwise. The
Charge Level can also be changed by
tapping
«andªinside the gauge on the
screen. The Range estimate updates once
the desired Charge Level is set. To optimize
battery health, the minimum allowable
Charge Level is determined by the vehicle. Charge Later
Instead of charging immediately to a desired
Charge Level, you may choose to delay the
charge to the vehicle and have it complete
by your desired departure time. This may be
a more economical choice and a more
efficient use of energy when charging at
home. To use this mode, touch the Charge
Later tab from the Next Charge screen.
With Charge Later selected, the Charging
screen displays:
.Text explaining that your vehicle will
delay the planned charge to be ready by
the time specified.
.Time Selector: Used to set the desired
time at which the vehicle will finish
charging and be ready for departure.
Page 155 of 429
Chevrolet Silverado EV Owner Manual (GMNA-Localizing-U.S./Canada-
16702912) - 2024 - CRC - 1/13/23
154 Infotainment System
reduce interference, some static can occur,
especially around tall buildings or hills,
causing the sound to fade in and out.
AM
The range for most AM stations is greater
than for FM, especially at night. The longer
range can cause station frequencies to
interfere with each other. Static can also
occur when things like storms and power
lines interfere with radio reception. When
this happens, try reducing the treble on the
radio.
SiriusXM Satellite Radio Service
If equipped, SiriusXM Satellite Radio Service
provides digital radio reception. Tall
buildings or hills can interfere with satellite
radio signals, causing the sound to fade in
and out. In addition, traveling or standing
under heavy foliage, bridges, garages,
or tunnels may cause loss of the SiriusXM
signal for a period of time. Some cellular
services may interfere with SXM reception
causing loss of signal.
Mobile Device Usage
Mobile device usage, such as making or
receiving calls, charging, or just having the
mobile device on may cause static
interference in the radio. Unplug the mobile
device or turn it off if this happens.
Multi-Band Antenna
The multi-band roof antenna may be used
for radio, navigation, and other
communication systems, depending on the
equipped options. To ensure clear reception,
keep the antenna clear of obstructions, such
as snow and ice. If the vehicle has a
sunroof, and it is open, or a roof loaded
with cargo, reception may be affected.
Audio Players
Avoiding Untrusted Media Devices
When using media devices such as USB and
mobile devices, consider the source.
Untrusted media devices could contain files
that affect system operation or performance
and should be avoided.
USB Port
The vehicle may be equipped with multiple
USB ports. Ports may also be used for
charging. Music may be played from a
connected USB device.
Caution
To avoid vehicle damage, unplug all
accessories and disconnect all accessory
cables from the vehicle when not in use.
Accessory cables left plugged into the
vehicle, unconnected to a device, could be
damaged or cause an electrical short if
the unconnected end comes in contact
with liquids or another power source such
as the accessory power outlet.
USB Audio
To play music via USB:1. On the audio now playing page, touch source and select USB.
2. If there is no device connected, follow the screen prompts to connect the
device.
3. Supported media content will appear on the display.