2024 CHEVROLET SILVERADO EV length
[x] Cancel search: lengthPage 314 of 429

Chevrolet Silverado EV Owner Manual (GMNA-Localizing-U.S./Canada-
16702912) - 2024 - CRC - 1/17/23
Driving and Operating 313
a maximum of two minutes to detect and
label each TTPMS sensor. After each sensor
is learned, a check mark appears next to the
tire, the vehicle horn sounds, the vehicle
brake lamps flash, and all working trailer
lamps flash.
The recommended tire pressure must be
entered for the trailer tires. An alert appears
when a trailer tire's pressure is high or low.
Tool Method: A TTPMS activation tool can
be purchased separately to learn the trailer
TTPMS sensor locations.
Manual Method: Without the TTPMS
activation tool, the air pressure can be
increased or decreased in each tire for
10 seconds. Do not exceed the maximum
inflation pressure found on the tire
sidewalls. Make sure to readjust tire
pressure to the recommended level when
the process is complete.
Sensor Learning Steps
To complete the sensor-to-vehicle learn
process:1. Touch Start on the Learn Sensors screen. The horn chirps twice and the Learning
Active screen appears on the
infotainment display. 2. Start with the driver side front
trailer tire.
3. Activate the tool near the valve stem or adjust the air pressure of this tire until
the horn chirps and all working vehicle
and trailer lights flash.
The process stops without saving the
sensor locations if this step takes more
than two minutes.
4. Move to the next tire and repeat Step 3 for each sensor. The horn chirps twice
when all sensors are completed.
5. Return to the vehicle to complete the setup.
Maintenance Reminders
To set up maintenance reminders, touch the
Trailer Maintenance icon. Follow the
on-screen prompts. The maximum number
of reminders is 50.
Camera Views and Guides
To set up the trailer camera and guideline
features, if equipped, touch the Camera
Views and Guides icon.
1. Select the number of axles on the trailer.
2. Select the wheel location on the trailer (inboard or outboard). 3. Enter the trailer dimensions as prompted.
Follow the on-screen instructions to
complete setup for available features.
Certain trailer features require a compatible
trailer profile be configured and selected.
A compatible trailer is a box-type trailer
(cargo, camper, etc.) with a conventional
hitch.
Transparent Trailer Setup
If equipped, the rear trailer camera must be
mounted on the trailer and electrically
connected to the vehicle before transparent
trailer feature can be used. See Assistance
Systems for Parking or Backing 0246.
Follow the on-screen instructions to enter
the trailer dimensions.
Trailer dimensions must be in range and
transparent trailer must be calibrated
before use.
.Trailer Length: Measure from center of
coupler to furthest rear point on the
trailer.
.Trailer Total Width: Measure from the left
most edge of trailer, including the wheels,
to the right most edge.
Page 315 of 429

Chevrolet Silverado EV Owner Manual (GMNA-Localizing-U.S./Canada-
16702912) - 2024 - CRC - 1/17/23
314 Driving and Operating
.Trailer Body Width: Measure from the left
edge to the right edge of the trailer
body. This is only applicable to trailers
with outboard tires.
.Trailer Height: Measure from ground to
tallest point of the trailer.
.Hitching Point Length: Measure from
center of coupler to middle of tires.
.Trailer Tongue Length: Measure from the
center of the coupler to the trailer front
wall, if the trailer has a flat front. If it
does not have a flat front, measure from
the center of the coupler to the corner of
the sidewall. The point where the taper
meets the full width of the trailer.
.Vehicle Hitch Height: Measure from
ground to top of coupler.
.Vehicle Hitch Length: Measure from hitch
receiver to center of ball.
If trailer dimensions are out of range, this
feature is unavailable. Ensure the rear trailer
camera is connected.
Follow on-screen instructions to drive
forward to complete calibration.
Rear Trailer Guidance Setup
If equipped, a rear trailer camera must be
mounted on the trailer and electrically
connected to the vehicle before the rear trailer guidance feature can be used. See
Assistance Systems for Parking or Backing
0
246.
Trailer dimensions must be in the following
range to enable this feature:
.Trailer Length: Measure from center of
coupler to furthest rear point on the
trailer.
If trailer dimensions are out of range, this
feature is unavailable. Ensure rear trailer
camera is connected.
Follow the on-screen instructions to drive
forward to complete calibration.
Jack-Knife Alert Setup
If equipped, follow the on-screen instructions
to drive forward to complete calibration.
Trailer Length Indicator Setup
Follow on-screen instructions to drive
forward to complete calibration.
Trailer Side Blind Zone Alert Setup
Follow the on-screen instructions to enter
the trailer dimensions.
Trailer dimensions must be in range to
enable this feature.
.Trailer Length: Measure from center of
coupler to furthest rear point on the
trailer.
.Trailer Width: Measure from the left edge
to right edge of the trailer body.
If trailer dimensions are out of range, this
feature is unavailable.
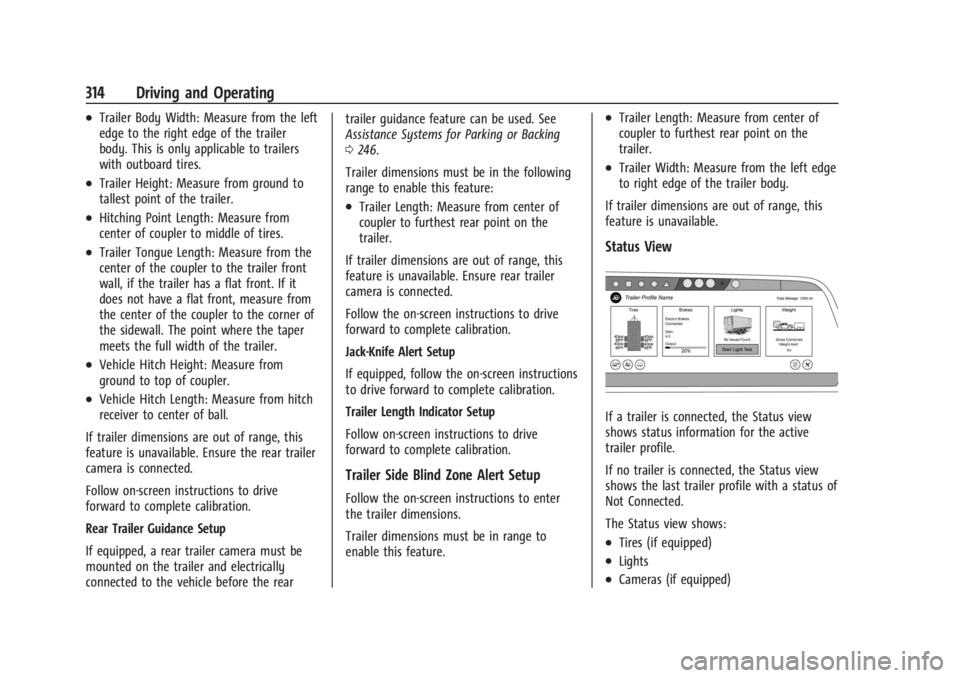
Status View
If a trailer is connected, the Status view
shows status information for the active
trailer profile.
If no trailer is connected, the Status view
shows the last trailer profile with a status of
Not Connected.
The Status view shows:
.Tires (if equipped)
.Lights
.Cameras (if equipped)
Page 332 of 429

Chevrolet Silverado EV Owner Manual (GMNA-Localizing-U.S./Canada-
16702912) - 2024 - CRC - 1/13/23
Vehicle Care 331
Warning (Continued)
structure or anything that can burn.
Ventilate the vehicle by opening a
window or a door.
Contact Customer Assistance as soon as
possible to determine whether an
inspection is needed. SeeCustomer
Assistance Offices 0398.
If the vehicle is in a crash, the sensing
system may shut down the high voltage
system. When this occurs, the high voltage
battery is disconnected and the vehicle will
not start. The SERVICE VEHICLE SOON
message in the Driver Information Center
(DIC) will display. Before the vehicle can
operate again, it must be serviced at your
dealer. If a crash occurs or an airbag(s)
inflates, see “If a Crash Occurs” under
Collision Damage Repair 0402 and
What Will You See after an Airbag Inflates?
0 64 for additional information.
Keep the vehicle plugged in, even when fully
charged, to keep the high voltage battery
temperature ready for the next drive. This is
important when outside temperatures are
extremely hot or cold. Propulsion power may be reduced in
extremely cold temperatures, or if the high
voltage battery is too cold. The message
BATTERY TOO COLD, PLUG IN TO WARM will
display. If the message displays, a level 2
charger is required to heat the battery to a
minimum temperature to enable propulsion
or charging.
A vehicle cover, which can reduce sun
loading on the vehicle and improve high
voltage battery life, is available from your
dealer.
See
Radio Frequency Statement 0404.
Federal Communications Commission (FCC)
Radiation Exposure Statement
This equipment has been evaluated to be
installed and operated at a minimum
distance of 5.7 cm (2.2 in) between the
device and your body. The vehicle design
ensures this distance is maintained during
normal use. Changes or modifications to any
of these systems by other than an
authorized service facility could void
authorization to use this equipment. Innovation, Science, and Economic
Development (ISED) Radiation Exposure
Statement
This equipment complies with RSS-102
radiation exposure limits set forth for an
uncontrolled environment. This equipment
should be installed and operated with a
minimum distance of 5.7 cm (2.2 in) between
the radiator and any part of your body. The
vehicle design ensures this distance is
maintained during normal use. Changes or
modifications to any of these systems by
other than an authorized service facility
could void authorization to use this
equipment.
Vehicle Storage
The best way to store the vehicle for any
length of time is to plug in the charge cord
and leave it plugged in. The vehicle
monitors and maintains the 12-volt battery
daily. It is okay to leave the vehicle plugged
in for extended periods of time. Once
charged to full, very little energy is required
to maintain the 12-volt battery and high
voltage battery.
If it is not possible to charge the vehicle
with the charge cord left plugged in, be sure
to fully charge the high voltage battery
Page 334 of 429

Chevrolet Silverado EV Owner Manual (GMNA-Localizing-U.S./Canada-
16702912) - 2024 - CRC - 1/13/23
Vehicle Care 333
TAMPERING WITH NOISE CONTROL
SYSTEM PROHIBITED
Federal law prohibits the following acts or
the causing thereof:1. The removal or rendering inoperative by any person, other than for purposes of
maintenance, repair, or replacement, of
any device or element of design
incorporated into any new vehicle for
the purpose of noise control prior to its
sale or delivery to the ultimate purchaser
or while it is in use; or
2. the use of the vehicle after such device or element of design has been removed
or rendered inoperative by any person.
Among those acts presumed to constitute
tampering are the acts listed below.
Insulation:
Removal of the noise shields or any
undercab insulation.
Fan and Drive:
Removal of fan clutch or rendering clutch
inoperative.
Removal of fan shroud. External Sound System:
Modification of the vehicle’s external sound
system.
Wiper Blade Replacement
Windshield wiper blades should be replaced
periodically. See the
Maintenance Schedule
0 389.
Replacement blades come in different types
and are removed in different ways. For
proper type and length, see Maintenance
Replacement Parts 0392.
Caution
Allowing the wiper arm to touch the
windshield when no wiper blade is
installed could damage the windshield.
Any damage that occurs would not be
covered by the vehicle warranty. Do not
allow the wiper arm to touch the
windshield.
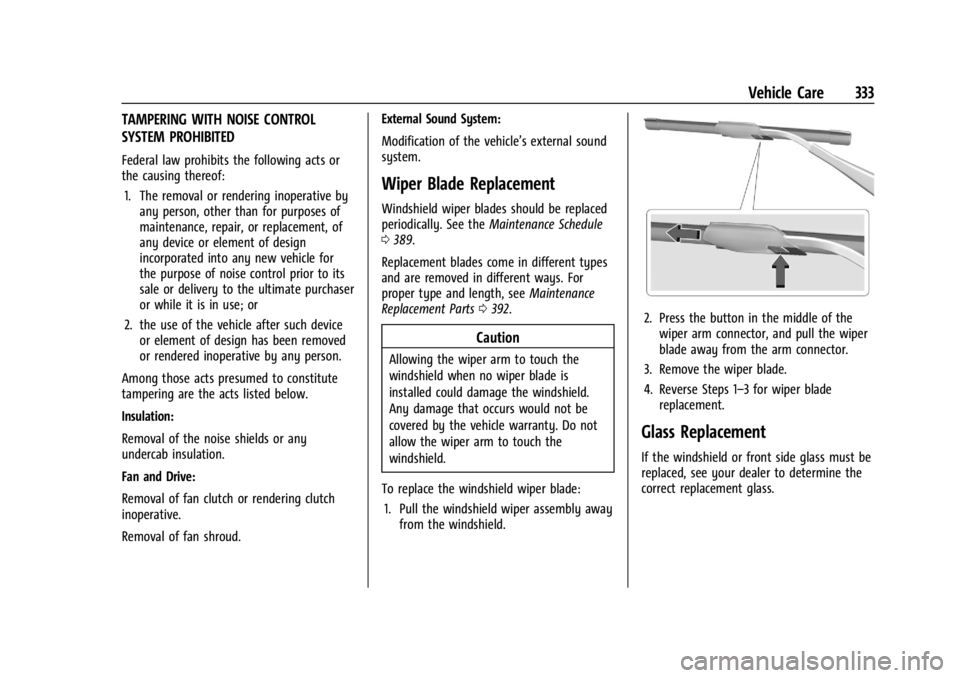
To replace the windshield wiper blade: 1. Pull the windshield wiper assembly away from the windshield.
2. Press the button in the middle of thewiper arm connector, and pull the wiper
blade away from the arm connector.
3. Remove the wiper blade.
4. Reverse Steps 1–3 for wiper blade replacement.
Glass Replacement
If the windshield or front side glass must be
replaced, see your dealer to determine the
correct replacement glass.