2024 CHEVROLET SILVERADO EV display
[x] Cancel search: displayPage 319 of 429
Chevrolet Silverado EV Owner Manual (GMNA-Localizing-U.S./Canada-
16702912) - 2024 - CRC - 1/17/23
318 Driving and Operating
Custom Checklist Items
For each of the Trailer Profile checklists,
there is an option to create custom items to
view in the checklist. Custom checklist items
are displayed at the end of the default
checklist items.
Guest Trailer and No Trailer Connected
If a Guest Trailer Profile is active, or if no
trailer is connected, this view shows the
default checklist.
Weight
.Touch to turn on or off the GCW Alert.
.When on, an alert displays in the DIC
when the combined weight of the vehicle
and trailer exceed the vehicle's Gross
Combined Weight Raring (GCWR). For
more information on the Gross Combined
Weight (GCW) Alert, seeTrailer Towing
0 297.
Brakes
If equipped with Integrated Trailer Brake
Controller (ITBC) system and if the
connected trailer is equipped with electric
brakes or electric over hydraulic brakes, this
view displays the current state of the brakes
including brake gain setting and output.
If no electric brakes are detected or if no trailer is connected, this view displays the
last known brake gain setting and the
output shows dashed lines.
‐
Touch Add to Driver Display to show
trailer brake gain and output in the DIC.
‐ Touch How To Set Brake Gain to access
detailed steps to set trailer brake gain.
The Trailering App System shows any brake
issues reported by the trailer brake
controller in the Brakes view. Trailer
diagnosis and service may be required.
Repair your trailer brakes, if needed. Trailer
brake repairs are not covered by your GM
warranty.
See “Integrated Trailer Brake Control
System” section under Towing Equipment
0 301.
Guest Trailer Status View
If the Guest Trailer Profile is active, the
Status view shows:
.Lights
.Cameras
.Checklist
.Weight
.Brakes (if equipped) The Trailer Status view displays mileage
information. The mileage value resets when
the trailer is disconnected from the vehicle.
Accessory/No Trailer Status View
If the Accessory/No Trailer profile is active,
trailer status information is not available.
Trailers View
Touch the trailer profile icon in the Status
view to view, activate, create, edit, or delete
trailer profiles.
If a trailer is connected, touch the Trailer
Profile name to activate a Trailer Profile.
The Trailering App can save a maximum of
five trailer profiles
The Custom Trailer Profiles and Guest Trailer
are in order of the most frequently used.
The Accessory/No Trailer profile is shown
below the Custom Trailer Profiles and Guest
Trailer Profile.
Guest Trailer
If the Guest Trailer Profile is the active
Trailer Profile, trailer detection, lights/
connections status, theft, and the Tow/Haul
reminder alerts can be sent. The system
does not track total mileage, but the system
tracks trip mileage if the Guest Trailer
Page 321 of 429
Chevrolet Silverado EV Owner Manual (GMNA-Localizing-U.S./Canada-
16702912) - 2024 - CRC - 1/17/23
320 Driving and Operating
Delete/Remove Trailer
Touch to remove the Trailer Profile and all
of its settings.
On the pop-up, touch Remove to delete the
Trailer Profile. Touch Cancel to dismiss the
pop-up and return to the previous view.
When selecting Remove, it will display if
there is a connected OnStar plan active with
the vehicle. Removing a trailer profile
deletes the profile from the vehicle but the
profile still associates with the user account.
However, if there is not a connected OnStar
plan and Remove is selected, DELETE
displays and the profile deletes
permanently.
Set as Default Trailer
Touch Set as Default Trailer to select the
current profile as the default trailer profile.
The default trailer profile automatically is
selected each time a new connection is
detected. The Trailer Detection Alert will no
longer appear on the infotainment screen.
If this setting is turned off, the current
trailer profile is not the default trailer.GCW Alerts
Touch GCW Alert to enable/disable the GCW
Alert for the selected profile. These alerts
are based on the Trailer Profile, so the
settings for each Trailer Profile must be
turned on or off.
Turn this setting off to stop receiving GCW
Alerts when that Trailer Profile is active.
Theft Alert
If Theft Alerts are enabled, an alarm will
sound anytime the trailer is disconnected
from the vehicle while the vehicle is off.
Touch Theft Alert to enable/disable Theft
Alerts for the selected profile. These alerts
are based on the Trailer Profile, so the
settings for each Trailer Profile must be
turned on or off.
This setting defaults for each Trailer Profile,
including the Guest Trailer Profile.
A smartphone receives a notification that
the trailer related to the selected Trailer
Profile is disconnected from the vehicle,
if the setting is on for the active Trailer
Profile, the vehicle has an OnStar or
connected service plan and the smartphone
number has been added to the account for
this notification.If the setting is turned off for a given Trailer
Profile, the smartphone will not receive this
security notification even if the Trailer
Profile is active.
Tow/Haul Mode Reminder
When the vehicle detects a new trailer
connection, and if the Tow/Haul Mode
Reminder setting is enabled, a courtesy
message displays reminding you to turn on
Tow/Haul mode if appropriate. See
Driver
Mode Control 0209.
Touch Tow/Haul Mode Reminder to turn on/
off for the selected profile. The status of
Tow/Haul Mode Reminder Alerts are specific
to each trailer profile. You must specify
whether you want to enable theft alerts for
each trailer profile.
If Tow/Haul mode is off and Tow/Haul
Mode Reminder is on for a Trailer Profile,
each time the vehicle is turned on, a
reminder appears to turn on Tow/Haul
Mode when the Trailer Profile is active.
If Tow/Haul mode is on and Tow/Haul Mode
Reminder is on for a Trailer Profile, the
reminder does not appear when the Trailer
Profile is active.
Page 322 of 429
Chevrolet Silverado EV Owner Manual (GMNA-Localizing-U.S./Canada-
16702912) - 2024 - CRC - 1/17/23
Driving and Operating 321
Conversions and Add-Ons
Add-On Electrical Equipment
{Warning
The Data Link Connector (DLC) is used for
vehicle service and Emission Inspection/
Maintenance testing. SeeService Vehicle
Soon Light (Propulsion System Failure)
0 115. A device connected to the DLC —
such as an aftermarket fleet or
driver-behavior tracking device —may
interfere with vehicle systems. This could
affect vehicle operation and cause a
crash. Such devices may also access
information stored in the vehicle’s
systems.
Caution
Some electrical equipment can damage
the vehicle or cause components to not
work and would not be covered by the
vehicle warranty. Always check with your
dealer before adding electrical equipment. Add-on equipment can drain the vehicle's
12-volt battery, even if the vehicle is not
operating.
When adding electrical equipment, it should
only be connected using the accessory
power outlets. The maximum power that
can be supplied by one accessory power
outlet or spread across all three is 200 watts
or 15 amps. Exceeding 200 watts or 15 amps
may cause erratic vehicle operation.
The vehicle has an airbag system. Before
attempting to add anything electrical to the
vehicle, see
Servicing the Airbag-Equipped
Vehicle 068 and
Adding Equipment to the Airbag-Equipped
Vehicle 068.
Auxiliary Switches
On-screen auxiliary switches, if equipped, are
quick-touch icons that appear within the
infotainment system, giving you easy access
to some of the features of certain
aftermarket accessories installed on the
vehicle (off-road lighting, light bars, etc.). To access the on-screen auxiliary switches,
select Controls > Aux Switches. Six on-screen
auxiliary switches are available.
Use of the on-screen switches requires
installation of an auxiliary switch interface
module, which is mounted under the hood.
See your dealer for purchase and installation
of the necessary components. When an
aftermarket accessory is installed onto the
vehicle, it should be hard-wired to the
auxiliary switch interface module to the
numbered connection that corresponds with
the numbered on-screen auxiliary switch.
See
Accessories and Modifications 0324.
If you touch an on-screen auxiliary switch
but the auxiliary switch interface module is
not installed or has no accessory wired at
that connection, a message “No accessory
connected to this switch” displays.
Customizing the On-Screen Auxiliary
Switches
After a purchased accessory is installed,
create a text label for the corresponding
on-screen auxiliary switch and choose an
icon to represent the installed accessory.
1. While the vehicle is in P (Park), touch the Controls icon on the infotainment
home page.
Page 332 of 429
Chevrolet Silverado EV Owner Manual (GMNA-Localizing-U.S./Canada-
16702912) - 2024 - CRC - 1/13/23
Vehicle Care 331
Warning (Continued)
structure or anything that can burn.
Ventilate the vehicle by opening a
window or a door.
Contact Customer Assistance as soon as
possible to determine whether an
inspection is needed. SeeCustomer
Assistance Offices 0398.
If the vehicle is in a crash, the sensing
system may shut down the high voltage
system. When this occurs, the high voltage
battery is disconnected and the vehicle will
not start. The SERVICE VEHICLE SOON
message in the Driver Information Center
(DIC) will display. Before the vehicle can
operate again, it must be serviced at your
dealer. If a crash occurs or an airbag(s)
inflates, see “If a Crash Occurs” under
Collision Damage Repair 0402 and
What Will You See after an Airbag Inflates?
0 64 for additional information.
Keep the vehicle plugged in, even when fully
charged, to keep the high voltage battery
temperature ready for the next drive. This is
important when outside temperatures are
extremely hot or cold. Propulsion power may be reduced in
extremely cold temperatures, or if the high
voltage battery is too cold. The message
BATTERY TOO COLD, PLUG IN TO WARM will
display. If the message displays, a level 2
charger is required to heat the battery to a
minimum temperature to enable propulsion
or charging.
A vehicle cover, which can reduce sun
loading on the vehicle and improve high
voltage battery life, is available from your
dealer.
See
Radio Frequency Statement 0404.
Federal Communications Commission (FCC)
Radiation Exposure Statement
This equipment has been evaluated to be
installed and operated at a minimum
distance of 5.7 cm (2.2 in) between the
device and your body. The vehicle design
ensures this distance is maintained during
normal use. Changes or modifications to any
of these systems by other than an
authorized service facility could void
authorization to use this equipment. Innovation, Science, and Economic
Development (ISED) Radiation Exposure
Statement
This equipment complies with RSS-102
radiation exposure limits set forth for an
uncontrolled environment. This equipment
should be installed and operated with a
minimum distance of 5.7 cm (2.2 in) between
the radiator and any part of your body. The
vehicle design ensures this distance is
maintained during normal use. Changes or
modifications to any of these systems by
other than an authorized service facility
could void authorization to use this
equipment.
Vehicle Storage
The best way to store the vehicle for any
length of time is to plug in the charge cord
and leave it plugged in. The vehicle
monitors and maintains the 12-volt battery
daily. It is okay to leave the vehicle plugged
in for extended periods of time. Once
charged to full, very little energy is required
to maintain the 12-volt battery and high
voltage battery.
If it is not possible to charge the vehicle
with the charge cord left plugged in, be sure
to fully charge the high voltage battery
Page 335 of 429
Chevrolet Silverado EV Owner Manual (GMNA-Localizing-U.S./Canada-
16702912) - 2024 - CRC - 1/13/23
334 Vehicle Care
Windshield Replacement
Driver Assistance Systems
If the windshield needs to be replaced and
the vehicle is equipped with a front camera
sensor for the Driver Assistance Systems, a
GM replacement windshield is
recommended. The replacement windshield
must be installed according to GM
specifications for proper alignment. If it is
not, these systems may not work properly,
they may display messages, or they may
not work at all. See your dealer for proper
windshield replacement.
Gas Strut(s)
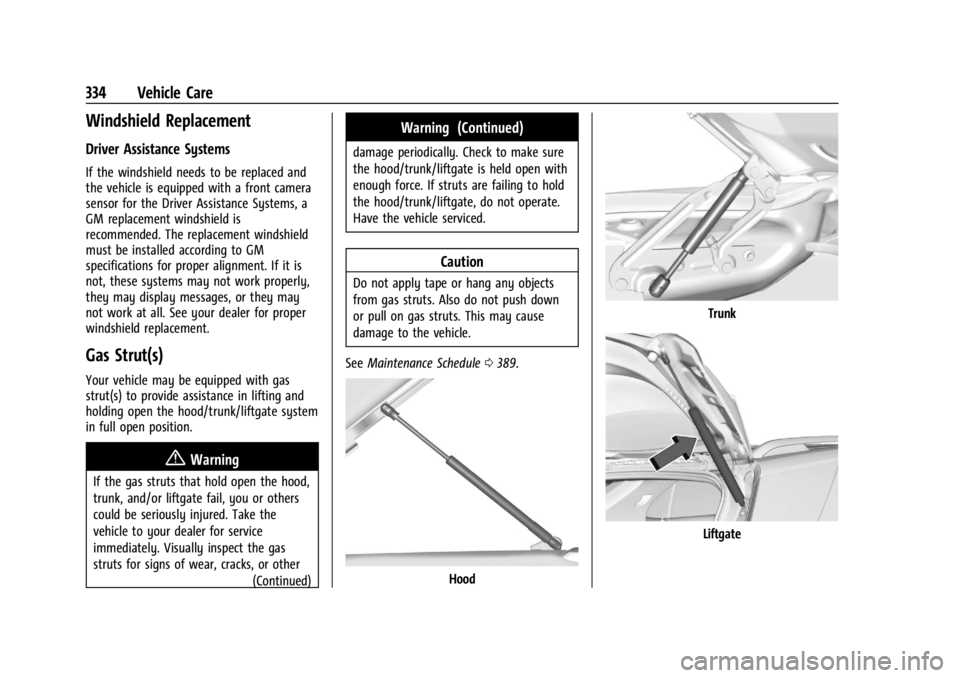
Your vehicle may be equipped with gas
strut(s) to provide assistance in lifting and
holding open the hood/trunk/liftgate system
in full open position.
{Warning
If the gas struts that hold open the hood,
trunk, and/or liftgate fail, you or others
could be seriously injured. Take the
vehicle to your dealer for service
immediately. Visually inspect the gas
struts for signs of wear, cracks, or other(Continued)
Warning (Continued)
damage periodically. Check to make sure
the hood/trunk/liftgate is held open with
enough force. If struts are failing to hold
the hood/trunk/liftgate, do not operate.
Have the vehicle serviced.
Caution
Do not apply tape or hang any objects
from gas struts. Also do not push down
or pull on gas struts. This may cause
damage to the vehicle.
See Maintenance Schedule 0389.
Hood
Trunk
Liftgate
Page 345 of 429
Chevrolet Silverado EV Owner Manual (GMNA-Localizing-U.S./Canada-
16702912) - 2024 - CRC - 1/13/23
344 Vehicle Care
FusesUsage
F10 Displays SPARE
F11 CGM –Central Gateway
Module
SPARE
F12 SPARE
F13 SPARE DLC–Data Link Connection
F14 BODY MISC BODY MISC 1
F15 MISC_IP 1
F16 SPARE F17 SPARE
F18 BDY 1 HDLNR
F19 VICM TPIM IGN –Vehicle
Integration Control
Module/Traction Power
Inverter Module/Ignition
F20 OHC HUD Fuses
Usage
F21 VCU VCU 2
F22 SPARE
F23 SPARE
F24 FCM_RLH_UGDO F25 USB_ROW 2
F26 SPARE F27 USB
F28 SPARE
F29 FRT_HVAC_DIS
F30 SPARE F31 BCM 3 –Body Control
Module 3
F32 HSWM –Heating Steering
Wheel Module
F33 SPARE
F34 SPARE F35 SPARE
F36 SPARE F37 SPARE Fuses
Usage
F38 SPARE
F39 SPARE
F40 SPARE
Circuit
Breakers Usage
CB01 APO –Auxiliary Power
Outlet Center Console
CB02 SPARE
Wheels and Tires
Tires
Every new GM vehicle has high-quality
tires made by a leading tire
manufacturer. See the warranty manual
for information regarding the tire
warranty and where to get service. For
additional information refer to the tire
manufacturer.
Page 353 of 429
Chevrolet Silverado EV Owner Manual (GMNA-Localizing-U.S./Canada-
16702912) - 2024 - CRC - 1/13/23
352 Vehicle Care
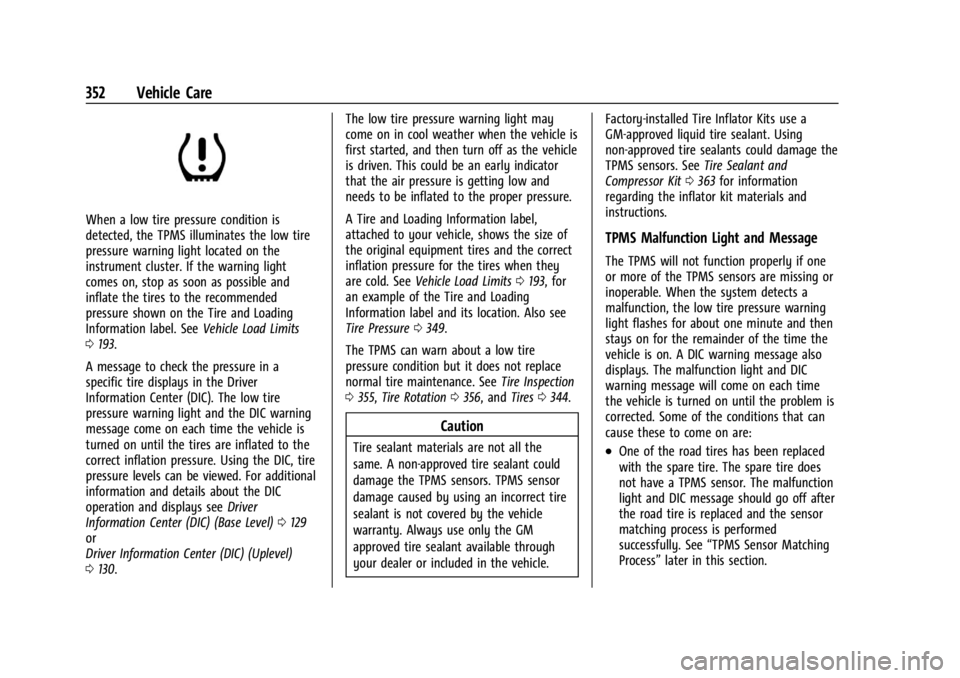
When a low tire pressure condition is
detected, the TPMS illuminates the low tire
pressure warning light located on the
instrument cluster. If the warning light
comes on, stop as soon as possible and
inflate the tires to the recommended
pressure shown on the Tire and Loading
Information label. SeeVehicle Load Limits
0 193.
A message to check the pressure in a
specific tire displays in the Driver
Information Center (DIC). The low tire
pressure warning light and the DIC warning
message come on each time the vehicle is
turned on until the tires are inflated to the
correct inflation pressure. Using the DIC, tire
pressure levels can be viewed. For additional
information and details about the DIC
operation and displays see Driver
Information Center (DIC) (Base Level) 0129
or
Driver Information Center (DIC) (Uplevel)
0 130. The low tire pressure warning light may
come on in cool weather when the vehicle is
first started, and then turn off as the vehicle
is driven. This could be an early indicator
that the air pressure is getting low and
needs to be inflated to the proper pressure.
A Tire and Loading Information label,
attached to your vehicle, shows the size of
the original equipment tires and the correct
inflation pressure for the tires when they
are cold. See
Vehicle Load Limits 0193, for
an example of the Tire and Loading
Information label and its location. Also see
Tire Pressure 0349.
The TPMS can warn about a low tire
pressure condition but it does not replace
normal tire maintenance. See Tire Inspection
0 355, Tire Rotation 0356, and Tires0344.
Caution
Tire sealant materials are not all the
same. A non-approved tire sealant could
damage the TPMS sensors. TPMS sensor
damage caused by using an incorrect tire
sealant is not covered by the vehicle
warranty. Always use only the GM
approved tire sealant available through
your dealer or included in the vehicle. Factory-installed Tire Inflator Kits use a
GM-approved liquid tire sealant. Using
non-approved tire sealants could damage the
TPMS sensors. See
Tire Sealant and
Compressor Kit 0363 for information
regarding the inflator kit materials and
instructions.
TPMS Malfunction Light and Message
The TPMS will not function properly if one
or more of the TPMS sensors are missing or
inoperable. When the system detects a
malfunction, the low tire pressure warning
light flashes for about one minute and then
stays on for the remainder of the time the
vehicle is on. A DIC warning message also
displays. The malfunction light and DIC
warning message will come on each time
the vehicle is turned on until the problem is
corrected. Some of the conditions that can
cause these to come on are:
.One of the road tires has been replaced
with the spare tire. The spare tire does
not have a TPMS sensor. The malfunction
light and DIC message should go off after
the road tire is replaced and the sensor
matching process is performed
successfully. See “TPMS Sensor Matching
Process” later in this section.
Page 355 of 429
Chevrolet Silverado EV Owner Manual (GMNA-Localizing-U.S./Canada-
16702912) - 2024 - CRC - 1/13/23
354 Vehicle Care
.There is a malfunction in the TPMS.
.There is a malfunction in the horn or turn
signal lamps.
.The identification code of the TPMS
sensor is not registered to the system.
.The battery of the TPMS sensor is low.
If the tire fill alert does not operate due to
TPMS interference, move the vehicle about
1 m (3 ft) back or forward and try again.
If the tire fill alert feature is not working,
use a tire pressure gauge to confirm tire
pressure.
TPMS Sensor Matching Process —Auto
Learn Function
Each TPMS sensor has a unique
identification code. The identification code
needs to be matched to a new tire/wheel
position after rotating the tires or replacing
one or more of the TPMS sensors. When a
tire is installed, the vehicle must be
stationary for about 20 minutes before the
system recalculates. The following relearn
process takes up to 10 minutes, driving at a
minimum speed of 20 km/h (12 mph). A dash (-) or pressure value will display in
the DIC. See
Driver Information Center (DIC)
(Base Level) 0129 or
Driver Information Center (DIC) (Uplevel)
0 130. A warning message displays in the
DIC if a problem occurs during the relearn
process.
Trailer Tire Pressure Monitoring
Operation
If equipped, the Trailer Tire Pressure
Monitoring System (TTPMS) is designed to
monitor the pressure of the trailer tires and
warn the driver when a low pressure
condition exists. TTPMS sensors for four tires
are provided. The system can accommodate
a trailer with up to six tires if additional
sensors are purchased from the dealer. Also,
the system can be paired with up to five
individual trailers.
Prior to use, the vehicle must learn the
sensors by following the learning process.
See Trailering App 0310.
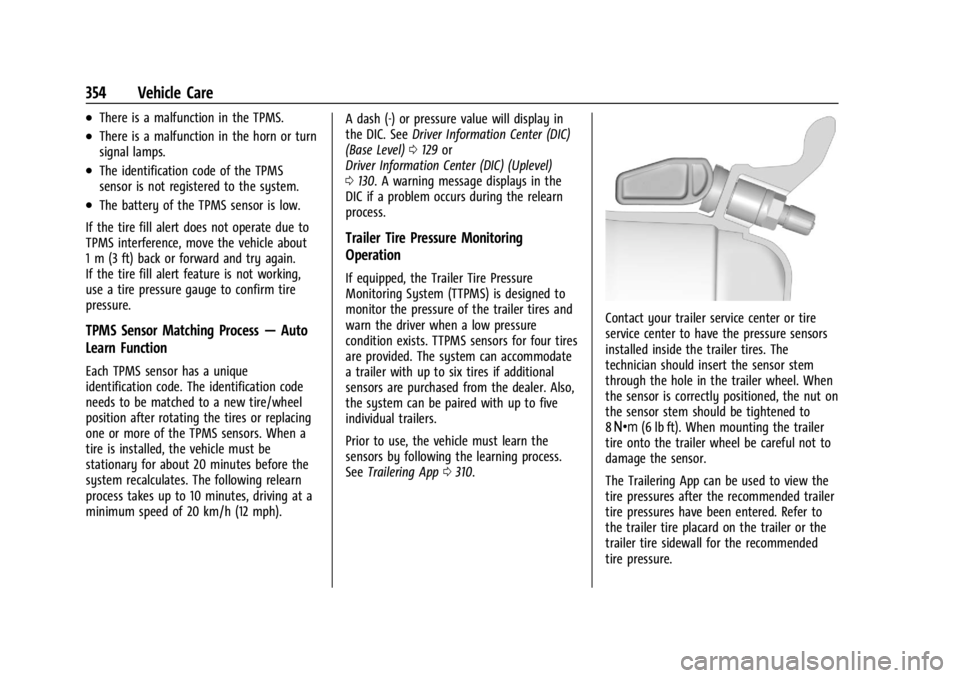
Contact your trailer service center or tire
service center to have the pressure sensors
installed inside the trailer tires. The
technician should insert the sensor stem
through the hole in the trailer wheel. When
the sensor is correctly positioned, the nut on
the sensor stem should be tightened to
8Y (6 lb ft). When mounting the trailer
tire onto the trailer wheel be careful not to
damage the sensor.
The Trailering App can be used to view the
tire pressures after the recommended trailer
tire pressures have been entered. Refer to
the trailer tire placard on the trailer or the
trailer tire sidewall for the recommended
tire pressure.