2023 LINCOLN CORSAIR lights
[x] Cancel search: lightsPage 401 of 690
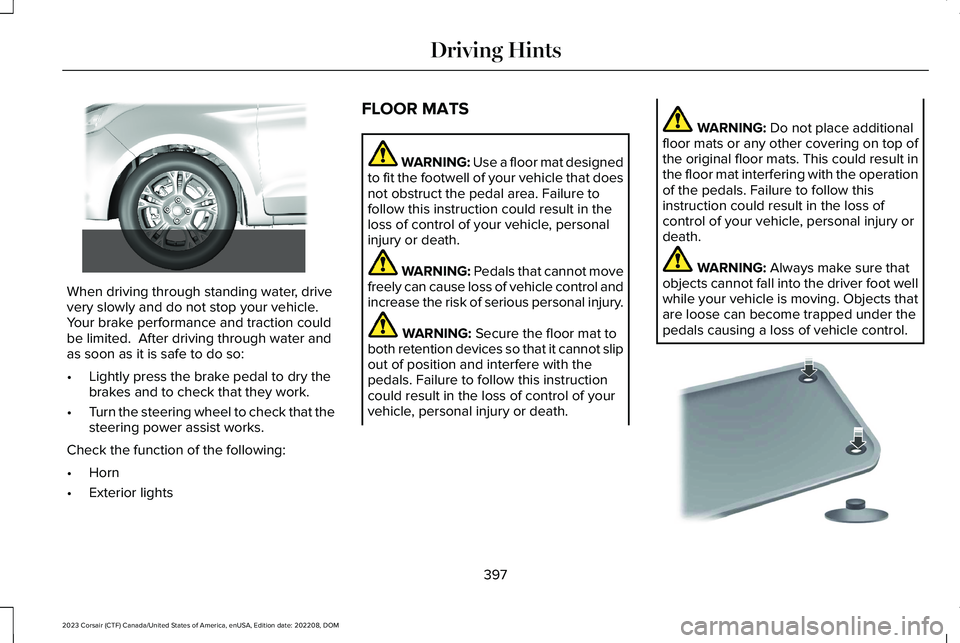
When driving through standing water, drivevery slowly and do not stop your vehicle. Your brake performance and traction couldbe limited. After driving through water andas soon as it is safe to do so:
•Lightly press the brake pedal to dry thebrakes and to check that they work.
•Turn the steering wheel to check that thesteering power assist works.
Check the function of the following:
•Horn
•Exterior lights
FLOOR MATS
WARNING: Use a floor mat designedto fit the footwell of your vehicle that doesnot obstruct the pedal area. Failure tofollow this instruction could result in theloss of control of your vehicle, personalinjury or death.
WARNING: Pedals that cannot movefreely can cause loss of vehicle control andincrease the risk of serious personal injury.
WARNING: Secure the floor mat toboth retention devices so that it cannot slipout of position and interfere with thepedals. Failure to follow this instructioncould result in the loss of control of yourvehicle, personal injury or death.
WARNING: Do not place additionalfloor mats or any other covering on top ofthe original floor mats. This could result inthe floor mat interfering with the operationof the pedals. Failure to follow thisinstruction could result in the loss ofcontrol of your vehicle, personal injury ordeath.
WARNING: Always make sure thatobjects cannot fall into the driver foot wellwhile your vehicle is moving. Objects thatare loose can become trapped under thepedals causing a loss of vehicle control.
397
2023 Corsair (CTF) Canada/United States of America, enUSA, Edition date: 202208, DOMDriving Hints E266447 E142666
Page 448 of 690
Note:If you add electrical accessories orcomponents to the vehicle, it could adverselyaffect battery performance and durability.This could also affect the performance ofother electrical systems in the vehicle.
CHANGING THE 12V BATTERY
The battery is in the engine compartment.See Maintenance (page 426).
Your vehicle has a maintenance-free battery. It does not require additional water duringservice.
If the vehicle battery has a cover, make sureyou correctly install it after cleaning orreplacing the battery.
For longer, trouble-free operation, keep thetop of the battery clean and dry and thebattery cables tightly fastened to the batteryterminals. If any corrosion is present on thebattery or terminals, remove the cables fromthe terminals and clean with a wire brush. You can neutralize the acid with a solutionof baking soda and water.
We recommend that you disconnect thenegative battery cable terminal from thebattery if you plan to store your vehicle foran extended period.
Note:If you only disconnect the negativebattery cable terminal, make sure it isisolated or placed away from the batteryterminal to avoid unintended connection orarcing.
If you disconnect or replace the battery andyour vehicle has an automatic transmission,it must relearn its adaptive strategy. Becauseof this, the transmission may shift firmly whenfirst driven. This is normal operation whilethe transmission fully updates its operationto optimum shift feel.
Removing the Battery
1.Apply the parking brake and switch theignition off.
2.Switch all electrical equipment off, forexample lights and radio.
3.Wait a minimum of two minutes beforedisconnecting the battery.
Note:The engine management system hasa power hold function and remains poweredfor a period of time after you switch theignition off. This is to allow diagnostic andadaptive tables to be stored. Disconnectingthe battery without waiting can causedamage not covered by the vehicleWarranty.
4.Disconnect and isolate the negativebattery cable terminal.
5.Disconnect and isolate the positivebattery cable terminal.
6.Remove the battery securing clamp.
7.Remove the battery.
If you disconnect or replace the vehiclebattery, you must reset the followingfeatures:
•Window bounce-back. See WindowBounce-Back (page 131).
•Clock Settings.
•Pre-set radio stations.
444
2023 Corsair (CTF) Canada/United States of America, enUSA, Edition date: 202208, DOMMaintenance
Page 449 of 690
Replacing the Battery
Note:Before reconnecting the battery, makesure the ignition remains switched off.
You must replace the battery with one ofexactly the same specification.
To install, reverse the removal procedure.
Note:Make sure that you correctly installthe battery terminal covers, battery coverand battery cable terminals.
CHANGING THE 12V BATTERY - PLUG-IN HYBRID ELECTRIC VEHICLE (PHEV)
The battery is in the luggage compartment.
Your vehicle has a maintenance-free battery.It does not require additional water duringservice.
If the vehicle battery has a cover, make sureyou correctly install it after cleaning orreplacing the battery.
For longer, trouble-free operation, keep thetop of the battery clean and dry and thebattery cables tightly fastened to the batteryterminals. If any corrosion is present on thebattery or terminals, remove the cables fromthe terminals and clean with a wire brush.You can neutralize the acid with a solutionof baking soda and water.
Note:If you only disconnect the negativebattery cable terminal, make sure it isisolated or placed away from the batteryterminal to avoid unintended connection orarcing.
If you disconnect or replace the battery andyour vehicle has an automatic transmission,it must relearn its adaptive strategy. Becauseof this, the transmission may shift firmly whenfirst driven. This is normal operation whilethe transmission fully updates its operationto optimum shift feel.
Removing the Battery
1.Apply the parking brake and switch theignition off.
2.Switch all electrical equipment off, forexample lights and radio.
3.Wait a minimum of two minutes beforedisconnecting the battery.
Note:The engine management system hasa power hold function and remains poweredfor a period of time after you switch theignition off. This is to allow diagnostic andadaptive tables to be stored. Disconnectingthe battery without waiting can causedamage not covered by the vehicleWarranty.
4.Remove the battery securing clamp.
5.Disconnect and isolate the negativebattery cable terminal.
6.Disconnect and isolate the positivebattery cable terminal.
7.Remove the battery.
If you disconnect or replace the vehiclebattery, you must reset the followingfeatures:
•Window bounce-back. See What IsWindow Bounce-Back (page 131).
•Clock Settings.
•Pre-set radio stations.
445
2023 Corsair (CTF) Canada/United States of America, enUSA, Edition date: 202208, DOMMaintenance
Page 481 of 690
What to do when a tire is punctured
A tire puncture within the tire's tread areacan be repaired in two stages with the kit.
•In the first stage, the tire is reinflated witha sealing compound and air. After the tirehas been inflated, drive the vehicle ashort distance approximately 4 mi (6 km)to distribute the sealant in the tire.
•In the second stage, check the tirepressure and adjust, if necessary, to thevehicle's specified tire inflation pressure.
First Stage: Reinflating the Tire withsealing compound and air
WARNING: Do not stand directly overthe kit while inflating the tire. If you noticeany unusual bulges or deformations in thetire's sidewall during inflation, stop and callroadside assistance.
WARNING: If the tire does not inflateto the recommended tire pressure within15 minutes, stop and call roadsideassistance.
Park the vehicle in a safe, level and securearea, away from moving traffic.
Turn the hazard lights on. Apply the parkingbrake and power off the vehicle. Inspect theflat tire for visible damage.
If a puncture is located in the tire sidewall,stop and call roadside assistance.
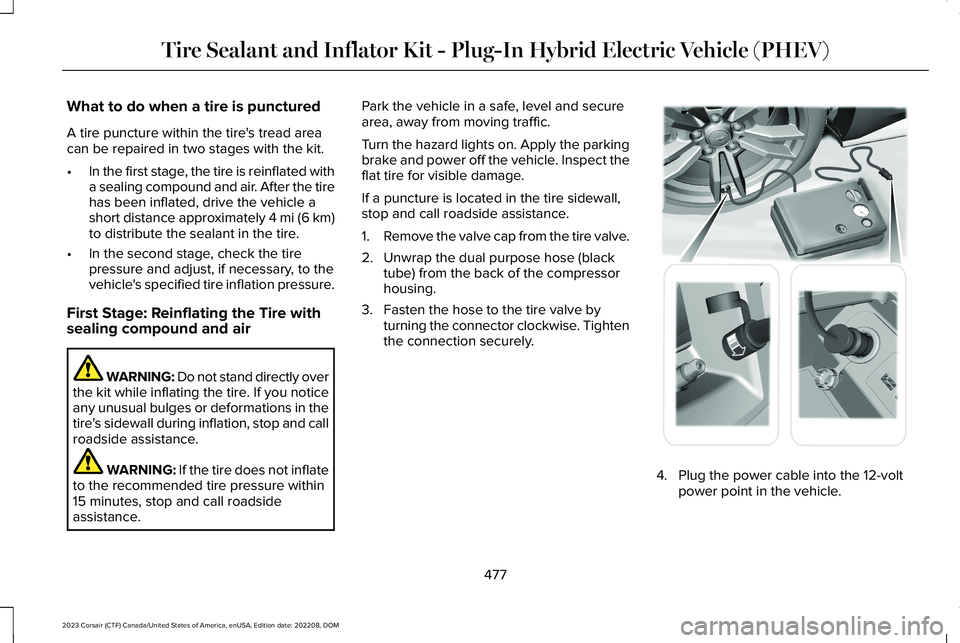
1.Remove the valve cap from the tire valve.
2.Unwrap the dual purpose hose (blacktube) from the back of the compressorhousing.
3.Fasten the hose to the tire valve byturning the connector clockwise. Tightenthe connection securely.
4.Plug the power cable into the 12-voltpower point in the vehicle.
477
2023 Corsair (CTF) Canada/United States of America, enUSA, Edition date: 202208, DOMTire Sealant and Inflator Kit - Plug-In Hybrid Electric Vehicle (PHEV) E175979
Page 569 of 690
Make sure to change your vehicle’s oils andfluids at the specified intervals or inconjunction with a repair. Flushing is a viableway to change fluid for many vehiclesub-systems during scheduled maintenance.
It is critical that systems are flushed only withnew fluid that is the same as that requiredto fill and operate the system or using aFord-approved flushing chemical.
Owner Checks and Services
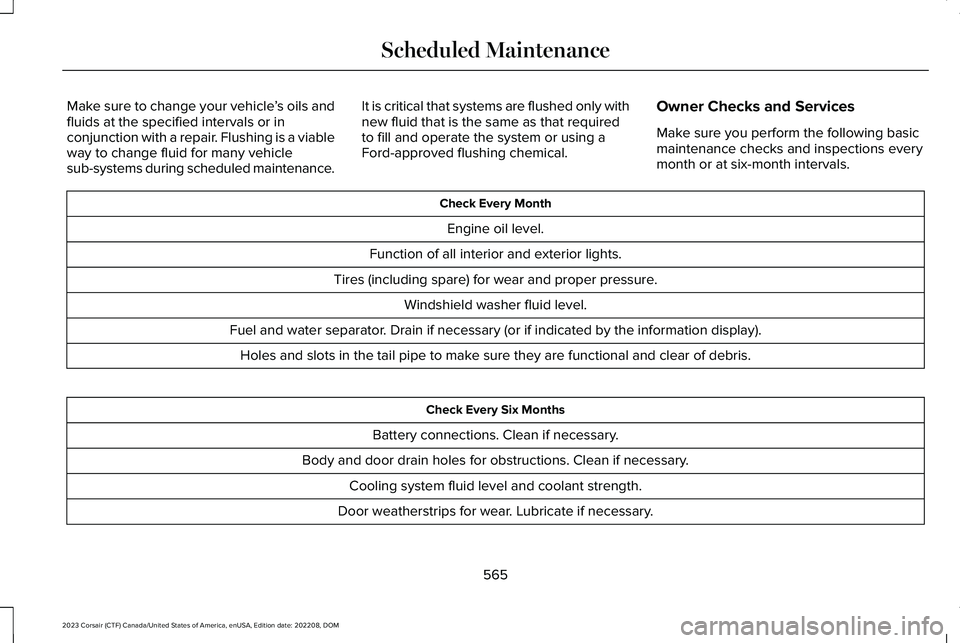
Make sure you perform the following basicmaintenance checks and inspections everymonth or at six-month intervals.
Check Every Month
Engine oil level.
Function of all interior and exterior lights.
Tires (including spare) for wear and proper pressure.
Windshield washer fluid level.
Fuel and water separator. Drain if necessary (or if indicated by the information display).
Holes and slots in the tail pipe to make sure they are functional and clear of debris.
Check Every Six Months
Battery connections. Clean if necessary.
Body and door drain holes for obstructions. Clean if necessary.
Cooling system fluid level and coolant strength.
Door weatherstrips for wear. Lubricate if necessary.
565
2023 Corsair (CTF) Canada/United States of America, enUSA, Edition date: 202208, DOMScheduled Maintenance