2023 FORD SUPER DUTY set clock
[x] Cancel search: set clockPage 361 of 738

INSTALLING AND REMOVING THEPICKUP BED TIE-DOWN CLEATS
Installing the Cleats
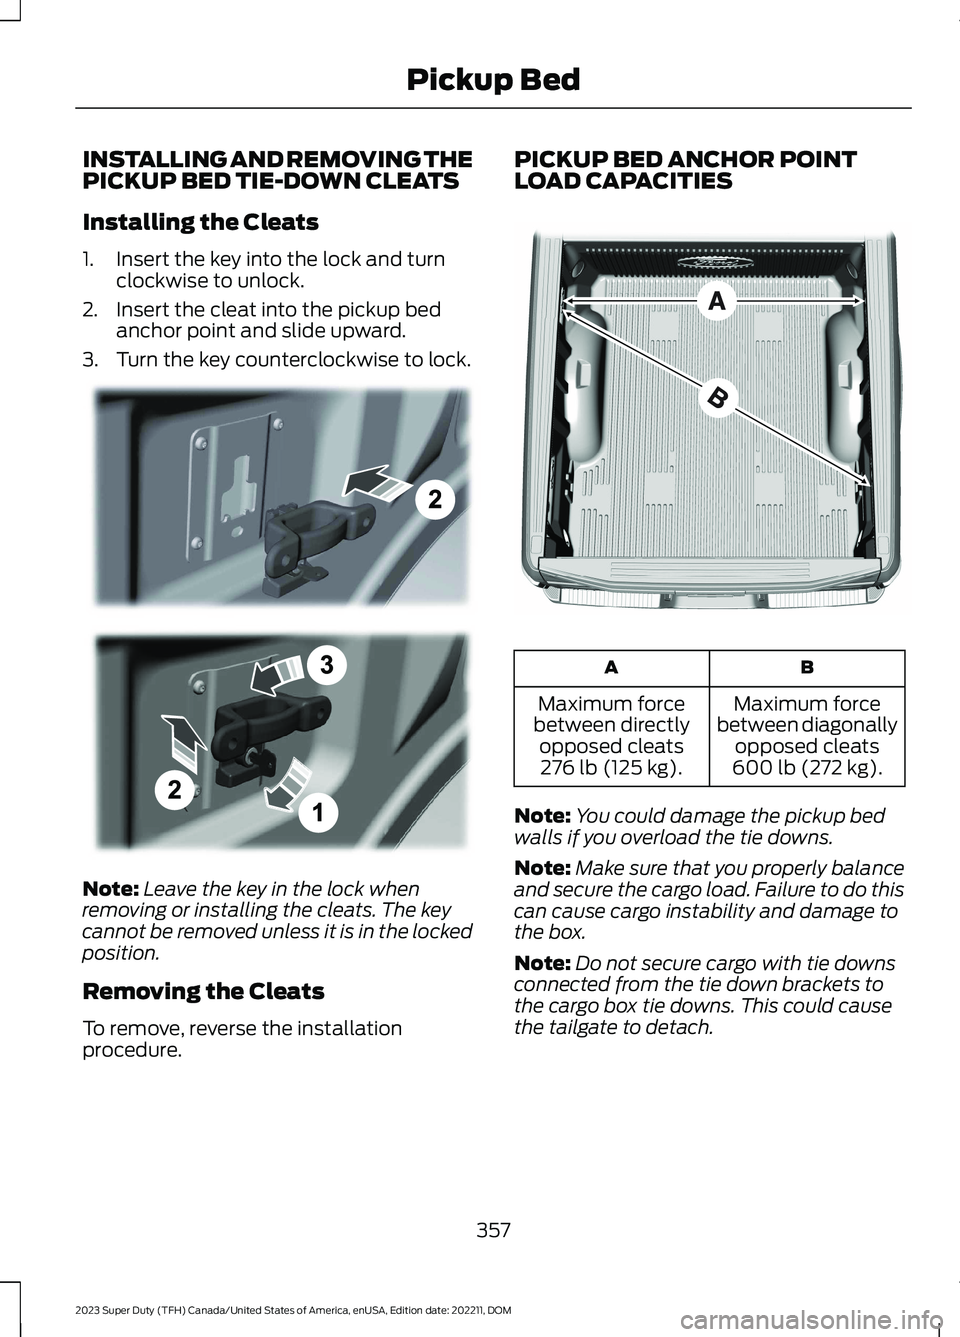
1.Insert the key into the lock and turnclockwise to unlock.
2.Insert the cleat into the pickup bedanchor point and slide upward.
3.Turn the key counterclockwise to lock.
Note:Leave the key in the lock whenremoving or installing the cleats. The keycannot be removed unless it is in the lockedposition.
Removing the Cleats
To remove, reverse the installationprocedure.
PICKUP BED ANCHOR POINTLOAD CAPACITIES
BA
Maximum forcebetween diagonallyopposed cleats600 lb (272 kg).
Maximum forcebetween directlyopposed cleats276 lb (125 kg).
Note:You could damage the pickup bedwalls if you overload the tie downs.
Note:Make sure that you properly balanceand secure the cargo load. Failure to do thiscan cause cargo instability and damage tothe box.
Note:Do not secure cargo with tie downsconnected from the tie down brackets tothe cargo box tie downs. This could causethe tailgate to detach.
357
2023 Super Duty (TFH) Canada/United States of America, enUSA, Edition date: 202211, DOMPickup BedE327575 E327576
Page 396 of 738

Note:Keep the steering wheel straightwhen instructed to by the instrument clusterdisplay and touchscreen. If the steeringwheel is in a turned position during thisinstruction, the calibration pauses.
Note:During calibration, the systemdetermines the trailer length. The systemsupports trailer lengths of 10–39 ft(3–11.94 m) distance from the hitch pointto the center of the axle or axles.
Note:The instrument cluster displays andtouchscreen shows if you are going too slowor fast. Calibration pauses if the speed isoutside the required range of 2–16 mph(4–25 km/h).
Note:You need to complete at least a 90°turn, and longer trailers could require a 180°turn.
SWITCHING TRAILER BACKUP
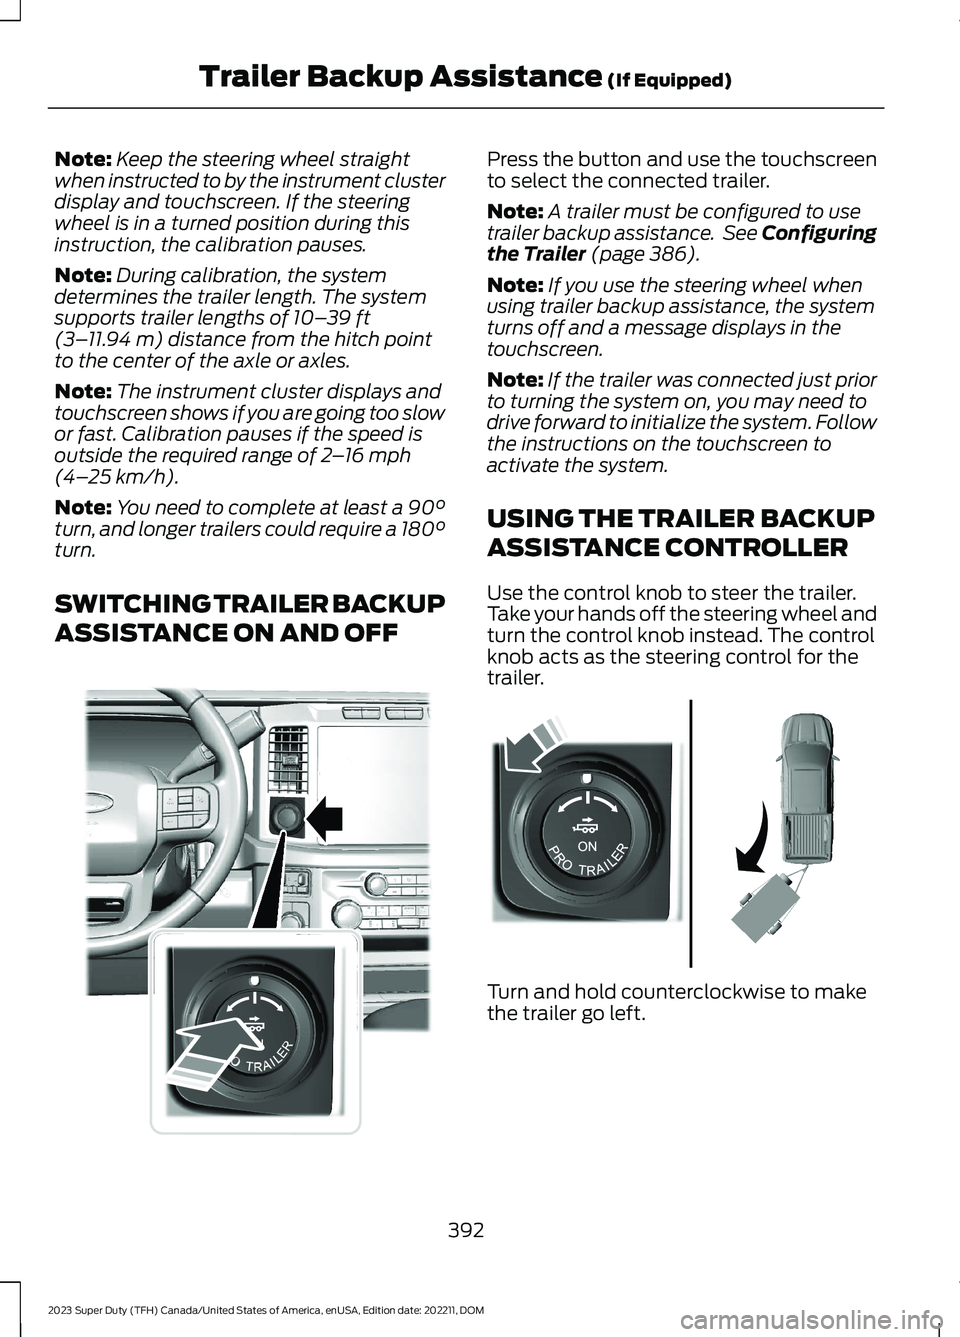
ASSISTANCE ON AND OFF
Press the button and use the touchscreento select the connected trailer.
Note:A trailer must be configured to usetrailer backup assistance. See Configuringthe Trailer (page 386).
Note:If you use the steering wheel whenusing trailer backup assistance, the systemturns off and a message displays in thetouchscreen.
Note:If the trailer was connected just priorto turning the system on, you may need todrive forward to initialize the system. Followthe instructions on the touchscreen toactivate the system.
USING THE TRAILER BACKUP
ASSISTANCE CONTROLLER
Use the control knob to steer the trailer.Take your hands off the steering wheel andturn the control knob instead. The controlknob acts as the steering control for thetrailer.
Turn and hold counterclockwise to makethe trailer go left.
392
2023 Super Duty (TFH) Canada/United States of America, enUSA, Edition date: 202211, DOMTrailer Backup Assistance (If Equipped)E373857 E313025
Page 449 of 738

WARNING: Do not add engine oilwhen the engine is hot. Failure to followthis instruction could result in personalinjury.
Do not use supplemental engine oiladditives because they are unnecessaryand could lead to engine damage that thevehicle warranty may not cover.
1.Clean the area surrounding the engineoil filler cap before you remove it.
2.Remove the engine oil filler cap.
3.Add engine oil that meets ourspecifications. See Capacities andSpecifications (page 520).
4.Reinstall the engine oil filler cap. Turnit clockwise until you feel a strongresistance.
Note: Do not add oil further than themaximum mark. Oil levels above themaximum mark may cause engine damage.
Note:Immediately soak up any oil spillagewith an absorbent cloth.
INTELLIGENT OIL LIFE MONITOR
Under certain conditions the vehicle’sintelligent oil life monitor may determineyour oil requires replacement prior to yourgeneral service. Should this occur it isrecommended you replace your oil withintwo weeks or 500 mi (800 km) of beingalerted.
Your authorized dealer will be able toadvise you whether only an engine oil andfilter change is recommended or whetheryou should complete your general serviceinclusive of oil and oil Filter.
RESETTING THE INTELLIGENT OILLIFE MONITOR
1.Press the Menu button on the steeringwheel to enter the instrument clusterdisplay main menu.
2.Select Vehicle Maintenance.
3.Select Oil Life.
4.Select Reset Oil Life.
5.Press and hold the OK button until thesystem reset confirmation appears.
ENGINE OIL CAPACITY ANDSPECIFICATION
For filling information, please refer to theCapacities and Specifications section ofyour owner's manual. See Capacities andSpecifications (page 520).
ENGINE AIR FILTER
CHANGING THE ENGINE AIRFILTER
WARNING: To reduce the risk ofvehicle damage and personal burninjuries, do not start your engine with theair cleaner removed and do not removeit while the engine is running.
Use the correct specification air filterelement. See Engine Air Filter (page 445).
Note: Failure to use the correct air filterelement may result in severe enginedamage. Resulting component damagemay not be covered by the vehicle Warranty.
445
2023 Super Duty (TFH) Canada/United States of America, enUSA, Edition date: 202211, DOMMaintenance
Page 462 of 738

If you disconnect or replace the batteryand your vehicle has an automatictransmission, it must relearn its adaptivestrategy. Because of this, the transmissionmay shift firmly when first driven. This isnormal operation while the transmissionfully updates its operation to optimumshift feel.
Removing the Battery
1.Apply the parking brake and switch theignition off.
2.Switch all electrical equipment off, forexample lights and radio.
3.Wait a minimum of two minutes beforedisconnecting the battery.
Note:The engine management system hasa power hold function and remains poweredfor a period of time after you switch theignition off. This is to allow diagnostic andadaptive tables to be stored. Disconnectingthe battery without waiting can causedamage not covered by the vehicleWarranty.
4.Disconnect and isolate the negativebattery cable terminal.
5.Disconnect and isolate the positivebattery cable terminal.
6.Remove the battery securing clamp.
7.Remove the battery.
If you disconnect or replace the vehiclebattery, you must reset the followingfeatures:
•Window bounce-back. See WindowBounce-Back (page 129).
•Clock Settings.
•Pre-set radio stations.
Replacing the Battery
Note:Before reconnecting the battery,make sure the ignition remains switched off.
You must replace the battery with one ofexactly the same specification.
To install, reverse the removal procedure.
Note:Make sure that you correctly installthe battery terminal covers, battery coverand battery cable terminals.
RESETTING THE BATTERYSENSOR
When you install a new battery, reset thebattery sensor by doing the following:
1.Switch the ignition on, and leave theengine off.
Note:Complete Steps 2 and 3 within 10seconds.
2.Flash the high beam headlamps fivetimes, ending with the high beams off.
3.Press and release the brake pedal threetimes.
The battery warning lamp flashes threetimes to confirm that the reset issuccessful.
RECYCLING AND DISPOSING OFTHE 12V BATTERY
Make sure that you dispose ofold batteries in anenvironmentally friendly way.Seek advice from your local authorityabout recycling old batteries.
458
2023 Super Duty (TFH) Canada/United States of America, enUSA, Edition date: 202211, DOMMaintenanceE107998
Page 559 of 738

Occupancy Mode (If Equipped)
1.Press Settings on the touchscreen.
2.Press Sound Settings.
3.Press Occupancy Mode.
4.Press a setting.
Sound Mode (If Equipped)
1.Press Settings on the touchscreen.
2.Press Sound Settings.
3.Press Sound Mode.
4.Press a setting.
SETTING THE CLOCK AND
DATE
1.Press Settings on the touchscreen.
2.Press Clock Settings.
3.Set the time.
Note:The AM and PM options are notavailable if 24-hour mode is on.
Switching Automatic TimeUpdates On and Off
1.Press Settings on the touchscreen.
2.Press Clock Settings.
3.Switch Auto Time Update on or off.
AM/FM RADIO
AM/FM RADIO LIMITATIONS
The further you travel from an AM or FMstation, the weaker the signal and theweaker the reception.
Hills, mountains, tall buildings, bridges,tunnels, freeway overpasses, parkinggarages, dense tree foliage andthunderstorms can interfere with thereception.
When you pass a ground-based broadcastrepeating tower, a stronger signal mayovertake a weaker one and result in theaudio system muting.
SELECTING A RADIO STATION
Manually Selecting a RadioStation
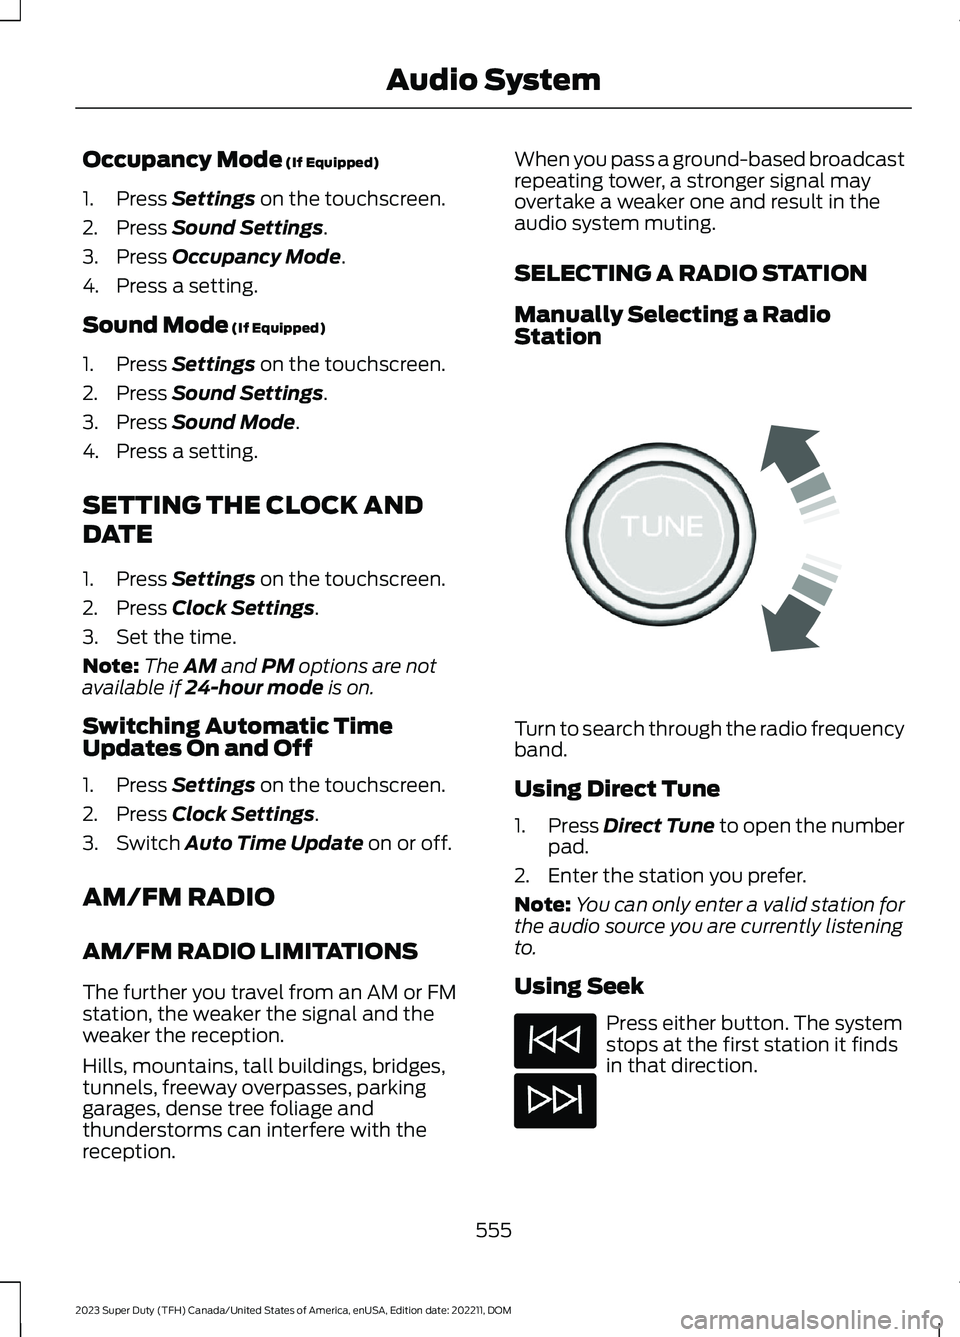
Turn to search through the radio frequencyband.
Using Direct Tune
1.Press Direct Tune to open the numberpad.
2.Enter the station you prefer.
Note:You can only enter a valid station forthe audio source you are currently listeningto.
Using Seek
Press either button. The systemstops at the first station it findsin that direction.
555
2023 Super Duty (TFH) Canada/United States of America, enUSA, Edition date: 202211, DOMAudio SystemE270235
Page 729 of 738

Selective Catalytic Reduction SystemPrecautions.................................................226Selective Catalytic Reduction SystemRequirements.............................................228Selective Catalytic ReductionSystem..........................................................226Filling the Selective Catalytic ReductionSystem Tank...................................................228Selective Catalytic Reduction System –Troubleshooting............................................230Selective Catalytic Reduction System –Troubleshooting........................................230Selective Catalytic Reduction System –Information Messages.................................231Selective Catalytic Reduction System –Warning Lamps.............................................230Sending and Receiving a TextMessage........................................................572Sensitive Locking Mode...............................52How Does Sensitive Locking ModeWork.....................................................................52What is Sensitive Locking Mode.....................52Service Data......................................................27Setting a Destination..................................579Setting a Destination Using a Point ofInterest.............................................................580Setting a Destination Using a PredictiveDestination.....................................................580Setting a Destination Using a RecentDestination.....................................................580Setting a Destination Using a SavedDestination.....................................................580Setting a Destination Using the MapScreen..............................................................580Setting a Destination Using the Text EntryScreen...............................................................579Setting a Memory Preset..........................554Settings Data...................................................28Setting the Adaptive Cruise ControlGap................................................................300Setting the Adaptive Cruise ControlSpeed............................................................299Setting the Blower Motor Speed............153Setting the Clock and Date......................555Setting the Cruise Control Speed.........294Setting the Hill Descent Speed...............277Setting the Speed Limit.............................316
Setting the Speed Sign RecognitionSpeed Tolerance.......................................349Setting the Speed Sign RecognitionSpeed Warning..........................................349Setting the Temperature...........................153Setting the Trail Control Speed..............273Setting Up the Trailer Backup Assistancefor a Conventional Trailer......................386Applying the Trailer Reversing AidSticker...............................................................388Calibrating the System...................................389Configuring the Trailer.....................................386Trailer Sensor Installation..............................388Setting Up the Trailer Backup Assistancefor a Fifth-Wheel or GooseneckTrailer............................................................389Calibrating the System.....................................391Configuring the Trailer.....................................389Trailer Sensor Installation...............................391Setting Up Trailer Reverse Guidance fora Conventional Trailer.............................401Applying the Trailer Reverse AidSticker...............................................................403Calibrating the System...................................404Configuring the Trailer......................................401Trailer Sensor Installation..............................403Shifting Your Vehicle Into Gear...............235Signing Into Your Account........................567Sitting in the Correct Position...................161Smart Hitch Limitations............................382Smart Hitch...................................................382Snow Plowing Precautions......................418Snow Plowing................................................418Software Update Indicators....................583Software Update Settings.......................582Software UpdateSee: Software Update Settings...................582See: Vehicle Software Updates...................582Sounding the Panic Alarm..........................74Special Operating Conditions ScheduledMaintenance - Diesel..............................603Special Operating Conditions ScheduledMaintenance - Gasoline........................608Speed ControlSee: Cruise Control...........................................294Speed Limiter Audible Warnings............316Speed Limiter Indicators............................316Speed Limiter.................................................316
725
2023 Super Duty (TFH) Canada/United States of America, enUSA, Edition date: 202211, DOMIndex