2023 FORD EXPEDITION remote control
[x] Cancel search: remote controlPage 185 of 658

GARAGE DOOR OPENER
INTRODUCTION
HomeLink Wireless ControlSystem
The universal garage door opener replacesthe common handheld garage door openerwith a three-button transmitter integratedinto the driver-side sun visor.
How Does The Garage Door OpenerWork
The system includes two primary features,a garage door opener and a platform forremote activation of devices within thehome. You can program garage doors aswell as entry gate operators, securitysystems, entry door locks and home oroffice lighting.
Additional assistance can be found onlineat www.homelink.com/Ford or by callingthe toll-free help line at 1-800-355-3515.
Garage Door Opener Limitations
Canadian radio-frequency laws requiretransmitter signals to time out, or quit,after several seconds – which may not belong enough for HomeLink to pick up thesignal. U.S. gate operators time-out in thesame manner.
GARAGE DOOR OPENER
PRECAUTIONS AND
FREQUENCIES
Garage Door Opener Precautions
WARNING: Do not use the systemwith any garage door opener that doesnot have the safety stop and reversefeature as required by U.S. FederalSafety Standards (this includes anygarage door opener manufacturedbefore April 1, 1982). A garage dooropener which cannot detect an object,signaling the door to stop and reverse,does not meet current federal safetystandards. Using a garage door openerwithout these features increases the riskof serious injury or death.
FCC and RSS-210 Industry CanadaCompliance
WARNING: Changes ormodifications not expressively approvedby the party responsible for compliancecould void the user's authority to operatethe equipment. The term "IC:" before theradio certification number only signifiesthat Industry Canada technicalspecifications were met.
This device complies with Part 15 of theFCC Rules and with RSS-210 of IndustryCanada. Operation is subject to thefollowing two conditions: (1) this devicemay not cause harmful interference, and(2) this device must accept anyinterference received, includinginterference that may cause undesiredoperation.
181
2023 Expedition (TB8) Canada/United States of America, enUSA, Edition date: 202207, DOMGarage Door OpenerE188211
Page 187 of 658
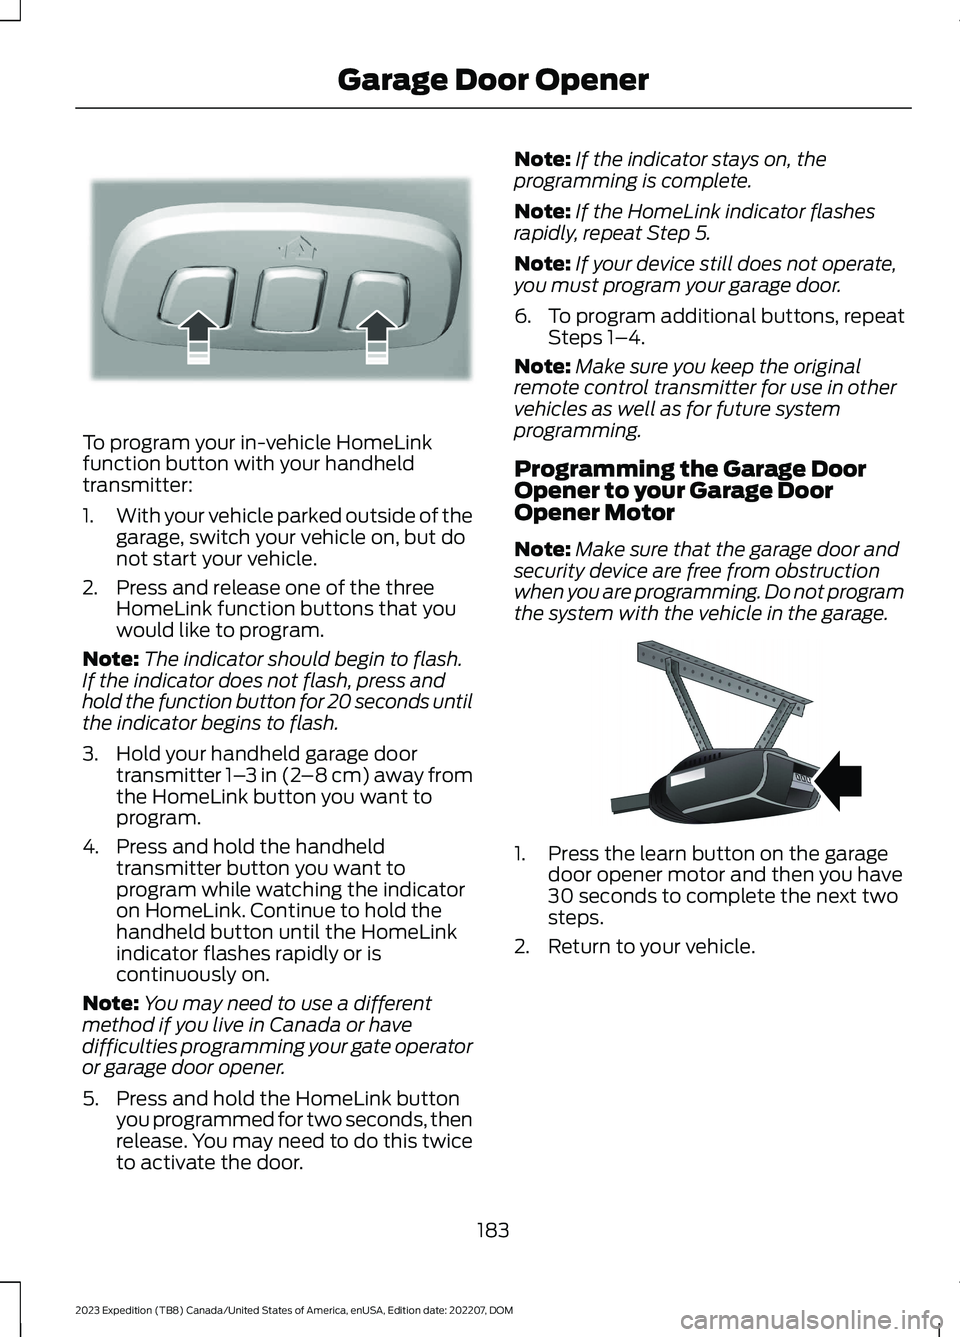
To program your in-vehicle HomeLinkfunction button with your handheldtransmitter:
1.With your vehicle parked outside of thegarage, switch your vehicle on, but donot start your vehicle.
2.Press and release one of the threeHomeLink function buttons that youwould like to program.
Note:The indicator should begin to flash.If the indicator does not flash, press andhold the function button for 20 seconds untilthe indicator begins to flash.
3.Hold your handheld garage doortransmitter 1–3 in (2–8 cm) away fromthe HomeLink button you want toprogram.
4.Press and hold the handheldtransmitter button you want toprogram while watching the indicatoron HomeLink. Continue to hold thehandheld button until the HomeLinkindicator flashes rapidly or iscontinuously on.
Note:You may need to use a differentmethod if you live in Canada or havedifficulties programming your gate operatoror garage door opener.
5.Press and hold the HomeLink buttonyou programmed for two seconds, thenrelease. You may need to do this twiceto activate the door.
Note:If the indicator stays on, theprogramming is complete.
Note:If the HomeLink indicator flashesrapidly, repeat Step 5.
Note:If your device still does not operate,you must program your garage door.
6.To program additional buttons, repeatSteps 1–4.
Note:Make sure you keep the originalremote control transmitter for use in othervehicles as well as for future systemprogramming.
Programming the Garage DoorOpener to your Garage DoorOpener Motor
Note:Make sure that the garage door andsecurity device are free from obstructionwhen you are programming. Do not programthe system with the vehicle in the garage.
1.Press the learn button on the garagedoor opener motor and then you have30 seconds to complete the next twosteps.
2.Return to your vehicle.
183
2023 Expedition (TB8) Canada/United States of America, enUSA, Edition date: 202207, DOMGarage Door OpenerE188213 E142659
Page 194 of 658
WHAT IS THE WIRELESS
ACCESSORY CHARGER
The wireless accessory charger allows youto charge one compatible Qi wirelesscharging device on the charging area.
WIRELESS ACCESSORY
CHARGER PRECAUTIONS
WARNING: Wireless chargingdevices can affect the operation ofimplanted medical devices, includingcardiac pacemakers. If you have anyimplanted medical devices, werecommend that you consult with yourphysician.
Keep the charging area clean and removeforeign objects prior to charging a device.
Do not place items with a magnetic stripor radio-frequency identification chip, forexample passports, parking tickets,transportation passes or credit cards, nearthe charging area when charging a device.Damage could occur to the magnetic stripor radio-frequency identification chip.
Do not place metal objects, for exampleremote controls, coins and candywrappers, on or near the charging areawhen charging a device. Metal objects mayheat up and degrade the chargingperformance, in addition to causinginterruptions in charging.
Charging could be interrupted, degraded,or could stop if any of the following occur:
•The system detects a foreign object.
•The device is misaligned on thecharging area.
•The device moves on the activecharging area when the vehicle is inmotion.
•The vehicle ambient temperature is toohigh.
•You attempt to charge a non-Qicompatible device on the wirelesscharger.
Note:During charging, the device and thecharger could heat up, this is normal. If thebattery gets hotter than usual, the devicemay stop charging.
LOCATING THE WIRELESS
ACCESSORY CHARGER
The charging area is on thecenter console or in the mediabin below the instrument panel.
CHARGING A WIRELESS
DEVICE
Place the device on the center of thecharging surface with the charging sidedown. The charging stops after your devicereaches a full charge.
You can use the charger when the vehicleis in accessory mode, when the vehicle isrunning, or when SYNC is on.
Displays on the status bar whenwireless charging is in progress.
Displays on the status bar whenwireless charging has beeninterrupted.
Note:The charging performance may beaffected if your device is in a case. It may benecessary to remove the case to wirelesslycharge your device.
Note:Software and firmware updates mayaffect device compatibility, including theuse of unofficial software or firmware. Youshould verify charging functionality with yourspecific devices in-vehicle.
190
2023 Expedition (TB8) Canada/United States of America, enUSA, Edition date: 202207, DOMWireless Accessory Charger (If Equipped)E297549 E263583 E372644
Page 198 of 658

Switching the Ignition On
Turn the key to position II. All electricalcircuits and accessories are operationaland the warning lamps and indicatorsilluminate.
PUSH BUTTON IGNITION
SWITCH (IF EQUIPPED)
Switching the Ignition Off
When the ignition is on or in accessorymode, press the push button ignitionswitch once without your foot on the brakepedal.
Switching the Ignition toAccessory Mode
When the ignition is off, press the pushbutton ignition switch once without yourfoot on the brake pedal.
All electrical circuits and accessories areoperational and the warning lamps andindicators illuminate.
Note:Your vehicle has a battery saverfeature that shuts your vehicle off when itdetects a certain amount of battery drain,or after approximately 30 minutes ofinactivity in accessory mode.
Note:The system may not function if theremote control is close to metal objects orelectronic devices, for example keys or a cellphone.
Note:You need a valid key inside yourvehicle to switch the ignition on and startthe engine.
STARTING THE ENGINE
STARTING A GASOLINE ENGINE -VEHICLES WITHOUT: PUSHBUTTON START
Before starting your vehicle, check thefollowing:
•Make sure that the headlamps andelectrical accessories are off.
•Make sure that the parking brake is on.
•Make sure that the transmission is inpark (P).
1.Fully press the brake pedal.
Note:Do not touch the accelerator pedal.
2.Turn the key to position III.
Note:The engine may continue crankingfor up to 15 seconds or until it starts.
Note:The engine takes longer to start atlower temperatures. It may crank for severalseconds when very cold.
STARTING A GASOLINE ENGINE -VEHICLES WITH: PUSH BUTTONSTART
Before starting your vehicle, check thefollowing:
•Make sure that the headlamps andelectrical accessories are off.
•Make sure that the parking brake is on.
•Make sure that the transmission is inpark (P).
1.Fully press the brake pedal.
Note:Do not touch the accelerator pedal.
194
2023 Expedition (TB8) Canada/United States of America, enUSA, Edition date: 202207, DOMStarting and Stopping the EngineE321258 E322354
Page 217 of 658
AUTOMATIC TRANSMISSION
PRECAUTIONS
WARNING: Apply the parkingbrake, shift into park (P), switch theignition off and remove the key beforeyou leave your vehicle. Failure to followthis instruction could result in personalinjury or death.
WARNING: When your vehicle isstationary, keep the brake pedal fullypressed when shifting gears. Failure tofollow this instruction could result inpersonal injury, death or propertydamage.
WARNING: Do not apply the brakepedal and accelerator pedalsimultaneously. Applying both pedalssimultaneously for more than a fewseconds will limit engine performance,which may result in difficulty maintainingspeed in traffic and could lead to seriousinjury.
AUTOMATIC TRANSMISSION
POSITIONS
PARK (P)
WARNING: Shift into park (P) onlywhen your vehicle is stationary.
In park (P) power is not transmitted to thedriven wheels.
Note:A tone sounds if you attempt to exityour vehicle without the vehicle in park (P).
Note:Your vehicle may not shift out of park(P) if the vehicle battery has run out ofcharge.
Note:Your vehicle may not shift out of park(P) if a fuse is blown.
Note:Your vehicle may not shift out of park(P) unless the key or remote control is insideyour vehicle.
Note:The electronic parking brake couldapply when the selector is in park (P). SeeAutomatically Releasing the ElectricParking Brake (page 233).
Note:Your vehicle could shift into park (P)if you attempt to exit your vehicle withoutthe vehicle in park (P). See How DoesAutomatic Return to Park (P) Work (page217).
Note:A tone could sound when you selectpark (P).
REVERSE (R)
WARNING: Shift into reverse (R)only when your vehicle is stationary.
In reverse (R) power is transmitted to thedriven wheels.
NEUTRAL (N)
WARNING: In neutral (N) yourvehicle is free to roll.
In neutral (N) power is not transmitted tothe driven wheels.
DRIVE (D)
In drive (D) power is transmitted to thedriven wheels.
213
2023 Expedition (TB8) Canada/United States of America, enUSA, Edition date: 202207, DOMAutomatic Transmission
Page 400 of 658
Starting the Engine
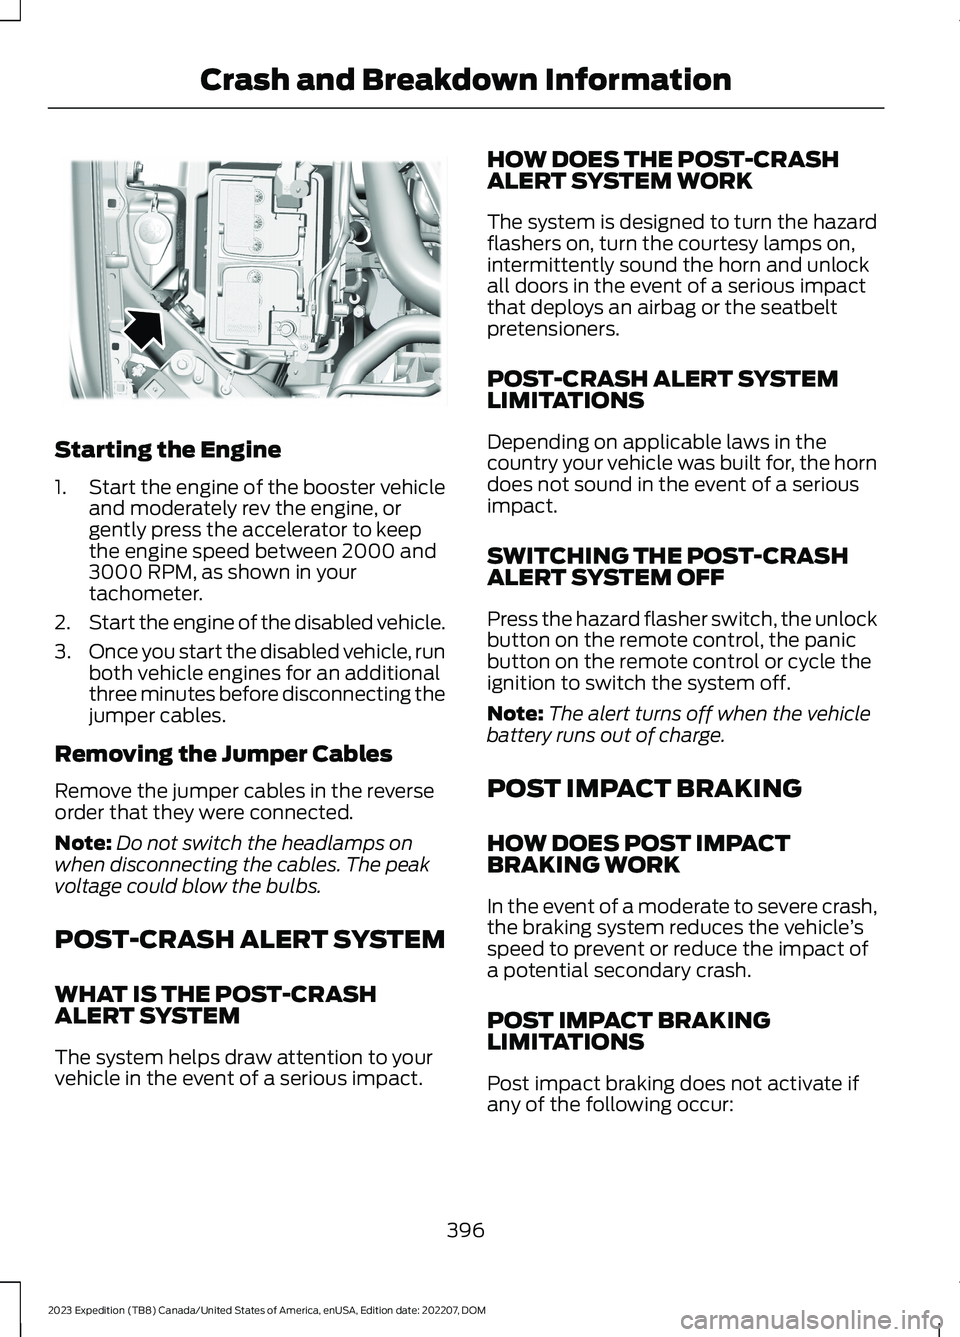
1.Start the engine of the booster vehicleand moderately rev the engine, orgently press the accelerator to keepthe engine speed between 2000 and3000 RPM, as shown in yourtachometer.
2.Start the engine of the disabled vehicle.
3.Once you start the disabled vehicle, runboth vehicle engines for an additionalthree minutes before disconnecting thejumper cables.
Removing the Jumper Cables
Remove the jumper cables in the reverseorder that they were connected.
Note:Do not switch the headlamps onwhen disconnecting the cables. The peakvoltage could blow the bulbs.
POST-CRASH ALERT SYSTEM
WHAT IS THE POST-CRASHALERT SYSTEM
The system helps draw attention to yourvehicle in the event of a serious impact.
HOW DOES THE POST-CRASHALERT SYSTEM WORK
The system is designed to turn the hazardflashers on, turn the courtesy lamps on,intermittently sound the horn and unlockall doors in the event of a serious impactthat deploys an airbag or the seatbeltpretensioners.
POST-CRASH ALERT SYSTEMLIMITATIONS
Depending on applicable laws in thecountry your vehicle was built for, the horndoes not sound in the event of a seriousimpact.
SWITCHING THE POST-CRASHALERT SYSTEM OFF
Press the hazard flasher switch, the unlockbutton on the remote control, the panicbutton on the remote control or cycle theignition to switch the system off.
Note:The alert turns off when the vehiclebattery runs out of charge.
POST IMPACT BRAKING
HOW DOES POST IMPACTBRAKING WORK
In the event of a moderate to severe crash,the braking system reduces the vehicle’sspeed to prevent or reduce the impact ofa potential secondary crash.
POST IMPACT BRAKINGLIMITATIONS
Post impact braking does not activate ifany of the following occur:
396
2023 Expedition (TB8) Canada/United States of America, enUSA, Edition date: 202207, DOMCrash and Breakdown InformationE355168
Page 449 of 658
WARNING: Only usereplacement tires and wheelsthat are the same size, loadindex, speed rating, and type asthose originally provided for yourvehicle. The recommended tireand wheel sizes can be found onthe Tire Label on the driver sidedoor frame or the edge of thedriver door. If this information isnot found in those locations, orfor additional options, contactyour authorized dealer. Use ofany tire or wheel notrecommended, could affect thesafety and performance of yourvehicle, which could result in anincreased risk of loss of vehiclecontrol, vehicle rollover, personalinjury and death.
WARNING: To reduce therisk of serious injury, whenmounting replacement tires andwheels, you should not exceedthe maximum pressure indicatedon the sidewall of the tire to setthe beads without additionalprecautions listed below. If thebeads do not seat at themaximum pressure indicated,re-lubricate and try again.
WARNING: For a mountingpressure more than 20 psi(1.38 bar) greater than themaximum pressure, a Forddealer or other tire serviceprofessional should do themounting.
WARNING: Always inflatesteel carcass tires with a remoteair fill with the person inflatingstanding at a minimum of 12 ft(3.66 m) away from the wheeland tire assembly.
WARNING: When inflatingthe tire for mounting pressuresup to 20 psi (1.38 bar) greaterthan the maximum pressure onthe tire sidewall, the followingprecautions must be taken toprotect the person mounting thetire:
•Make sure that you have thecorrect tire and wheel size.
•Lubricate the tire bead and
wheel bead seat area again.
•Stand at a minimum of 12 ft(3.66 m) away from the wheeland tire assembly.
•Use both eye and earprotection.
Important: Remember to replacethe wheel valve stems when theroad tires are replaced on yourvehicle.
It is recommended that the two
front tires or two rear tiresgenerally be replaced as a pair ifthe worn tires still have usabledepth.
445
2023 Expedition (TB8) Canada/United States of America, enUSA, Edition date: 202207, DOMWheel and Tire Information
Page 479 of 658
WHAT IS A CONNECTED
VEHICLE
A connected vehicle has technology thatallows your vehicle to connect to a mobilenetwork and for you to access a range offeatures. When used in conjunction withthe FordPass app, it could allow you tomonitor and control your vehicle further,for example checking the tire pressures,the fuel level and the vehicle location. Foradditional information, refer to the localFord website.
CONNECTED VEHICLE
REQUIREMENTS
Connected service and related featurefunctionality requires a compatible vehiclenetwork.
Some remote features require additionalservice activation. Log in to your Fordaccount for details. Some restrictions, thirdparty terms and message or data ratesmay apply.
CONNECTED VEHICLE
LIMITATIONS
Evolving technology, cellular networks, orregulations could affect functionality andavailability, or continued provision of somefeatures. These changes could even stopsome features from functioning.
CONNECTING THE VEHICLE TO
A MOBILE NETWORK
WHAT IS THE MODEM
The modem allows access to arange of features built into yourvehicle.
ENABLING AND DISABLING THEMODEM - VEHICLES WITH: 12 INCHSCREEN
1.Press Settings.
2.Press Connectivity.
3.Press Connected Vehicle Features.
4.Switch vehicle connectivity on or off.
ENABLING AND DISABLING THEMODEM - VEHICLES WITH: 15 INCHSCREEN
Tap the vehicle drawer on the top left ofthe screen.
1.Press Connectivity.
2.Press Connected Vehicle Features.
3.Switch vehicle connectivity on or off.
CONNECTING FORDPASS TO THEMODEM
1.Make sure that the modem is enabledusing the vehicle settings menu.
2.Open the FordPass app on your deviceand log in.
3.Add your vehicle or select your vehicleif already added.
4.Select the option to activate yourvehicle.
5.Make sure that the name on the screenmatches the name shown in yourFordPass account.
6.Confirm that FordPass account isconnected to the modem.
475
2023 Expedition (TB8) Canada/United States of America, enUSA, Edition date: 202207, DOMConnected Vehicle