Page 65 of 292

GETTING TO KNOW YOUR INSTRUMENT PANEL63
INSTRUMENT CLUSTER DESCRIPTIONS
Use this QR code to access your digital
experience.
1. Tachometer
Indicates the engine speed in
revolutions per minute (RPM x
1000).
2. Instrument Cluster Display When the appropriate conditions exist, this display
shows the instrument cluster display messages
Úpage 63.
3. Speedometer Indicates vehicle speed.
4. Temperature Gauge The temperature gauge shows engine coolant
temperature. Any reading within the normal range
indicates that the engine cooling system is oper -
ating satisfactorily.
The gauge pointer will likely indicate a higher
temperature when driving in hot weather, up
mountain grades, or when towing a trailer. It
should not be allowed to exceed the upper limits
of the normal operating range. 5. Fuel Gauge
The pointer shows the level of fuel in the fuel tank
when the Keyless Push Button Ignition is in the
ON/RUN position.
The fuel pump symbol points to the
side of the vehicle where the fuel door
is located.
NOTE:The hard telltales will illuminate for a bulb check when the
ignition is first cycled.
INSTRUMENT CLUSTER DISPLAY
Your vehicle is equipped with an instrument cluster
display, which offers useful information to the driver. With
the ignition in the OFF mode, opening/closing of a door will
activate the display for viewing, and display the total miles,
or kilometers, in the odometer. Your instrument cluster
display is designed to display important information about
your vehicle’s systems and features. Using a driver
interactive display located on the instrument panel, your
instrument cluster display can show you how systems are
working and give you warnings when they are not. The
steering wheel mounted controls allow you to scroll
through the main menus and submenus. You can access
the specific information you want and make selections
and adjustments.
WARNING!
A hot engine cooling system is dangerous. You or others
could be badly burned by steam or boiling coolant. You
may want to call an authorized dealer for service if your
vehicle overheats. If you decide to look under the hood
yourself, follow the warnings under Cooling System
Úpage 234.
CAUTION!
Driving with a hot engine cooling system could damage
your vehicle. If the temperature gauge reads high pull
over and stop the vehicle. Idle the vehicle with the air
conditioner turned off until the pointer drops back into
the normal range. If the pointer remains high, turn the
engine off immediately and call an authorized dealer
for service.
3
23_LD_OM_EN_USC_t.book Page 63
Page 66 of 292

64GETTING TO KNOW YOUR INSTRUMENT PANEL
LOCATION AND CONTROLS
The instrument cluster display features an interactive
display which is located in the instrument cluster.
Instrument Cluster Display And Controls Location
The system allows the driver to select information by
pushing the following buttons mounted on the steering
wheel:
Instrument Cluster Display Controls
Up And Down Arrow Buttons:
Using the up or down arrow button allows you to
cycle through the Main Menu Items.
Changes the Main Screen area and Menu Title area.
Left And Right Arrow Buttons:
Using the left or right arrow button allows you to
cycle through the submenu items of the Main menu item.
NOTE:
Holding the up or down or left or
right arrow button will continuously loop through
the currently selected menu or options presented on
the screen.
Upon returning to a main menu, the last submenu
screen viewed within that main menu will be displayed.
OK Button:
For Digital Speedometer:
Pushing the OK button changes units (mph or km/h).
For Screen Setup:
OK button allows user to enter menu and submenus.
Within each submenu layer, the up and
down arrow buttons will allow the user to select the
item of interest.
Pushing the OK button makes the selection and a
confirmation screen will appear (returning the user to
the first page of the submenu).
Pushing the left arrow button will exit each
submenu layer and return to the main menu.
1 – Instrument Cluster Display Screen
2 – Instrument Cluster Display Controls
1 — Left Arrow Button
2 — Up Arrow Button
3 — Right Arrow Button
4 — Down Arrow Button
5 — OK Button
23_LD_OM_EN_USC_t.book Page 64
Page 67 of 292

GETTING TO KNOW YOUR INSTRUMENT PANEL65
ENGINE OIL LIFE RESET
Use this QR code to access your digital
experience.
Oil Change Required
Your vehicle is equipped with an
engine oil change indicator system.
The “Oil Change Required” message
will display in the instrument cluster
display for five seconds after a single
chime has sounded, to indicate the next scheduled oil
change interval. The engine oil change indicator system is
duty cycle based, which means the engine oil change
interval may fluctuate, dependent upon your personal
driving style.
Unless reset, this message will continue to display each
time you place the ignition in the ON/RUN position. To turn
off the message temporarily, push and release the OK or
arrow buttons. To reset the oil change indicator system
(after performing the scheduled maintenance), refer to
the following procedure.
Vehicles Equipped With Keyless Enter ’n Go™ — Ignition
Use the steering wheel instrument cluster display controls
for the following procedure(s):
1. Without pressing the brake pedal, push the ENGINE START/STOP button and place the ignition in the
ON/RUN position (do not start the engine).
2. Push and release the down arrow button to scroll
downward through the main menu to “Vehicle Info.” 3. Push and release the
right arrow button to access
the ”Oil Life” screen.
4. Push and hold the OK button to reset oil life. If
conditions are met, the gauge and numeric display
will update to show 100%. If conditions are not met a
pop-up message of "To reset oil life engine must be
off with ignition in run” will be displayed (for five
seconds), and the user will remain at the Oil Life
screen.
5. Push and release the up or down arrow button
to exit the submenu screen.
NOTE:If the indicator message illuminates when you start the
vehicle, the oil change indicator system did not reset.
If necessary, repeat this procedure.
Secondary Method Of Resetting Engine Oil Life
1. Without pressing the brake pedal, push the ENGINE START/STOP button and place the ignition to the
ON/RUN position (do not start the engine).
2. Fully press the accelerator pedal, slowly, three times within ten seconds.
3. Without pushing the brake pedal, push the ENGINE START/STOP button once to return the ignition to the
OFF position.
NOTE:If the indicator message illuminates when you start the
vehicle, the oil change indicator system did not reset.
If necessary, repeat this procedure.
PERFORMANCE SHIFT INDICATOR
(PSI) — IF EQUIPPED
The PSI is enabled on vehicles with manual transmission,
or when a vehicle with automatic transmission is in
manual shift mode. The PSI provides the driver with a
visual indication within the instrument cluster display
when the driver configured gear shift point has been
reached and the driver is still accelerating. This indication
notifies the driver to change gear corresponding to the
configured RPM in the head unit.
INSTRUMENT CLUSTER DISPLAY
S
ELECTABLE MENU ITEMS
Push and release the up or down arrow button
until the desired Selectable Menu item is displayed in the
instrument cluster display.
Follow the Menu or submenu prompts as desired.
Speedometer
Push and release the up or down arrow button
until the speedometer menu is displayed in the instrument
cluster display. Push and release the OK button to toggle
units (km/h or mph) of the speedometer.
3
23_LD_OM_EN_USC_t.book Page 65
Page 68 of 292

66GETTING TO KNOW YOUR INSTRUMENT PANEL
Vehicle Info
Push and release the up or down arrow button until
the “Vehicle Info” menu is displayed in the instrument
cluster display. Push and release the right or left
arrow button to scroll through the submenus items of
“Vehicle Info.” Follow the directional prompts to access or
reset any of the following “Vehicle Info” submenu items:
Tire Pressure Monitor
Coolant Temperature
Trans Temperature
Oil Temperature
Oil Pressure
Oil Life
Battery Voltage
AWD Status — If Equipped
Driver Assist — If Equipped
The Driver Assist menu displays the status of the ACC and
LaneSense systems.
Push and release the up or down arrow button until
the Driver Assist menu is displayed in the instrument
cluster display.
Adaptive Cruise Control (ACC) Feature
The instrument cluster displays the current ACC system
settings. The information displayed depends on ACC
system status.
Push the ACC on/off button (located on the steering
wheel) until one of the following displays in the instrument
cluster display: Adaptive Cruise Control Off
When ACC is deactivated, the display will read “Adaptive
Cruise Control Off.”
Adaptive Cruise Control Ready
When ACC is activated but the vehicle speed setting has
not been selected, the display will read “Adaptive Cruise
Control Ready.”
Push the SET + or the SET- button (located on the steering
wheel) and the following will display in the instrument
cluster display:
ACC SET
When ACC is set, the set speed will display in the
instrument cluster.
The ACC screen may display once again if any ACC activity
occurs, which may include any of the following:
Distance Setting Change
System Cancel
Driver Override
System Off
ACC Proximity Warning
ACC Unavailable Warning
The instrument cluster display will return to the last
display selected after five seconds of no ACC display
activity
Úpage 87.
LaneSense — If Equipped
The instrument cluster displays the current LaneSense
system settings. The information displayed depends on
LaneSense system status and the conditions that need to
be met
Úpage 98.
Fuel Economy
Two submenu pages; one with Current Value
(instantaneous calculation of the fuel economy) displayed
and one without the Current Value displayed (toggle the
left or right arrow button to select one):
Current Fuel Economy (MPG, L/100 km, or km/L).
Range To Empty (miles or km).
Average Fuel Economy (MPG, L/100 km, or km/L).
The Max and Min values will correspond to the partic -
ular engine requirements.
Lower end of gauge will be displayed in an amber color
and turn green as Fuel Economy improves.
Hold the OK button to reset average fuel economy
information.
Trip Info
Push and release the up or down arrow button until
the Trip Menu item is displayed in the instrument cluster
display. Toggle the left or right arrow button to
select Trip A or Trip B. The Trip information will display the
following:
Distance – Shows the total distance (mi or km) traveled
for Trip A or Trip B since the last reset.
Average Fuel Economy – Shows the average fuel
economy (MPG, L/100km or km/L) of Trip A or Trip B
since the last reset.
Elapsed Time – Shows the total elapsed time of travel
since the last reset.
Hold the OK button to reset feature information.
23_LD_OM_EN_USC_t.book Page 66
Page 69 of 292
.
Messages
This feature shows the number of stored warning")
GETTING TO KNOW YOUR INSTRUMENT PANEL67
Audio
This menu displays the Audio information of the currently
playing audio source (e.g. FM radio).
Messages
This feature shows the number of stored warning
messages, if any. Pushing the right or left arrow
button will allow you to scroll through the stored
messages.
Screen Setup
Push and release the up or down arrow button until
the Screen Setup Menu displays in the instrument cluster
display. Push and release the OK button to enter the
submenus. The Screen Setup feature allows you to
change what information is displayed in the instrument
cluster as well as the location that information is
displayed.
NOTE:Based upon equipment options and current vehicle
status, some of the features may not be available.
Current Gear
On
Off
Gear Display
Full
Single
Defaults
Restore
Cancel
BATTERY SAVER ON/BATTERY SAVER
M
ODE MESSAGE — ELECTRICAL LOAD
R
EDUCTION ACTIONS — IF EQUIPPED
This vehicle is equipped with an Intelligent Battery Sensor
(IBS) to perform additional monitoring of the electrical
system and status of the vehicle battery. In cases when the IBS detects charging system failure, or
the vehicle battery conditions are deteriorating, electrical
load reduction actions will take place to extend the driving
time and distance of the vehicle. This is done by reducing
power to or turning off non-essential electrical loads.
Load reduction is only active when the engine is running.
It will display a message if there is a risk of battery
depletion to the point where the vehicle may stall due to
lack of electrical supply, or will not restart after the current
drive cycle.
When load reduction is activated, the message “Battery
Saver On” or “Battery Saver Mode” will appear in the
instrument cluster.
These messages indicate the vehicle battery has a low
state of charge and continues to lose electrical charge at
a rate that the charging system cannot sustain.
NOTE:
The charging system is independent from load reduc -
tion. The charging system performs a diagnostic on the
charging system continuously.
If the Battery Charge Warning Light is on it may indicate
a problem with the charging system
Úpage 69.
The electrical loads that may be switched off (if equipped),
and vehicle functions which can be affected by load
reduction:
Heated Seat/Vented Seats/Heated Wheel
Heated/Cooled Cup Holders — If Equipped
Rear Defroster And Heated Mirrors
HVAC System
115 Volts AC Power Inverter System
Audio and Telematics System
Upper Left or Upper Right
None CompassOutside
Temperature
Time RangeAvg L/100 km
(MPG or km/L)
Current
L/100 km (MPG
or km/L) Trip A
Trip B
Center
Digital
Speedometer CompassOutside
Temperature
Time Range to EmptyAvg L/100 km
(MPG or km/L)
Current
L/100 km
(MPG or km/L) Trip A
Trip B
Audio Menu Title None
3
23_LD_OM_EN_USC_t.book Page 67
Page 70 of 292

68GETTING TO KNOW YOUR INSTRUMENT PANEL
Loss of the battery charge may indicate one or more of the
following conditions:
The charging system cannot deliver enough electrical
power to the vehicle system because the electrical
loads are larger than the capability of the charging
system. The charging system is still functioning
properly.
Turning on all possible vehicle electrical loads (e.g.
HVAC to max settings, exterior and interior lights,
overloaded power outlets +12 Volts, 115 Volts AC, USB
ports) during certain driving conditions (city driving,
towing, frequent stopping).
Installing options like additional lights, upfitter elec -
trical accessories, audio systems, alarms and similar
devices.
Unusual driving cycles (short trips separated by long
parking periods).
The vehicle was parked for an extended period of time
(weeks, months).
The battery was recently replaced and was not charged
completely.
The battery was discharged by an electrical load left on
when the vehicle was parked.
The battery was used for an extended period with the
engine not running to supply radio, lights, chargers,
+12 Volts portable appliances like vacuum cleaners,
game consoles and similar devices. What to do when an electrical load reduction action
message is present
(“Battery Saver On” or “Battery Saver Mode”)
During a trip:
Reduce power to unnecessary loads if possible:
Turn off redundant lights (interior or exterior)
Check what may be plugged in to power outlets
+12 Volts, 115 Volts AC, USB ports
Check HVAC settings (blower, temperature)
Check the audio settings (volume)
After a trip:
Check if any aftermarket equipment was installed
(additional lights, upfitter electrical accessories, audio
systems, alarms) and review specifications if any (load
and Ignition Off Draw currents).
Evaluate the latest driving cycles (distance, driving
time and parking time).
The vehicle should have service performed if the
message is still present during consecutive trips and
the evaluation of the vehicle and driving pattern did not
help to identify the cause.
WARNING LIGHTS AND MESSAGES
The warning/indicator lights will illuminate in the
instrument panel together with a dedicated message and/
or acoustic signal when applicable. These indications are
indicative and precautionary and as such must not be
considered as exhaustive. Always refer to the information
in this chapter in the event of a failure indication. All active
telltales will display first if applicable. The system check menu may appear different based upon
equipment options and current vehicle status. Some
telltales are optional and may not appear.
RED WARNING LIGHTS
Air Bag Warning Light
This warning light will illuminate to indicate a
fault with the air bag, and will turn on for four to
eight seconds as a bulb check when the
ignition is placed in the ON/RUN or ACC/ON/
RUN position. This light will illuminate with a single chime
when a fault with the air bag has been detected, it will stay
on until the fault is cleared. If the light is either not on
during startup, stays on, or turns on while driving, have the
system inspected at an authorized dealer as soon as
possible.
Brake Warning Light
This warning light monitors various brake
functions, including brake fluid level and
parking brake application. If the brake light
turns on it may indicate that the parking brake
is applied, that the brake fluid level is low, or that there is
a problem with the Anti-Lock Brake System reservoir.
If the light remains on when the parking brake has been
disengaged, and the fluid level is at the full mark on the
master cylinder reservoir, it indicates a possible brake
hydraulic system malfunction or that a problem with the
Brake Booster has been detected by the Anti-Lock Brake
System (ABS) / Electronic Stability Control (ESC) system.
23_LD_OM_EN_USC_t.book Page 68
Page 71 of 292

GETTING TO KNOW YOUR INSTRUMENT PANEL69
In this case, the light will remain on until the condition has
been corrected. If the problem is related to the brake
booster, the ABS pump will run when applying the brake,
and a brake pedal pulsation may be felt during each stop.
The dual brake system provides a reserve braking capacity
in the event of a failure to a portion of the hydraulic
system. A leak in either half of the dual brake system is
indicated by the Brake Warning Light, which will turn on
when the brake fluid level in the master cylinder has
dropped below a specified level.
The light will remain on until the cause is corrected.
NOTE:The light may flash momentarily during sharp cornering
maneuvers, which change fluid level conditions. The
vehicle should have service performed, and the brake
fluid level checked.
If brake failure is indicated, immediate repair is necessary.
Vehicles equipped with the Anti-Lock Brake System (ABS)
are also equipped with Electronic Brake Force Distribution
(EBD). In the event of an EBD failure, the Brake Warning
Light will turn on along with the ABS Light. Immediate
repair to the ABS system is required. Operation of the Brake Warning Light can be checked by
turning the ignition switch from the OFF position to the
ON/RUN position. The light should illuminate for
approximately two seconds. The light should then turn off
unless the parking brake is applied or a brake fault is
detected. If the light does not illuminate, have the light
inspected by an authorized dealer.
The light also will turn on when the parking brake is
applied with the ignition switch in the ON/RUN position.
NOTE:This light shows only that the parking brake is applied.
It does not show the degree of brake application.
Battery Charge Warning Light
This warning light will illuminate when the
battery is not charging properly. If it stays on
while the engine is running, there may be a
malfunction with the charging system. Contact
an authorized dealer as soon as possible.
This indicates a possible problem with the electrical
system or a related component.
Door Open Warning Light
This indicator will illuminate when a door is
ajar/open and not fully closed.
NOTE:If the vehicle is moving, there will also be a single chime.
Electric Power Steering (EPS) Fault
Warning Light
This warning light will turn on when there's a
fault with the EPS system Úpage 85.
Electronic Throttle Control (ETC) Warning
Light
This warning light will illuminate to indicate a
problem with the ETC system. If a problem is
detected while the vehicle is running, the light
will either stay on or flash depending on the
nature of the problem. Cycle the ignition when the vehicle
is safely and completely stopped and the transmission is
placed in the PARK position. The light should turn off. If the
light remains on with the vehicle running, your vehicle will
usually be drivable; however, see an authorized dealer for
service as soon as possible.
NOTE:This light may turn on if the accelerator and brake pedals
are pressed at the same time.
WARNING!
Driving a vehicle with the red brake light on is
dangerous. Part of the brake system may have failed. It
will take longer to stop the vehicle. You could have a
collision. Have the vehicle checked immediately.
WARNING!
Continued operation with reduced assist could pose a
safety risk to yourself and others. Service should be
obtained as soon as possible.3
23_LD_OM_EN_USC_t.book Page 69
Page 72 of 292

70GETTING TO KNOW YOUR INSTRUMENT PANEL
If the light continues to flash when the vehicle is running,
immediate service is required and you may experience
reduced performance, an elevated/rough idle, or engine
stall and your vehicle may require towing. The light will
come on when the ignition is placed in the ON/RUN or
ACC/ON/RUN position and remain on briefly as a bulb
check. If the light does not come on during starting, have
the system checked by an authorized dealer.
Engine Coolant Temperature Warning
Light
This warning light warns of an overheated
engine condition. If the engine coolant
temperature is too high, this indicator will
illuminate and a single chime will sound. If the
temperature reaches the upper limit, a continuous chime
will sound for four minutes or until the engine is able to
cool: whichever comes first.
If the light turns on while driving, safely pull over and stop
the vehicle. If the Air Conditioning (A/C) system is on, turn
it off. Also, shift the transmission into NEUTRAL and idle
the vehicle. If the temperature reading does not return to
normal, turn the engine off immediately and call for
service
Úpage 216.
Oil Pressure Warning Light
This warning light will illuminate to indicate low
engine oil pressure. If the light turns on while
driving, stop the vehicle, shut off the engine as
soon as possible, and contact an authorized
dealer. A chime will sound when this light turns on. Do not operate the vehicle until the cause is corrected.
This light does not indicate how much oil is in the engine.
The engine oil level must be checked under the hood.
Oil Temperature Warning Light
This warning light will illuminate to indicate the
engine oil temperature is high. If the light turns
on while driving, stop the vehicle and shut off
the engine as soon as possible. Wait for oil
temperature to return to normal levels.
Seat Belt Reminder Warning Light
This warning light indicates when the driver or
passenger seat belt is unbuckled. When the
ignition is first placed in the ON/RUN or ACC/
ON/RUN position and if the driver’s seat belt is
unbuckled, a chime will sound and the light will turn on.
When driving, if the driver or front passenger seat belt
remains unbuckled, the Seat Belt Reminder Light will flash
or remain on continuously and a chime will sound
Úpage 177.
Transmission Temperature Warning Light
This warning light will illuminate to warn of a
high transmission fluid temperature. This may
occur with strenuous usage such as trailer
towing. If this light turns on, stop the vehicle
and run the engine at idle or slightly faster, with the
transmission in PARK or NEUTRAL, until the light turns off.
Once the light turns off, you may continue to drive
normally.
Trunk Open Warning Light
This indicator will illuminate when the trunk is
open and not fully closed.
NOTE:If the vehicle is moving, there will also be a single chime.
Vehicle Security Warning Light —
If Equipped
This light will flash at a fast rate for
approximately 15 seconds when the vehicle
security system is arming, and then will flash
slowly until the vehicle is disarmed.
WARNING!
If you continue operating the vehicle when the
Transmission Temperature Warning Light is illuminated
you could cause the fluid to boil over, come in contact
with hot engine or exhaust components and cause a
fire.
CAUTION!
Continuous driving with the Transmission Temperature
Warning Light illuminated will eventually cause severe
transmission damage or transmission failure.
23_LD_OM_EN_USC_t.book Page 70
 1
1 2
2 3
3 4
4 5
5 6
6 7
7 8
8 9
9 10
10 11
11 12
12 13
13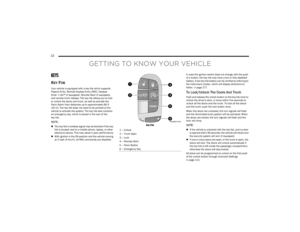 14
14 15
15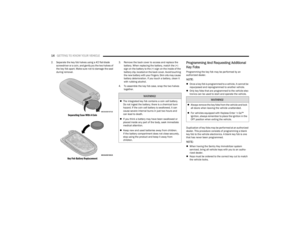 16
16 17
17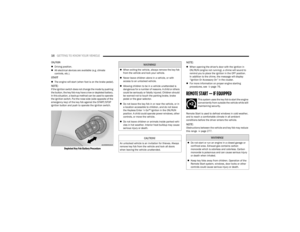 18
18 19
19 20
20 21
21 22
22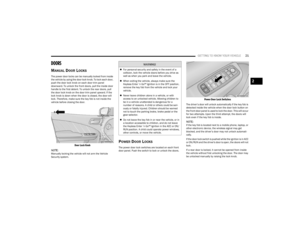 23
23 24
24 25
25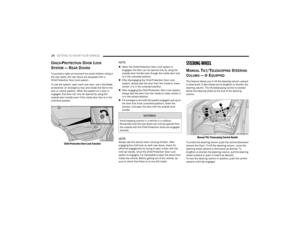 26
26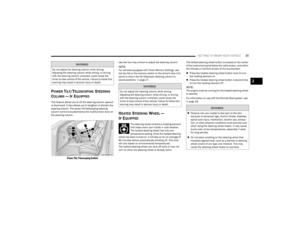 27
27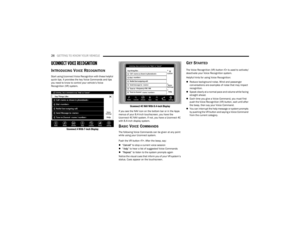 28
28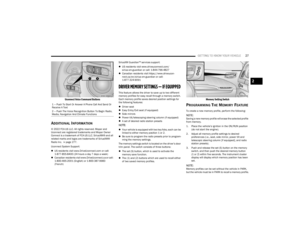 29
29 30
30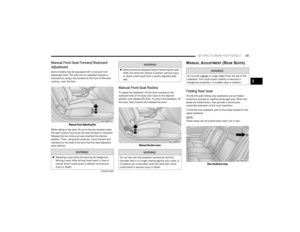 31
31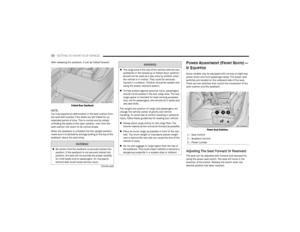 32
32 33
33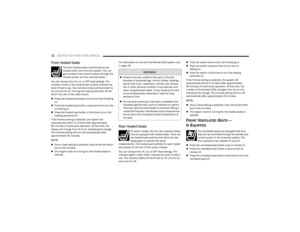 34
34 35
35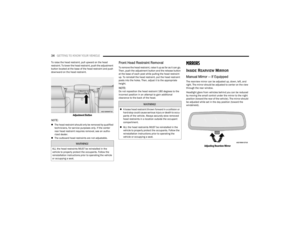 36
36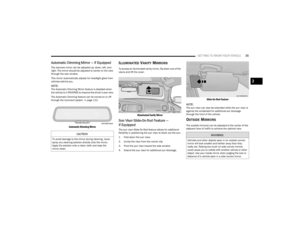 37
37 38
38 39
39 40
40 41
41 42
42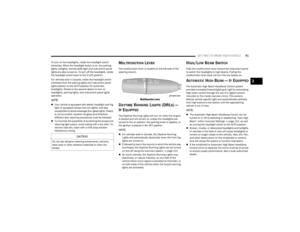 43
43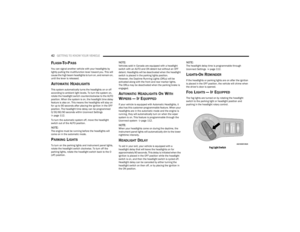 44
44 45
45 46
46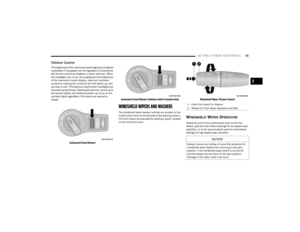 47
47 48
48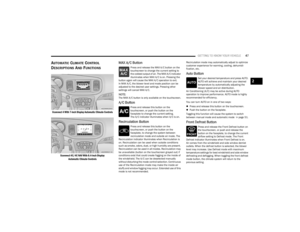 49
49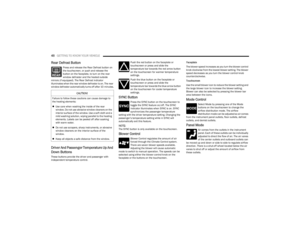 50
50 51
51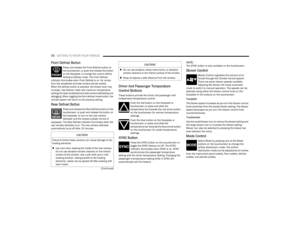 52
52 53
53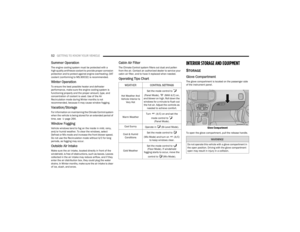 54
54 55
55 56
56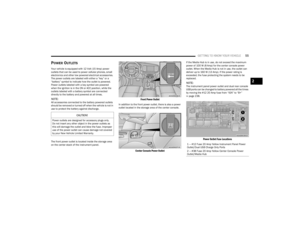 57
57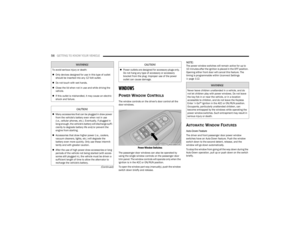 58
58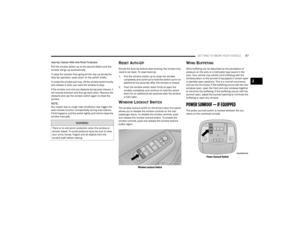 59
59 60
60 61
61 62
62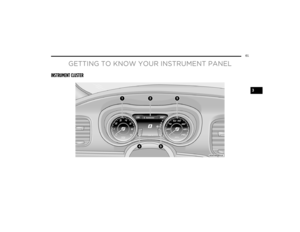 63
63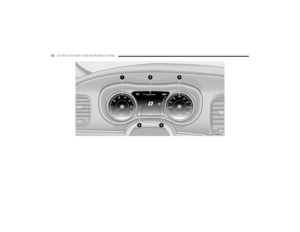 64
64 65
65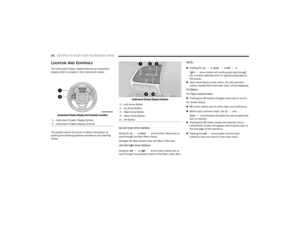 66
66 67
67 68
68 69
69 70
70 71
71 72
72 73
73 74
74 75
75 76
76 77
77 78
78 79
79 80
80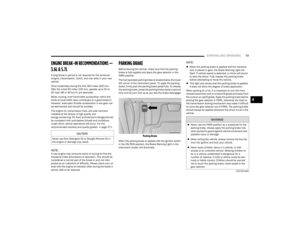 81
81 82
82 83
83 84
84 85
85 86
86 87
87 88
88 89
89 90
90 91
91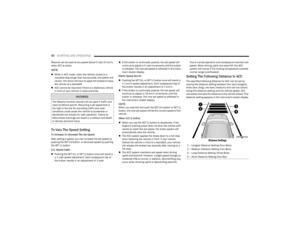 92
92 93
93 94
94 95
95 96
96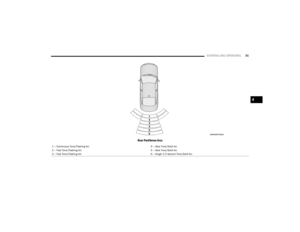 97
97 98
98 99
99 100
100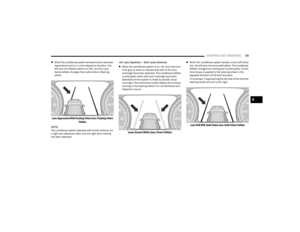 101
101 102
102 103
103 104
104 105
105 106
106 107
107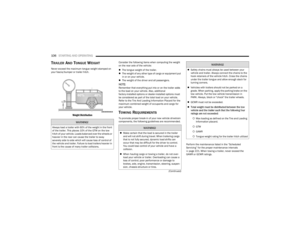 108
108 109
109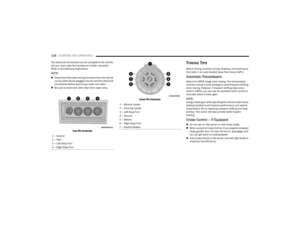 110
110 111
111 112
112 113
113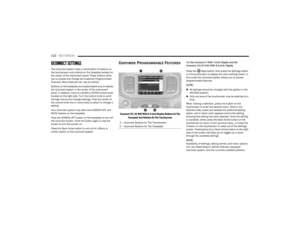 114
114 115
115 116
116 117
117 118
118 119
119 120
120 121
121 122
122 123
123 124
124 125
125 126
126 127
127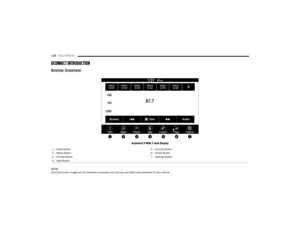 128
128 129
129 130
130 131
131 132
132 133
133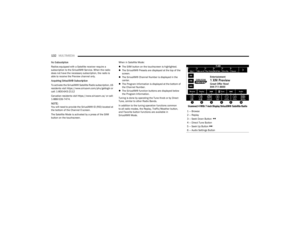 134
134 135
135 136
136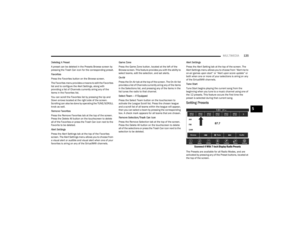 137
137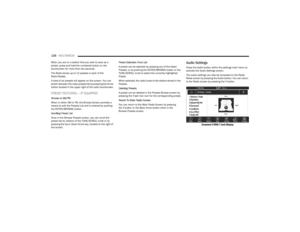 138
138 139
139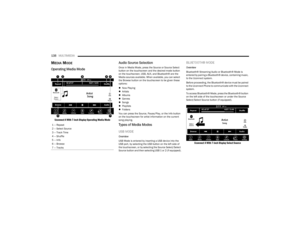 140
140 141
141 142
142 143
143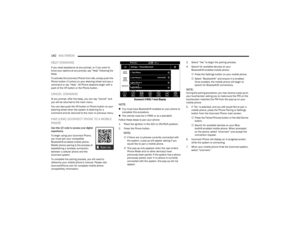 144
144 145
145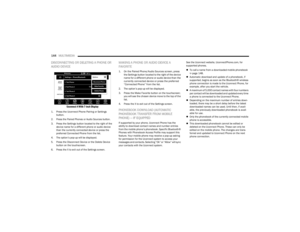 146
146 147
147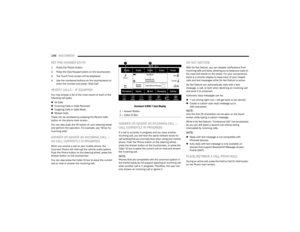 148
148 149
149 150
150 151
151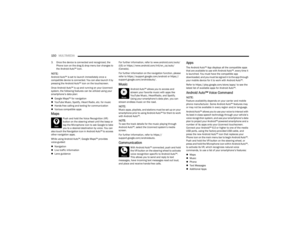 152
152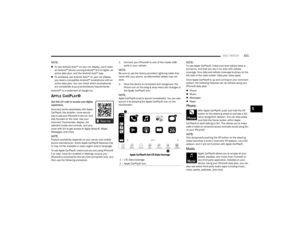 153
153 154
154 155
155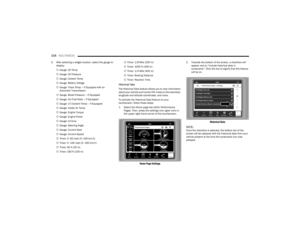 156
156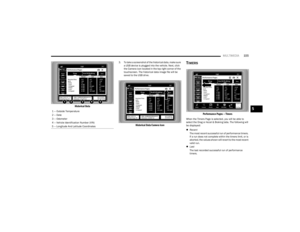 157
157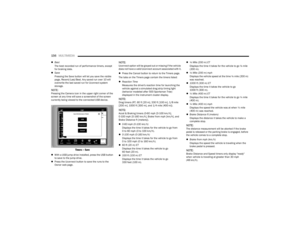 158
158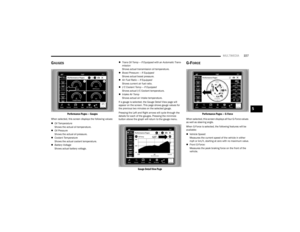 159
159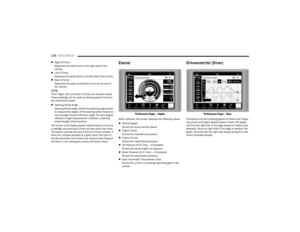 160
160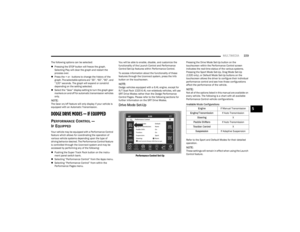 161
161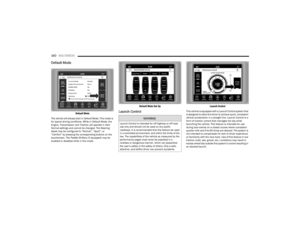 162
162 163
163 164
164 165
165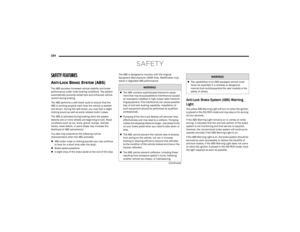 166
166 167
167 168
168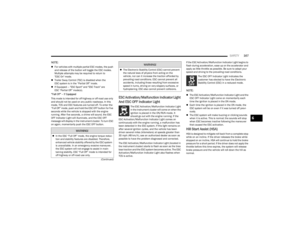 169
169 170
170 171
171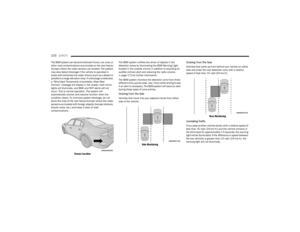 172
172 173
173 174
174 175
175 176
176 177
177 178
178 179
179 180
180 181
181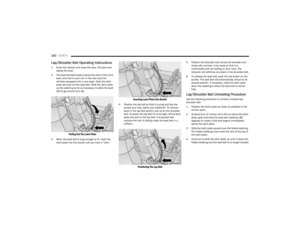 182
182 183
183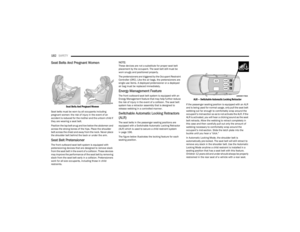 184
184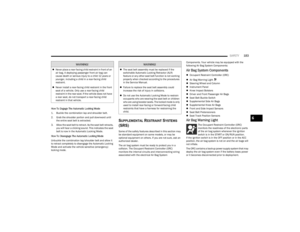 185
185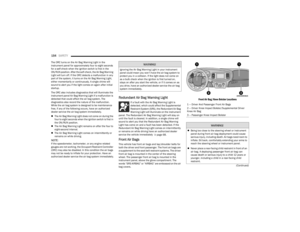 186
186 187
187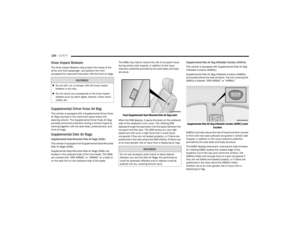 188
188 189
189 190
190 191
191 192
192 193
193 194
194 195
195 196
196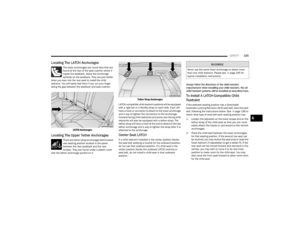 197
197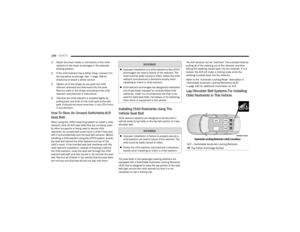 198
198 199
199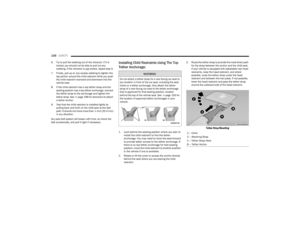 200
200 201
201 202
202 203
203 204
204 205
205 206
206 207
207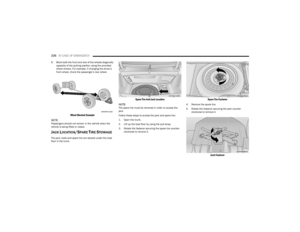 208
208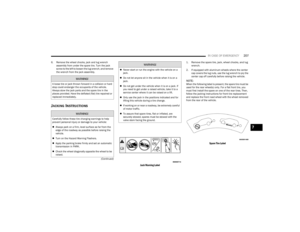 209
209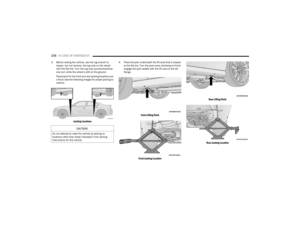 210
210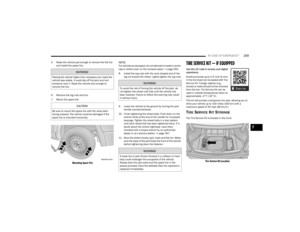 211
211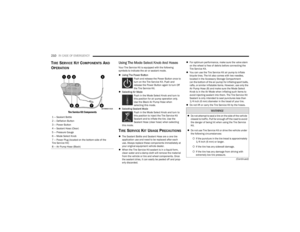 212
212 213
213 214
214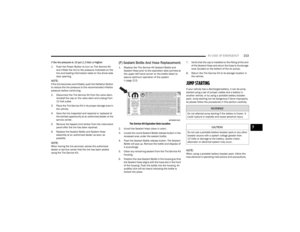 215
215 216
216 217
217 218
218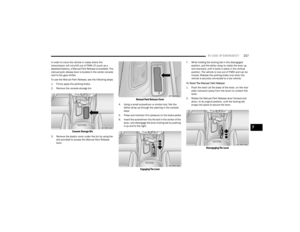 219
219 220
220 221
221 222
222 223
223 224
224 225
225 226
226 227
227 228
228 229
229 230
230 231
231 232
232 233
233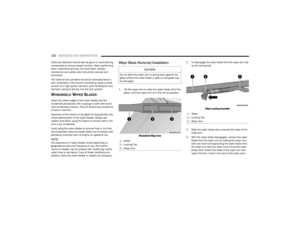 234
234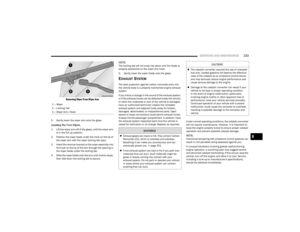 235
235 236
236 237
237 238
238 239
239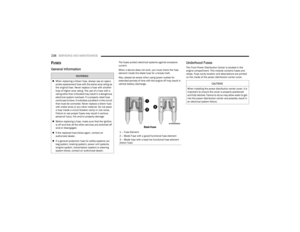 240
240 241
241 242
242 243
243 244
244 245
245 246
246 247
247 248
248 249
249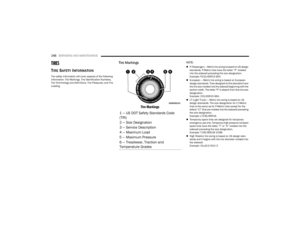 250
250 251
251 252
252 253
253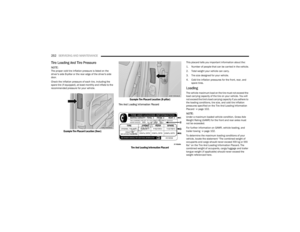 254
254 255
255 256
256 257
257 258
258 259
259 260
260 261
261 262
262 263
263 264
264 265
265 266
266 267
267 268
268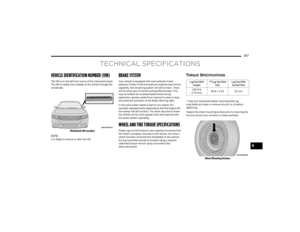 269
269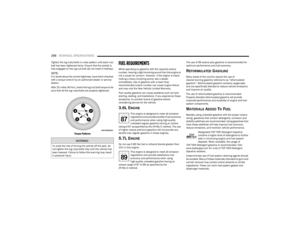 270
270 271
271 272
272 273
273 274
274 275
275 276
276 277
277 278
278 279
279 280
280 281
281 282
282 283
283 284
284 285
285 286
286 287
287 288
288 289
289 290
290 291
291