Page 177 of 256

3. Remove Jack by turning the jack screw counter
-
clockwise to collapse from storage area that is
located behind the tire.
Jack Location
JACKING INSTRUCTIONS")
IN CASE OF EMERGENCY175
(Continued)
3. Remove Jack by turning the jack screw counter
-
clockwise to collapse from storage area that is
located behind the tire.
Jack Location
JACKING INSTRUCTIONS
Jack Warning Label Extending The Wrench
1. Loosen (but do not remove) the wheel lug nuts by
turning them to the left, one turn while the wheel is
still on the ground.
1 — Jack Screw
2 — Jack
WARNING!
Carefully follow these tire changing warnings to help
prevent personal injury or damage to your vehicle:
Always park on a firm, level surface as far from the
edge of the roadway as possible before raising the
vehicle.
Turn on the Hazard Warning Flashers.
Apply the parking brake firmly and set the transmis -
sion in PARK.
Block the wheel diagonally opposite the wheel to be
raised.
Do not let any passenger sit in the vehicle when it is
on a jack.
Do not get under the vehicle when it is on a jack.
If you need to get under a raised vehicle, take it to a
service center where it can be raised on a lift.
Only use the jack in the positions indicated and for
lifting this vehicle during a tire change.
If working on or near a roadway, be extremely careful
of motor traffic.
WARNING!CAUTION!
Do not attempt to raise the vehicle by jacking on
locations other than those indicated in the Jacking
Instructions for this vehicle.
7
23_RUV_OM_EN_US_t.book Page 175
Page 178 of 256
176IN CASE OF EMERGENCY
2. There are two jack engagement locations on each
side of the vehicle body. These locations are on the
sill flange of the vehicle body.
NOTE:
Placement for the front and rear jacking locations are critical.
See the following images for proper jacking locations.
Jack Locations Front Lifting Point
Front Jack Location Rear Lifting Point
Rear Jacking Location
WARNING!
Being under a jacked-up vehicle is dangerous.
The vehicle could slip off the jack and fall on you.
You could be crushed. Never get any part of your body
under a vehicle that is on a jack. If you need to get
under a raised vehicle, take it to a service center where
it can be raised on a lift.
CAUTION!
Do not attempt to raise the vehicle by jacking on
locations other than those indicated.
23_RUV_OM_EN_US_t.book Page 176
Page 179 of 256

IN CASE OF EMERGENCY177
3. Place the wrench on the jack screw and turn
clockwise until the jack head is properly engaged in
the described location. Do not raise the vehicle until
you are sure the jack is securely engaged.
4. Raise the vehicle by turning the jack screw clockwise, using the swivel wrench. Raise the vehicle only until
the tire just clears the surface and enough clearance
is obtained to install the compact spare tire.
Minimum tire lift provides maximum stability.
5. Remove the wheel lug nuts, for vehicles with wheel covers, remove the cover from the wheel by hand.
Do not pry the wheel cover off. Then pull the wheel off
the hub.
6. Install the inflatable spare on the vehicle, located in the rear cargo area of the vehicle.
Mounting Inflatable Spare Tire
NOTE:
Do not install the wheel cover on the inflatable spare tire.
7. Leave the vehicle on the jack and start inflating the inflatable spare after the tire has been mounted to
the vehicle. Secure the wheel to the hub by tightening
the nuts with the wrench. After inflation, once the
vehicle is lowered you will have a second opportunity
to “torque” the lug nuts
Úpage 235. 8. Inflate the tire to the prescribed pressure 60 psi
(4.2 Bar) using the Portable Air Compressor
Úpage 179 or Tire Service Kit if equipped Úpage 180.
9. Lower the vehicle once the inflatable Spare has reached its pressure and the compressor-hose has
been removed from the tire valve.
10. Finish tightening the lug nuts. Push down on the wrench while at the end of the handle for increased
leverage. Tighten the lug nuts in a star pattern until
each nut has been tightened twice
Úpage 235.
If in doubt about the correct tightness, have them
checked with a torque wrench by an authorized
dealer or at a service station.
11. Lower the jack to its fully-closed position.
12. Place the deflated (flat) tire and foam tray cover assembly in the rear cargo area. Do not stow the
deflated tire in the inflatable spare tire location. Have
the full-sized tire repaired or replaced, as soon as
possible.WARNING!
Raising the vehicle higher than necessary can make the
vehicle less stable. It could slip off the jack and hurt
someone near it. Raise the vehicle only enough to
remove the tire.
WARNING!
To avoid the risk of forcing the vehicle off the jack, do
not tighten the wheel nuts fully until the vehicle has
been lowered. Failure to follow this warning may result
in serious injury.
CAUTION!
Be sure to mount the inflatable spare tire with the valve
stem facing outward. The vehicle could be damaged if
the inflatable spare tire is mounted incorrectly.
WARNING!
A loose tire or jack thrown forward in a collision or hard
stop could endanger the occupants of the vehicle.
Always stow the jack parts and the spare tire in the
places provided. Have the deflated (flat) tire repaired
or replaced immediately.
7
23_RUV_OM_EN_US_t.book Page 177
Page 180 of 256

178IN CASE OF EMERGENCY
13. Stow the jack back in the stowage compartment and
place the access panel back. The stud of the storage
area must be threaded through the lower part of the
jack. Then turn the Jack Screw clockwise to secure it
in place.
NOTE:Stow the foam tray and components in the cargo area.
Storing The Jack
ROAD TIRE INSTALLATION
Vehicles Equipped With Wheel Covers
1. Mount the road tire on the axle.
2. To ease the installation process for steel wheels with wheel covers, install two lug nuts on the mounting
studs which are on each side of the valve stem. Install
the lug nuts with the cone shaped end of the nut
toward the wheel. Lightly tighten the lug nuts.
Tire And Wheel Cover Or Center Cap
3. Align the valve notch in the wheel cover with the valve stem on the wheel. Install the cover by hand, snapping the
cover over the two lug nuts. Do not use a hammer or
excessive force to install the cover.
4. Install the remaining lug nuts with the cone shaped end of the nut toward the wheel. Lightly tighten all the lug nuts
until the wheel sits flush onto the hub and there is no play.
The nuts will have to be fully tightened once the vehicle is
lowered. Tightening an improperly seated wheel under
vehicle load can damage the threads, cause vibration, and
undermine safety.
5. Lower the vehicle to the ground by turning the jack handle counterclockwise.
6. Finish tightening the lug nuts. Push down on the wrench while at the end of the handle for increased leverage.
Tighten the lug nuts in a star pattern until each nut has
been tightened twice. Details for proper wheel lug nut
torque
Ú
page 235. If in doubt about the correct
tightness, have them checked with a torque wrench
by an authorized dealer or at a service station.
7. After 25 miles (40 km) check the lug nut torque with a torque wrench to ensure that all lug nuts are
properly seated against the wheel.
1 — Jack Screw
2 — Jack
3 — Stud
1 — Valve Stem
2 — Valve Notch
3 — Road Tire
4 — Wheel Cover
5 — Wheel Lug Nut
WARNING!
To avoid the risk of forcing the vehicle off the jack, do
not tighten the wheel nuts fully until the vehicle has
been lowered. Failure to follow this warning may result
in serious injury.
23_RUV_OM_EN_US_t.book Page 178
Page 181 of 256

IN CASE OF EMERGENCY179
PORTABLE AIR COMPRESSOR —
I
F EQUIPPED
Your vehicle may be equipped with a Portable Air
Compressor. Use the Portable Air Compressor located in
the side compartment of the cargo area to inflate the
inflatable tire to 60 psi (4.2 Bar).
Portable Air Compressor
Portable Air Compressor Usage With Inflatable Spare Tire
1. Remove the Portable Air Compressor from the
storage location.
2. Raise the vehicle as described in the Jacking
Instructions within this section.
3. Install the Inflatable Spare tire as described
in the Jack Instructions section in this manual.
Make sure that the valve stem is located near
the ground, and then screw the air hose of the
Portable Air Compressor to the valve stem.
4. Uncoil the power plug and connect it the
vehicles 12 Volt power Outlet.
5. Always start the engine before turning ON
the Portable Air Compressor.
6. Switch the power button ON.
7. Inflate the tire to 60 psi (4.2 Bar)
recommended as per the label on the wheel or
if the vehicle equipped with the inflatable spare
tire pressure indicated on the Tire and Loading
information label located on the driver-side door opening.NOTE:If the tire is overinflated, use the deflation button to
reduce the tire air pressure.
8. After the tire reaches the recommended
pressure, lower the vehicle with the jack as
described in the Jack Instructions section in
this manual.
9. Remove the speed limit label sticker from
the Portable Air Compressor and place it on the
center of the steering wheel.
10. Return the Portable Air Compressor to the foam tray and secure it with the strap. Store the foam tray in the
cargo area.
1 — Power Plug
2 — Deflation Button
3 — Pressure Gauge
4 — Power Button
5 — Air Hose
WARNING!
Do not lift or carry the Portable Air Compressor by
the hose.
Always stow the Portable Air Compressor only in the
provided place.
The metal end fitting from Power Plug may get hot
after use, so it should be handled carefully.
Keep the Portable Air Compressor away from open
flames or heat source.
7
23_RUV_OM_EN_US_t.book Page 179
Page 182 of 256

180IN CASE OF EMERGENCY
RETURN INFLATABLE SPARE TIRE
To return Inflatable Spare Tire to its storage location.
1. Return the Jack.
2. Deflate the spare tire. Use the Tire Service Kit or
Portable Air Compressor
Úpage 179 and push the
deflation button to do this step. See the Portable Air
Compressor in this section for additional information.
The inflatable spare tire will return to its original
shape.
3. Install the inflatable spare tire back into its original stowage location and position facing outward.
4. Install the foam tray with wrench and funnel installed.
5. Install and tighten the wing nut by hand.
6. Install the Tire Service Kit or Portable Air Compressor (if equipped) and tighten the strap.
7. Install access panel door.
TIRE SERVICE KIT — IF EQUIPPED
Use this QR code to access your digital
experience.
Your vehicle may be equipped with a
Tire Service Kit. Small punctures up to
1/4 inch (6 mm) in the tire tread can be
sealed with Tire Service Kit. Foreign
objects (e.g., screws or nails) should not
be removed from the tire. Tire Service Kit can be used in outside temperatures down to approximately
-4°F (-20°C). This kit will provide a temporary tire seal, allowing
you to drive your vehicle up to 100 miles (160 km) with a
maximum speed of 50 mph (80 km/h).
Tire Service Kit Storage
Depending on the vehicle trim level, the Tire Service Kit
storage may vary.
The Tire Service Kit is secured with a strap and is stored in
the storage bin located behind the rear cargo trim panel.
Tire Service Kit Location
Tire Service Kit
Depending on the vehicle trim level, the Tire Service Kit
storage may vary.
Tire Service Kit Location — If Equipped
The Tire Service Kit is secured with a strap and is stored
under the load floor within the second row.
1 — Tire Service Kit
2 — Fuel Funnel
23_RUV_OM_EN_US_t.book Page 180
Page 183 of 256

Tire Service Kit And Components And Operation
Tire Service Kit Components
Using The Mode Select Knob And Hoses
Your Tire Service Kit is equipped with the followi")
IN CASE OF EMERGENCY181
(Continued)
Tire Service Kit And Components And Operation
Tire Service Kit Components
Using The Mode Select Knob And Hoses
Your Tire Service Kit is equipped with the following
symbols to indicate the air or sealant mode.
Selecting Air Mode
Push in the Mode Select Knob and turn to this
position for air pump operation only.
Selecting Sealant Mode
Push in the Mode Select Knob and turn to this
position to inject the Tire Service Kit Sealant
and to inflate the tire.
Using The Power Button
Push and release the Power Button once to
turn On the Tire Service Kit. Push and release
the Power Button again to turn Off the Tire
Service Kit.
Using The Deflation Button
Push the Deflation Button to reduce the air
pressure in the tire if it becomes overinflated.
Tire Service Kit Usage Precautions
Replace the Tire Service Kit Sealant Bottle prior to the
expiration date (printed at the lower right hand corner
on the bottle label) to ensure optimum operation of the
system. See the Sealant Bottle Replacement in this
section for further information.
The Sealant Bottle is a one tire application use and
needs to be replaced after each use. Always replace
these components immediately at your original equip -
ment vehicle dealer.
When the Tire Service Kit sealant is in a liquid form,
clean water, and a damp cloth will remove the material
from the vehicle or tire and wheel components. Once
the sealant dries, it can easily be peeled off and prop -
erly discarded.
For optimum performance, make sure the valve stem
on the wheel is free of debris before connecting the
Tire Service Kit.
The Tire Service Kit Sealant is only intended to seal
punctures less than 1/4 inch (6 mm) diameter in the
tread/contact surface of your vehicle’s tires.
The Tire Service Kit Sealant is not intended to seal
punctures on the tires' side walls.
You can use the Tire Service Kit air pump to inflate bicycle
tires. The kit also comes with two needles, located in the
Accessory Storage Compartment (on the bottom of the air
pump) for inflating sport balls, rafts, or similar inflatable
items. However, use only the Air Pump and make sure the
Mode Select Knob is in the Air Mode when inflating such
items to avoid injecting sealant into them.
Do not lift or carry the Tire Service Kit by the hoses.
1 — Sealant/Air Hose
2 — Hose Accessories
3 — Mode Select Knob
4 — Pressure Gauge
5 — Deflation Button
6 — Power Switch
7 — Sealant Bottle
8 — Power Plug
WARNING!
Do not attempt to seal a tire on the side of the vehicle
closest to traffic. Pull far enough off the road to avoid the
danger of being hit when using the Tire Service Kit.
Do not use Tire Service Kit or drive the vehicle under
the following circumstances:
If the puncture in the tire tread is approximately
1/4 inch (6 mm) or larger.
If the tire has any sidewall damage.
If the tire has any damage from driving with
extremely low tire pressure.
If the tire has any damage from driving on a flat tire.
If the wheel has any damage.
If you are unsure of the condition of the tire or
the wheel.
7
23_RUV_OM_EN_US_t.book Page 181
Page 184 of 256

182IN CASE OF EMERGENCY
Sealing A Tire With Tire Service Kit
Whenever You Stop To Use Tire Service Kit:
1. Pull over to a safe location and turn on the vehicle’s
Hazard Warning Flashers.
2. Verify that the valve stem (on the wheel with the deflated tire) is in a position that is near to the ground. This will
allow the Tire Service Kit Hose to reach the valve stem and
keep the Tire Service Kit flat on the ground. This will
provide the best positioning of the kit when injecting the
sealant into the deflated tire and running the air pump.
Move the vehicle as necessary to place the valve stem in
this position before proceeding.
3. Place the transmission in PARK (P) and cycle the ignition in the OFF position.
4. Apply the parking brake.
Setting Up To Use Tire Service Kit:
1. Uncoil the Sealant Hose and then remove the cap from the fitting at the end of the hose.
2. Place the Tire Service Kit flat on the ground
next to the deflated tire.
3. Remove the cap from the valve stem and then screw the fitting at the end of the Sealant Hose onto the
valve stem.
4. Uncoil the Power Plug and insert the plug
into the vehicle’s 12 Volt power outlet.
NOTE:Do not remove foreign objects (e.g., screws or nails) from
the tire. Injecting Tire Service Kit Sealant Into The Deflated Tire:
1. Always start the vehicle before turning the
Tire Service Kit on.
2. Ensure the Mode Select Knob is to the
Sealant Mode position.
3. After pushing the Power Button, the sealant
(white fluid) will flow from the Sealant Bottle
through the Sealant Hose and into the tire.
NOTE:Sealant may leak out through the puncture in the tire.
If the sealant (white fluid) does not flow within
0 – 10 seconds through the Sealant Hose:
1. Push the Power Button to turn the Tire Service Kit off. Disconnect the Sealant Hose from the valve
stem. Make sure the valve stem is free of debris.
Reconnect the Sealant Hose to the valve stem.
Check that the Mode Select Knob is in the Sealant
Mode position and not Air Mode. Push the Power
Button to turn the Tire Service Kit on.
2. Connect the Power Plug to a different 12 Volt power outlet in your vehicle or another vehicle, if available.
Make sure the vehicle is running before turning the
Tire Service Kit on.
3. The Sealant Bottle may be empty due to previous use. Call for assistance.
Keep Tire Service Kit away from open flames or heat
source.
A loose Tire Service Kit thrown forward in a collision
or hard stop could endanger the occupants of the
vehicle. Always stow the Tire Service Kit in the place
provided. Failure to follow these warnings can result
in injuries that are serious or fatal to you, your
passengers, and others around you.
Take care not to allow the contents of Tire Service Kit
to come in contact with hair, eyes, or clothing. Tire
Service Kit sealant is harmful if inhaled, swallowed,
or absorbed through the skin. It causes skin, eye, and
respiratory irritation. Flush immediately with plenty of
water if there is any contact with eyes or skin. Change
clothing as soon as possible, if there is any contact
with clothing.
Tire Service Kit Sealant solution contains latex. In
case of an allergic reaction or rash, consult a physi -
cian immediately. Keep Tire Service Kit out of reach
of children. If swallowed, rinse mouth immediately
with plenty of water and drink plenty of water. Do not
induce vomiting! Consult a physician immediately.
WARNING!
23_RUV_OM_EN_US_t.book Page 182
 1
1 2
2 3
3 4
4 5
5 6
6 7
7 8
8 9
9 10
10 11
11 12
12 13
13 14
14 15
15 16
16 17
17 18
18 19
19 20
20 21
21 22
22 23
23 24
24 25
25 26
26 27
27 28
28 29
29 30
30 31
31 32
32 33
33 34
34 35
35 36
36 37
37 38
38 39
39 40
40 41
41 42
42 43
43 44
44 45
45 46
46 47
47 48
48 49
49 50
50 51
51 52
52 53
53 54
54 55
55 56
56 57
57 58
58 59
59 60
60 61
61 62
62 63
63 64
64 65
65 66
66 67
67 68
68 69
69 70
70 71
71 72
72 73
73 74
74 75
75 76
76 77
77 78
78 79
79 80
80 81
81 82
82 83
83 84
84 85
85 86
86 87
87 88
88 89
89 90
90 91
91 92
92 93
93 94
94 95
95 96
96 97
97 98
98 99
99 100
100 101
101 102
102 103
103 104
104 105
105 106
106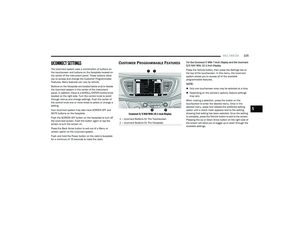 107
107 108
108 109
109 110
110 111
111 112
112 113
113 114
114 115
115 116
116 117
117 118
118 119
119 120
120 121
121 122
122 123
123 124
124 125
125 126
126 127
127 128
128 129
129 130
130 131
131 132
132 133
133 134
134 135
135 136
136 137
137 138
138 139
139 140
140 141
141 142
142 143
143 144
144 145
145 146
146 147
147 148
148 149
149 150
150 151
151 152
152 153
153 154
154 155
155 156
156 157
157 158
158 159
159 160
160 161
161 162
162 163
163 164
164 165
165 166
166 167
167 168
168 169
169 170
170 171
171 172
172 173
173 174
174 175
175 176
176 177
177 178
178 179
179 180
180 181
181 182
182 183
183 184
184 185
185 186
186 187
187 188
188 189
189 190
190 191
191 192
192 193
193 194
194 195
195 196
196 197
197 198
198 199
199 200
200 201
201 202
202 203
203 204
204 205
205 206
206 207
207 208
208 209
209 210
210 211
211 212
212 213
213 214
214 215
215 216
216 217
217 218
218 219
219 220
220 221
221 222
222 223
223 224
224 225
225 226
226 227
227 228
228 229
229 230
230 231
231 232
232 233
233 234
234 235
235 236
236 237
237 238
238 239
239 240
240 241
241 242
242 243
243 244
244 245
245 246
246 247
247 248
248 249
249 250
250 251
251 252
252 253
253 254
254 255
255