2022 TOYOTA GR SUPRA jump cable
[x] Cancel search: jump cablePage 317 of 356

3175-1. MOBILITY
5
MOBILITY
the SOS button.
1Tap the cover.
2 Press and hold the SOS but-
ton until the LED in the area
of the button illuminates
green.
The LED is illuminated green
when an emergency call has
been initiated.
If a cancel prompt appears on the
Control Display, the emergency call
can be aborted.
If the situation allows, wait in your
vehicle until the voice connection
has been established.
The LED flashes green when
a connection to the Toyota
Emergency Call Center has
been established.
The Toyota Emergency Call Center
then makes contact with the occu-
pants of the vehicle and initiates
further steps to help.
Even if you are unable to respond,
the Toyota Emergency Call Center
can take further steps to help you
under certain circumstances.
For this, data is transmitted to the
Toyota Emergency Call Center
which serves to determine the nec-
essary rescue measures. E.g., the
current position of the vehicle, if it
can be established.
Even if the Toyota Emergency Call
Center is no longer heard through
the loudspeakers, the Toyota Emer- gency Call Center may still be able
to hear the occupants of the vehi-
cle.
The Toyota Emergency Call
Center ends the Emergency
call.
If the battery is discharged, the
engine can be started using the
battery of another vehicle and
two jumper cables. Only use
jumper cables with fully insu-
lated clamp handles.
Manual triggering
Jump-starting
General information
Safety information
WARNING
Contact with live components can
lead to an electric shock. There is
a risk of injuries or danger to life.
Do not touch any components
that are under voltage.
WARNING
If the jumper cables are con-
nected in the incorrect order,
sparking may occur. There is a
risk of injury. Pay attention to the
correct order during connection.
NOTICE
In the case of body contact
between the two vehicles, a short
circuit can occur during
jump-starting. There is a risk of
damage to property. Make sure
that no body contact occurs.
Page 318 of 356

3185-1. MOBILITY
1Check whether the battery of
the other vehicle has a volt-
age of 12 volts. The voltage
information can be found on
the battery.
2 Switch off the engine of the
assisting vehicle.
3 Switch off any electronic sys-
tems/power consumers in
both vehicles.
The starting aid terminal in the
engine compartment acts as the
positive battery terminal.
A special connection on the
body in the engine compartment
acts as the negative battery ter-
minal.
Additional information:
Overview of engine compart-
ment, refer topage 291.
Open the cover of the positive
battery terminal.
Before you begin, switch off all
unnecessary electronic sys-
tems/power consumers, such as
the radio, on the assisting and
receiving vehicle.
1 Open the cover of the starting
aid terminal. 2
Attach one terminal clamp of
the positive jumper cable to
the positive terminal of the
battery, or to the correspond-
ing starting aid terminal of the
vehicle providing assistance.
3 Attach the terminal clamp on
the other end of the cable to
the positive terminal of the
battery, or to the correspond-
ing starting aid terminal of the
vehicle to be started.
4 Attach one terminal clamp of
the negative jumper cable to
the negative terminal of the
battery, or to the correspond-
ing engine or body ground of
assisting vehicle.
5 Attach the second terminal
clamp to the negative termi-
nal of the battery, or to the
corresponding engine or
body ground of the vehicle to
be started.
Never use spray fluids to start
the engine.
1 Start the engine of the assist-
ing vehicle and let it run for
several minutes at an
increased idle speed.
2 Start the engine of the vehicle
that is to be started in the
usual way.
If the first starting attempt is not
successful, wait a few minutes
before making another attempt in
Preparation
Starting aid terminals
Connecting the cables
Starting the engine
Page 319 of 356

3195-1. MOBILITY
5
MOBILITY
order to allow the discharged bat-
tery to recharge.
3Let both engines run for sev-
eral minutes.
4 Disconnect the jumper
cables in the reverse order.
Check the battery and recharge,
if needed.
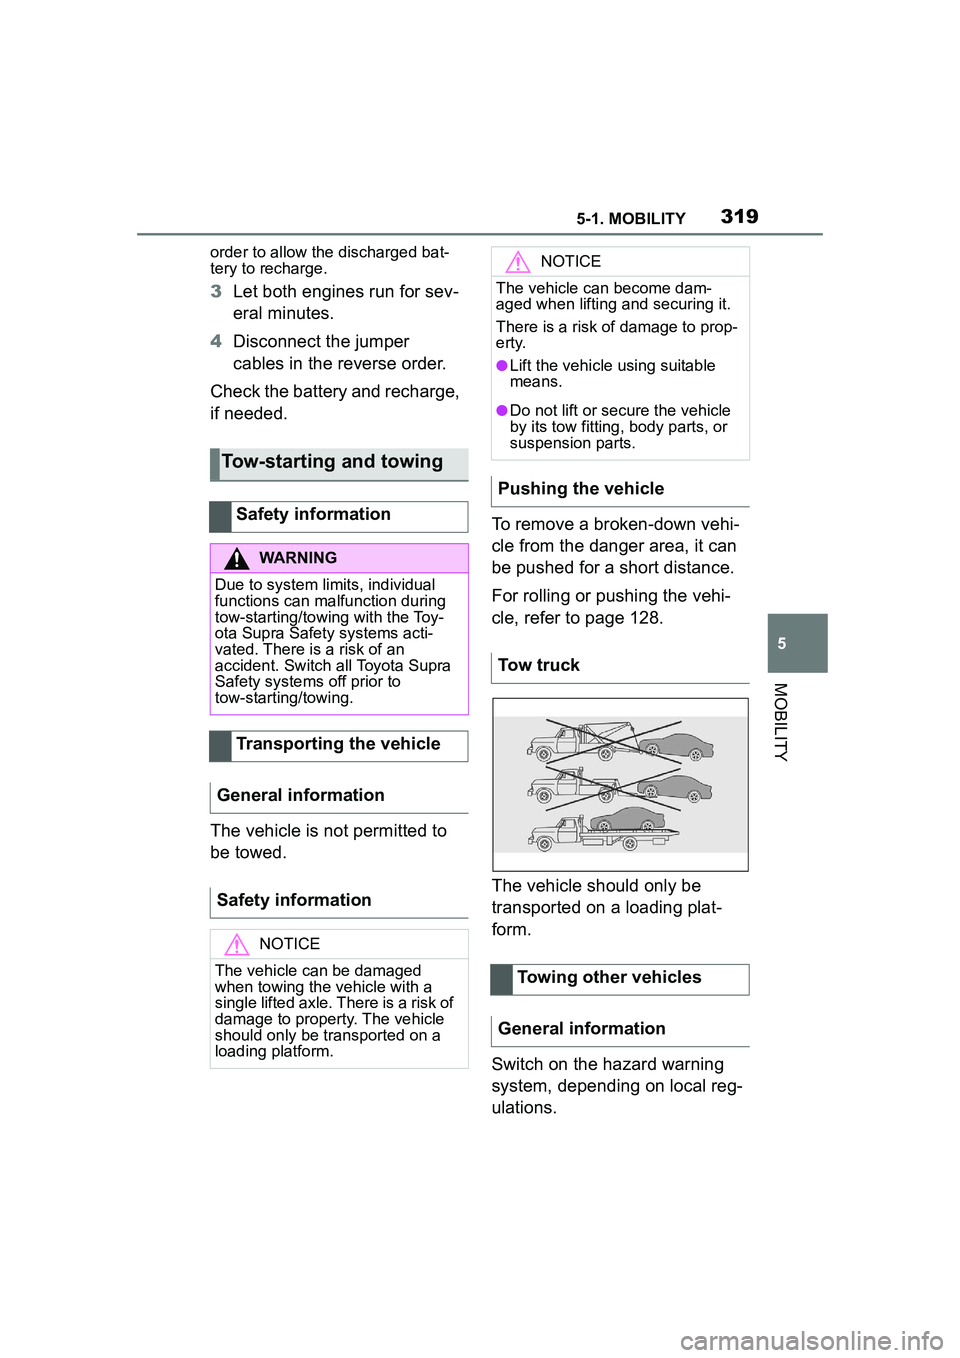
The vehicle is not permitted to
be towed. To remove a broken-down vehi-
cle from the danger area, it can
be pushed for a short distance.
For rolling or pushing the vehi-
cle, refer to page 128.
The vehicle should only be
transported on a loading plat-
form.
Switch on the hazard warning
system, depending on local reg-
ulations.
Tow-starting and towing
Safety information
WARNING
Due to system limits, individual
functions can malfunction during
tow-starting/towing with the Toy-
ota Supra Safety systems acti-
vated. There is a risk of an
accident. Switch all Toyota Supra
Safety systems off prior to
tow-starting/towing.
Transporting the vehicle
General information
Safety information
NOTICE
The vehicle can be damaged
when towing the vehicle with a
single lifted axle. There is a risk of
damage to property. The vehicle
should only be transported on a
loading platform.
NOTICE
The vehicle can become dam-
aged when lifting and securing it.
There is a risk of damage to prop-
erty.
●Lift the vehicle using suitable
means.
●Do not lift or secure the vehicle
by its tow fitting, body parts, or
suspension parts.
Pushing the vehicle
Tow truck
Towing other vehicles
General information
Page 345 of 356

345Alphabetical Index
Being towed, see Tow-starting and towing ............................ 319
Belts, see Safety belts ........... 100
Beverage holder, see Cup hold- ers .......................................... 245
Blind spot monitor ................. 187
Bluetooth connection .............. 69
Bottle holder, see Cup holders ............................................... 245
Brake assist ............................ 195
Brake assist, adaptive ........... 195
Brake discs, breaking in, see Brake system ........................ 253
Brake lights, see Lights and bulbs...................................... 304
Brake pads, breaking in, see Brake system ........................ 253
Brake system .......................... 253
Brake, Fluid ............................. 332
Braking, information .............. 255
Break recommendation, see Driver attention control ....... 192
Breakdown assistance .......... 315
Break-in ................................... 252
Brightness, Control Display .... 62
Bulb replacement, see Lights and bulbs .............................. 304
Bulbs, replacing, see Lights and bulbs...................................... 304
Button, SOS, see Intelligent emergency call ..................... 316
Button, Start/Stop................... 115
Buttons on the steering wheel 36
Bypassing, see Jump-starting ............................................... 317
C
Cable for tow-starting/towing 320
California Proposition 65 Warn-ing .............................................. 6
Calling up mirror adjustment .. 91
Calling up seat adjustment...... 91 Calling up steering wheel adjust-
ment .........................................91
Camera lenses, ca re ...............327
Camera, rearview camera ......218
Camera-based assistance sys- tems, see Toyota Supra Safety...............................................172
Camera-based cruise control, see Dynamic radar cruise con-
trol with full-speed range .....203
Cameras, see Sensors of the vehicle .....................................40
Can holder, see Cup holders .245
Car seats, see Transporting chil- dren safely............................. 111
Car wash..................................322
Car washing ............................322
Care of displays , screens ......328
Care, Head-up Display ...........328
Care, see Washing the vehicle ...............................................322
Care, vehicle ...........................324
Cargo area ...............................246
Cargo area, loading, see Stowing and securing cargo ..............247
Cargo straps, see Lashing eyes in the cargo area ...................247
Cargo, stowing and securing 247
Carpet, care .............................327
CarPlay, connection to the vehi- cle ............................................73
Catalytic converter, see Hot exhaust gas system .............253
CBS Condition Based Service ...............................................301
CC, see Cruise control ...........199
Center console..........................38
Central locking system ............85
Central screen, see Control Dis- play ..........................................49
Changes, technical, see For Your Own Safety ................................5