2022 TOYOTA GR SUPRA towing
[x] Cancel search: towingPage 92 of 356
923-1. CONTROLS
3"Doors/Key"
4 "Turn off after door opening"
Opening the front doors establishes
the idle state, refer to page 43.
When the vehicle is locked, the
vehicle alarm system reacts to
the following changes:
• Opening a door, the hood or
the trunk lid.
• Movements in the car's inte- rior.
• Changes in the vehicle tilt, e. g., during attempts at stealing
a wheel or when towing the
vehicle.
• Disconnected battery voltage.
• Improper use of the socket for OBD Onboard Diagnosis.
• Locking the vehicle while a device is connected to the
socket for the OBD Onboard-
Diagnosis. For socket for the
OBD Onboard Diagnosis,
refer to page 302.
The alarm system signals the
following changes visually and
acoustically:
• Acoustic alarm: Depending on local regulations, the acoustic
alarm may be suppressed.
• Visual alarm: By flashing of the hazard warning system
and headlights, where
required. Do not modify the system to
ensure function of the alarm
system.
When you unlock and lock the
vehicle, either with the remote
control or with Comfort entry, the
alarm system is switched off and
on at the same time.
The alarm system is triggered
when a door is opened if the
door was unlocked using the
integrated key in the door lock.
Switching off the alarm, refer to
page 94.
The trunk lid can be opened
even when the alarm system is
switched on.
After the trunk lid is closed, it is
locked and monitored again pro-
vided the doors are locked. The
hazard warning system flashes
once.
You can trigger the alarm sys-
tem if you find yourself in a dan-
Alarm system
General information
Switching on/off
Opening the doors with
the alarm system switched
on
Opening the trunk lid with
the alarm system switched
on
Panic mode
Page 130 of 356
1303-1. CONTROLS
Electronically unlock the trans-
mission lock to maneuver vehi-
cle from a danger area.
Unlocking is possible, if the
starter can spin the engine.
Before unlocking the transmis-
sion lock, set the parking brake
to prevent the vehicle from roll-
ing away.
1Press and hold down brake
pedal.
2 Press the Start/Stop button.
The starter must audibly
start. Hold the Start/Stop but-
ton pressed.
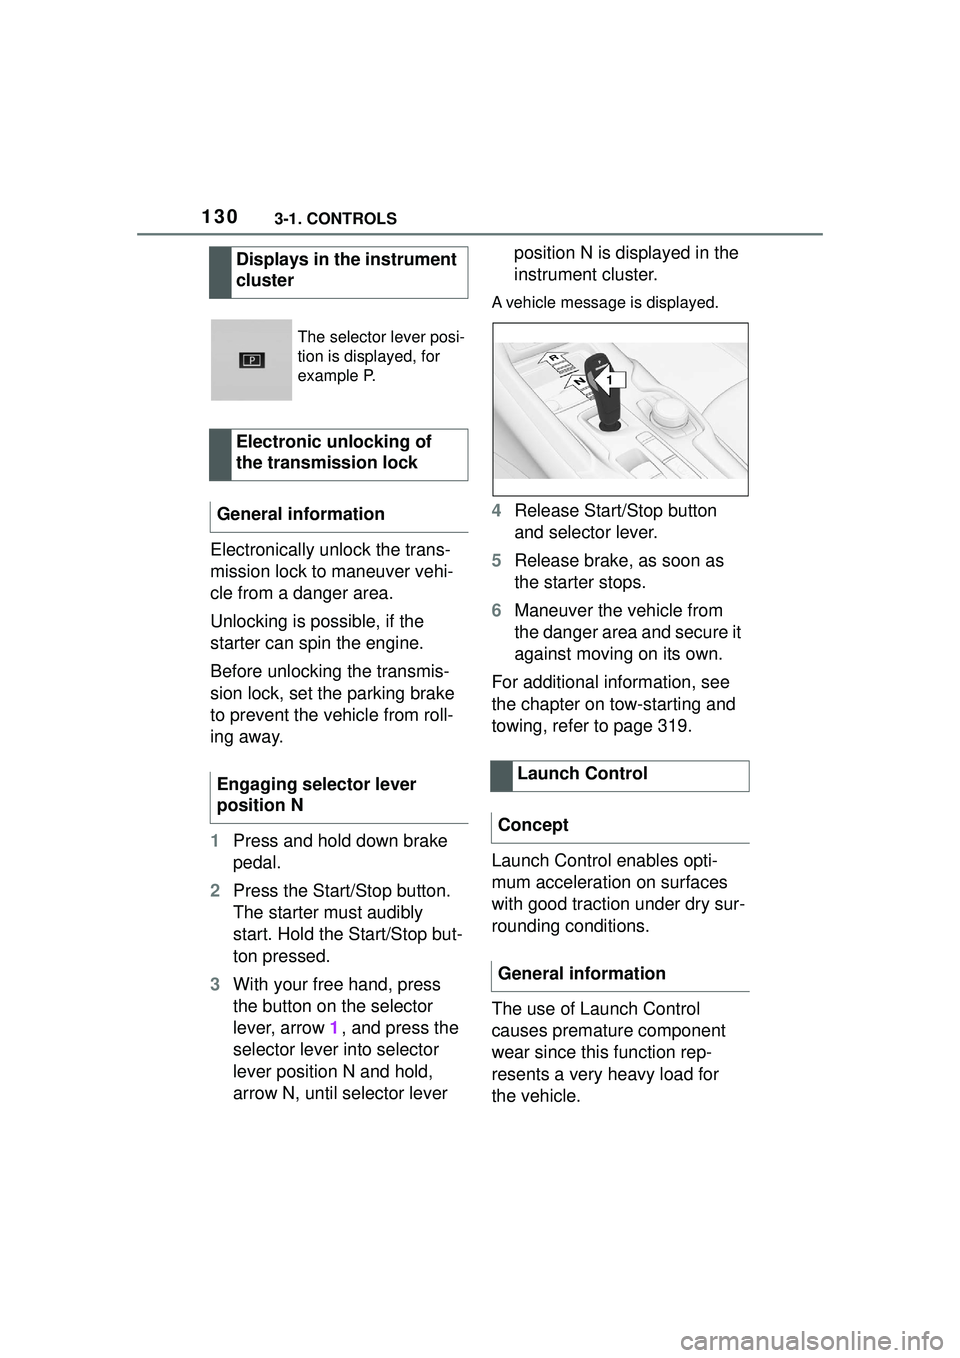
3 With your free hand, press
the button on the selector
lever, arrow 1, and press the
selector lever into selector
lever position N and hold,
arrow N, until selector lever position N is displayed in the
instrument cluster.
A vehicle message is displayed.
4
Release Start/Stop button
and selector lever.
5 Release brake, as soon as
the starter stops.
6 Maneuver the vehicle from
the danger area and secure it
against moving on its own.
For additional information, see
the chapter on tow-starting and
towing, refer to page 319.
Launch Control enables opti-
mum acceleration on surfaces
with good traction under dry sur-
rounding conditions.
The use of Launch Control
causes premature component
wear since this function rep-
resents a very heavy load for
the vehicle.
Displays in the instrument
cluster
The selector lever posi-
tion is displayed, for
example P.
Electronic unlocking of
the transmission lock
General information
Engaging selector lever
position N
Launch Control
Concept
General information
1
R
N
Page 173 of 356
1733-1. CONTROLS
3
CONTROLS
Some Toyota Supra Safety sys-
tems are automatically active after every departure. Some
Toyota Supra Safety systems
activate according to the last
setting.
The menu for the Toyota Supra
Safety system is displayed.
If all Toyota Supra Safety sys-
tems were switched off, all sys-
tems are now switched on.
"Customize Settings": depend-
ing on the equipment version,
the Toyota Supra Safety sys-
tems can be individually config-
ured. The individual settings are
activated and stored. As soon
as a setting is changed on the
menu, all settings of the menu
are activated.
WARNING
Indicators and warnings cannot
serve as a substitute for the
driver’s personal judgment. Due
to its limits, the system might not
output warnings or reactions or
these might be ou
tput late, incor-
rectly. There is a risk of an acci-
dent. Adjust driving style to traffic
conditions. Watch traffic closely
and actively intervene where
appropriate.
WARNING
Due to system limits, individual
functions can malfunction during
tow-starting/towing with the Toy-
ota Supra Safety systems acti-
vated. There is a risk of an
accident. Switch all Toyota Supra
Safety systems off prior to
tow-starting/towing.
Overview
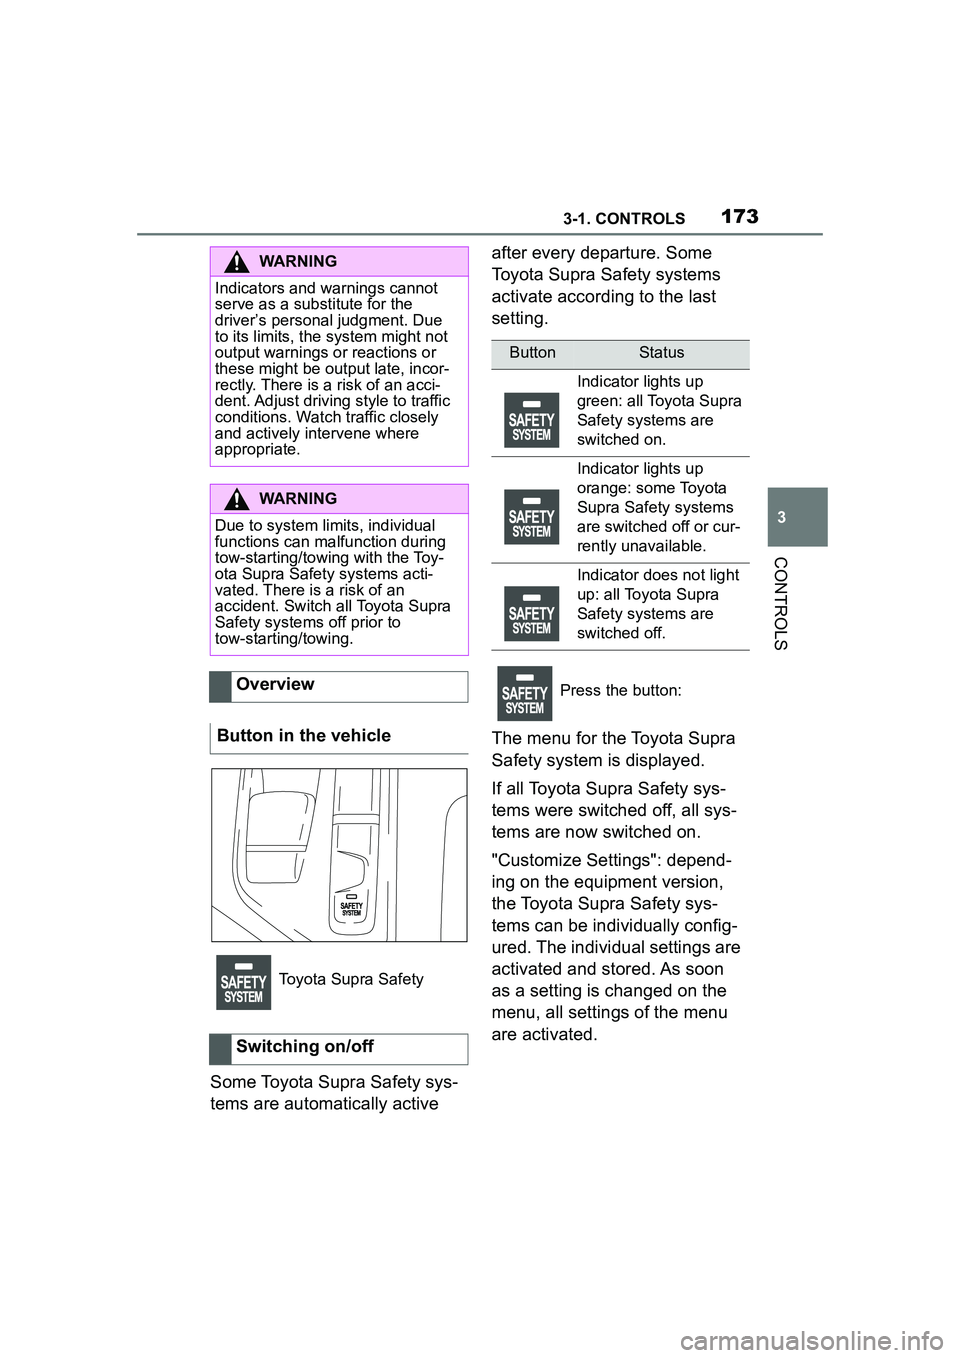
Button in the vehicle
Toyota Supra Safety
Switching on/off
ButtonStatus
Indicator lights up
green: all Toyota Supra
Safety systems are
switched on.
Indicator lights up
orange: some Toyota
Supra Safety systems
are switched off or cur-
rently unavailable.
Indicator does not light
up: all Toyota Supra
Safety systems are
switched off.
Press the button:
Page 175 of 356

1753-1. CONTROLS
3
CONTROLS
The system is controlled by the following sensors:
• Cameras behind the wind-
shield.
• With radar sensor: front radar sensor.
Additional information:
Sensors of the vehicle, refer to
page P.43.
The system is automatically
active after every driving off.
The menu for the Toyota Supra
Safety system is displayed.
If all Toyota Supra Safety sys-
tems were switched off, all sys-
tems are now switched on.
"Customize Settings": depend-
ing on the equipment version,
the Toyota Supra Safety sys-
tems can be individually config-
ured. The individual settings are
activated and stored. As soon
as a setting is changed on the
menu, all settings of the menu
are activated.
WARNING
Indicators and warnings cannot
serve as a substitute for the
driver’s personal judgment. Due
to its limits, the system may not
issue warnings or reactions, or
these may be issued late or in a
manner that is not consistent with
their normal use. There is a risk of
accident. Adjust driving style to
traffic conditions. Watch traffic
closely and actively intervene
where appropriate.
WARNING
Due to system limits, individual
functions can malfunction during
tow-starting/towing with the Toy-
ota Supra Safety systems acti-
vated. There is a risk of accident.
Switch all Toyota Supra Safety
systems off prio r to tow-start-
ing/towing.
Overview
Button in the vehicle
Toyota Supra Safety
Sensors
Switching on/off
Switching on automatically
Switching on/off manually
Press the button.
Press the button repeat-
edly.
Page 180 of 356

1803-1. CONTROLS
The system is controlled by the following sensors:
• Cameras behind the wind-
shield.
• With radar sensor: front radar sensor.
Additional information:
Sensors of the vehicle, refer to
P.43.
The system is automatically
active after every driving off.
The menu for the Toyota Supra
Safety system is displayed.
If all Toyota Supra Safety sys-
tems were switched off, all sys-
tems are now switched on.
"Customize Settings": depend-
ing on the equipment version,
the Toyota Supra Safety sys-
tems can be individually config-
ured. The individual settings are
activated and stored. As soon
as a setting is changed on the
menu, all settings of the menu
are activated.
WARNING
Indicators and warnings cannot
serve as a substitute for the
driver’s personal judgment. Due
to its limits, the system may not
issue warnings or reactions, or
these may be issued late or in a
manner that is not consistent with
their normal use. There is a risk of
accident. Adjust driving style to
traffic conditions. Watch traffic
closely and actively intervene
where appropriate.
WARNING
Due to system limits, individual
functions can malfunction during
tow-starting/towing with the Toy-
ota Supra Safety systems acti-
vated. There is a risk of accident.
Switch all Toyota Supra Safety
systems off prio r to tow-start-
ing/towing.
Overview
Button in the vehicle
Toyota Supra Safety
Sensors
Switching on/off
Switching on automatically
Switching on/off manually
Press the button.
Press the button repeat-
edly.
Page 244 of 356
2443-1. CONTROLS
This chapter describes all stan-
dard, country-specific and
optional features offered with
the series. It also describes fea-
tures and functions that are not
necessarily available in your
vehicle, e.g., due to the selected
options or country versions. This
also applies to safety-related
functions and systems. When
using these functions and sys-
tems, the applicable laws and
regulations must be observed.The vehicle interior contains
multiple storage compartments
for stowing objects.
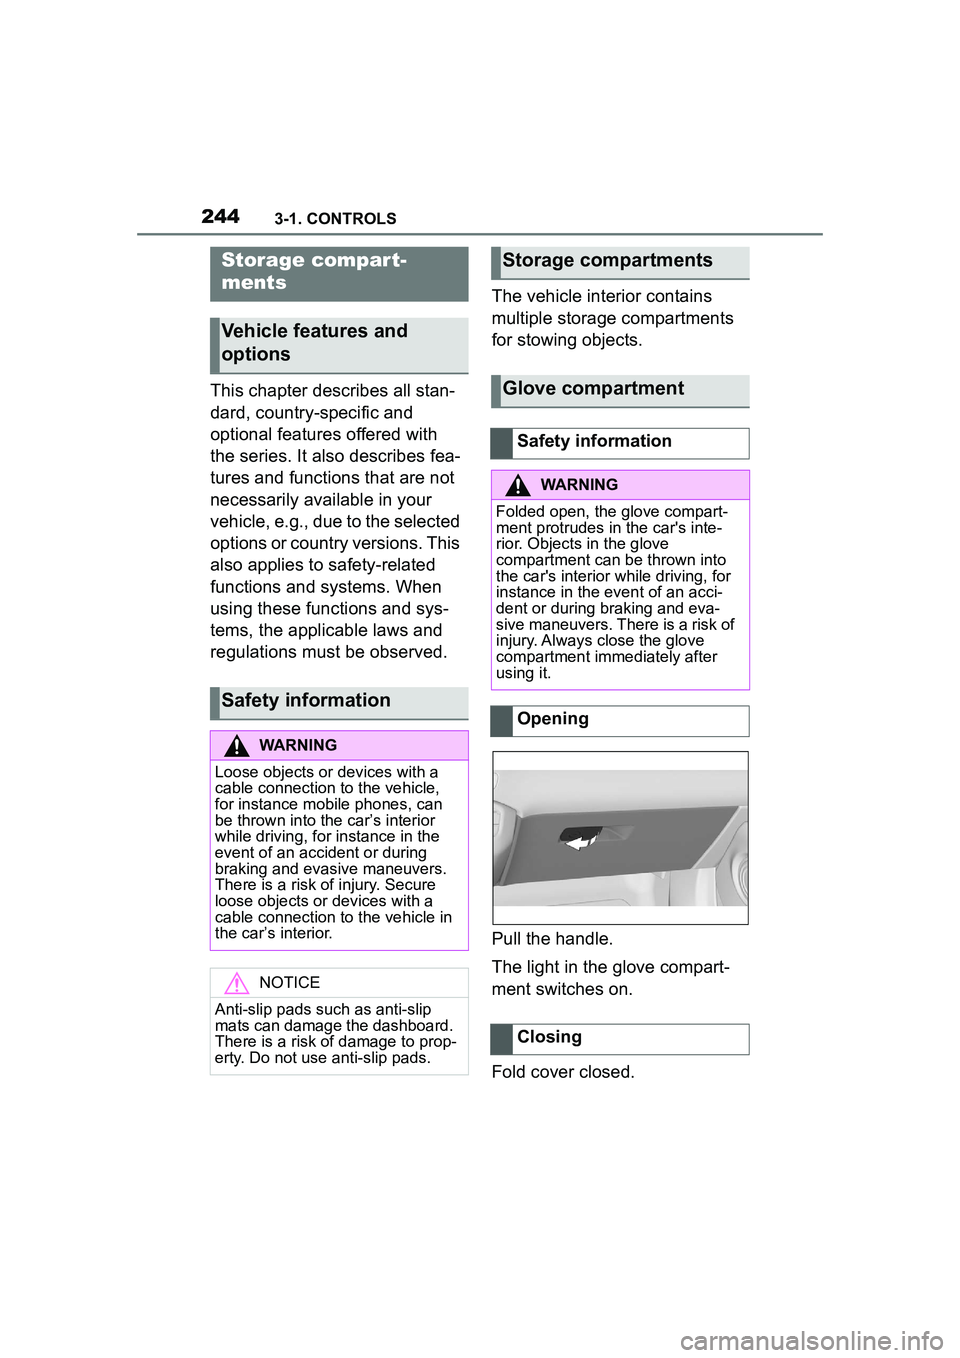
Pull the handle.
The light in the glove compart-
ment switches on.
Fold cover closed.
Storage compar t-
ments
Vehicle features and
options
Safety information
WARNING
Loose objects or devices with a
cable connection to the vehicle,
for instance mobile phones, can
be thrown into the car’s interior
while driving, for instance in the
event of an accident or during
braking and evasive maneuvers.
There is a risk of injury. Secure
loose objects or devices with a
cable connection to the vehicle in
the car’s interior.
NOTICE
Anti-slip pads such as anti-slip
mats can damage the dashboard.
There is a risk of damage to prop-
erty. Do not use anti-slip pads.
Storage compartments
Glove compartment
Safety information
WARNING
Folded open, the glove compart-
ment protrudes in the car's inte-
rior. Objects in the glove
compartment can
be thrown into
the car's interior while driving, for
instance in the event of an acci-
dent or during braking and eva-
sive maneuvers. There is a risk of
injury. Always close the glove
compartment immediately after
using it.
Opening
Closing
Page 247 of 356
2473-1. CONTROLS
3
CONTROLS
3Subtract the combined
weight of the driver and pas-
sengers from XXX kg or XXX
lbs.
4 The resulting figure equals
the available amount of cargo
and luggage load capacity.
For example, if the “XXX”
amount equals 1,400 lbs and
there will be five 150 lbs pas-
sengers in your vehicle, the
amount of available cargo
and luggage load capacity is
650 lbs (1,400–750 (5 x 150)
= 650 lbs).
5 Determine the combined
weight of luggage and cargo
being loaded on the vehicle.
That weight may not safely
exceed the available cargo
and luggage load capacity
calculated in Step 4.
6 If your vehicle will be towing
a trailer, load from your trailer
will be transferred to your
vehicle. Consult this manual
to determine how this
reduces the available cargo
and luggage load capacity of
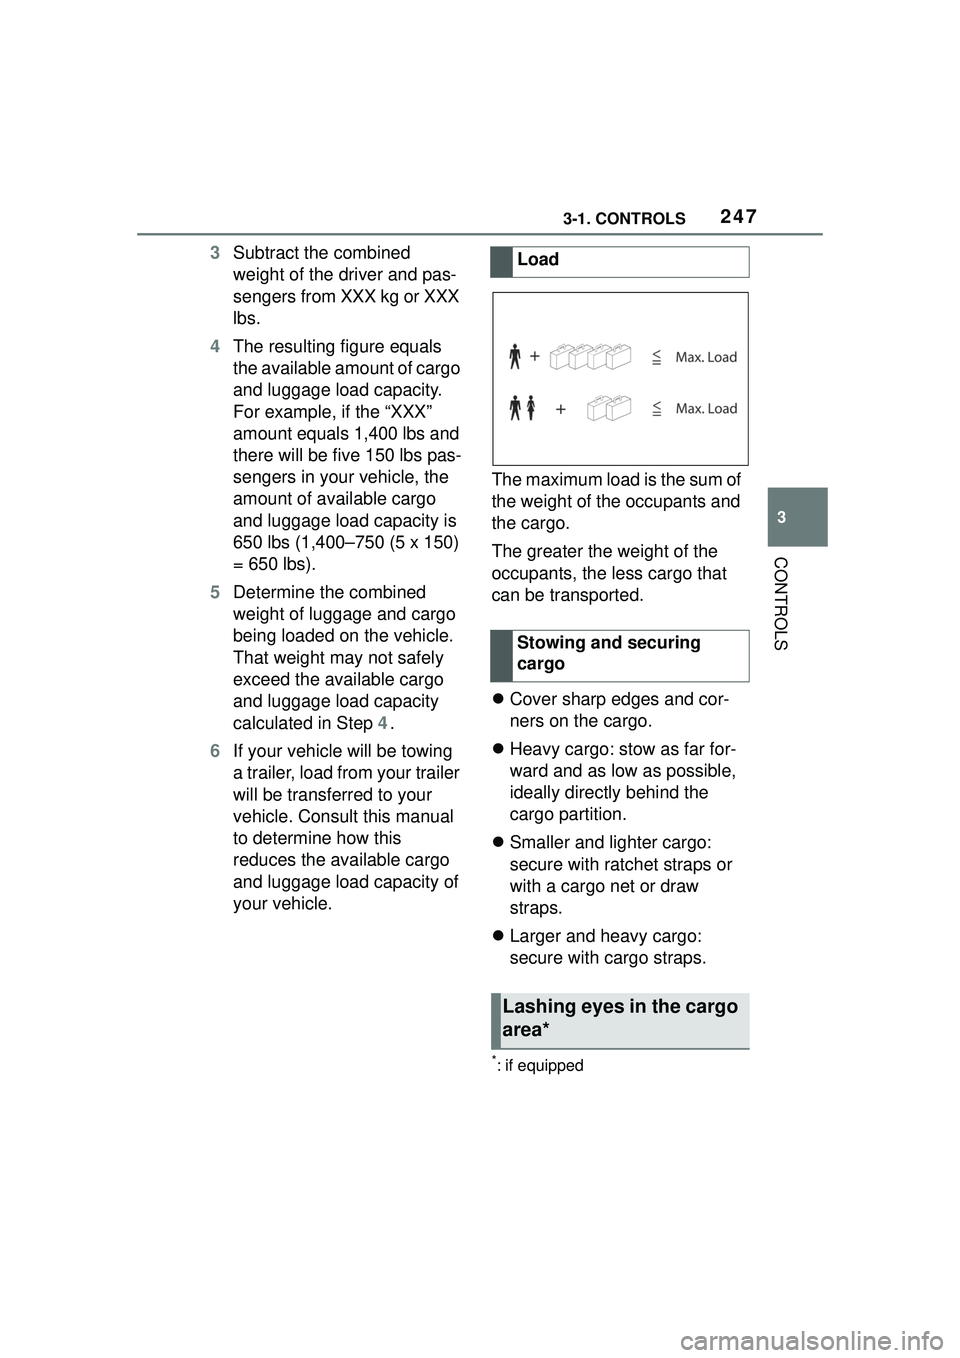
your vehicle. The maximum load is the sum of
the weight of the occupants and
the cargo.
The greater the weight of the
occupants, the less cargo that
can be transported.
Cover sharp edges and cor-
ners on the cargo.
Heavy cargo: stow as far for-
ward and as low as possible,
ideally directly behind the
cargo partition.
Smaller and lighter cargo:
secure with ratchet straps or
with a cargo net or draw
straps.
Larger and heavy cargo:
secure with cargo straps.
*: if equipped
Load
Stowing and securing
cargo
Lashing eyes in the cargo
area*
Page 249 of 356
2493-1. CONTROLS
3
CONTROLS
A storage compartment is avail-
able on the right side of the
cargo area.
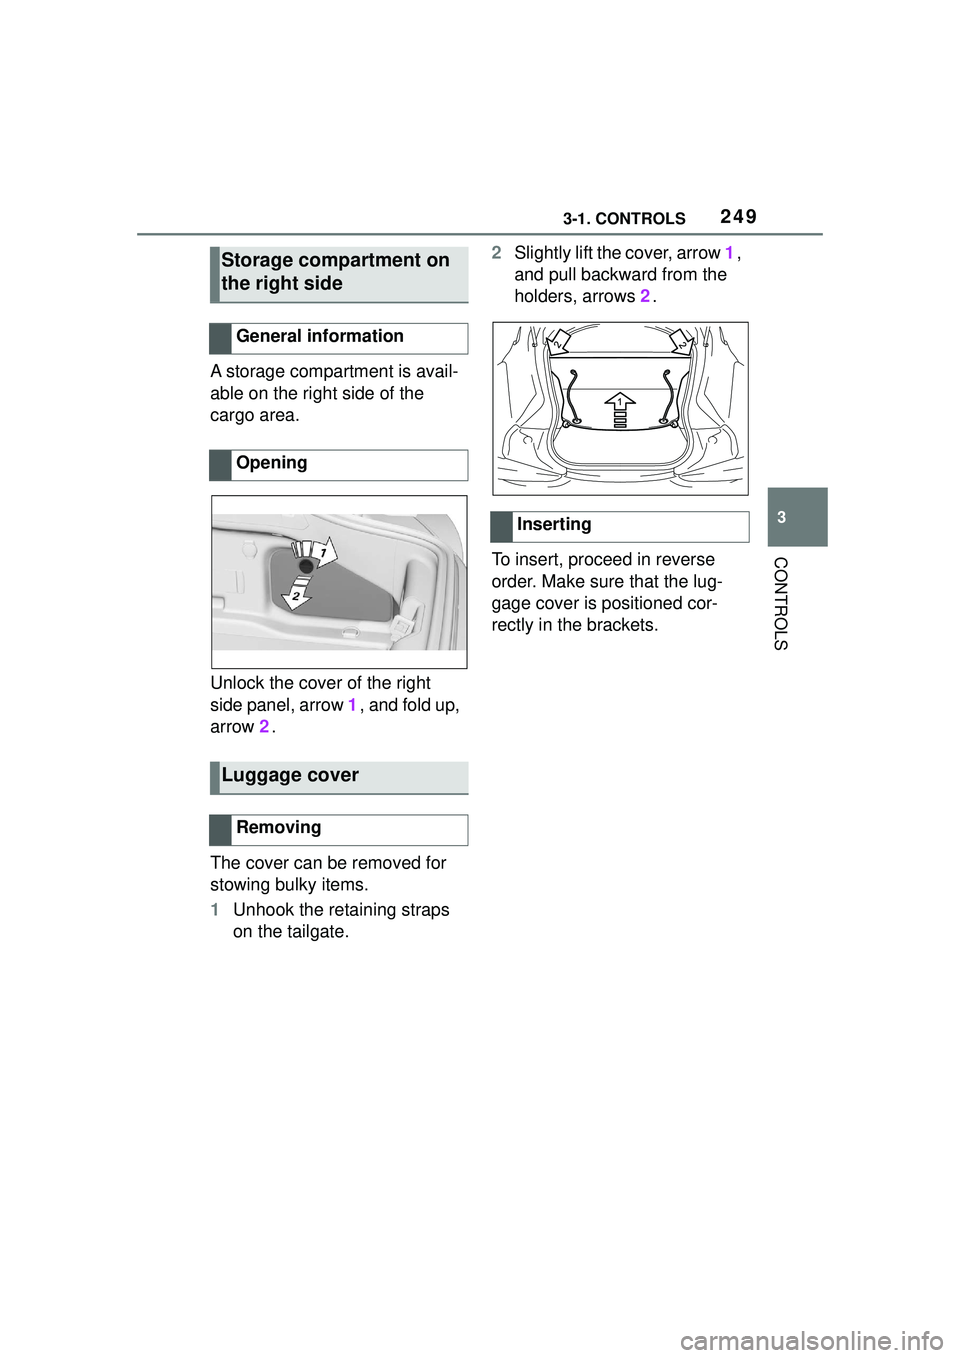
Unlock the cover of the right
side panel, arrow 1, and fold up,
arrow 2.
The cover can be removed for
stowing bulky items.
1 Unhook the retaining straps
on the tailgate. 2
Slightly lift the cover, arrow 1,
and pull backward from the
holders, arrows 2.
To insert, proceed in reverse
order. Make sure that the lug-
gage cover is positioned cor-
rectly in the brackets.
Storage compartment on
the right side
General information
Opening
Luggage cover
Removing
Inserting