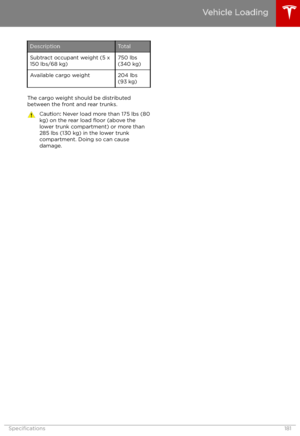
Page 153 of 212
Mobile App
Model X Mobile App
The Tesla Model X mobile app allows you to
communicate with Model X remotely using
your iPhone
Page 154 of 212
Charging
Electric Vehicle Components
High Voltage Components
1. Front Motor
2. Air Conditioning Compressor
3. Forward Junction Box
4. High Voltage Cabling
5. Battery Coolant Heater
6. DC-DC Converter
7. Cabin Heater
8. High Voltage Battery
9. On-board Charger
10. Charge Port
11. Rear Motor
12. HV Cable to Rear HVAC Assembly
Warning:
The high voltage system has no user serviceable parts. Do not disassemble, remove
or replace high voltage components, cables or connectors. High voltage cables are typically colored orange for easy identification.Warning: Read and follow all instructions provided on the labels that are attached to Model X.
These labels are there for your safety.Warning: In the unlikely event that a fire occurs, immediately contact your local fire
emergency responders.
Electric Vehicle Components
154Model X Owner
Page 155 of 212
Charging Equipment
Charging equipment designed specifically to
charge your Model X is available from Tesla. A
Tesla Wall Connector, which installs in your
garage, is the fastest way to charge Model X
at home.
In several market regions, Model X is equipped
with a Mobile Connector and the adapter(s)
you need to plug into commonly used power
outlets. When using the Mobile Connector,
first plug the Mobile Connector into the power
outlet, and then plug in Model X. For more
information about your Mobile Connector, see
the Mobile Connector Owner
Page 156 of 212
Battery Information
About the Battery
Model X has one of the most sophisticated
battery systems in the world. The most
important way to preserve the Battery is to LEAVE YOUR VEHICLE PLUGGED IN when
you are not using it. This is particularly
important if you are not planning to drive Model X for several weeks. When plugged in,
Model X wakes up when needed to
automatically maintain a charge level that
maximizes the lifetime of the Battery.
Note: When left idle and unplugged, your
vehicle periodically uses energy from the Battery for system tests and recharging the
12V battery when necessary.
There is no advantage to waiting until the
Battery
Page 157 of 212
instrument panel warns you that the
Page 158 of 212
Charging Instructions
Opening the Charge Port The charge port is located on the left side of
Model X, behind a door that is part of the rear
tail light assembly. Park so that the charge
cable easily reaches the charge port.
With Model X unlocked (or a recognized key is
within range) and in Park, press and release
the button on the Tesla charge cable to open the charge port door.
You can also open the charge port door using
any of these methods:
Page 159 of 212

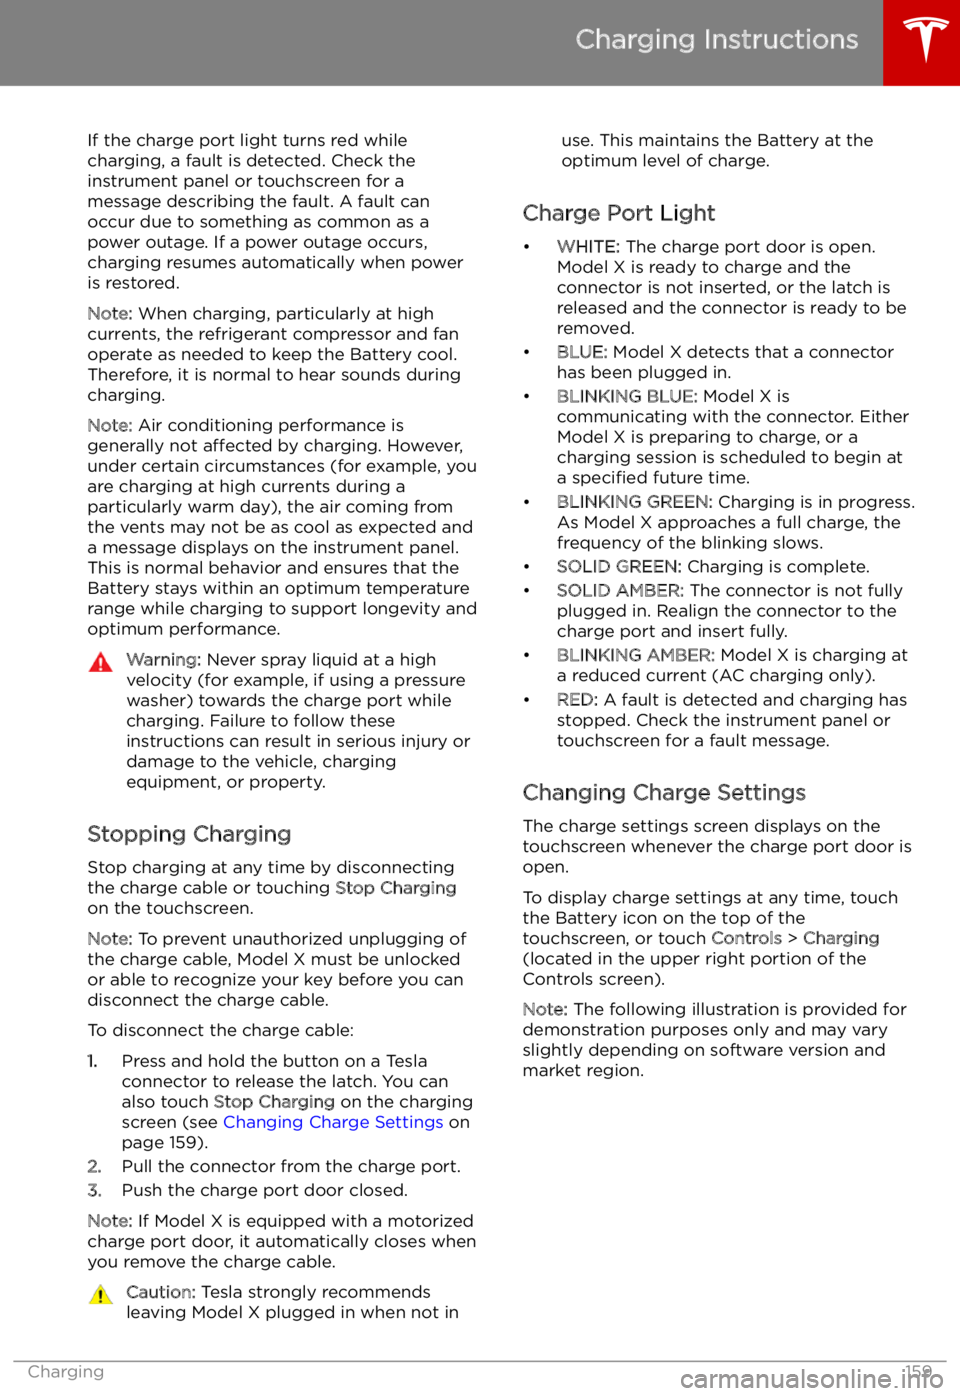
If the charge port light turns red while
charging, a fault is detected. Check the instrument panel or touchscreen for a
message describing the fault. A fault can
occur due to something as common as a power outage. If a power outage occurs,
charging resumes automatically when power
is restored.
Note: When charging, particularly at high
currents, the refrigerant compressor and fan
operate as needed to keep the Battery cool.
Therefore, it is normal to hear sounds during charging.
Note: Air conditioning performance is
generally not affected by charging. However,
under certain circumstances (for example, you
are charging at high currents during a
particularly warm day), the air coming from
the vents may not be as cool as expected and
a message displays on the instrument panel.
This is normal behavior and ensures that the Battery stays within an optimum temperature
range while charging to support longevity and
optimum performance.Warning: Never spray liquid at a high
velocity (for example, if using a pressure
washer) towards the charge port while
charging. Failure to follow these
instructions can result in serious injury or
damage to the vehicle, charging
equipment, or property.
Stopping Charging
Stop charging at any time by disconnecting
the charge cable or touching Stop Charging
on the touchscreen.
Note: To prevent unauthorized unplugging of
the charge cable, Model X must be unlocked
or able to recognize your key before you can
disconnect the charge cable.
To disconnect the charge cable:
1. Press and hold the button on a Tesla
connector to release the latch. You can
also touch Stop Charging on the charging
screen (see Changing Charge Settings on
page 159).
2. Pull the connector from the charge port.
3. Push the charge port door closed.
Note: If Model X is equipped with a motorized
charge port door, it automatically closes when
you remove the charge cable.
Caution: Tesla strongly recommends
leaving Model X plugged in when not inuse. This maintains the Battery at the
optimum level of charge.
Charge Port Light
Page 160 of 212

Note: If charging at a Tesla Supercharger, and
paid supercharging is potentially in effect, the
charging screen also displays information
about your previous or current Supercharger
session (see Supercharger Usage Fees and
Idle Fees on page 162).
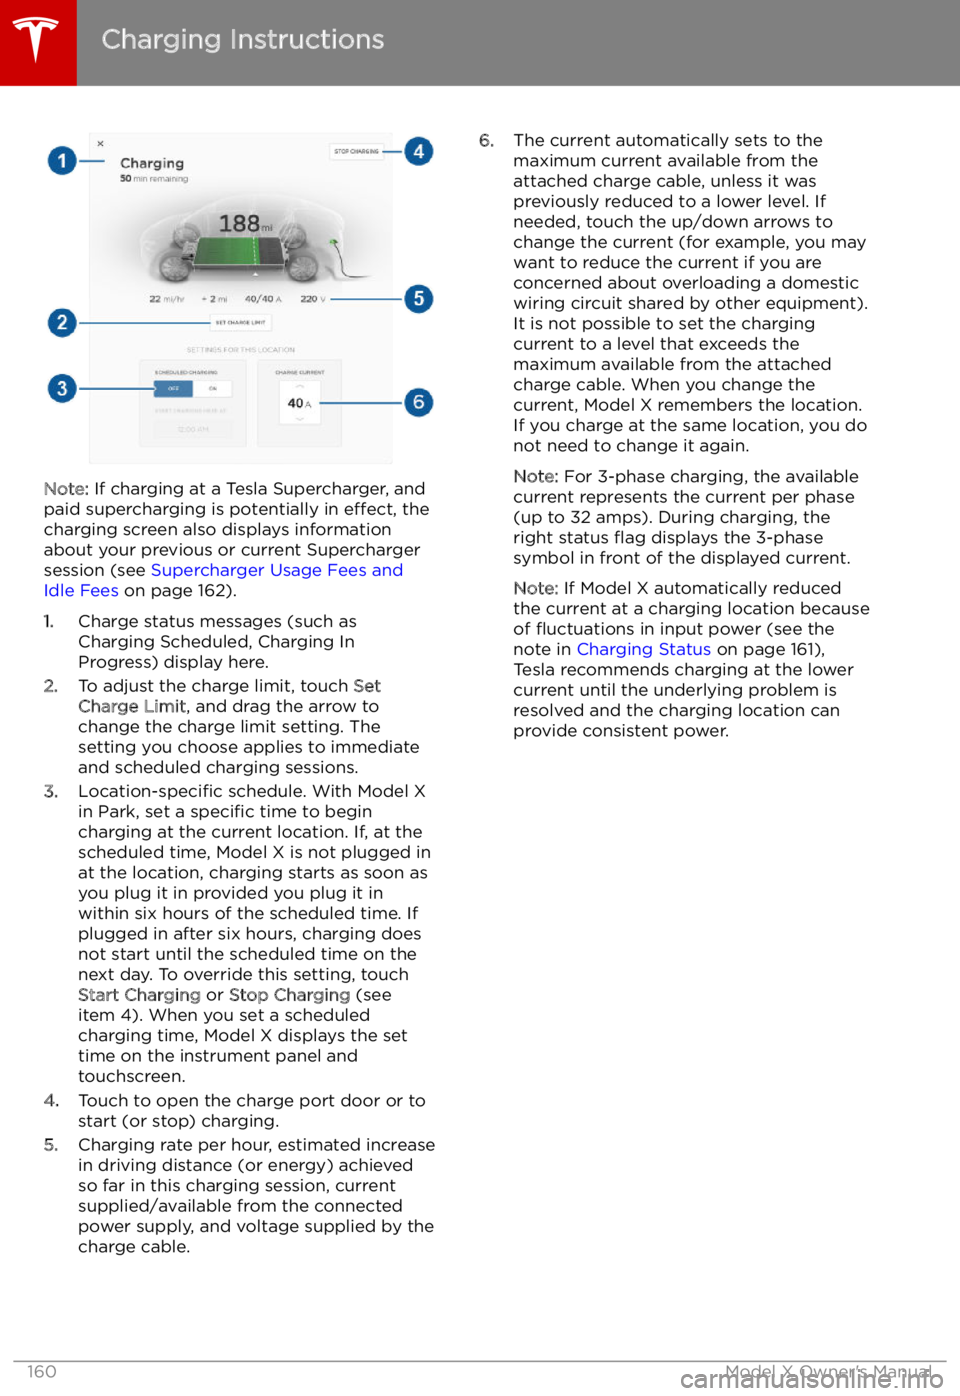
1. Charge status messages (such as
Charging Scheduled, Charging In
Progress) display here.
2. To adjust the charge limit, touch Set
Charge Limit , and drag the arrow to
change the charge limit setting. The
setting you choose applies to immediate
and scheduled charging sessions.
3. Location-specific schedule. With Model X
in Park, set a specific time to begin
charging at the current location. If, at the
scheduled time, Model X is not plugged in
at the location, charging starts as soon as
you plug it in provided you plug it in
within six hours of the scheduled time. If
plugged in after six hours, charging does
not start until the scheduled time on the
next day. To override this setting, touch Start Charging or Stop Charging (see
item 4). When you set a scheduled
charging time, Model X displays the set
time on the instrument panel and
touchscreen.
4. Touch to open the charge port door or to
start (or stop) charging.
5. Charging rate per hour, estimated increase
in driving distance (or energy) achieved
so far in this charging session, current
supplied/available from the connected
power supply, and voltage supplied by the
charge cable.
6. The current automatically sets to the
maximum current available from the
attached charge cable, unless it was
previously reduced to a lower level. If
needed, touch the up/down arrows to
change the current (for example, you may
want to reduce the current if you are
concerned about overloading a domestic
wiring circuit shared by other equipment).
It is not possible to set the charging
current to a level that exceeds the
maximum available from the attached charge cable. When you change the
current, Model X remembers the location.
If you charge at the same location, you do
not need to change it again.
Note: For 3-phase charging, the available
current represents the current per phase
(up to 32 amps). During charging, the
right status