Page 101 of 148
EYESIGHT®ASSIST MONITOR (EAM)
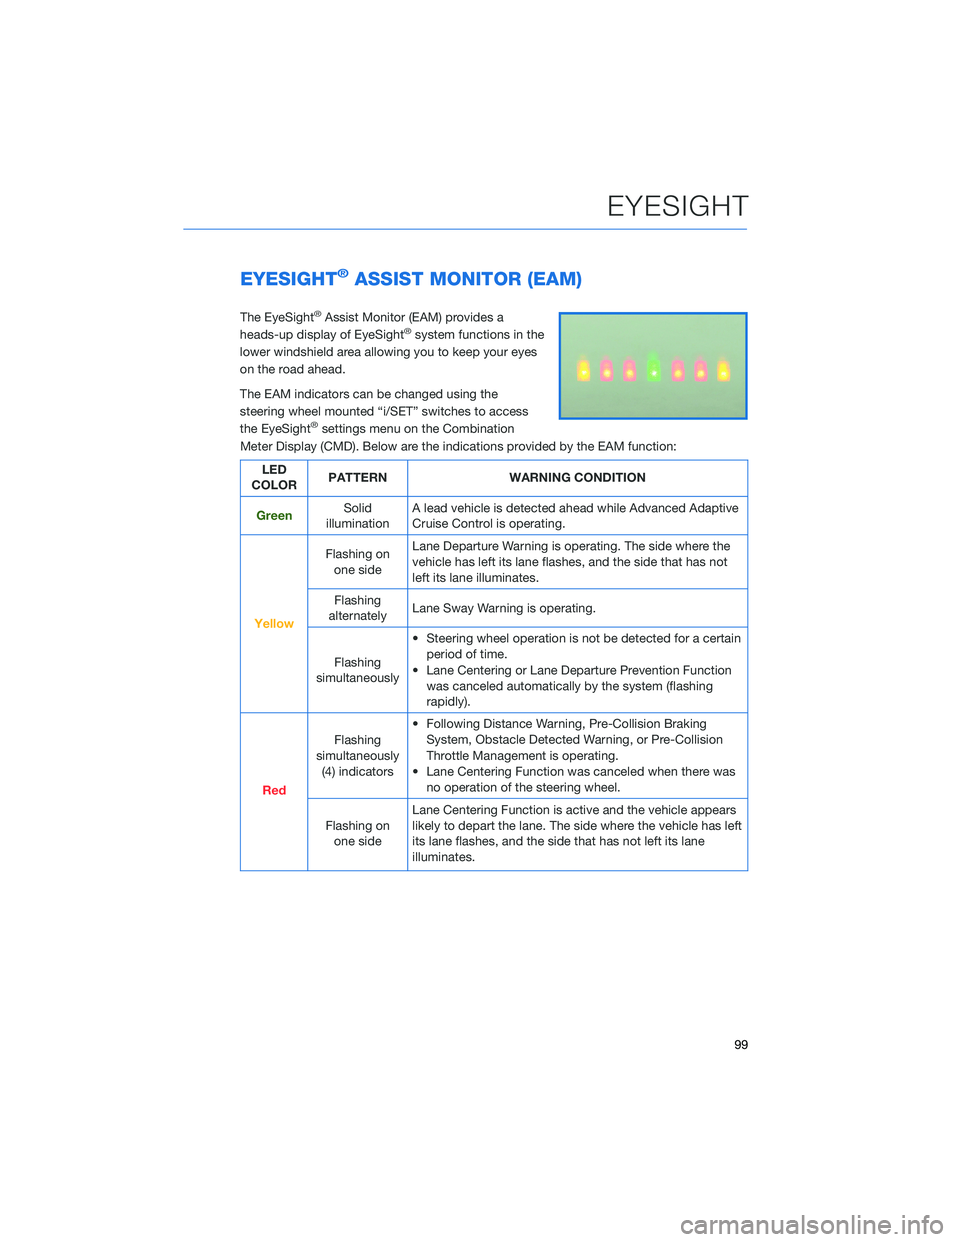
The EyeSight®Assist Monitor (EAM) provides a
heads-up display of EyeSight®system functions in the
lower windshield area allowing you to keep your eyes
on the road ahead.
The EAM indicators can be changed using the
steering wheel mounted “i/SET” switches to access
the EyeSight
®settings menu on the Combination
Meter Display (CMD). Below are the indications provided by the EAM function:
LED
COLORPATTERN WARNING CONDITION
GreenSolid
illuminationA lead vehicle is detected ahead while Advanced Adaptive
Cruise Control is operating.
Yellow
Flashing on
one sideLane Departure Warning is operating. The side where the
vehicle has left its lane flashes, and the side that has not
left its lane illuminates.
Flashing
alternatelyLane Sway Warning is operating.
Flashing
simultaneously• Steering wheel operation is not be detected for a certain
period of time.
• Lane Centering or Lane Departure Prevention Function
was canceled automatically by the system (flashing
rapidly).
Red
Flashing
simultaneously
(4) indicators• Following Distance Warning, Pre-Collision Braking
System, Obstacle Detected Warning, or Pre-Collision
Throttle Management is operating.
• Lane Centering Function was canceled when there was
no operation of the steering wheel.
Flashing on
one sideLane Centering Function is active and the vehicle appears
likely to depart the lane. The side where the vehicle has left
its lane flashes, and the side that has not left its lane
illuminates.
EYESIGHT
99
Page 102 of 148

LANE DEPARTURE WARNING AND PRE-COLLISION
BRAKING SYSTEM OFF SWITCHES
Lane Departure Warning OFF Switch
Press and hold this switch on the overhead console
for approximately two seconds to turn off the Lane
Departure Warning and Lane Sway Warning functions.
Press and hold the switch again for approximately two
seconds to turn the functions on.
When these functions are off, a yellow Lane Departure
Warning OFF indicator will be illuminated in the
Combination Meter. It may be helpful to turn these functions off when lane markings on the
road are inconsistent.
Pre-Collision Braking System OFF Switch
Press and hold this switch on the overhead console
for approximately two seconds to turn off the
Pre-Collision Braking, Pre-Collision Brake Assist, and
Pre-Collision Throttle Management functions. Press
and hold the switch again for approximately two
seconds to turn the functions on.
When these functions are off, a yellow Pre-Collision
Braking OFF indicator illuminates in the Combination Meter. It may be helpful to turn these
functions off when using a drive-through carwash.
EYESIGHT
100
Page 104 of 148
BLIND SPOT DETECTION (BSD) / REAR CROSS
TRAFFIC ALERT (RCTA)(if equipped)
This system uses radar sensors mounted behind the rear bumper on the left and right
sides that warn you if another vehicle is sensed in your blind spots. These functions
provide additional awareness when changing lanes or driving in reverse.
Blind Spot Detection (BSD)
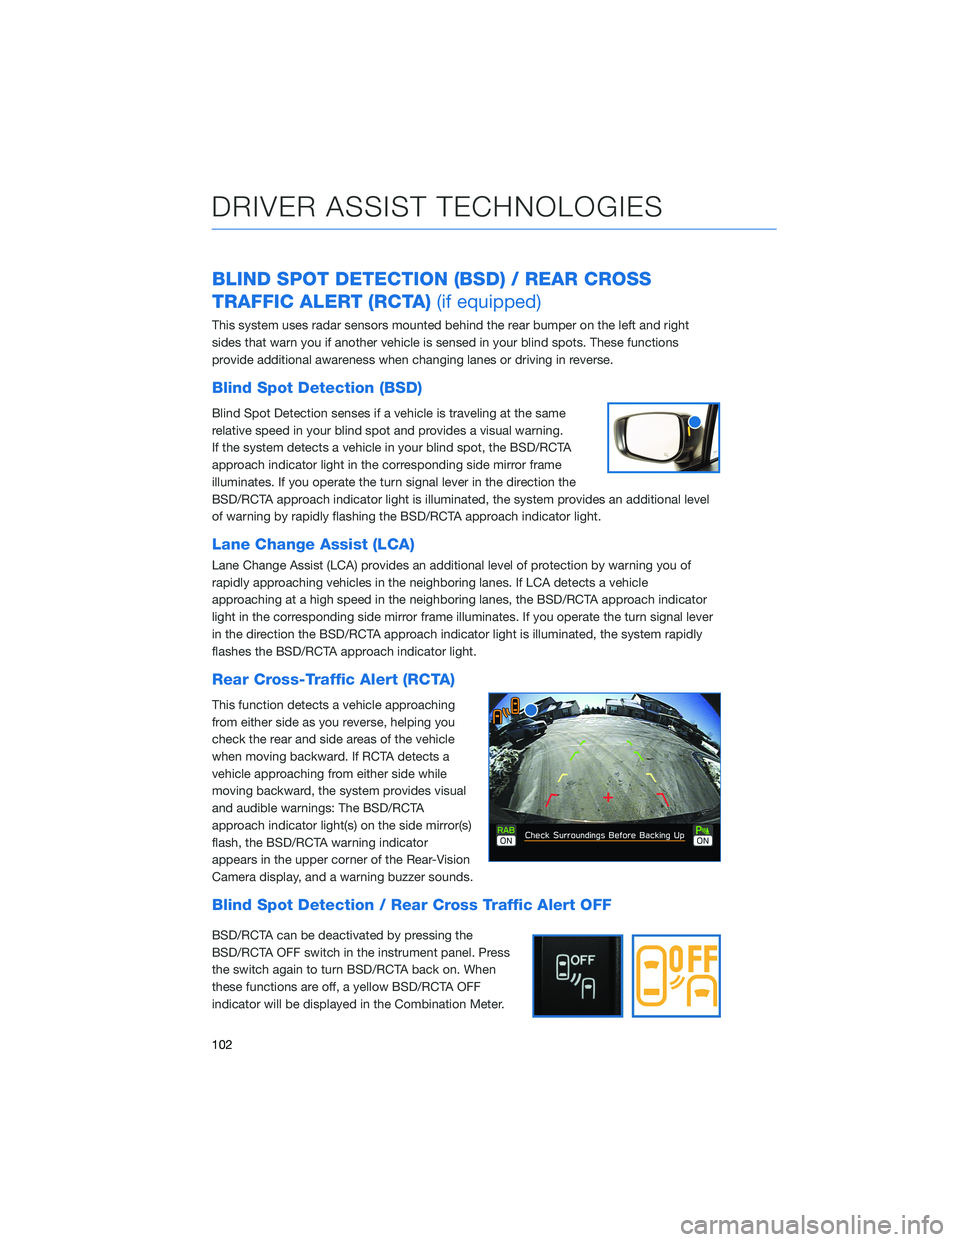
Blind Spot Detection senses if a vehicle is traveling at the same
relative speed in your blind spot and provides a visual warning.
If the system detects a vehicle in your blind spot, the BSD/RCTA
approach indicator light in the corresponding side mirror frame
illuminates. If you operate the turn signal lever in the direction the
BSD/RCTA approach indicator light is illuminated, the system provides an additional level
of warning by rapidly flashing the BSD/RCTA approach indicator light.
Lane Change Assist (LCA)
Lane Change Assist (LCA) provides an additional level of protection by warning you of
rapidly approaching vehicles in the neighboring lanes. If LCA detects a vehicle
approaching at a high speed in the neighboring lanes, the BSD/RCTA approach indicator
light in the corresponding side mirror frame illuminates. If you operate the turn signal lever
in the direction the BSD/RCTA approach indicator light is illuminated, the system rapidly
flashes the BSD/RCTA approach indicator light.
Rear Cross-Traffic Alert (RCTA)
This function detects a vehicle approaching
from either side as you reverse, helping you
check the rear and side areas of the vehicle
when moving backward. If RCTA detects a
vehicle approaching from either side while
moving backward, the system provides visual
and audible warnings: The BSD/RCTA
approach indicator light(s) on the side mirror(s)
flash, the BSD/RCTA warning indicator
appears in the upper corner of the Rear-Vision
Camera display, and a warning buzzer sounds.
Blind Spot Detection / Rear Cross Traffic Alert OFF
BSD/RCTA can be deactivated by pressing the
BSD/RCTA OFF switch in the instrument panel. Press
the switch again to turn BSD/RCTA back on. When
these functions are off, a yellow BSD/RCTA OFF
indicator will be displayed in the Combination Meter.
DRIVER ASSIST TECHNOLOGIES
102
Page 105 of 148
HIGH BEAM ASSIST (HBA)
This function uses the EyeSight®cameras to automatically switch the
headlights between high and low beam settings, enhancing safety for
both you and other drivers on the road. To activate High Beam Assist,
set the headlight control switch to the “AUTO” position and push the
headlight lever forward to the high beam position. The green HBA
indicator illuminates on the Combination Meter.
HBA automatically activates the high beams when the forward area is dark, there are no
preceding/oncoming vehicles or sharp curves in the road, and your speed is approximately
20 mph or greater. When a preceding/oncoming vehicle is detected, the forward area is
bright, your speed decreases to 10 mph or less, or the EyeSight
®system is malfunctioning
or is temporarily stopped, HBA automatically switches to low beams.
STEERING RESPONSIVE HEADLIGHTS (SRH)
The Steering Responsive Headlights (SRH) system aims the headlight beams in the
direction you are steering, improving visibility at corners and intersections when driving at
night. You can turn the SRH system on or off using the steering wheel mounted “i/SET”
switches to access the settings menu on the Combination Meter Display (CMD).
For more information, please refer to “Instruments and Controls” in your Owner’s
Manual.
REVERSE AUTOMATIC BRAKING (RAB)(if equipped)
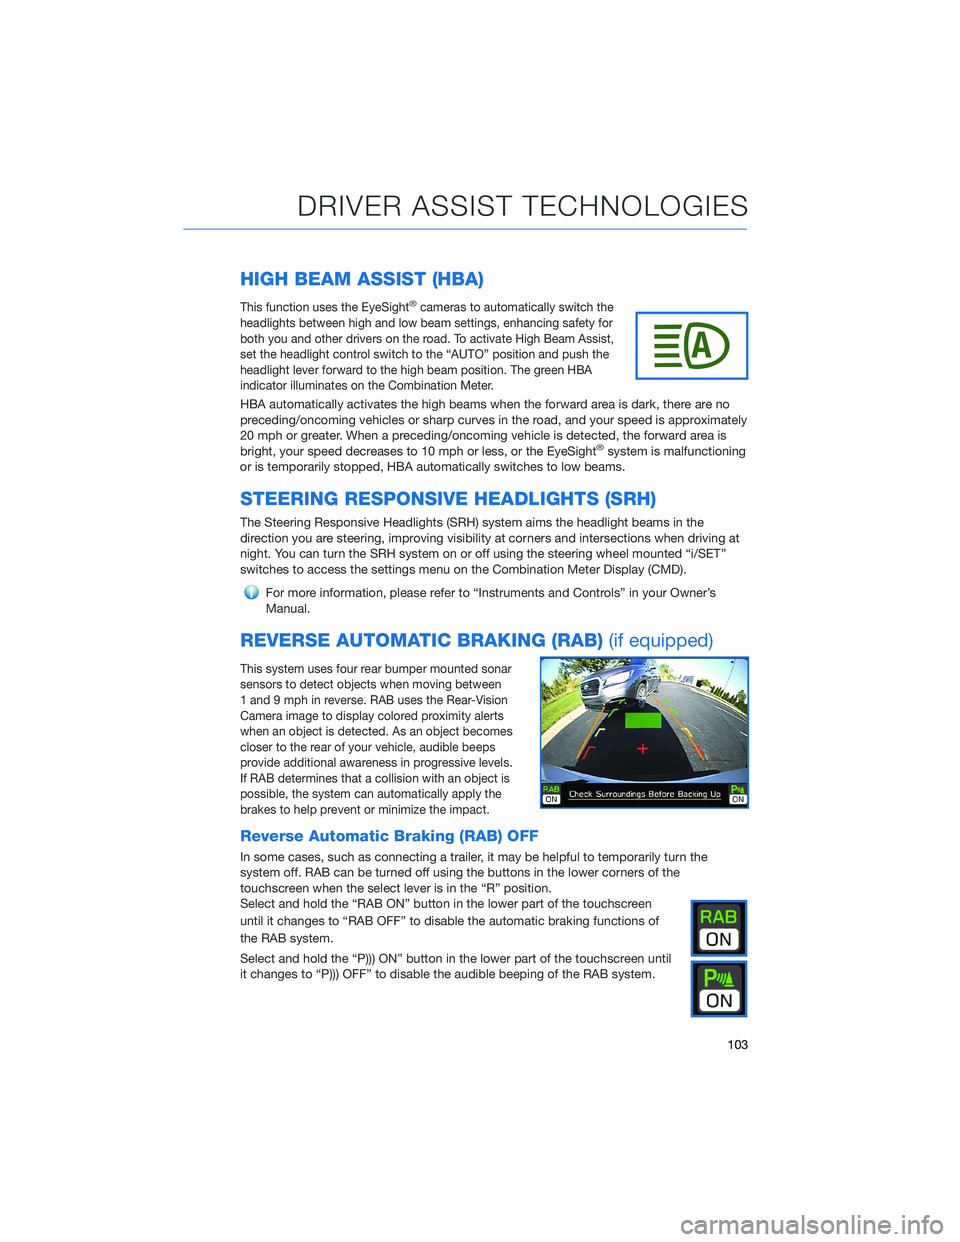
This system uses four rear bumper mounted sonar
sensors to detect objects when moving between
1 and 9 mph in reverse. RAB uses the Rear-Vision
Camera image to display colored proximity alerts
when an object is detected. As an object becomes
closer to the rear of your vehicle, audible beeps
provide additional awareness in progressive levels.
If RAB determines that a collision with an object is
possible, the system can automatically apply the
brakes to help prevent or minimize the impact.
Reverse Automatic Braking (RAB) OFF
In some cases, such as connecting a trailer, it may be helpful to temporarily turn the
system off. RAB can be turned off using the buttons in the lower corners of the
touchscreen when the select lever is in the “R” position.
Select and hold the “RAB ON” button in the lower part of the touchscreen
until it changes to “RAB OFF” to disable the automatic braking functions of
the RAB system.
Select and hold the “P))) ON” button in the lower part of the touchscreen until
it changes to “P))) OFF” to disable the audible beeping of the RAB system.
DRIVER ASSIST TECHNOLOGIES
103
Page 106 of 148
STEREO CAMERA PRECAUTIONS
Your EyeSight®stereo cameras are precision components that must be kept free from
obstruction and contamination, such as fingerprints or cleaning solutions. When the
system detects that the stereo camera lenses are impaired, a malfunction indicator will be
displayed and EyeSight
®functions will not be available.
When you are in the vicinity of the EyeSight
®stereo cameras, always observe the following
precautions:
• Do not touch or attempt to clean the EyeSight
®camera lenses inside the vehicle. Extra
caution should be used when cleaning the inside of the windshield. Over-spray from
cleaning solutions may impair or even damage the camera lenses. Please inform others
who may attempt to clean the windshield, such as car wash staff, of this precaution.
• Electronic Toll Collection devices, such as EZPass
TM, must be installed in an area
that does not obstruct the stereo cameras' field of vision. See "Prohibited Area" on
page 105.
• Adjust the rearview mirror so it does not obstruct the stereo cameras' field of vision.
• Do not install any interior rearview mirror accessories, such as a wide-type mirror or
hanging objects. Only approved Genuine SUBARU accessories may be installed.
For more detailed information, please refer to your EyeSight
®Owner’s Manual.
WINDSHIELD GLASS AND DASHBOARD
Since the characteristics and limitations of the EyeSight®stereo cameras are similar to
human eyes, it is important that the area in front of the cameras be kept free from dirt,
scratches, cracks, fogging, or accessories mounted to the windshield, hood or dashboard.
Visual impairments or reflections can affect EyeSight
®system performance. Extra caution
should be taken when cleaning the windshield to prevent over-spray from cleaning
solutions.
The image in the following section outlines those areas that must be kept clean and free
from obstruction. Please refer to the Owner’s Manual for a complete listing of limitations.
CARE AND LIMITATIONS
104
Page 110 of 148
MEMORY HEIGHT(if equipped)
You can set where the Power Rear Gate stops when it opens.
This is a great feature to limit the upward travel of the rear gate to
ensure you can reach it or to prevent the rear gate from contacting a
garage ceiling. You can learn more about setting the Power Rear
Gate Memory Height from the how-to video linked in the QR code
and the following steps.
1Make sure the Memory
Height Switch is the “OFF”
position (the switch is raised
and you can see a white line
on the top).
2Open the rear gate using the
Power Rear Gate Button.
Pause the rear gate when it
reaches the desired height
by pressing the Power Rear
Gate Button on the rear
gate, instrument panel, or
key fob.
Memory Height Button
Power Rear Gate Button
HOW TO APPENDIX
108
Page 115 of 148
6. Now select "OK" to pair with Subaru BT and select
“Confirm” on the Touchscreen if the PIN matches
the phone.
7. Make sure to allow access to your contacts
and call history and select “Download” to
download the phonebook contacts.
8. If your phonebook or messages are not
appearing, press the “Phone” icon on the
home screen and then select “Change
Device” in the Overview menu.
HOW TO APPENDIX
113
Page 119 of 148
7. Verify your iOS/Apple device PIN is correct and
select “Pair” on your phone and “Confirm” on the
Touchscreen.
8. Select “Allow” on the “Allow Contacts and
Favorites Sync?” screen, then select “Download”
to download the phonebook contacts.
HOW TO APPENDIX
117


