2022 PEUGEOT LANDTREK sensor
[x] Cancel search: sensorPage 66 of 164
64
Driving
Do not exceed the maximum towable
weights.
At altitude: reduce the maximum load by
10% per 1,000 metres of altitude; the lower
air density at high altitudes decreases engine
performance.
New vehicle: do not tow a trailer until the
vehicle has driven at least 620 miles
(1,000 kilometres).
If the outside temperature is high, let the
engine idle for 1 to 2 minutes after the
vehicle comes to a stop, to help it to cool.
Before setting off
Nose weight
► Distribute the load in the trailer so that the
heaviest items are as close as possible to the
axle and the nose weight (at the point where it
joins your vehicle) approaches the maximum
permitted without exceeding it.
Tyres
► Check the tyre pressures of the towing
vehicle and of the trailer , observing the
recommended pressures.
Lighting
► Check the electrical signalling on the trailer
and the headlamp beam height of your vehicle.
If a genuine PEUGEOT towing device is
used, the rear parking sensors will be
deactivated automatically to avoid the audible
signal.
When driving
Cooling
Towing a trailer uphill causes the coolant
temperature to increase. The maximum towable
load depends on the gradient and the exterior
temperature. The fan’s cooling capacity does not
increase with engine speed.
►
Reduce speed and lower the engine speed to
limit the amount of heating produced.
►
Pay constant attention to the coolant
temperature.
If this warning lamp and the STOP
warning lamp come on, stop the vehicle
and switch off the engine as soon as possible.
Brakes
Using the engine brake is recommended to limit
the overheating of the brakes. Braking distances
are increased when towing a trailer.
Side wind
Bear in mind that the vehicle will be more
susceptible to wind when towing.
Anti-theft protection
Electronic immobiliser
The keys contain a code, which must be
recognised by the vehicle before starting is
possible.
If the system malfunctions, indicated by the
display of a message, the engine will not start.
Contact a PEUGEOT dealer.
Starting / Switching off the
engine with the key
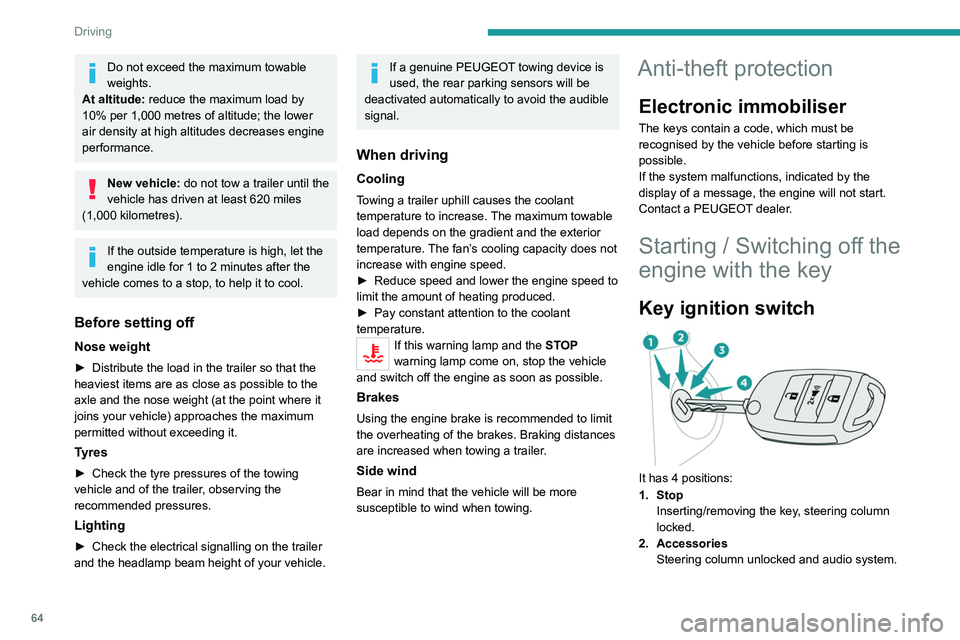
Key ignition switch
It has 4 positions:
1. Stop Inserting/removing the key, steering column
locked.
2. Accessories Steering column unlocked and audio system.
3. IgnitionIgnition, preheating (Diesel), engine starting.
4. Starting
Avoid attaching heavy objects to the key or the remote control. This would weigh
down on its shaft in the ignition switch and
could cause a malfunction.
Ignition position
This allows the use of the vehicle's electrical
equipment (ventilation, electric windows) or the
charging of accessories.
Once the battery charge level drops to the
reserve level, the system switches to energy
economy mode. The power supply is cut off
automatically to preserve the remaining battery
charge.
Starting the engine
With the parking brake applied:
► With a manual gearbox, place the gear lever
in neutral then fully depress the clutch pedal.
► With an automatic gearbox, place the gear
selector in mode N or P then depress the brake
pedal.
► Insert the key into the ignition switch; the
system recognises the code.
► Unlock the steering column by simultaneously
turning the steering wheel and the key.
Page 77 of 164
75
Driving
6The alert is raised when the vehicle is moving,
not when stationary.
A pressure sensor is located in the valve of each
tyre (except the spare wheel).
The tyre under-inflation detection cannot, in any circumstances, replace the need
for vigilance on the part of the driver.
This system does not avoid the need to
regularly check the tyre pressures (including
the spare wheel), especially before a long
journey.
Driving with under-inflated tyres, particularly
in adverse conditions (heavy load, high
speed, long journey):
–
worsens road-holding.
–
lengthens braking distances.
–
causes premature wear of the tyres.
–
increases energy consumption.
The inflation pressures defined for the vehicle can be found on the tyre pressure
label.
For more information on the Identification
markings, refer to the corresponding section.
Checking tyre pressures
This check should be done monthly
when the tyres are "cold" (vehicle stopped for
1 hour or after a journey of less than 6 miles
(10
km) at moderate speeds).
Otherwise, add 0.3 bar to the pressures
shown on the label.
Under-inflation alert
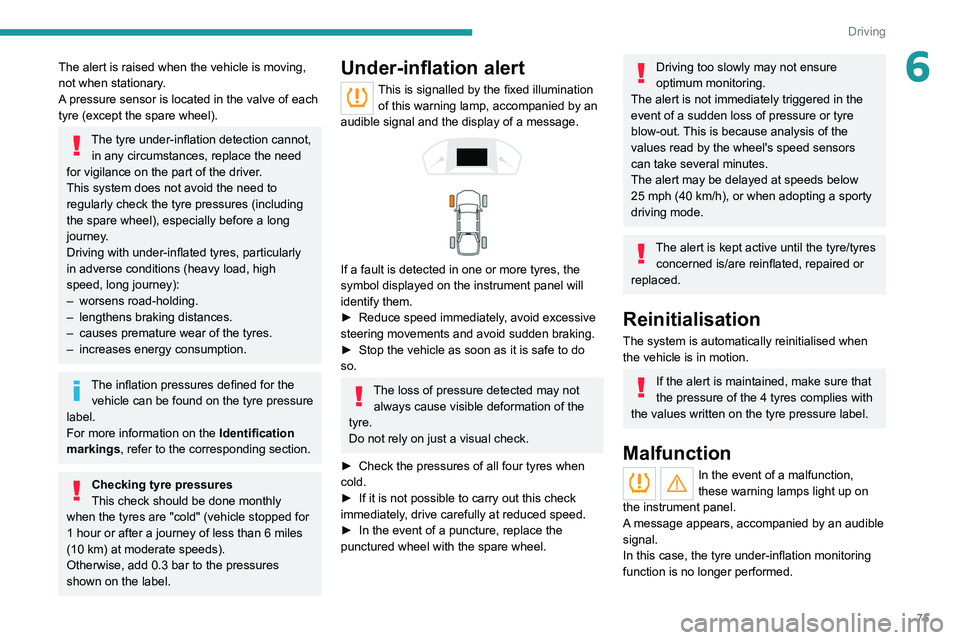
This is signalled by the fixed illumination of this warning lamp, accompanied by an
audible signal and the display of a message.
If a fault is detected in one or more tyres, the
symbol displayed on the instrument panel will
identify them.
►
Reduce speed immediately
, avoid excessive
steering movements and avoid sudden braking.
►
Stop the vehicle as soon as it is safe to do
so.
The loss of pressure detected may not always cause visible deformation of the
tyre.
Do not rely on just a visual check.
►
Check the pressures of all four tyres when
cold.
►
If it is not possible to carry out this check
immediately
, drive carefully at reduced speed.
►
In the event of a puncture, replace the
punctured wheel with the spare wheel.
Driving too slowly may not ensure
optimum monitoring.
The alert is not immediately triggered in the
event of a sudden loss of pressure or tyre
blow-out. This is because analysis of the
values read by the wheel's speed sensors
can take several minutes.
The alert may be delayed at speeds below
25 mph (40 km/h), or when adopting a sporty
driving mode.
The alert is kept active until the tyre/tyres
concerned is/are reinflated, repaired or
replaced.
Reinitialisation
The system is automatically reinitialised when
the vehicle is in motion.
If the alert is maintained, make sure that
the pressure of the 4 tyres complies with
the values written on the tyre pressure label.
Malfunction
In the event of a malfunction,
these warning lamps light up on
the instrument panel.
A message appears, accompanied by an audible
signal.
In this case, the tyre under-inflation monitoring
function is no longer performed.
Page 78 of 164
76
Driving
Have it checked by a PEUGEOT dealer or a
qualified workshop.
Driving and manoeuvring
aids - General
recommendations
Driving and manoeuvring aids cannot, in
any circumstances, replace the need for
vigilance on the part of the driver.
The driver must comply with the Highway
Code, must remain in control of the vehicle in
all circumstances and must be able to retake
control of it at all times. The driver must adapt
the speed to climatic conditions, traffic and
the state of the road.
It is the driver's responsibility to constantly
monitor traffic conditions, assess the distance
and relative speed of other vehicles, and
anticipate their manoeuvres before using the
direction indicator and changing lanes.
These systems do not make it possible to
exceed the laws of physics.
Driving aids
You should hold the steering wheel with
both hands, always use the door and interior
mirrors, always leave your feet close to the
pedals and take a break every 2 hours.
Manoeuvring aids
The driver must always check the
surroundings of the vehicle before and during
the whole manoeuvre, in particular using the
mirrors.
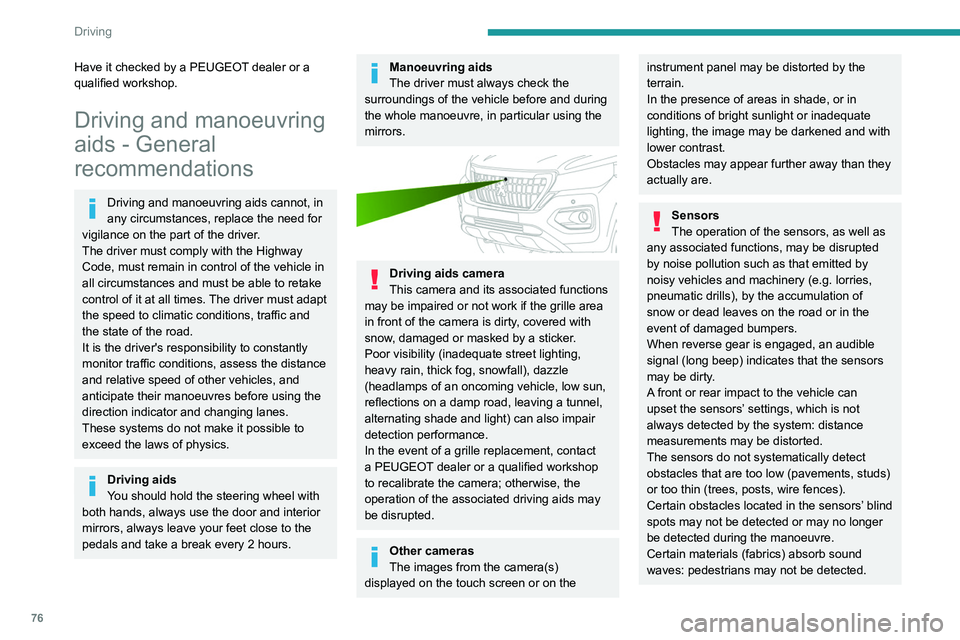
Driving aids camera
This camera and its associated functions
may be impaired or not work if the grille area
in front of the camera is dirty, covered with
snow, damaged or masked by a sticker.
Poor visibility (inadequate street lighting,
heavy rain, thick fog, snowfall), dazzle
(headlamps of an oncoming vehicle, low sun,
reflections on a damp road, leaving a tunnel,
alternating shade and light) can also impair
detection performance.
In the event of a grille replacement, contact
a PEUGEOT dealer or a qualified workshop
to recalibrate the camera; otherwise, the
operation of the associated driving aids may
be disrupted.
Other cameras
The images from the camera(s)
displayed on the touch screen or on the
instrument panel may be distorted by the
terrain.
In the presence of areas in shade, or in
conditions of bright sunlight or inadequate
lighting, the image may be darkened and with
lower contrast.
Obstacles may appear further away than they
actually are.
Sensors
The operation of the sensors, as well as
any associated functions, may be disrupted
by noise pollution such as that emitted by
noisy vehicles and machinery (e.g.
lorries,
pneumatic drills), by the accumulation of
snow or dead leaves on the road or in the
event of damaged bumpers.
When reverse gear is engaged, an audible
signal (long beep) indicates that the sensors
may be dirty.
A front or rear impact to the vehicle can
upset the sensors’ settings, which is not
always detected by the system: distance
measurements may be distorted.
The sensors do not systematically detect
obstacles that are too low (pavements, studs)
or too thin (trees, posts, wire fences).
Certain obstacles located in the sensors’ blind
spots may not be detected or may no longer
be detected during the manoeuvre.
Certain materials (fabrics) absorb sound
waves: pedestrians may not be detected.
Maintenance
Clean the bumpers and door mirrors and
the field of vision of the cameras regularly.
When washing your vehicle at high pressure,
direct the spray from at least 30 cm away
from the sensors and cameras.
Mats
The use of mats not approved by
PEUGEOT may interfere with the operation of
the speed limiter or cruise control.
To avoid any risk of jamming the pedals:
– Ensure that the mat is secured correctly.
– Never fit one mat on top of another.
Units of speed
Ensure that the units of speed displayed
on the instrument panel (mph or km/h) are
correct for the country you are driving in.
If this is not the case, when the vehicle is
stationary, set the display to the required
units of speed so that it complies with what is
authorised locally.
In case of doubt, contact a PEUGEOT dealer
or a qualified workshop.
Speed limiter
For more information, refer to the
General recommendations on the use
of driving and manoeuvring aids .
Page 79 of 164
77
Driving
6Maintenance
Clean the bumpers and door mirrors and
the field of vision of the cameras regularly.
When washing your vehicle at high pressure,
direct the spray from at least 30
cm away
from the sensors and cameras.
Mats
The use of mats not approved by
PEUGEOT may interfere with the operation of
the speed limiter or cruise control.
To avoid any risk of jamming the pedals:
–
Ensure that the mat is secured correctly
.
–
Never fit one mat on top of another
.
Units of speed
Ensure that the units of speed displayed
on the instrument panel (mph or km/h) are
correct for the country you are driving in.
If this is not the case, when the vehicle is
stationary, set the display to the required
units of speed so that it complies with what is
authorised locally.
In case of doubt, contact a PEUGEOT dealer
or a qualified workshop.
Speed limiter
For more information, refer to the
General recommendations on the use
of driving and manoeuvring aids .
This system prevents the vehicle from
exceeding the speed programmed by the
driver (speed setting).
The speed limiter is switched on manually.
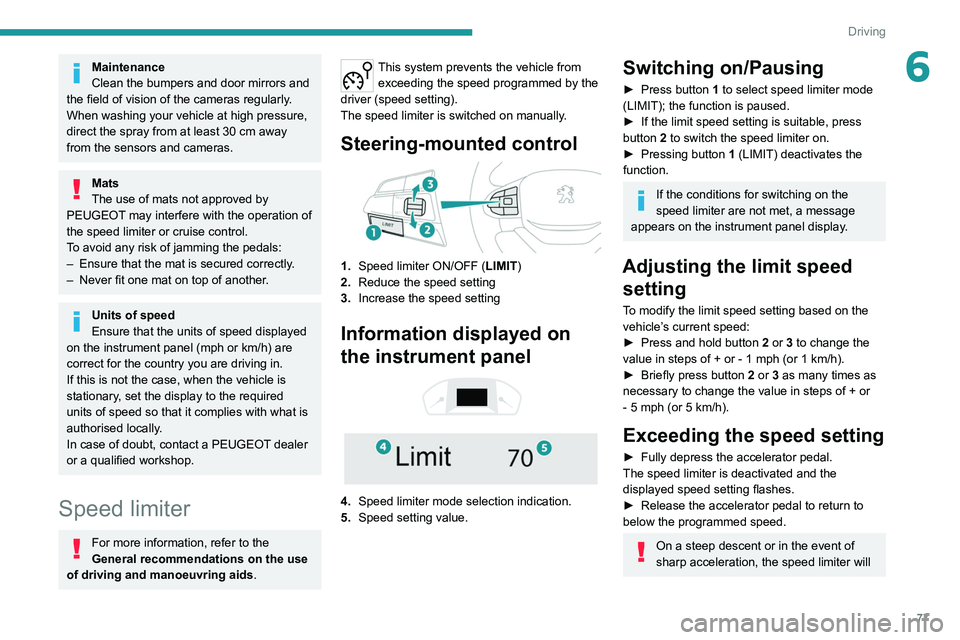
Steering-mounted control
1. Speed limiter ON/OFF (LIMIT )
2. Reduce the speed setting
3. Increase the speed setting
Information displayed on
the instrument panel
4. Speed limiter mode selection indication.
5. Speed setting value.
Switching on/Pausing
► Press button 1 to select speed limiter mode
(LIMIT); the function is paused.
►
If the limit speed setting is suitable, press
button
2 to switch the speed limiter on.
►
Pressing button 1
(LIMIT) deactivates the
function.
If the conditions for switching on the
speed limiter are not met, a message
appears on the instrument panel display.
Adjusting the limit speed setting
To modify the limit speed setting based on the
vehicle’s current speed:
►
Press and hold button
2
or 3 to change the
value in steps of +
or - 1 mph (or 1 km/h).
►
Briefly press button
2 or 3 as many times as
necessary to change the value in steps of +
or
-
5 mph (or 5 km/h).
Exceeding the speed setting
► Fully depress the accelerator pedal.
The speed limiter is deactivated and the
displayed speed setting flashes.
►
Release the accelerator pedal to return to
below the programmed speed.
On a steep descent or in the event of
sharp acceleration, the speed limiter will
Page 83 of 164
81
Driving
6Operating limits
The system goes into standby automatically in
the following cases:
–
ESC deactivated or operation triggered.
–
Speed below 40 mph (65
km/h).
–
Driving over lane markings.
–
Activation
of the direction indicators.
–
Crossing the inside line on a bend.
–
Driving on a tight bend.
–
Activation
of the hazard warning lamps.
The following situations may interfere with the operation of the system or
prevent it from working:
–
Insufficient contrast between the road
surface and the verge or hard shoulder
(e.g.
shade).
–
Lane markings worn, hidden (snow
, mud)
or multiple (roadworks, etc.),
–
Close proximity to the vehicle in front (lane
markings may not be detected).
–
Roads that are narrow
, winding.
Risk of undesirable operation
The system should be deactivated in the
following situations:
–
When changing a wheel or working near a
wheel.
–
T
owing or with a bicycle carrier on a towing
device, especially with trailer not plugged in or
not approved. –
Road in poor condition, unstable or with very
poor grip (risk of aquaplaning, snow
, ice).
–
Adverse weather conditions.
–
Driving on racing circuits.
–
Driving on a rolling road.
Deactivation/Activation
By default, the system is automatically activated
at every engine start.
►
At any time, press and hold this button (for
around 5 seconds) to deactivate the system
or
press briefly to reactivate it.
The warning lamp lights up on the
instrument panel when the system is
activated.
Malfunction
In the event of a malfunction, this warning
lamp comes on on the instrument panel,
accompanied by the display of a message and
an audible signal.
Contact a PEUGEOT dealer or a qualified
workshop.
Parking sensors
For more information, refer to the
General recommendations on the use
of driving and manoeuvring aids .
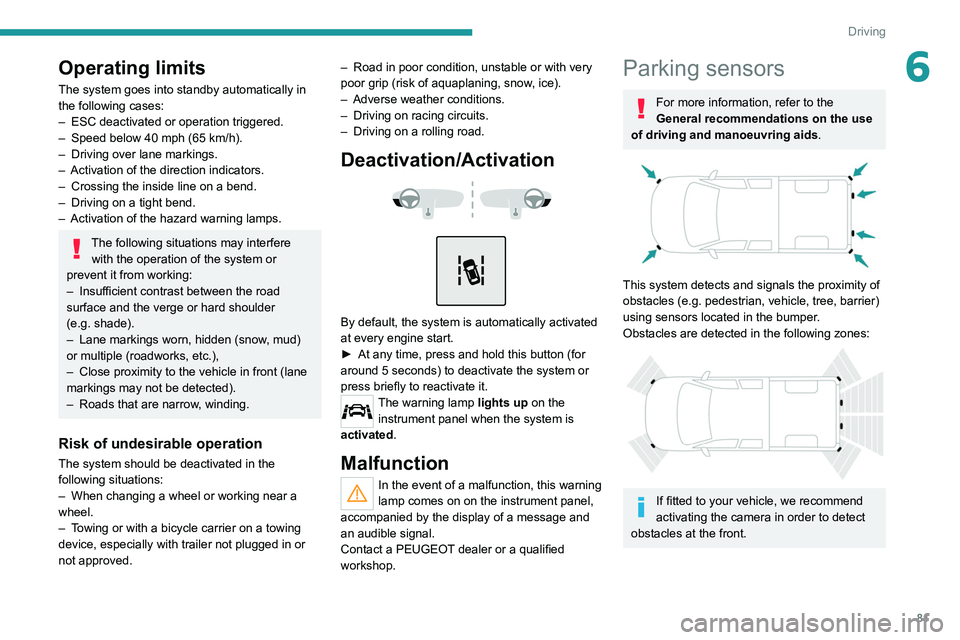
This system detects and signals the proximity of
obstacles (e.g.
pedestrian, vehicle, tree, barrier)
using sensors located in the bumper.
Obstacles are detected in the following zones:
If fitted to your vehicle, we recommend
activating the camera in order to detect
obstacles at the front.
Page 84 of 164
82
Driving
Rear parking sensors
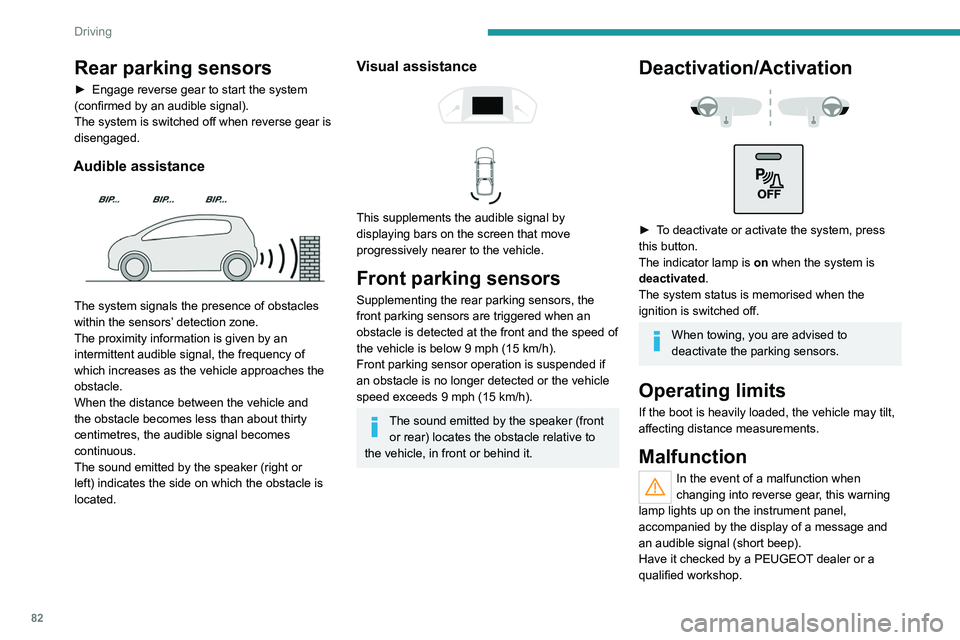
► Engage reverse gear to start the system
(confirmed by an audible signal).
The system is switched off when reverse gear is
disengaged.
Audible assistance
The system signals the presence of obstacles
within the sensors’ detection zone.
The proximity information is given by an
intermittent audible signal, the frequency of
which increases as the vehicle approaches the
obstacle.
When the distance between the vehicle and
the obstacle becomes less than about thirty
centimetres, the audible signal becomes
continuous.
The sound emitted by the speaker (right or
left) indicates the side on which the obstacle is
located.
Visual assistance
This supplements the audible signal by
displaying bars on the screen that move
progressively nearer to the vehicle.
Front parking sensors
Supplementing the rear parking sensors, the
front parking sensors are triggered when an
obstacle is detected at the front and the speed of
the vehicle is below 9 mph (15 km/h).
Front parking sensor operation is suspended if
an obstacle is no longer detected or the vehicle
speed exceeds 9 mph (15
km/h).
The sound emitted by the speaker (front or rear) locates the obstacle relative to
the vehicle, in front or behind it.
Deactivation/Activation
► To deactivate or activate the system, press
this button.
The indicator lamp is on when the system is
deactivated.
The system status is memorised when the
ignition is switched off.
When towing, you are advised to
deactivate the parking sensors.
Operating limits
If the boot is heavily loaded, the vehicle may tilt,
affecting distance measurements.
Malfunction
In the event of a malfunction when
changing into reverse gear, this warning
lamp lights up on the instrument panel,
accompanied by the display of a message and
an audible signal (short beep).
Have it checked by a PEUGEOT dealer or a
qualified workshop.
Reversing camera
For more information, refer to the
General recommendations on the use
of driving and manoeuvring aids .
The visual reversing assistance camera is
activated automatically when reverse gear is
engaged.
The function may be supplemented by parking
sensors.
The image is displayed on the touch screen.
Page 85 of 164
83
Driving
6Reversing camera
For more information, refer to the
General recommendations on the use
of driving and manoeuvring aids .
The visual reversing assistance camera is
activated automatically when reverse gear is
engaged.
The function may be supplemented by parking
sensors.
The image is displayed on the touch screen.
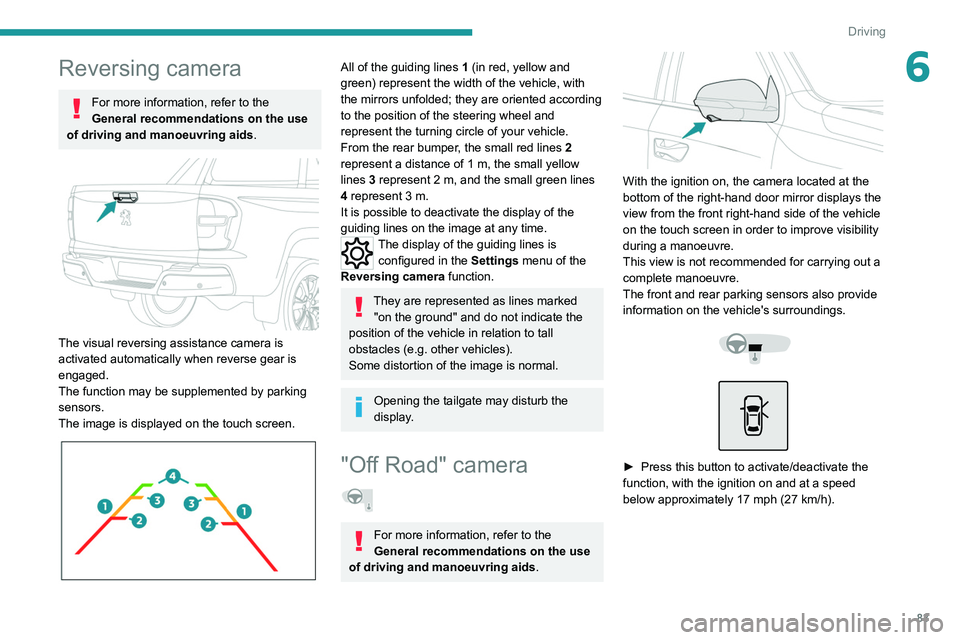
All of the guiding lines 1 (in red, yellow and
green) represent the width of the vehicle, with
the mirrors unfolded; they are oriented according
to the position of the steering wheel and
represent the turning circle of your vehicle.
From the rear bumper, the small red lines 2
represent a distance of 1 m, the small yellow
lines 3
represent 2 m, and the small green lines
4
represent 3 m.
It is possible to deactivate the display of the
guiding
lines on the image at any time.
The display of the guiding lines is
configured in the Settings
menu of the
Reversing camera function.
They are represented as lines marked
"on the ground" and do not indicate the
position of the vehicle in relation to tall
obstacles (e.g. other vehicles).
Some distortion of the image is normal.
Opening the tailgate may disturb the
display.
"Off Road" camera
For more information, refer to the
General recommendations on the use
of driving and manoeuvring aids .
With the ignition on, the camera located at the
bottom of the right-hand door mirror displays the
view from the front right-hand side of the vehicle
on the touch screen in order to improve visibility
during a manoeuvre.
This view is not recommended for carrying out a
complete manoeuvre.
The front and rear parking sensors also provide
information on the vehicle's surroundings.
► Press this button to activate/deactivate the
function, with the ignition on and at a speed
below approximately 17 mph (27
km/h).
Page 86 of 164
84
Driving
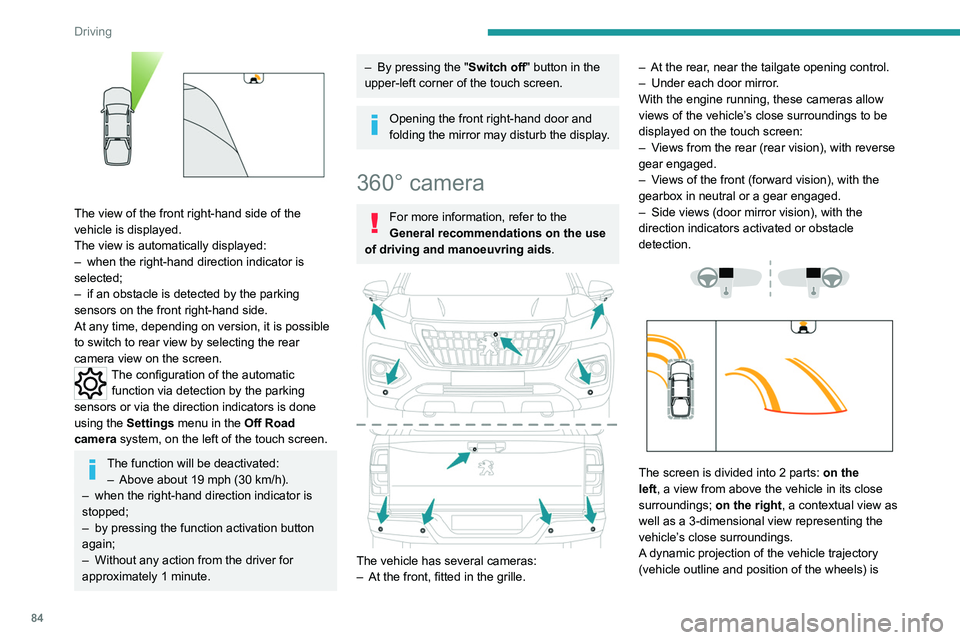
The view of the front right-hand side of the
vehicle is displayed.
The view is automatically displayed:
–
when the right-hand direction indicator is
selected;
–
if an obstacle is detected by the parking
sensors on the front right-hand side.
At any time, depending on version, it is possible
to switch to rear view by selecting the rear
camera view on the screen.
The configuration of the automatic
function via detection by the parking
sensors or via the direction indicators is done
using the
Settings menu in the Off Road
camera system, on the left of the touch screen.
The function will be deactivated:
– Above about 19 mph (30 km/h).
–
when the right-hand direction indicator is
stopped;
–
by pressing the function activation button
again;
–
Without any action from the driver for
approximately 1 minute.
– By pressing the " Switch off" button in the
upper-left corner of the touch screen.
Opening the front right-hand door and
folding the mirror may disturb the display.
360° camera
For more information, refer to the
General recommendations on the use
of driving and manoeuvring aids .
The vehicle has several cameras:
–
At the front, fitted in the grille. –
At the rear
, near the tailgate opening control.
–
Under each door mirror
.
With the engine running, these cameras allow
views of the vehicle’s close surroundings to be
displayed on the touch screen:
–
V
iews from the rear (rear vision), with reverse
gear engaged.
–
V
iews of the front (forward vision), with the
gearbox in neutral or a gear engaged.
–
Side views (door mirror vision), with the
direction indicators activated or obstacle
detection.
The screen is divided into 2 parts: on the
left, a view from above the vehicle in its close
surroundings; on the right, a contextual view as
well as a 3-dimensional view representing the
vehicle’s close surroundings.
A dynamic projection of the vehicle trajectory
(vehicle outline and position of the wheels) is