2022 HYUNDAI ELANTRA HYBRID instrument cluster
[x] Cancel search: instrument clusterPage 237 of 529
![HYUNDAI ELANTRA HYBRID 2022 Owners Manual Convenient Features
5-90
Wireless Cellular Phone
Charging System (if equipped)
OCN7050070
[A] : Charging pad
There is a wireless cellular phone charger
inside the front console.
The system is HYUNDAI ELANTRA HYBRID 2022 Owners Manual Convenient Features
5-90
Wireless Cellular Phone
Charging System (if equipped)
OCN7050070
[A] : Charging pad
There is a wireless cellular phone charger
inside the front console.
The system is](/manual-img/35/56241/w960_56241-236.png)
Convenient Features
5-90
Wireless Cellular Phone
Charging System (if equipped)
OCN7050070
[A] : Charging pad
There is a wireless cellular phone charger
inside the front console.
The system is available when all doors
are closed, and when the ignition switch is in the ON position
To charge a cellular phone
The wireless cellular phone charging
system charges only the Qi-enabled
cellular phones. Read the label on the
cellular phone accessory cover or visit
your cellular phone manufacturer’s
website to check whether your cellular
phone supports the Qi technology.
The wireless charging process starts
when you put a Qi-enabled cellular
phone on the wireless charging unit.
1. Remove other items, including the smart key, from the wireless charging
unit. If not, the wireless charging
process may be interrupted. Place
the cellular phone on the center of
the charging pad (
).
2. The indicator light is orange when the cellular phone is charging. The
indicator light turns green when
phone charging is complete.
3. You can turn ON or OFF the wireless charging function in the user settings
mode on the instrument cluster. For
further information, refer to the “LCD
Display Modes” in this chapter.
If your cellular phone is not charging:
- Slightly change the position of the cellular phone on the charging pad.
- Make sure the indicator light is orange.
The indicator light will blink orange for 10
seconds if there is a malfunction in the
wireless charging system.
In this case, temporarily stop the
charging process, and re-attempt to
charge your cellular phone again.
The system warns you with a message
on the LCD display if the cellular phone
is still on the wireless charging unit after
the engine is turned OFF and the front door is opened.
Information
For some manufacturers’ cellular phones, the system may not warn you even though
the cellular phone is left on the wireless
charging unit. This is due to the particular
characteristic of the cellular phone and
not a malfunction of the wireless charging.
NOTICE
• The wireless cellular phone charging system may not support certain
cellular phones, which are not
verified for the Qi specification (
).
• When placing your cellular phone on the charging mat, position the
phone in the middle of the mat for
optimal charging performance. If
your cellular phone is off to the side,
the charging rate may be less and in
some cases the cellular phone may
experience higher heat conduction.
• In some cases, the wireless charging may stop temporarily when the
Remote Key or Smart Key is used,
either when starting the vehicle or
locking/unlocking the doors, etc.
• When charging certain cellular phones, the charging indicator
may not change to green when the
cellular phone is fully charged.
Page 257 of 529
Driving your vehicle
6-12
Auto shut-off system (if equipped)
To prevent accidents caused by carbon
dioxide poisoning, the engine is turned
off automatically 60 minutes later when
the following conditions are satisfied.
The timer appears on the instrument
cluster 30 minutes before it turns off
automatically.
Operating conditions •
The driver does not fasten a seat belt
• No one in the passenger's seat
• Stop the vehicle and the speed is under 3kph and the gear shift is in P
• While the brake or accelerator is not
working
• When AVN update is performing
Cluster timer reset conditions • Release the accelerator or brake after
completing operation
• Press the OK button on the steering
wheel while the timer appears on the
instrument cluster
Off conditions • The driver fastened the seat belt
• A passenger is in the pasenger's seat
• Driving over 3kph
• Shifting the gear in R, N or D
CAUTION
Please do not leave a passenger or a pet
in the vehicle since the air conditioning
system stops when the engine is off.
Page 262 of 529
06
6-17
Transmission overheated
• If the vehicle continues to be driven
and the clutch temperatures reach
the maximum temperature limit, the
"Transmission hot! Park with engine
On" warning will be displayed. When
this occurs the clutch is disabled
until the clutch cools to normal
temperatures.
• The warning will display a time to wait
for the transmission to cool.
• If this occurs, pull over to a safe
location, stop the vehicle with the
engine running, apply the brakes and
shift the vehicle to P (Park), and allow
the transmission to cool.
• When the message "Transmission
cooled down. Resume driving"
appears you can continue to drive
your vehicle.
• When possible, drive the vehicle
smoothly.
If any of the warning messages in the
LCD display continue to blink, for your
safety, contact an authorized HYUNDAI
dealer and have the system checked. Transmission ranges
The indicator in the instrument cluster
displays the shift lever position when the
ignition switch is in the ON position.
P (Park)
Always come to a complete stop before
shifting into P (Park).
To shift from P (Park), you must depress
firmly on the brake pedal and make sure
your foot is off the accelerator pedal.
If you have done all of the above and
still cannot shift the lever out of P
(Park), see "Shift-Lock Release" in this
chapter.
The shift lever must be in P (Park) before
turning the engine off.
WARNING
• Shifting into P (Park) while the
vehicle is in motion may cause you to
lose control of the vehicle.
• After the vehicle has stopped, always
make sure the shift lever is in P
(Park), apply the parking brake, and
turn the engine off.
• Do not use the P (Park) position in
place of the parking brake.
Page 268 of 529
06
6-23
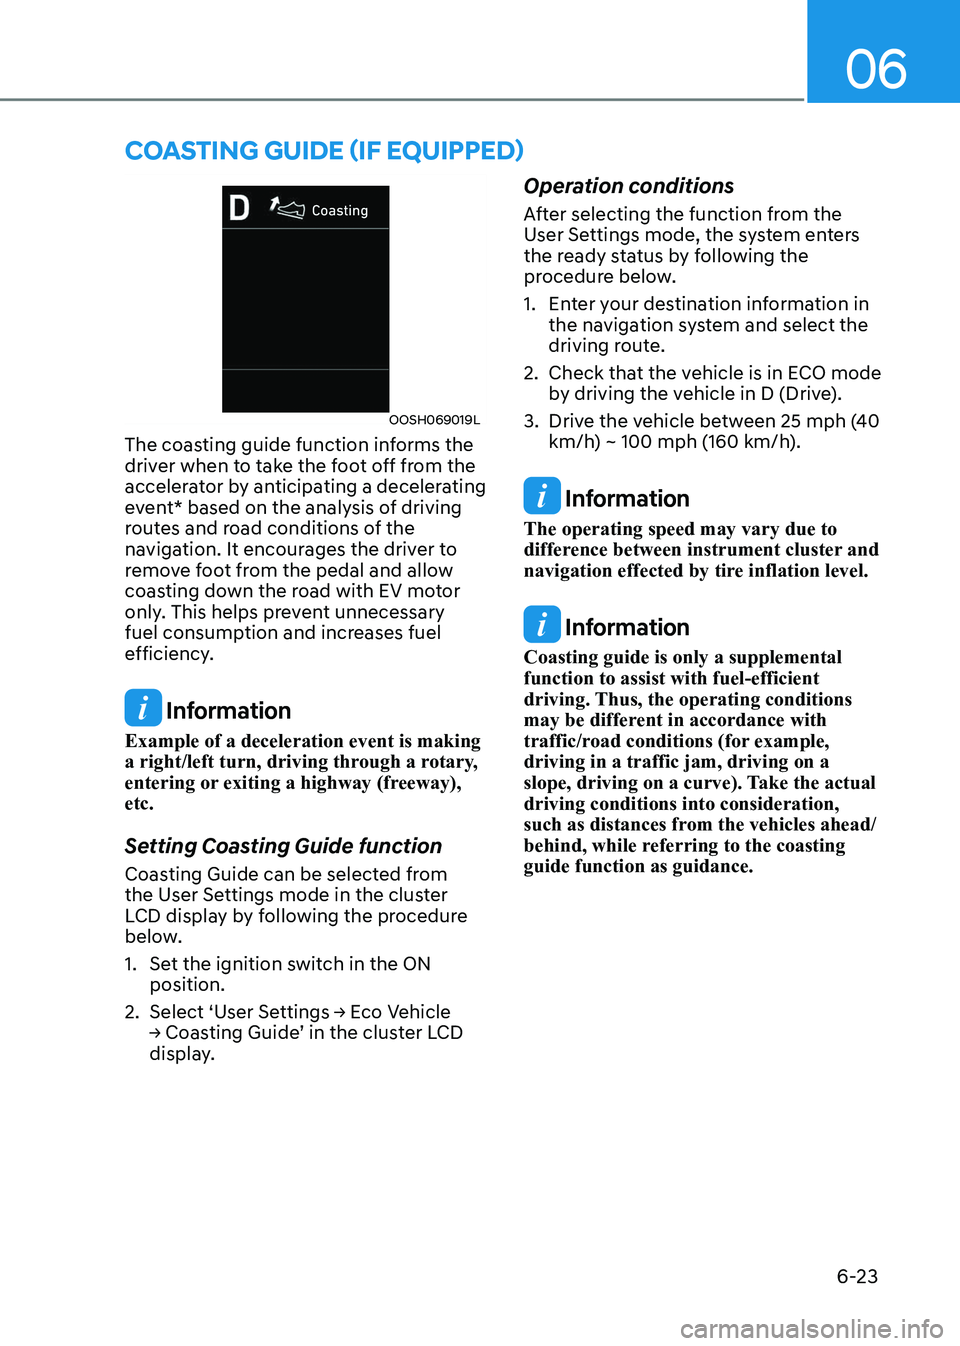
OOSH069019L
The coasting guide function informs the
driver when to take the foot off from the
accelerator by anticipating a decelerating
event* based on the analysis of driving
routes and road conditions of the
navigation. It encourages the driver to
remove foot from the pedal and allow
coasting down the road with EV motor
only. This helps prevent unnecessary
fuel consumption and increases fuel
efficiency.
Information
Example of a deceleration event is making
a right/left turn, driving through a rotary,
entering or exiting a highway (freeway), etc.
Setting Coasting Guide function
Coasting Guide can be selected from
the User Settings mode in the cluster
LCD display by following the procedure
below.
1. Set the ignition switch in the ON position.
2. Select ‘User Settings → Eco Vehicle
→ Coasting Guide’ in the cluster LCD
display. Operation conditions
After selecting the function from the
User Settings mode, the system enters
the ready status by following the
procedure below.
1. Enter your destination information in
the navigation system and select the
driving route.
2. Check that the vehicle is in ECO mode by driving the vehicle in D (Drive).
3. Drive the vehicle between 25 mph (40 km/h) ~ 100 mph (160 km/h).
Information
The operating speed may vary due to
difference between instrument cluster and
navigation effected by tire inflation level.
Information
Coasting guide is only a supplemental function to assist with fuel-efficient
driving. Thus, the operating conditions
may be different in accordance with
traffic/road conditions (for example, driving in a traffic jam, driving on a
slope, driving on a curve). Take the actual driving conditions into consideration,
such as distances from the vehicles ahead/
behind, while referring to the coasting guide function as guidance.
coasting guiDe (if equippeD)
Page 283 of 529
Driving your vehicle
6-38
Drive moDe integrateD control system (if equippeD)
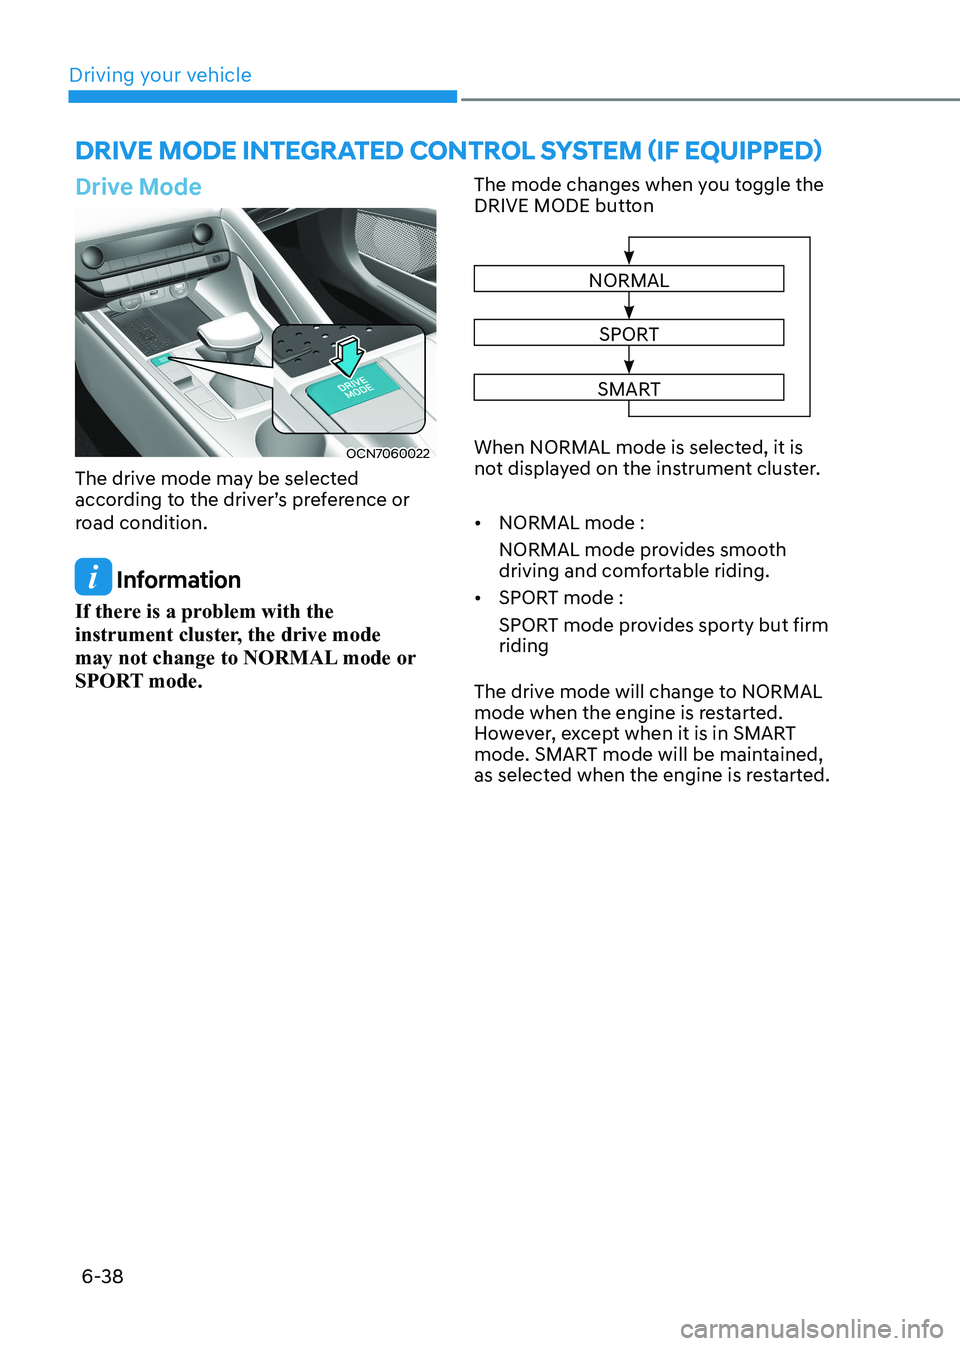
Drive Mode
OCN7060022
The drive mode may be selected
according to the driver’s preference or
road condition.
Information
If there is a problem with the
instrument cluster, the drive mode
may not change to NORMAL mode or
SPORT mode. The mode changes when you toggle the
DRIVE MODE button
NORMAL
SPORT
SMART
When NORMAL mode is selected, it is
not displayed on the instrument cluster. • NORMAL mode :
NORMAL mode provides smooth
driving and comfortable riding.
• SPORT mode :
SPORT mode provides sporty but firm riding
The drive mode will change to NORMAL
mode when the engine is restarted.
However, except when it is in SMART
mode. SMART mode will be maintained,
as selected when the engine is restarted.
Page 284 of 529
06
6-39
SPORT mode
SPORT mode manages the
driving dynamics by
automatically adjusting the
steering effort, the engine
and transmission control
logic for enhanced driver
performance.
• When SPORT mode is selected by
using the DRIVE MODE button, the
SPORT indicator will illuminate.
• Whenever the engine is restarted,
the Drive Mode will revert back to
NORMAL mode. If SPORT mode is
desired, re-select SPORT mode from
the DRIVE MODE button.
• When SPORT mode is activated:
- The engine rpm will tend to remain raised over a certain length of time
even after releasing the accelerator
- Upshifts are delayed when accelerating
Information
In SPORT mode, the fuel efficiency may
decrease. SMART mode
SMART mode selects the
proper driving mode among
ECO, NORMAL, and SPORT
by judging the driver’s driving
habits (for example, Economic
or Aggressive (Sportive)) from
the brake pedal depression or
the steering wheel operation.
• Toggle the DRIVE MODE button to
select SMART mode. When SMART
mode is selected, the indicator
illuminates on the instrument cluster.
• SMART mode automatically controls
the vehicle driving, such as gear
shifting patterns and engine torque,
in accordance with the driver’s driving habits.
• Whenever the engine is restarted, the
drive mode remains in SMART mode.
Information
• When you mildly drive the vehicle
in SMART mode, the driving mode
changes to SMART ECO mode to
improve fuel efficiency. However, the
actual fuel efficiency may differ in
accordance with your driving situations
(for example, upward/downward slope, vehicle deceleration/acceleration).
• When you dynamically drive the
vehicle in SMART mode by abruptly
decelerating or sharply turning the
driving mode changes to SMART
SPORT mode. However, it may
adversely affect fuel economy.
Page 286 of 529
06
6-41
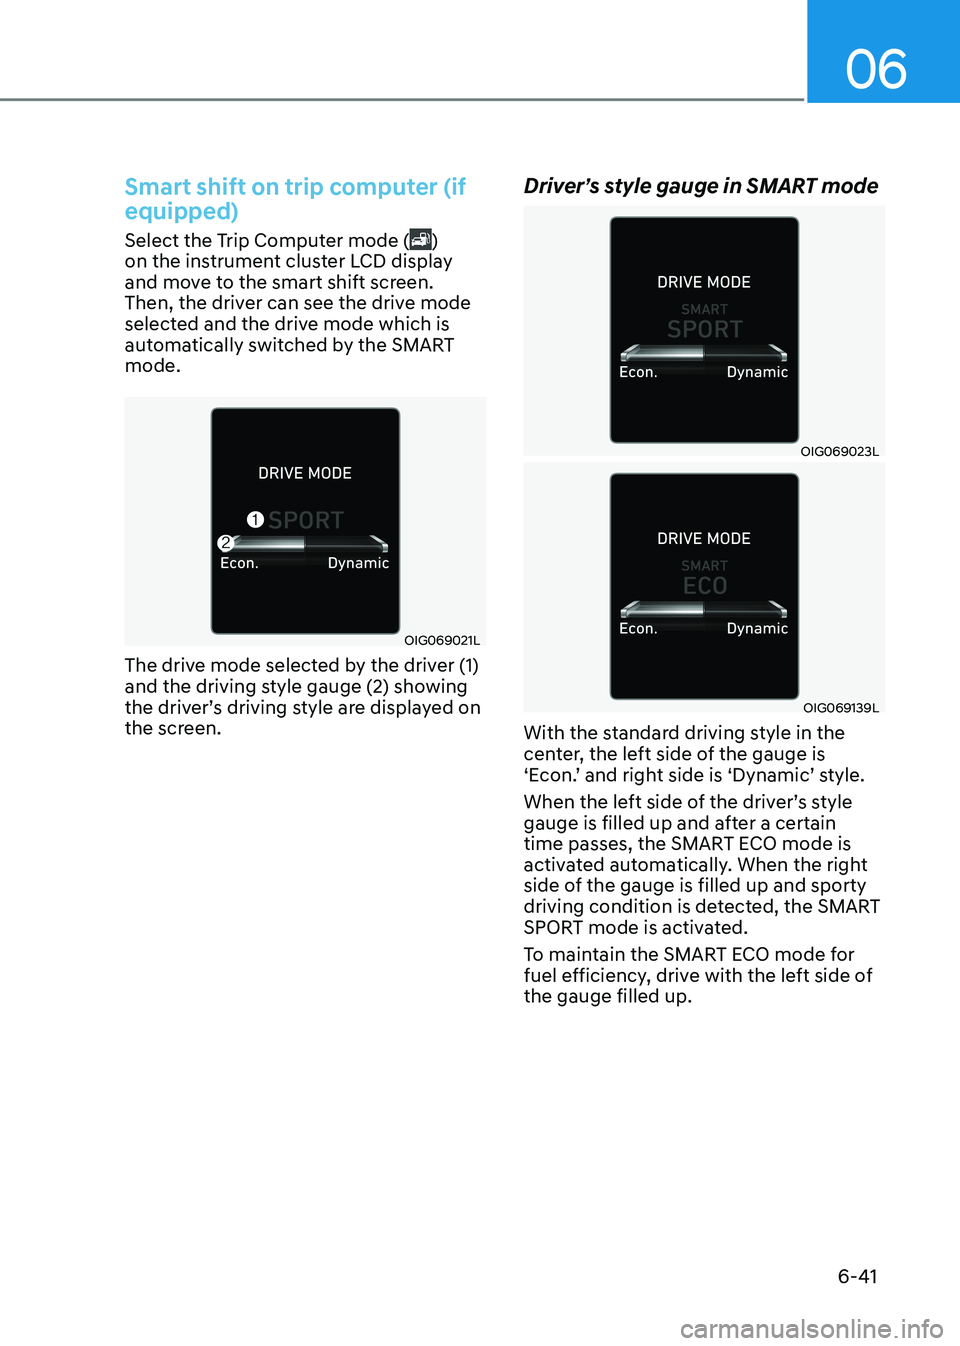
Smart shift on trip computer (if equipped)
Select the Trip Computer mode ()
on the instrument cluster LCD display
and move to the smart shift screen.
Then, the driver can see the drive mode
selected and the drive mode which is
automatically switched by the SMART mode.
OIG069021L
The drive mode selected by the driver (1)
and the driving style gauge (2) showing
the driver’s driving style are displayed on
the screen. Driver’s style gauge in SMART mode
OIG069023L
OIG069139L
With the standard driving style in the
center, the left side of the gauge is
‘Econ.’ and right side is ‘Dynamic’ style.
When the left side of the driver’s style
gauge is filled up and after a certain
time passes, the SMART ECO mode is
activated automatically. When the right
side of the gauge is filled up and sporty
driving condition is detected, the SMART
SPORT mode is activated.
To maintain the SMART ECO mode for
fuel efficiency, drive with the left side of the gauge filled up.
Page 328 of 529
07
7-31
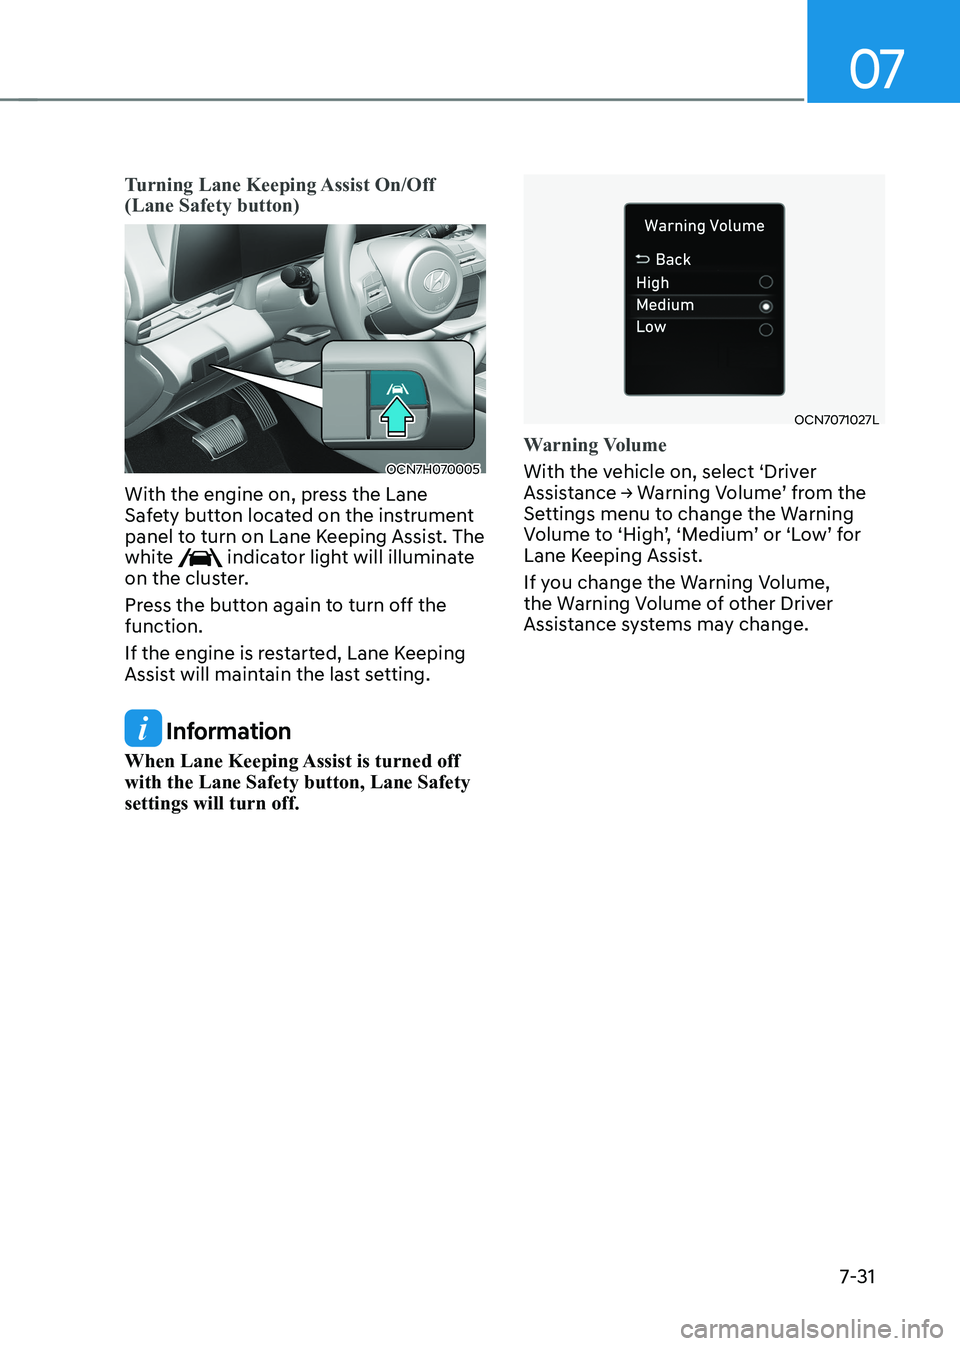
Turning Lane Keeping Assist On/Off (Lane Safety button)
OCN7H070005
With the engine on, press the Lane
Safety button located on the instrument
panel to turn on Lane Keeping Assist. The
white
indicator light will illuminate
on the cluster.
Press the button again to turn off the function.
If the engine is restarted, Lane Keeping
Assist will maintain the last setting.
Information
When Lane Keeping Assist is turned off with the Lane Safety button, Lane Safety settings will turn off.
OCN7071027L
Warning Volume
With the vehicle on, select ‘Driver
Assistance → Warning Volume’ from the
Settings menu to change the Warning
Volume to ‘High’, ‘Medium’ or ‘Low’ for
Lane Keeping Assist.
If you change the Warning Volume,
the Warning Volume of other Driver
Assistance systems may change.