2022 HYUNDAI ELANTRA HYBRID instrument cluster
[x] Cancel search: instrument clusterPage 144 of 529
Instrument Cluster
4-46
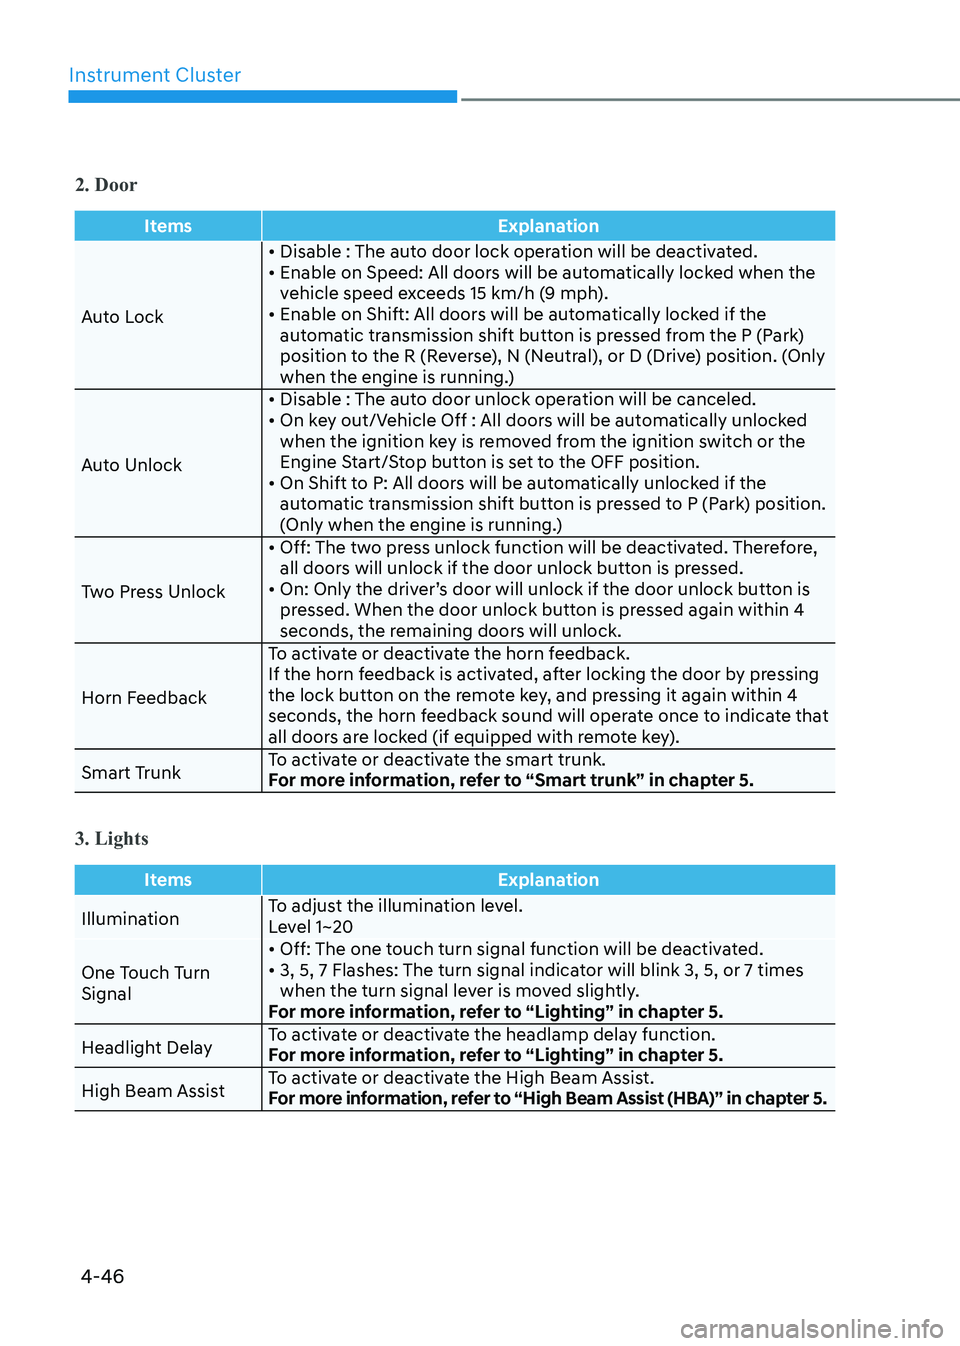
2. Door
ItemsExplanation
Auto Lock• Disable : The auto door lock operation will be deactivated.
• Enable on Speed: All doors will be automatically locked when the
vehicle speed exceeds 15 km/h (9 mph).
• Enable on Shift: All doors will be automatically locked if the
automatic transmission shift button is pressed from the P (Park)
position to the R (Reverse), N (Neutral), or D (Drive) position. (Only
when the engine is running.)
Auto Unlock • Disable : The auto door unlock operation will be canceled.
• On key out/Vehicle Off : All doors will be automatically unlocked
when the ignition key is removed from the ignition switch or the
Engine Start/Stop button is set to the OFF position.
• On Shift to P: All doors will be automatically unlocked if the automatic transmission shift button is pressed to P (Park) position.
(Only when the engine is running.)
Two Press Unlock • Off: The two press unlock function will be deactivated. Therefore,
all doors will unlock if the door unlock button is pressed.
• On: Only the driver’s door will unlock if the door unlock button is pressed. When the door unlock button is pressed again within 4
seconds, the remaining doors will unlock.
Horn Feedback To activate or deactivate the horn feedback.
If the horn feedback is activated, after locking the door by pressing
the lock button on the remote key, and pressing it again within 4
seconds, the horn feedback sound will operate once to indicate that
all doors are locked (if equipped with remote key).
Smart Trunk To activate or deactivate the smart trunk.
For more information, refer to “Smart trunk” in chapter 5.
3. Lights
Items
Explanation
IlluminationTo adjust the illumination level.
Level 1~20
One Touch Turn Signal • Off: The one touch turn signal function will be deactivated.
• 3, 5, 7 Flashes: The turn signal indicator will blink 3, 5, or 7 times
when the turn signal lever is moved slightly.
For more information, refer to “Lighting” in chapter 5.
Headlight Delay To activate or deactivate the headlamp delay function.
For more information, refer to “Lighting” in chapter 5.
High Beam Assist To activate or deactivate the High Beam Assist.
For more information, refer to “High Beam Assist (HBA)” in chapter 5.
Page 146 of 529
Instrument Cluster
4-48
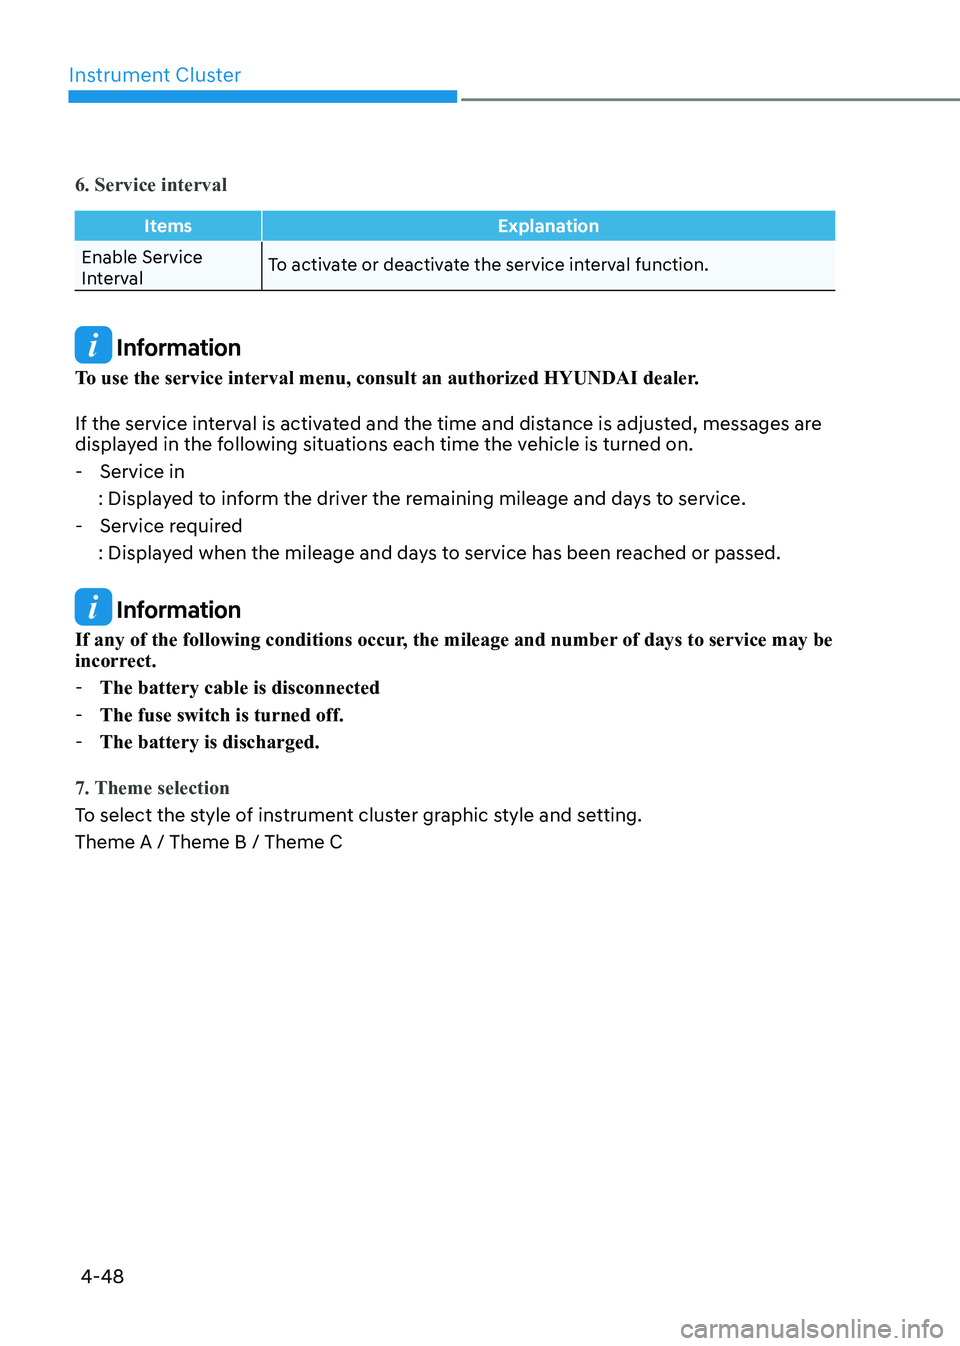
6. Service interval
ItemsExplanation
Enable Service
IntervalTo activate or deactivate the service interval function.
Information
To use the service interval menu, consult an authorized HYUNDAI dealer.
If the service interval is activated and the time and distance is adjusted, messages are
displayed in the following situations each time the vehicle is turned on. - Service in
: Displayed to inform the driver the remaining mileage and days to service. - Service required
: Displayed when the mileage and days to service has been reached or passed.
Information
If any of the following conditions occur, the mileage and number of days to service may be
incorrect. - The battery cable is disconnected
- The fuse switch is turned off.
- The battery is discharged.
7. Theme selection
To select the style of instrument cluster graphic style and setting. Theme A / Theme B / Theme C
Page 170 of 529
05
5-23
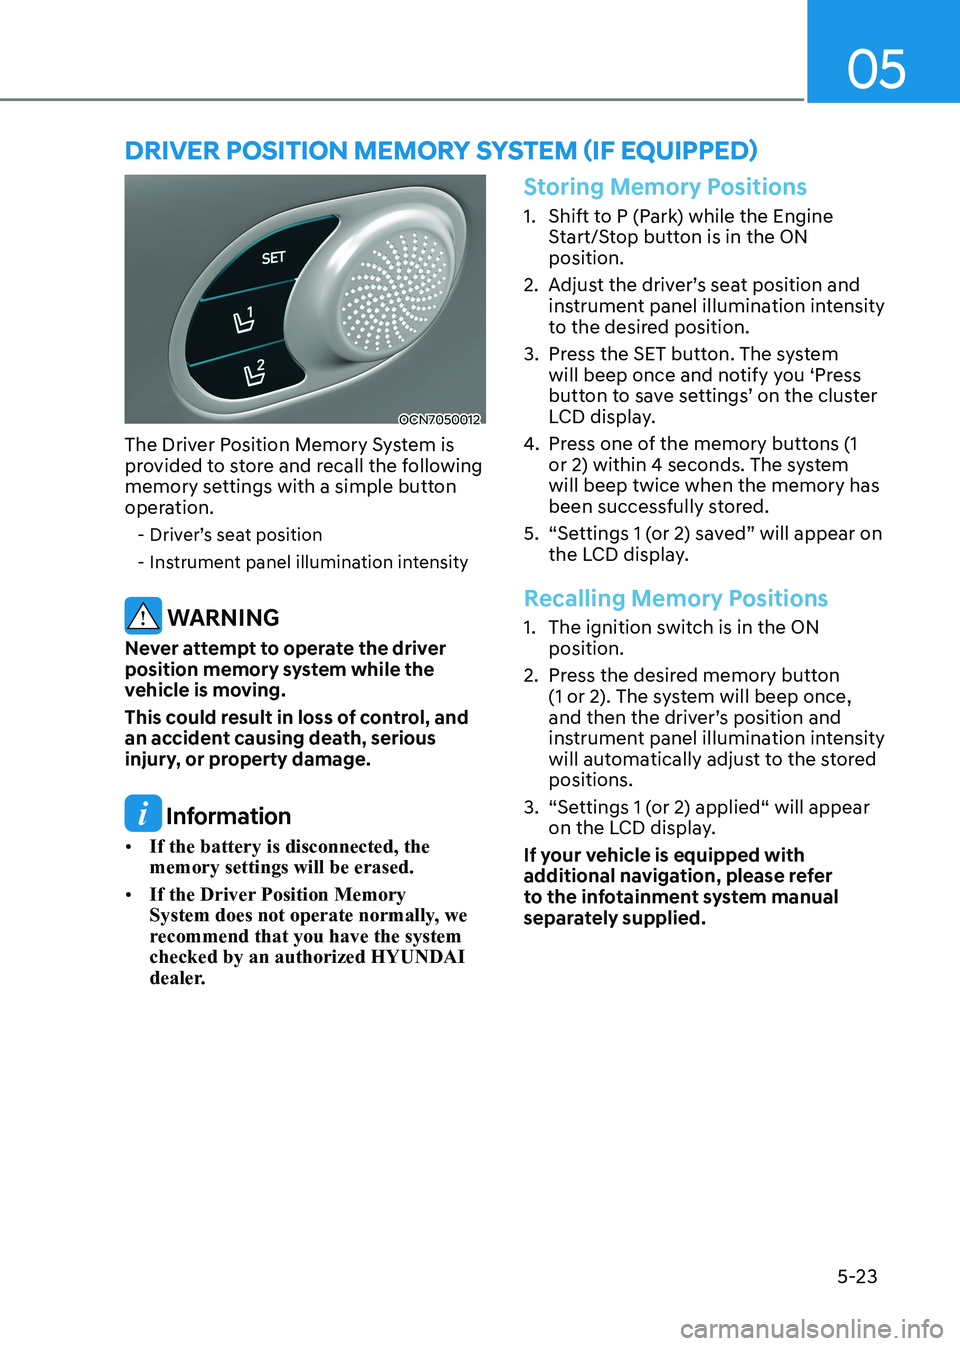
OCN7050012
The Driver Position Memory System is
provided to store and recall the following
memory settings with a simple button
operation. - Driver’s seat position
- Instrument panel illumination intensity
WARNING
Never attempt to operate the driver
position memory system while the
vehicle is moving.
This could result in loss of control, and
an accident causing death, serious
injury, or property damage.
Information
• If the battery is disconnected, the memory settings will be erased.
• If the Driver Position Memory
System does not operate normally, we
recommend that you have the system checked by an authorized HYUNDAI
dealer.
Storing Memory Positions
1. Shift to P (Park) while the Engine
Start/Stop button is in the ON position.
2. Adjust the driver’s seat position and instrument panel illumination intensity
to the desired position.
3. Press the SET button. The system will beep once and notify you ‘Press
button to save settings’ on the cluster
LCD display.
4. Press one of the memory buttons (1
or 2) within 4 seconds. The system will beep twice when the memory has
been successfully stored.
5. “Settings 1 (or 2) saved” will appear on the LCD display.
Recalling Memory Positions
1. The ignition switch is in the ON position.
2. Press the desired memory button (1 or 2). The system will beep once,
and then the driver’s position and
instrument panel illumination intensity
will automatically adjust to the stored positions.
3. “Settings 1 (or 2) applied“ will appear on the LCD display.
If your vehicle is equipped with
additional navigation, please refer
to the infotainment system manual
separately supplied.
DRiveR pOSitiOn memORy SyStem (if equippeD)
Page 173 of 529
Convenient Features
5-26
Electric Power Steering (EPS)
The system assists you with steering the
vehicle. If the vehicle is turned off or
if the power steering system becomes
inoperative, you may still steer the
vehicle, but it will require increased
steering effort.
Also, the steering effort becomes heavier
as the vehicle’s speed increases and
becomes lighter as the vehicle’s speed
decreases for better control of the
steering wheel.
Should you notice any change in the
effort required to steer during normal
vehicle operation, have the system
checked by an authorized HYUNDAI
dealer.
CAUTION
• If the Electric Power Steering System
does not operate normally, the
warning light (
) will illuminate
on the instrument cluster. You may
steer the vehicle, but it will require
increased steering efforts. Take your
vehicle to an authorized HYUNDAI
dealer and have the system checked as soon as possible.
• When an abnormality is detected
in the electric power steering
system, to prevent a an accident, the
steering assist function may become
inoperative. At this time, the warning
light turns on or blinks on the cluster.
The steering wheel may become
difficult to control or operate. Have
your vehicle checked immediately,
after moving the vehicle to a safe
area.
Information
The following symptoms may occur during normal vehicle operation: • The steering effort may be high
immediately after placing the ignition switch in the ON position. This happens as the system performs
the EPS system diagnostics. When the
diagnostics are completed, the steering
wheel effort will return to its normal condition.
• When the battery voltage is low, you
might have to put more steering effort.
However, it is a temporary condition so
that it will return to normal condition
after charging the battery.
• A click noise may be heard from the
EPS relay after the ignition switch is in
the ON or LOCK/OFF position.
• Motor noise may be heard when the
vehicle is at a stop or at a low driving speed.
• When you operate the steering wheel
in low temperatures, abnormal noise
may occur. If the temperature rises, the
noise will disappear. This is a normal condition.
• When an error is detected from the EPS, the steering effort assist function
may become inoperative in order to
prevent fatal accidents. Instrument
cluster warning lights may be on or the steering effort may be high. If these
symptoms occur, drive the vehicle to
a safe area as soon as it is safe to do so. Have the system checked by an
authorized HYUNDAI dealer as soon as possible.
steering Wheel
Page 174 of 529
05
5-27
Tilt Steering / Telescope Steering
When adjusting the steering wheel to a
comfortable position, adjust the steering
wheel so that it points toward your chest,
not toward your face. Make sure you can
see the instrument cluster warning lights
and gauges. After locking the lever, push
the steering wheel both up and down to
be certain it is locked in position. Always
adjust the position of the steering wheel
before driving.
WARNING
NEVER adjust the steering wheel while
driving. This may cause loss of vehicle
control resulting in an accident.
OCN7050013
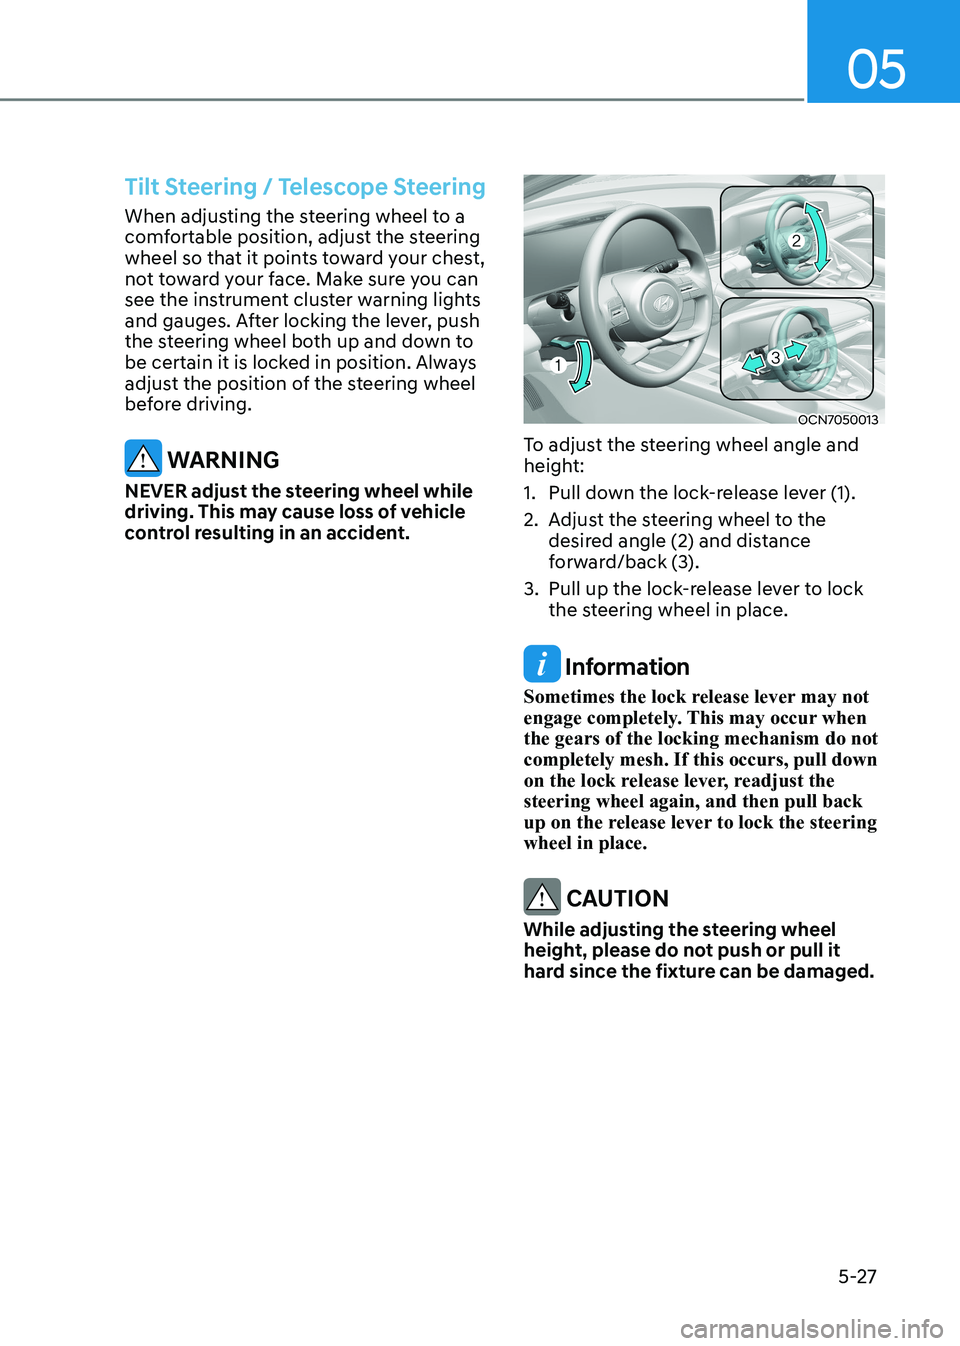
To adjust the steering wheel angle and
height:
1. Pull down the lock-release lever (1).
2. Adjust the steering wheel to the desired angle (2) and distance
forward/back (3).
3. Pull up the lock-release lever to lock the steering wheel in place.
Information
Sometimes the lock release lever may not
engage completely. This may occur when the gears of the locking mechanism do not completely mesh. If this occurs, pull down
on the lock release lever, readjust the steering wheel again, and then pull back
up on the release lever to lock the steering wheel in place.
CAUTION
While adjusting the steering wheel
height, please do not push or pull it
hard since the fixture can be damaged.
Page 195 of 529
Convenient Features
5-48
Closing the Hood
1. Before closing the hood, check the following:
• All filler caps in engine
compartment must be correctly
installed.
• Gloves, rags or any other
combustible material must
be removed from the engine
compartment.
2. Return the support rod to its clip to prevent it from rattling.
3. Lower the hood halfway (lifted approximately 30 cm from the closed
position) and push down to securely
lock in place. Then double check to be
sure the hood is secure.
If the hood can be raised slightly, it is
not securely locked. Open it again and
close it with more force. WARNING
• Before closing the hood, ensure
all obstructions are removed from
around the hood opening.
• Always double check to be sure that
the hood is firmly latched before
driving away. Check there is no
hood open warning light or message
displayed on the instrument cluster.
Driving with the hood opened may
cause a total loss of visibility, which
might result in an accident.
• Do not move the vehicle with the
hood in the raised position, as vision
is obstructed, which might result in
an accident, and the hood could fall or be damaged.
Page 208 of 529
05
5-61
High Beam Assist Operation
Display and control • After selecting ‘High Beam Assist’
in the Settings menu, High Beam
Assist will operate by following the
procedure below.
- Place the headlamp switch in the AUTO position and push
the headlamp lever towards the
instrument cluster. The High Beam
Assist (
) indicator light will
illuminate on the cluster and High
Beam Assist will be enabled.
- When High Beam Assist is enabled, high beam will turn on when vehicle
speed is above 40 km/h (25 mph).
When vehicle speed is below 25
km/h (15 mph), high beam will turn
off.
- The High Beam (
) indicator light
will illuminate on the cluster when high beam is on.
• When High Beam Assist is operating, if
the headlamp lever or switch is used,
High Beam Assist operates as follow:
- If the headlamp lever is pulled towards you when the high beam
is off, the high beam will turn on
without High Beam Assist canceled.
When you let go of the headlamp
lever, the lever will move to the middle and the high beam will turn
off.
- If the headlamp lever is pulled towards you when the high beam is
on by High Beam Assist, low beam
will turn on and High Beam Assist
will turn off.
- If the headlamp switch is placed from AUTO to another position
(headlamp/position/off), High
Beam Assist will turn off and the
corresponding lamp will turn on. •
When High Beam Assist is operating,
high beam switches to low beam if
any of the following conditions occur:
- When the headlamp of an oncoming vehicle is detected.
- When the tail lamp of a vehicle in front is detected.
- When the headlamp or tail lamp of a motorcycle or a bicycle is detected.
- When the surrounding ambient light is bright enough that high beams
are not required.
- When streetlights or other lights are detected.
High Beam Assist Malfunction
and Limitations
Function malfunction
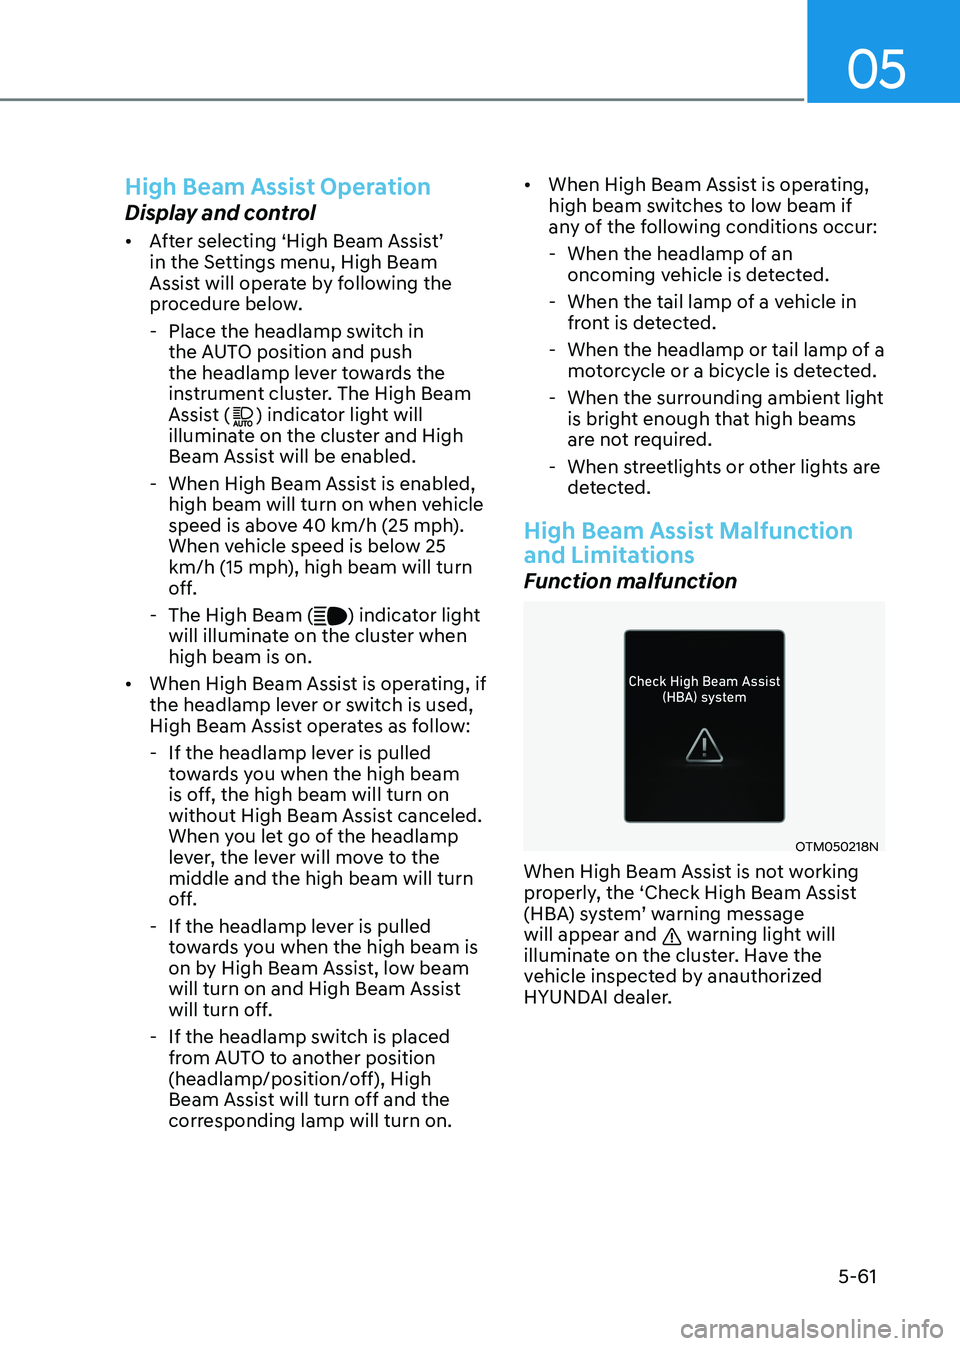
OTM050218N
When High Beam Assist is not working
properly, the ‘Check High Beam Assist
(HBA) system’ warning message will appear and
warning light will
illuminate on the cluster. Have the
vehicle inspected by anauthorized
HYUNDAI dealer.
Page 221 of 529
Convenient Features
5 -74
Temperature conversion
If the battery has been discharged or
disconnected, the temperature mode
display will reset to Centigrade.
To change the temperature unit from °C
to °F or °F to °C : - Automatic climate control system Press the AUTO button for 3 seconds
while pressing the OFF button.
- Instrument clusterAutomatic climate control system
Go to User Settings → Other →
Temperature Unit.
The temperature unit on both the
cluster LCD display and the climate
control screen will change.
Information
When starting the vehicle in cold weather
using manual temperature control,
operate the system in the following method
to improve heating. - Turn off or lower the blower, right after starting the engine.
- Allow the engine to warm up during
this time since the air flow from the
heater is still cold.
- After a few minutes of engine warm up,
turn on or set the fan to a higher level
and adjust the temperature setting to hot. Air intake control
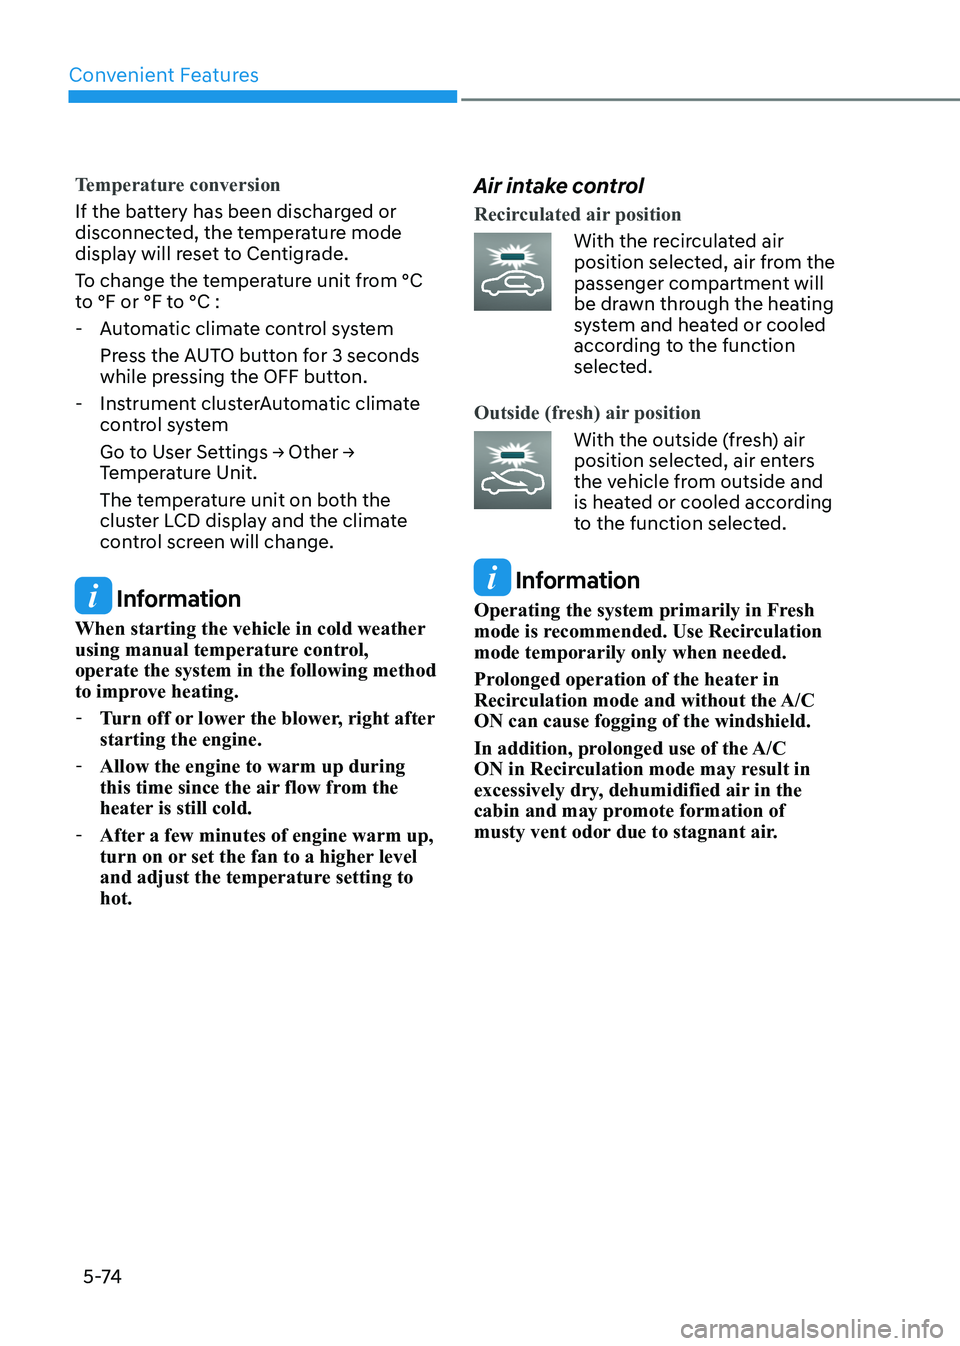
Recirculated air position
With the recirculated air
position selected, air from the
passenger compartment will
be drawn through the heating
system and heated or cooled
according to the function
selected.
Outside (fresh) air position
With the outside (fresh) air
position selected, air enters
the vehicle from outside and
is heated or cooled according
to the function selected.
Information
Operating the system primarily in Fresh
mode is recommended. Use Recirculation mode temporarily only when needed.
Prolonged operation of the heater in
Recirculation mode and without the A/C ON can cause fogging of the windshield.
In addition, prolonged use of the A/C
ON in Recirculation mode may result in
excessively dry, dehumidified air in the
cabin and may promote formation of
musty vent odor due to stagnant air.