Page 41 of 276
 39
Access
2► press button C or the exterior control B for
more than 3 seconds (deletion is confirmed by a
long audible signal).
Manual operation
The tailgate can be manoeuvred by hand, even
with")
39
Access
2► press button C or the exterior control B for
more than 3 seconds (deletion is confirmed by a
long audible signal).
Manual operation
The tailgate can be manoeuvred by hand, even
with motorised operation activated.
The tailgate must be stationary.
When opening and closing the motorised tailgate
manually, there is no assistance from gas struts.
Resistance to opening and closing is therefore
entirely normal.
Repeatedly opening and closing the
motorised tailgate can cause overheating
of its electric motor, after which opening and
closing will not be possible.
Allow at least 10 minutes for the electric
motor to cool down before operating the
tailgate again.
If you are unable to wait, operate it manually.
Manual closing of the
motorised tailgate in case of
failure
This operation is only necessary in the case of
failure of the tailgate motor .
If the failure originates from the battery, it is
recommended to recharge it or change it with the
tailgate closed.
In this situation, a significant force may be
needed to close the tailgate.
► Close it gently without slamming, as slowly as
possible, by pushing at the centre of the tailgate.
Do not lower the tailgate by pushing at
one of its sides - risk of damage!
Precautions in use
To avoid unintentionally opening the tailgate while operating the towing
device:
–
Deactivate the “Hands-Free
Tailgate
Access” function in advance in the vehicle
configuration menu.
–
Or remove the electronic key from the
recognition zone, with the tailgate closed.
In wintry conditions
To avoid any operating problems, remove
the snow or wait until the ice melts before
requesting motorised opening of the tailgate.
When washing
When washing the vehicle in an
automatic car wash, do not forget to lock
the vehicle to prevent any risk of unwanted
opening.
Alarm
(Depending on version)
System which protects and provides a deterrent
against theft and break-ins.
Exterior perimeter monitoring
The system checks for opening of the vehicle.
The alarm is triggered if anyone tries to open a
door, the boot or the bonnet, for example.
Interior volumetric monitoring
The system checks for any variation in volume in
the passenger compartment.
The alarm is triggered if anyone breaks a
window, enters the passenger compartment or
moves inside the vehicle.
Anti-tilt monitoring
The system checks for any change in the attitude
of the vehicle.
The alarm goes off if the vehicle is lifted or
moved.
When the vehicle is parked, the alarm
will not be triggered if the vehicle is
knocked.
Page 42 of 276
 40
Access
► Switch on the ignition; this stops the alarm.
The indicator lamp in the button goes off.
Locking the vehicle without
activating the alarm
► Lock or deadlock the vehicle using the ke")
40
Access
► Switch on the ignition; this stops the alarm.
The indicator lamp in the button goes off.
Locking the vehicle without
activating the alarm
► Lock or deadlock the vehicle using the key
(integral to the remote control) in the driver's
door lock.
Automatic activation
(Depending on version)
The system is activated automatically 2 minutes
after the last door or the boot is closed.
► To avoid triggering the alarm on entering the
vehicle, first press the unlocking button on the
remote control or unlock the vehicle using the
“Keyless Entry and Starting” system.
Malfunction
When the ignition is switched on, fixed
illumination of the red indicator lamp in the
button indicates a malfunction of the system.
Have it checked by a CITROËN dealer or a
qualified workshop.
Self-protection function
The system checks whether any of its
components are out of service.
The alarm is triggered if the battery, the central
control or the siren wiring is put out of service or
damaged.
Work on the alarm system
Consult a CITROËN dealer or a qualified
workshop.
Locking the vehicle with full
alarm system
Activation/Deactivation
► Lock or deadlock/unlock the vehicle using
the remote control or the "Keyless Entry and
Starting" system (confirmed by the button's red
indicator lamp coming on/going out and the
direction indicators coming on).
The exterior perimeter monitoring is activated
after 5 seconds and the interior volumetric and
anti-tilt monitoring after 45 seconds.
If the vehicle automatically locks itself
again (as happens if a door or the boot is
not opened within 30 seconds of unlocking),
the monitoring system is automatically
reactivated.
If an opening (door, boot or bonnet) is not
properly closed, the vehicle is not locked,
but the exterior perimeter monitoring will be
activated after 45 seconds, at the same time
as the interior volumetric and anti-tilt
monitoring.
Locking the vehicle
with exterior perimeter
monitoring only
Disable volumetric monitoring to avoid unwanted
alarm triggering in certain cases, such as:
–
Slightly open window
.
–
W
ashing the vehicle.
–
Changing a wheel.
–
T
owing your vehicle.
–
T
ransport on a ship or ferry.
Deactivating the interior volumetric
and anti-tilt monitoring
► Switch off the ignition and within 10 seconds
press the alarm button until its red indicator lamp
is on fixed.
►
Get out of the vehicle.
►
Immediately lock the vehicle using the remote
control or the Keyless Entry and Starting system.
Only the exterior perimeter monitoring is
activated; the button's red indicator lamp flashes
once every second.
To take effect, this deactivation must be carried out after each time the ignition is
switched off.
Reactivating the interior volumetric
and anti-tilt monitoring
► Deactivate the exterior perimeter monitoring
by unlocking the vehicle using the remote control
or the Keyless Entry and Starting system.
The indicator lamp in the button goes off.
►
Reactivate all monitoring by locking the
vehicle using the remote control or the Keyless
Entry and Starting system.
The red indicator lamp in the button once again
flashes every second.
Triggering of the alarm
This is indicated by sounding of the siren
and flashing of the direction indicators for 30
seconds.
The monitoring functions remain active until
the alarm has been triggered eleven times in
succession.
When the vehicle is unlocked using the remote
control or the Keyless Entry and Starting system,
rapid flashing of the indicator lamp in the button
informs you that the alarm was triggered during
your absence. When the ignition is switched on,
the flashing stops immediately.
Failure of the remote control
To deactivate the monitoring functions:
► Unlock the vehicle using the key in the
driver's door lock.
►
Open the door; the alarm is triggered.
Page 43 of 276
 41
Access
2► Switch on the ignition; this stops the alarm.
The indicator lamp in the button goes off.
Locking the vehicle without
activating the alarm
► Lock or deadlock the vehicle using the ke")
41
Access
2► Switch on the ignition; this stops the alarm.
The indicator lamp in the button goes off.
Locking the vehicle without
activating the alarm
► Lock or deadlock the vehicle using the key
(integral to the remote control) in the driver's
door lock.
Automatic activation
(Depending on version)
The system is activated automatically 2 minutes
after the last door or the boot is closed.
►
T
o avoid triggering the alarm on entering the
vehicle, first press the unlocking button on the
remote control or unlock the vehicle using the
“Keyless Entry and Starting” system.
Malfunction
When the ignition is switched on, fixed
illumination of the red indicator lamp in the
button indicates a malfunction of the system.
Have it checked by a CITROËN dealer or a
qualified workshop.
Electric windows
1. Left-hand front
2. Right-hand front
3. Right-hand rear
4. Left-hand rear
5. Deactivation of electric window controls
located by rear seats
Manual operation
► To open/close the window, press/pull the
switch without passing the point of resistance;
the window stops as soon as the switch is
released.
Automatic operation
► To open/close the window, press/pull the
switch past its resistance point: the window
opens/closes completely when the switch is
released.
Operating the switch again stops the movement
of the window.
Window controls remain operational for
approximately 45 seconds after switching
off the ignition or after locking the vehicle.
After that time, the controls are disabled.
To reactivate them, switch on the ignition or
unlock the vehicle.
Anti-pinch
If the window meets an obstacle while rising, it
stops and immediately partially lowers again.
Deactivating the rear
controls for the rear electric
windows
For your children's safety, press control 5
to deactivate the controls for the rear
electric windows, irrespective of their positions.
The red indicator lamp in the button comes
on and a confirmation message is displayed.
The lamp will remain lit until the controls are
reactivated.
The rear electric windows can still be controlled
using the driver's controls.
Reinitialising the electric
windows
After reconnecting the battery, or in the event
of abnormal window movement, the anti-pinch
function must be reinitialised.
The anti-pinch function is disabled during the
following sequence of operations.
Page 44 of 276
 42
Access
For each window:
► Lower the window fully , then raise it; it will
rise in steps of a few centimetres each time the
control is pressed. Repeat the operation until the
window is fully cl")
42
Access
For each window:
► Lower the window fully , then raise it; it will
rise in steps of a few centimetres each time the
control is pressed. Repeat the operation until the
window is fully closed.
►
Continue to pull the control upwards for at
least one second after the window reaches the
closed position.
If an electric window meets an obstacle
during operation, the movement of the
window must be reversed. To do this, press
the relevant switch.
When the driver operates the passengers’
electric window switches, it is important to
ensure that nothing can prevent the window
from closing properly.
It is important to ensure that passengers use
the electric windows correctly.
Pay particular attention to children when
operating windows.
Be aware of passengers and/or other persons
present when closing windows using the key
or the "Keyless Entry and Starting" system.
Panoramic sunroof
The panoramic sunroof consists of a movable
glass panel that slides over the roof and a blind
that can be opened independently. Opening the
sunroof automatically opens the blind.
►
T
o operate the panoramic sunroof or the
blind, use the buttons in the roof console.
A. Sunroof blind control
B. Sunroof control
The sunroof or blind can be operated when the
ignition is turned on (if the battery is charged
enough), with the engine running, in STOP mode
of Stop & Start, and up to 45
seconds after
turning off the ignition or after locking the vehicle.
Precautions
Do not put your head or arms through the
sunroof while the vehicle is moving - risk
of serious injury!
Ensure that any luggage or accessories
carried on the roof bars do not interfere
with the movement of the sunroof.
Do not place heavy loads on the movable
glass panel of the sunroof.
If the sunroof is wet, following a shower
or washing the vehicle, wait until it is
completely dry before opening.
Do not operate the sunroof if it is covered by
snow or ice - risk of damage!
Use only plastic scrapers to remove snow or
ice from the sunroof.
Check the condition of the sunroof seals
regularly (presence of dust or deposits,
dead leaves, etc.).
If using a car wash, check first that the roof is
correctly closed and keep the high-pressure
jet at least 30 centimetres from the seals.
Never leave the vehicle with the sunroof
open.
Operation
When opening the sunroof fully, the movable
glass moves to a partially open position, then
slides over the roof. All intermediate positions
are allowed.
Depending on the speed of the vehicle,
the partially open position may vary to
improve the acoustics.
Page 45 of 276
 43
Access
2Before operating the sunroof or blind
control buttons, ensure that no object or
person might prevent the movement.
Be particularly aware of children when
operating the sunroof or blind.")
43
Access
2Before operating the sunroof or blind
control buttons, ensure that no object or
person might prevent the movement.
Be particularly aware of children when
operating the sunroof or blind.
If something is trapped when operating the
sunroof or blind, you should reverse the
movement of the sunroof or blind by pressing
the control in question.
The driver must ensure that passengers use
the sunroof and blind correctly.
Anti-pinch system
If the sunroof or blind encounters an obstacle
when closing, the movement is automatically
reversed.
The roof anti-pinch system is designed to be
effective at speeds of up to 75 mph (120
km/h).
Opening / Closing
► To open the sunroof or the blind, use the part
of the button located towards the rear.
►
T
o close the sunroof or the blind, use the part
of the button located towards the front.
Operation of buttons
► Pressing a button beyond its point of
resistance directly opens or closes the sunroof
fully
.
►
Pressing the button again stops the current
movement.
►
When holding a button (without going
beyond the point of resistance), the movement
of the sunroof or blind stops when this button is
released.
►
When the sunroof is closed: pressing once
without passing the point of resistance moves it
to a partially open position.
►
When the sunroof is partially open: pressing
once without passing the point of resistance
opens or closes it fully
.
The roof and windows, then the blind, can be closed by holding down the door
locking control. The operation stops as soon
as the locking control is released.
Closing of the blind is limited by the
position of the sunroof: the blind cannot
go further than the front of the mobile glass.
During simultaneous movements of the
sunroof and blind, the blind automatically
stops or resumes movement depending on
the position of the sunroof.
Reinitialisation
Following reconnection of the battery or in the
event of a fault or jerky movement of the sunroof
or blind, reinitialisation is required.
►
Check that nothing is interfering with the
sunroof or blind and that the seals are clean.
►
With the ignition on, fully close the sunroof
and blind.
► Press and hold the front part of button B, until
the sunroof and blind move slightly, then hold for
a further 1 second before releasing.
►
W
ait 2 seconds and then press and hold the
front part of button B. The blind and the sunroof
will open and close, one after the other. When
both are completely closed again, hold for a
further 2 seconds and release.
If there is an operating fault, restart the
whole procedure.
Page 46 of 276
 44
Ease of use and comfort
Correct driving position
Before taking to the road and to make the most
of the ergonomic layout of the instruments and
controls, carry out these adjustments in the
follow")
44
Ease of use and comfort
Correct driving position
Before taking to the road and to make the most
of the ergonomic layout of the instruments and
controls, carry out these adjustments in the
following order:
–
the height of the head restraint,
–
the seat backrest angle,
–
the seat cushion height,
–
the longitudinal position of the seat,
–
the height and reach of the steering wheel,
–
the rear view mirror and door mirrors.
Once these adjustments have been
made, check the instrument panel can be
viewed correctly from your driving position.
Front seats
Caution when moving the
front seats
For safety reasons, only adjust seats
when the vehicle is stationary.
Before moving the seat backwards,
ensure that there is no person or object
that might prevent the full travel of the seat.
There is a risk of trapping or pinching
passengers if present in the rear seats or of
jamming the seat if large objects are placed
on the floor behind the seat.
Front head restraints
Adjusting the height
The adjustment is correct when the upper edge of the head restraint is level
with the top of the head.
‘Two-way’ adjustment model
Upwards:
► pull the head restraint up to the desired
position; the head restraint can be felt to click
into position.
Downwards:
►
press lug
A and push the head restraint down
to the desired position.
‘Four-way’ adjustment model
Upwards:
► pull the head restraint up to the desired
position; the head restraint can be felt to click
into position.
Downwards:
► press and hold button B and push the head
restraint down to the desired position.
Adjusting the angle
“Four-way” adjustment model
► press and hold button B and push the lower
part of the head restraint forwards or backwards.
Removing a head restraint
► Pull the head restraint up as far as it will go.
► Press the lug(s) A (depending on version)
to unlock the head restraint and remove it
completely,
► Stow the head restraint securely.
Page 47 of 276
 45
Ease of use and comfort
3► press and hold button B and push the head
restraint down to the desired position.
Adjusting the angle
“Four-way” adjustment model
► press and hold button B")
45
Ease of use and comfort
3► press and hold button B and push the head
restraint down to the desired position.
Adjusting the angle
“Four-way” adjustment model
► press and hold button B and push the lower
part of the head restraint forwards or backwards.
Removing a head restraint
► Pull the head restraint up as far as it will go.
► Press the lug(s) A (depending on version)
to unlock the head restraint and remove it
completely,
►
Stow the head restraint securely
.
Refitting a head restraint
► Introduce the head restraint rods into the
guides in the seat backrest.
►
Push the head restraint down as far as it will
go.
►
Press the lug(s)
A (depending on version) to
release the head restraint and push it down.
►
Adjust the height of the head restraint.
Never drive with the head restraints
removed; they should be in place and
correctly adjusted for the occupant of the
seat.
Manually-adjusted seats
Longitudinal
► Raise the control bar and slide the seat
forwards or backwards.
►
Release the bar to lock the seat in position on
one of the runners.
Backrest angle
► Turn the knob forwards or rearwards.
Lumbar support
(driver only)
► Turn the knob forwards or backwards to
obtain the desired level of lumbar support.
Height
► Pull the control upwards to raise or push
it downwards to lower , as many times as
necessary to obtain the position required.
Page 48 of 276
 46
Ease of use and comfort
Electrically-adjustable seats
To avoid draining the battery, carry out these adjustments with the engine
running.
Longitudinal adjustment
► Push the control forwards o")
46
Ease of use and comfort
Electrically-adjustable seats
To avoid draining the battery, carry out these adjustments with the engine
running.
Longitudinal adjustment
► Push the control forwards or rearwards to
slide the seat.
Backrest angle
► Tilt the control forwards or rearwards.
Electric lumbar adjustment
The control allows independent adjustment of
the depth and vertical position of the lumbar
support.
► Press and hold the front or rear of the
control to increase or reduce the lumbar
support.
►
Press and hold the top or bottom of the
control to raise or lower the lumbar support area.
Seat cushion height and angle
► Tilt the rear of the control upwards or
downwards to obtain the required height.
►
T
ilt the front of the control upwards or
downwards to obtain the required angle.
Comfort functions
Memorising driving positions
Associated with the electrically-adjusted driver’s
seat, this function allows two driving positions
to be memorised, to make these adjustments
easier if there are frequent driver changes.
It records the electric adjustments made to the
seat and door mirrors.
Using buttons M/1/2
► Enter the vehicle and switch the ignition on.
►
Adjust your seat and the door mirrors.
►
Press button
M, then press button 1 or 2
within 4 seconds.
An audible signal confirms the memorisation.
Memorising a new position cancels the previous
position.
Recalling a stored position
While the seat is moving, take care that
no person or object hinders the
automatic movement of the seat.
With the ignition on or engine running
► Press button 1 or 2 to recall the
corresponding position.
An audible signal sounds when adjustment is
complete.
You can interrupt the current movement by
pressing button M, 1 or 2 or by using one of the
seat adjustment controls.
A stored position cannot be recalled while
driving.
The recalling of stored positions is deactivated
45 seconds after switching off the ignition.
Heated seats
The function is active only with the engine
running.
► Press the button corresponding to the seat.
► Each press changes the heating level; the
corresponding number of indicator lamps come
on.
► To switch off the heating, press the button
until all of the indicator lamps are off.
The system status is memorised when the
ignition is switched off.
 1
1 2
2 3
3 4
4 5
5 6
6 7
7 8
8 9
9 10
10 11
11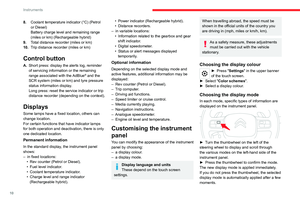 12
12 13
13 14
14 15
15 16
16 17
17 18
18 19
19 20
20 21
21 22
22 23
23 24
24 25
25 26
26 27
27 28
28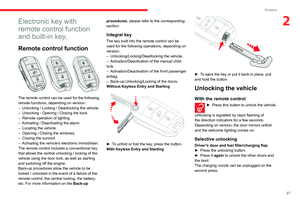 29
29 30
30 31
31 32
32 33
33 34
34 35
35 36
36 37
37 38
38 39
39 40
40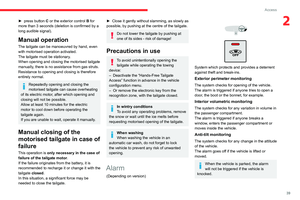 41
41 42
42 43
43 44
44 45
45 46
46 47
47 48
48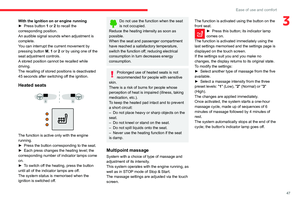 49
49 50
50 51
51 52
52 53
53 54
54 55
55 56
56 57
57 58
58 59
59 60
60 61
61 62
62 63
63 64
64 65
65 66
66 67
67 68
68 69
69 70
70 71
71 72
72 73
73 74
74 75
75 76
76 77
77 78
78 79
79 80
80 81
81 82
82 83
83 84
84 85
85 86
86 87
87 88
88 89
89 90
90 91
91 92
92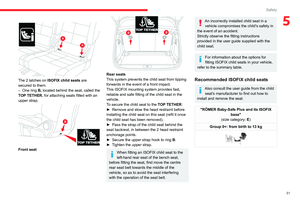 93
93 94
94 95
95 96
96 97
97 98
98 99
99 100
100 101
101 102
102 103
103 104
104 105
105 106
106 107
107 108
108 109
109 110
110 111
111 112
112 113
113 114
114 115
115 116
116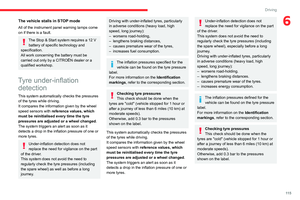 117
117 118
118 119
119 120
120 121
121 122
122 123
123 124
124 125
125 126
126 127
127 128
128 129
129 130
130 131
131 132
132 133
133 134
134 135
135 136
136 137
137 138
138 139
139 140
140 141
141 142
142 143
143 144
144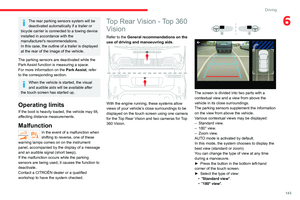 145
145 146
146 147
147 148
148 149
149 150
150 151
151 152
152 153
153 154
154 155
155 156
156 157
157 158
158 159
159 160
160 161
161 162
162 163
163 164
164 165
165 166
166 167
167 168
168 169
169 170
170 171
171 172
172 173
173 174
174 175
175 176
176 177
177 178
178 179
179 180
180 181
181 182
182 183
183 184
184 185
185 186
186 187
187 188
188 189
189 190
190 191
191 192
192 193
193 194
194 195
195 196
196 197
197 198
198 199
199 200
200 201
201 202
202 203
203 204
204 205
205 206
206 207
207 208
208 209
209 210
210 211
211 212
212 213
213 214
214 215
215 216
216 217
217 218
218 219
219 220
220 221
221 222
222 223
223 224
224 225
225 226
226 227
227 228
228 229
229 230
230 231
231 232
232 233
233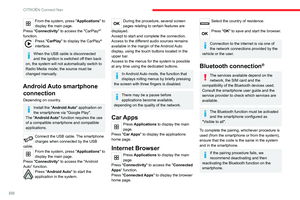 234
234 235
235 236
236 237
237 238
238 239
239 240
240 241
241 242
242 243
243 244
244 245
245 246
246 247
247 248
248 249
249 250
250 251
251 252
252 253
253 254
254 255
255 256
256 257
257 258
258 259
259 260
260 261
261 262
262 263
263 264
264 265
265 266
266 267
267 268
268 269
269 270
270 271
271 272
272 273
273 274
274 275
275