Page 153 of 276
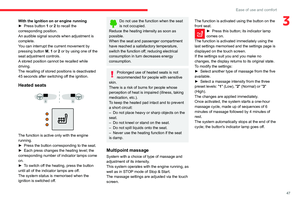
prefers
WITH TOTAL QUARTZ LUBRICANTS
FILL UP WITH
CONFIDENCE
F
ha
and technological innovation.
It is in this same spirit that T
a range of T
engines in CITRO\313N vehicles, making them ever
more fuel ef\037cient and environmentally friendly.
T
performance of
motorsport conditions.
Choose TOTAL QUARTZ lubricants when
servicing your vehicle; they are your assurance
of optimum engine life and performance.
Page 154 of 276

152
Practical information
Compatibility of fuels
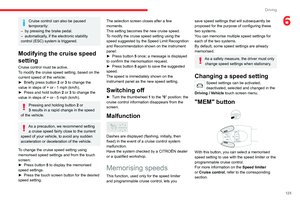
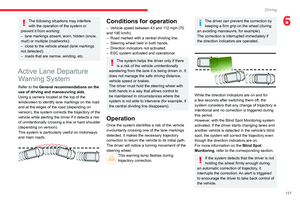
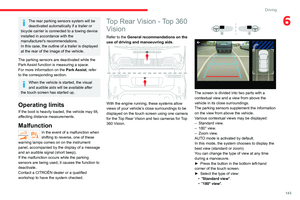
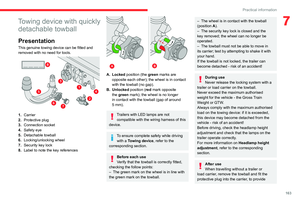
Petrol fuels conforming to the EN228 standard
containing up to 5% and 10% ethanol
respectively.
Diesel fuels conforming to the EN590, EN16734
and EN16709 standards and containing up to
7%, 10%, 20% and 30% fatty acid methyl ester
respectively. The use of B20 or B30 fuels, even
occasionally, imposes special maintenance
conditions referred to as "Arduous conditions".
Paraffinic Diesel fuel conforming to the EN15940
standard.
The use of any other type of (bio) fuel (vegetable or animal oils, pure or diluted,
domestic fuel, etc.) is strictly prohibited (risk
of damage to the engine and fuel system).
The only fuel additives authorised for use are those that meet the B715001 (petrol)
or B715000 (Diesel) standards.
Diesel at low temperature
At temperatures below 0 °C (+32 °F), the
formation of paraffins in summer-type Diesel fuels could prevent the engine from operating
correctly
. In these temperature conditions, use
winter-type Diesel fuel and keep the fuel tank
more than 50 % full.
At temperatures below -15 °C (+5 °F) to avoid
problems starting, it is best to park the vehicle
under shelter (heated garage).
Travelling abroad
Certain fuels could damage your vehicle’s
engine.
In certain countries, the use of a particular
fuel may be required (specific octane rating,
specific trade name, etc.) to ensure correct
operation of the engine.
For all additional information, consult a dealer.
Refuelling
Fuel tank capacity: approximately 53 litres
(Petrol or Diesel) or 43 litres (Rechargeable
hybrid).
Reserve level: approximately 6 litres.
Low fuel level
/2
1 1When the low fuel level is reached,
this warning lamp lights up on the
instrument panel, accompanied by the display of
a message and an audible signal. When it first
comes on, about 6 litres of fuel remain.
Until sufficient fuel is added, this warning lamp
appears every time the ignition is switched on,
accompanied by an onscreen message and
an audible signal. When driving, this message
and audible signal are repeated with increasing
frequency as the fuel level drops towards 0.
You must refuel as soon as possible to avoid
running out of fuel.
For more information on Running out of fuel
(Diesel), refer to the corresponding section.
A small arrow by the warning lamp indicates which side of the vehicle the
fuel filler flap is located on.
Stop & Start
Never refuel with the engine in STOP
mode; you must switch off the ignition.
Refuelling
Any addition of fuel must be in quantities of at
least 10 litres, in order to be registered by the
fuel gauge.
Opening the filler flap may create a noise caused
by an inrush of air. This vacuum is entirely
normal, resulting from the sealing of the fuel
system.
The filler cap is built into the filler
flap or must be
unscrewed (depending on version).
To refuel in complete safety:
►
Y
ou must switch off the engine.
Page 155 of 276

153
Practical information
7
► To open the filler flap, press the flap opening
button or, with the vehicle unlocked, press
the upper rear corner of the filler flap facing
the ejector or the tactile marker, if present
(depending on version).
Rechargeable hybrid vehicles
After pressing the button, it may take a
few minutes for the filler flap to open.
If the flap becomes stuck, press and hold the
button for more than 3
seconds.
►
T
ake care to select the pump that delivers the
correct fuel type for the vehicle's engine (see a
reminder label on the inside of the filler flap).
► Turn the filler cap to the left, remove it
and place it on its support on the filler flap
(depending on version).
►
Insert the filler nozzle and push it in as far as
possible before starting to refuel (to minimise the
risk of splashing).
►
Fill the tank.
Do not continue past the 3rd cut-off of the
nozzle; as this may cause malfunctions.
►
Put the filler cap back in place and turn it to
the right (depending on version).
►
Push the filler flap to close it.
The vehicle is fitted with a catalytic converter
,
which helps to reduce the level of harmful
emissions in the exhaust gases.
For petrol engines, you must use unleaded
fuel.
The filler neck is narrower, allowing only
unleaded petrol nozzles to be inserted.
If you have put in the wrong fuel for
the vehicle, you must have the fuel
tank drained and filled with the correct fuel
before starting the engine.
Rechargeable hybrid vehicles
If the filler flap is accidentally closed
before refuelling, it cannot be opened
manually. Restart the engine and move the
vehicle a few metres before pressing the
filler
flap opening button again.
Misfuel prevention (Diesel)
(Depending on country of sale.)
This mechanical device prevents filling the tank
of a Diesel vehicle with petrol.
Located in the filler neck, the misfuel prevention
device is visible when the filler cap is removed.
Operation
When a petrol filler nozzle is inserted into the
fuel filler neck of a Diesel vehicle, it comes into
contact with the flap. The system remains closed
and prevents filling.
Do not persist but introduce a Diesel type
filler nozzle.
It remains possible to use a fuel jerrycan
to fill the tank.
Travelling abroad
As Diesel fuel pump nozzles may be
different in other countries, the presence
of the misfuel prevention device may make
refuelling impossible.
Before travelling abroad, it is advisable to
check with a CITROËN dealer if the vehicle is
suitable for the distribution equipment of the
countries visited.
Page 156 of 276

154
Practical information
In the event of damage to the traction
battery
It is strictly prohibited to work on the vehicle
yourself.
Do not touch liquids coming from the traction
battery; in the event of contact between the
skin and these products, wash abundantly
with water and contact a doctor as soon as
possible.
Charging flap
The charging flap is located on the rear left-hand
side of the vehicle.
1. Deferred charging activation button
2. Indicator lamp confirming that the nozzle is
locked into the charging connector.
Fixed red: nozzle correctly positioned and
locked.
Flashing red: nozzle incorrectly positioned or
locking not possible.
3. Charging connector
Rechargeable hybrid
system
Electrical system
The electrical circuit of the rechargeable hybrid
system is identified by orange cables and its
components are marked with this symbol:
The rechargeable hybrid engine's system
uses a voltage of between 240 V and
400 V. This system may be hot both when the
ignition is on and after switching it off.
Observe the warning messages on the labels
in the vehicle, especially in the flap.
Any work on or modification to the vehicle's
electrical system (battery, connectors, orange
cables and components visible from inside or
outside) is strictly prohibited due to the risk of
serious burns or electrical shock that can lead
to death.
In the event of a problem, always contact a
CITROËN dealer or a qualified workshop.
This label is intended solely for use by firefighters and maintenance services in
the event of any work on the vehicle.
No other person must touch the device shown
on this label.
In the event of an accident or impact
to the vehicle’s underbody
In these situations, the electrical
circuit or the
traction battery can be seriously damaged.
Stop as soon as it is safe to do so and switch
off the ignition.
Contact a CITROËN dealer or a qualified
workshop.
In the event of exposure to a fire
Immediately exit and evacuate all
passengers from the vehicle. Never attempt
to fight the fire yourself - risk of electrocution!
You must immediately contact the emergency
services, informing them that the incident
involves a rechargeable hybrid vehicle.
When washing
Before washing the vehicle, always
check that the charging flap is closed
correctly.
Never wash the vehicle while the battery is
on charge.
High-pressure washing
To avoid damaging electrical
components, it is expressly prohibited to use
high-pressure washing to clean the front
compartment or the vehicle underbody.
Do not use a pressure greater than 80 bar
when washing the bodywork.
Never allow water or dust to enter the
connector or charging nozzle - risk of
electrocution or fire!
Never connect / disconnect the charging
nozzle or cable with wet hands - risk of
electrocution!
Traction battery
The Li-ion (Lithium-ion) traction battery stores
the electrical energy needed to propel the
vehicle.
It is located under the rear seats.
The traction battery's range varies depending
on the type of driving, the route, the use of
thermal comfort equipment and the ageing of its
components.
The traction battery ageing depends on several factors, such as climatic
conditions and the distance travelled.
Page 157 of 276

155
Practical information
7In the event of damage to the traction
battery
It is strictly prohibited to work on the vehicle
yourself.
Do not touch liquids coming from the traction
battery; in the event of contact between the
skin and these products, wash abundantly
with water and contact a doctor as soon as
possible.
Charging flap
The charging flap is located on the rear left-hand
side of the vehicle.
1. Deferred charging activation button
2. Indicator lamp confirming that the nozzle is
locked into the charging connector.
Fixed red: nozzle correctly positioned and
locked.
Flashing red: nozzle incorrectly positioned or
locking not possible.
3. Charging connector
4.Light guides
Status of light
guides Meaning
Fixed white Welcome lighting when flap
is opened
Fixed blue Deferred charging
Flashing green Charging
Fixed green Charging complete
Fixed red Malfunction
In case of impact, even light, against the
charging flap, do not use it.
Do not dismantle or modify the charging
connector - risk of electrocution and/or fire!
Contact a CITROËN dealer or a qualified
workshop.
Charging cable
The battery can be charged using several types
of cables.
The charging cable supplied with the vehicle is
compatible with the electrical installations of the
country of sale. If you are travelling abroad, refer to the following table to check the compatibility
of local electrical installations with the charging
cable.
Contact a CITROËN dealer or a qualified
workshop to obtain the appropriate charging
cable(s).
Page 158 of 276

156
Practical information
Control unit (mode 2)
Type 1
Type 2POWER
Green: electrical connection established;
charging can begin.
CHARGE
Flashing green: charging in progress or
temperature pre-conditioning activated.
Fixed green: charging complete.
Cable type CompatibilitySpecifications
Mode 2 charging cable with integrated control
unit
Conventional electrical socket.
Charge limited to a maximum of 8 A.
"Green'Up" type socket.
Charge limited to a maximum of 14 A.
Mode
3 charging cable
Wallbox accelerated charging unit
Charge limited to a maximum of 32 A.
The estimated charging time is indicated on the instrument panel when the vehicle
is connected. It may vary depending on
various factors such as the outside
temperature or the quality of the electrical
grid.
If the outside temperature is below -10°C, it
is recommended to connect the vehicle as
soon as possible as the charging time may
increase significantly. The battery may not
fully charge.Domestic charging cable (mode 2)
It is essential to avoid damaging the
cable and to keep it intact.
In the event of damage, do not use it and
contact a CITROËN dealer or a qualified
workshop to replace it.
Wallbox accelerated charging unit
(mode 3)
Do not dismantle or modify the accelerated
charging unit - risk of electrocution and/or fire!
To find out how it is used, please refer to the
accelerated charging unit's user instructions
Page 159 of 276

157
Practical information
7Control unit (mode 2)
Type 1
Type 2POWER
Green: electrical connection established;
charging can begin.
CHARGE
Flashing green: charging in progress or
temperature pre-conditioning activated.
Fixed green: charging complete.
FAULT
Red: fault; charging not permitted or must
be stopped immediately. Check that everything
is connected correctly and that the electrical
system is not faulty.
If the indicator lamp does not go off, contact a
CITROËN dealer or a qualified workshop.
Upon plugging the charging cable into a
domestic socket, all of the indicator lamps come
on briefly.
If no indicator lamps come on, check the
domestic socket's circuit-breaker.
–
If the circuit-breaker has tripped, contact a
professional to check that your electricity supply
is compatible and carry out any necessary
repairs.
–
If the circuit-breaker has not tripped, stop
using the charging cable and contact a
CITROËN dealer or a qualified workshop.
Type 1 control unit label
- Recommendations
1. Refer to the handbook before use. 2.
Incorrect use of this charging cable may
result in fire, property damage and serious
injury or death by electrocution!
3. Always use a correctly earthed power
socket, protected by a 30 mA residual
current device.
4. Always use an electrical socket protected
by a circuit-breaker appropriate for the
electrical circuit’s current rating.
5. The weight of the control unit must not be
borne by the electrical socket, plug and
cables.
6. Never use this charging cable if it is
defective or in any way damaged.
7. Never attempt to repair or open this
charging cable. It contains no repairable
parts - replace the charging cable if it is
damaged.
8. Never immerse this charging cable in water.
9. Never use this charging cable with an
extension cable, a multi-plug socket, a
conversion adaptor or on a damaged
electrical socket.
10. Do not unplug the plug from the wall as a
means of stopping charging.
11 . Do not force the connector if it is locked into
the vehicle.
12. Immediately stop charging, by locking and
then unlocking the vehicle using the remote
control key, if the charging cable or wall
socket feel burning hot to the touch.
Page 160 of 276

158
Practical information
13.This charging cable includes components
liable to cause electrical arcing or sparks.
Do not expose to flammable vapours.
14. Only use this charging cable with CITROËN
vehicles.
15. Never plug the cable into the wall socket (or
unplug it) with wet hands.
Type 2 control unit label
- Recommendations
Refer to the handbook before use.
1.Incorrect use of this charging cable may
result in fire, property damage and serious
injury or death by electrocution!
2. Always use a correctly earthed power
socket, protected by a 30
mA residual
current device. 3.
Always use an electrical socket protected
by a circuit-breaker appropriate for the
electrical circuit’s current rating.
4. The weight of the control unit must not be
borne by the electrical socket, plug and
cables.
5. Never use this charging cable if it is
defective or in any way damaged.
6. Never attempt to repair or open this
charging cable. It contains no repairable
parts - replace the charging cable if it is
damaged.
7. Never immerse this charging cable in water.
8. Never use this charging cable with an
extension cable, a multi-plug socket, a
conversion adaptor or on a damaged
electrical socket.
9. Do not unplug the plug from the wall as a
means of stopping charging.
10. Immediately stop charging, by locking and
then unlocking the vehicle using the remote
control key, if the charging cable or wall
socket feel burning hot to the touch. 11 .
This charging cable includes components
liable to cause electrical arcing or sparks.
Do not expose to flammable vapours.
12. Only use this charging cable with CITROËN
vehicles.
13. Never plug the cable into the wall socket (or
unplug it) with wet hands.
14. Do not force the connector if it is locked into
the vehicle.
Type 2 control unit label - State of
indicator lamps
State of the
indicator lamp
Off
On
Flashing
POWER CHARGE FAULT SymbolDescription
Not connected to the power supply or power is not
available from the infrastructure.
(green)
(green)
(red)
The control unit is currently performing a self-test.