2021 TOYOTA PROACE CITY VERSO key
[x] Cancel search: keyPage 102 of 272
102
NOTIC E
With petrol engines, after a cold start, pre-heating the catalytic converter can cause clearly-felt engine vibrations when stationary, with the engine running, for anything up to 2 minutes (accelerated idle speed).
WARNI NG
If the engine does not start straight away, switch off the ignition.Wait a few seconds before operating the starter motor again. If the engine does not start after several attempts, do not keep trying: you risk damaging the starter motor and the engine.Contact a TOYOTA dealer or a qualified workshop.
WARNI NG
To avoid any risk of jamming the pedals:– only use mats which are suited to the fixings already present in the vehicle; these fixings must be used,– never place one mat on top of another.
The use of mats not approved by TOYOTA may interfere with access to the pedals and hinder the operation of the cruise control / speed limiter.The mats approved by TOYOTA have two fixings located below the seat.
With the Keyless Entry and Starting
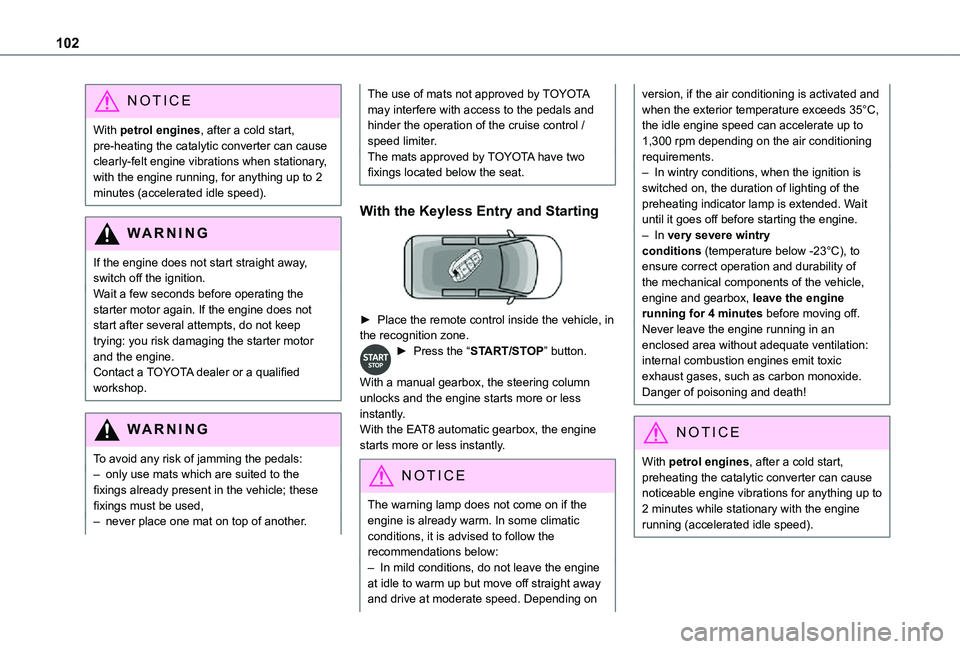
► Place the remote control inside the vehicle, in the recognition zone.► Press the “START/STOP” button.
With a manual gearbox, the steering column unlocks and the engine starts more or less instantly.With the EAT8 automatic gearbox, the engine starts more or less instantly.
NOTIC E
The warning lamp does not come on if the engine is already warm. In some climatic conditions, it is advised to follow the
recommendations below:– In mild conditions, do not leave the engine at idle to warm up but move off straight away and drive at moderate speed. Depending on
version, if the air conditioning is activated and when the exterior temperature exceeds 35°C, the idle engine speed can accelerate up to 1,300 rpm depending on the air conditioning requirements.– In wintry conditions, when the ignition is switched on, the duration of lighting of the preheating indicator lamp is extended. Wait until it goes off before starting the engine.– In very severe wintry conditions (temperature below -23°C), to ensure correct operation and durability of the mechanical components of the vehicle, engine and gearbox, leave the engine running for 4 minutes before moving off.Never leave the engine running in an enclosed area without adequate ventilation: internal combustion engines emit toxic exhaust gases, such as carbon monoxide. Danger of poisoning and death!
NOTIC E
With petrol engines, after a cold start, preheating the catalytic converter can cause noticeable engine vibrations for anything up to 2 minutes while stationary with the engine running (accelerated idle speed).
Page 103 of 272
103
Driving
6
WARNI NG
For Diesel vehicles, when the temperature is below zero, starting will only occur once the preheating warning lamp is off.If this warning lamp comes on after pressing the "START/STOP" button, press down on the brake or clutch pedal until the warning lamp goes off, without pressing the "START/STOP" button again, until the engine starts and runs.
NOTIC E
The presence of the “Keyless Entry and Starting” system remote control is imperative in the recognition zone.Never leave the vehicle with the engine running and with the remote control on your person.If the remote control leaves the recognition zone, a message is displayed.Move the remote control into the zone in order to be able to start the engine.
NOTIC E
If one of the starting conditions is not met, a message is displayed in the instrument panel. In some circumstances, it is necessary to turn the steering wheel while pressing the "START/STOP" button to assist unlocking of the steering column. A message is displayed.
Switching off
► Immobilise the vehicle, with the engine at idle.► With a manual gearbox, ideally put the gear lever into neutral.► With an automatic gearbox, ideally select position P.
With the conventional key/With the
remote control key
► Turn the key all the way to position 1 (Stop) and remove it from the ignition.► To lock the steering column, turn the steering
wheel until it locks.
NOTIC E
To facilitate unlocking of the steering column, it is recommended that the wheels be returned to the straight ahead position before switching off the engine.
► Check that the parking brake is correctly applied, particularly on sloping ground.
WARNI NG
Never switch off the ignition before the complete immobilisation of the vehicle. With the engine off, the braking and steering assistance systems are also turned off: risk of loss of control of the vehicle.
NOTIC E
As a safety measure, never leave the vehicle without taking the remote control with you, even for a short time.
NOTIC E
Avoid attaching heavy objects to the key or the remote control, which would weigh down on its blade in the ignition switch and could cause a malfunction.
Page 104 of 272
104
Key left in the ignition
NOTIC E
When opening the driver's door, an alert message is displayed, accompanied by an audible signal, to remind you that the key is still in the ignition switch at position 1 (Stop).If the key has been left in the ignition switch at position 2 (Ignition on), the ignition will be
switched off automatically after one hour.To switch the ignition back on, turn the key to position 1 (Stop), then back to position 2 (Ignition on).
With Keyless Entry and Starting
► With the remote control in the recognition zone, press the "START/STOP" button.With a manual gearbox, the engine switches off and the steering column locks.With the EAT8 automatic gearbox, the engine switches off.
NOTIC E
If the vehicle is not immobilised, the engine will not stop.
Switching on the ignition
with Keyless Entry and
Starting
With the Keyless Entry and Starting system’s electronic key inside the vehicle, pressing the "START/STOP" button, with no action on the pedals, allows the ignition to be switched on.► Pressing this button again switches off the ignition and allows the vehicle to be locked.
Back-up starting with
Keyless Entry and Starting
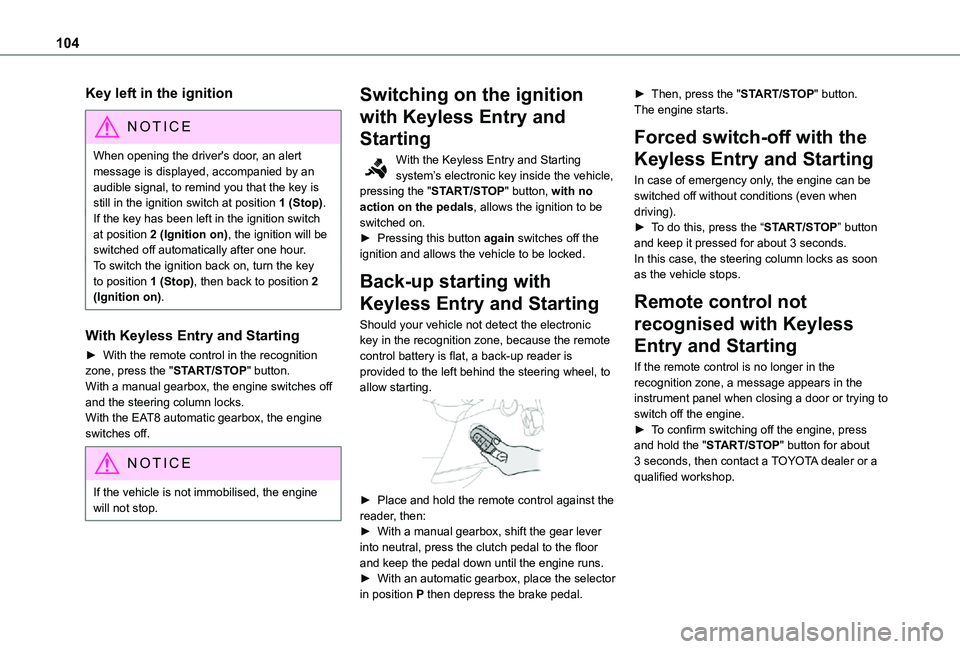
Should your vehicle not detect the electronic key in the recognition zone, because the remote control battery is flat, a back-up reader is provided to the left behind the steering wheel, to allow starting.
► Place and hold the remote control against the reader, then:► With a manual gearbox, shift the gear lever into neutral, press the clutch pedal to the floor and keep the pedal down until the engine runs.► With an automatic gearbox, place the selector in position P then depress the brake pedal.
► Then, press the "START/STOP" button.The engine starts.
Forced switch-off with the
Keyless Entry and Starting
In case of emergency only, the engine can be switched off without conditions (even when driving).► To do this, press the “START/STOP” button and keep it pressed for about 3 seconds.In this case, the steering column locks as soon as the vehicle stops.
Remote control not
recognised with Keyless
Entry and Starting
If the remote control is no longer in the recognition zone, a message appears in the instrument panel when closing a door or trying to switch off the engine.► To confirm switching off the engine, press
and hold the "START/STOP" button for about 3 seconds, then contact a TOYOTA dealer or a qualified workshop.
Page 111 of 272
111
Driving
6
When you move the selector or press button M, the corresponding gear and indicator lamp are shown on the instrument panel.The "-" symbol is displayed if a value is invalid.► If the message "Foot on the brake" is displayed on the instrument panel, press the brake pedal firmly.
Moving off
► With your foot on the brake, select position P.► Start the engine.If the conditions are not met, there is an audible signal, accompanied by a message on the instrument panel screen.► Release the parking brake.► Select position R, N or D.
WARNI NG
When moving off on a steep slope with a loaded vehicle, press the brake pedal, select position D, release the parking brake, then release the brake pedal.
► Gradually release the brake pedal.The vehicle moves off immediately.
NOTIC E
If P is displayed on the instrument panel but the selector is in another position, place the selector in position P to allow the engine to be started.If position N is selected inadvertently while driving, allow the engine to return to idle, then select position D to accelerate.
WARNI NG
When the engine is running at idle with the brakes released, if position R, D or M is selected, the vehicle moves even without the accelerator being pressed.Never leave children unsupervised inside the vehicle.As a safety measure, never leave the vehicle without taking your key or remote control with you, even for a short time.When carrying out maintenance with the engine running, apply the parking brake and select position P.
WARNI NG
With an automatic gearbox, never try to start
the engine by pushing the vehicle.
Automatic operation
► Select position D for automatic changing of the gears.The gearbox then operates in auto-adaptive mode, without any intervention on the part of the driver. It continuously selects the most suitable gear according to the driving style, the road profile and the load in the vehicle.For maximum acceleration without touching the selector, press the accelerator fully down (kick-down). The gearbox changes down automatically or holds the gear selected until the maximum engine speed is reached.When braking, the gearbox changes down automatically to provide effective engine braking.If the accelerator pedal is sharply released, the gearbox will not shift to a higher gear for safety reasons.
WARNI NG
Never select position N while the vehicle is moving.Never select positions P or R unless the vehicle is completely stationary.
Page 115 of 272
11 5
Driving
6
Operation
Main conditions for operation
– The driver’s door must be closed.– The sliding side door must be closed.– The driver's seat belt must be fastened.– The state of charge of the battery must be sufficient.– The temperature of the engine must be within its nominal operating range.– The outside temperature must be between 0°C and 35°C.
Putting the engine into standby
(STOP mode)
The engine automatically goes into standby as soon as the driver indicates the intention of stopping.– With a manual gearbox: at a speed below 3 km/h (2 mph) or with the vehicle stationary (depending on engine), with the gear lever in neutral and the clutch pedal released.– With an automatic gearbox: at a speed below
3 km/h (2 mph) or with the vehicle stationary (depending on engine), with the brake pedal depressed or the gear selector in position N.
Time counter
A time counter adds up the time spent in standby during the journey. It is reset to zero every time the ignition is switched on.
Special cases:
The engine will not go into standby if all of the conditions for operation are not met and in the following cases.– Steep slope (ascending or descending).– Vehicle has not exceeded 10 km/h (6 mph) since the last engine start (with the key or the “START/STOP” button).– The electric parking brake is applied or being applied.– Needed to maintain a comfortable temperature in the passenger compartment.– Demisting active.In these cases, this indicator lamp flashes for a few seconds, then goes off.
NOTIC E
After the engine has restarted, STOP mode is not available until the vehicle has reached a speed of 8 km/h (5 mph).
NOTIC E
During parking manoeuvres, STOP mode is not available for a few seconds after coming out of reverse gear or turning the steering wheel.
Restarting the engine (START mode)
The engine automatically restarts as soon as the driver indicates the intention of moving off again.
– With a manual gearbox: with the clutch pedal fully depressed.– With an automatic gearbox:• With the selector in position D or M: with the brake pedal released.• With the selector in position N and the brake pedal released: with the selector at D or M.• With the selector in position P and the brake pedal depressed: with the selector at R, N, D or M.
Special cases
The engine will restart automatically if all conditions for operation are met again and in the following case.– Speed of the vehicle exceeds 3 km/h (2 mph) (depending on the engine).In this case, this indicator lamp flashes for a few seconds, then goes off.
Malfunctions
Depending on the vehicle’s equipment:In the event of a system malfunction, this
warning lamp flashes on the instrument panel.The warning lamp in this button flashes and a message appears, accompanied by an audible signal.Have the vehicle checked by a TOYOTA dealer or a qualified workshop.
Page 116 of 272
11 6
The vehicle stalls in STOP mode
All of the instrument panel warning lamps come on if there is a fault.Depending on version, a warning message may also be displayed, prompting you to place the gear selector in position N and depress the brake pedal.► Switch off the ignition then start the engine again with the key or the "START/STOP" button.
WARNI NG
The Stop & Start system requires a 12 V battery of specific technology and specification.All work concerning the battery must be carried out only by a TOYOTA dealer or a qualified workshop.
Under-inflation detection
This system automatically checks the pressures
of the tyres while driving.It compares the information given by the wheel speed sensors with reference values, which must be reinitialised every time the tyre pressures are adjusted or a wheel changed.The system triggers an alert as soon as it detects a drop in the inflation pressure of one or more tyres.
WARNI NG
Under-inflation detection does not replace the need for vigilance on the part of the driver.This system does not avoid the need to regularly check the tyre pressures (including the spare wheel) as well as before a long journey.Driving with under-inflated tyres, particularly in adverse conditions (heavy load, high speed, long journey):– worsens road-holding.– lengthens braking distances.– causes premature wear of the tyres.– increases fuel consumption.
NOTIC E
The inflation pressures defined for the vehicle can be found on the tyre pressure label.For more information on the Identification markings, refer to the corresponding section.
WARNI NG
Checking tyre pressuresThis check should be done when the tyres are "cold" (vehicle stopped for 1 hour or after
a journey of less than 10 km (6 miles) at moderate speeds).Otherwise, add 0.3 bar to the pressures shown on the label.
NOTIC E
Snow chainsThe system does not have to be reinitialised after fitting or removing snow chains.
NOTIC E
Spare wheelThe steel spare wheel does not have an under-inflation detection sensor.
Under-inflation alert
This is signalled by the fixed illumination of this warning lamp, accompanied by an audible signal and, depending on equipment, the display of a message.► Reduce speed immediately, avoid excessive steering movements and avoid sudden braking.► Stop the vehicle as soon as it is safe to do so.
WARNI NG
The loss of pressure detected does not always cause visible bulging of the tyre.Do not rely on just a visual check.
► Using a compressor, such as the one in the temporary puncture repair kit, check the pressures of the four tyres when cold.
Page 152 of 272
152
Refuelling
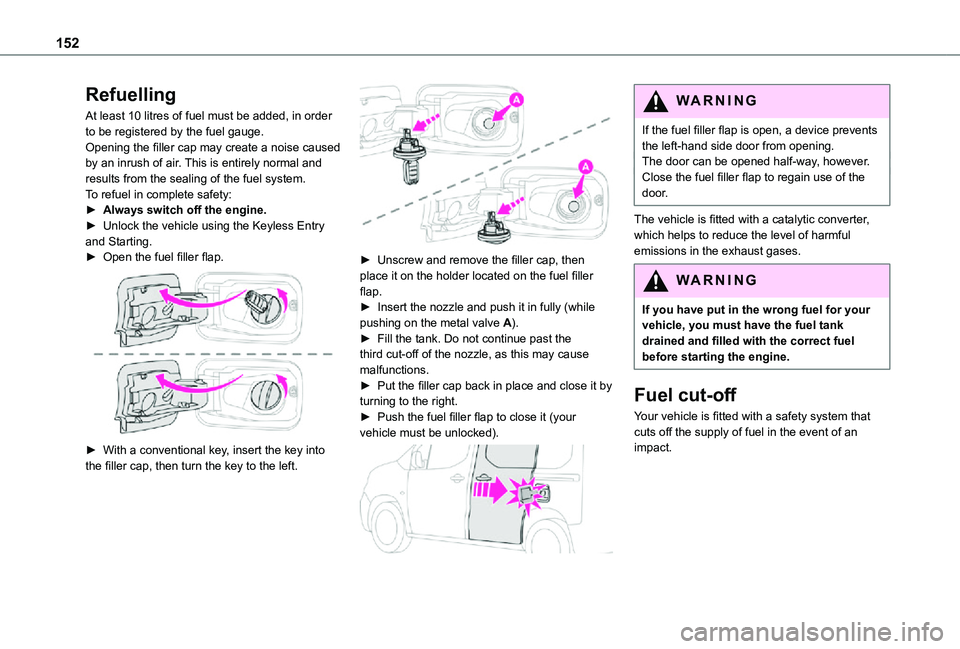
At least 10 litres of fuel must be added, in order to be registered by the fuel gauge.Opening the filler cap may create a noise caused by an inrush of air. This is entirely normal and results from the sealing of the fuel system.To refuel in complete safety:► Always switch off the engine.► Unlock the vehicle using the Keyless Entry and Starting.► Open the fuel filler flap.
► With a conventional key, insert the key into the filler cap, then turn the key to the left.
► Unscrew and remove the filler cap, then place it on the holder located on the fuel filler flap.► Insert the nozzle and push it in fully (while pushing on the metal valve A).► Fill the tank. Do not continue past the third cut-off of the nozzle, as this may cause malfunctions.► Put the filler cap back in place and close it by turning to the right.► Push the fuel filler flap to close it (your vehicle must be unlocked).
WARNI NG
If the fuel filler flap is open, a device prevents the left-hand side door from opening.The door can be opened half-way, however.Close the fuel filler flap to regain use of the door.
The vehicle is fitted with a catalytic converter, which helps to reduce the level of harmful emissions in the exhaust gases.
WARNI NG
If you have put in the wrong fuel for your vehicle, you must have the fuel tank drained and filled with the correct fuel before starting the engine.
Fuel cut-off
Your vehicle is fitted with a safety system that cuts off the supply of fuel in the event of an impact.
Page 166 of 272
166
If swallowed, immediately wash out the mouth with clean water and then drink plenty of water.In certain conditions (high temperature, for example), the risk of release of ammonia cannot be excluded: do not inhale the fluid. Ammonia vapours have an irritant effect on mucous membranes (eyes, nose and throat).
WARNI NG
Store AdBlue® out of the reach of children, in
its original container.
Procedure
Before starting the top-up procedure, ensure that the vehicle is parked on a flat and level surface.In wintry conditions, ensure that the temperature of the vehicle is above -11 °C. Otherwise the AdBlue® may be frozen and so cannot be poured into its tank. Park the vehicle in a warmer area for a few hours to allow the top-up to be carried out.
WARNI NG
Never put the AdBlue® into the Diesel fuel tank.
WARNI NG
If any AdBlue® is splashed, or if there are any spillages on the bodywork, rinse immediately with cold water or wipe with a damp cloth.If the fluid has crystallised, clean it off using a sponge and hot water.
WARNI NG
Important: in the event of a top-up after a breakdown because of a lack of AdBlue, it is essential to wait around 5 minutes before switching on the ignition, without opening the driver’s door, unlocking the vehicle, introducing the key into the ignition switch, or introducing the key of the “Keyless Entry and Starting ” system into the passenger compartment.Switch on the ignition, then wait for 10 seconds before starting the engine.
► Switch off the ignition and remove the key from the switch to switch off the engine.or► With Keyless Entry and Starting, press the "START/STOP" button to switch off the engine.
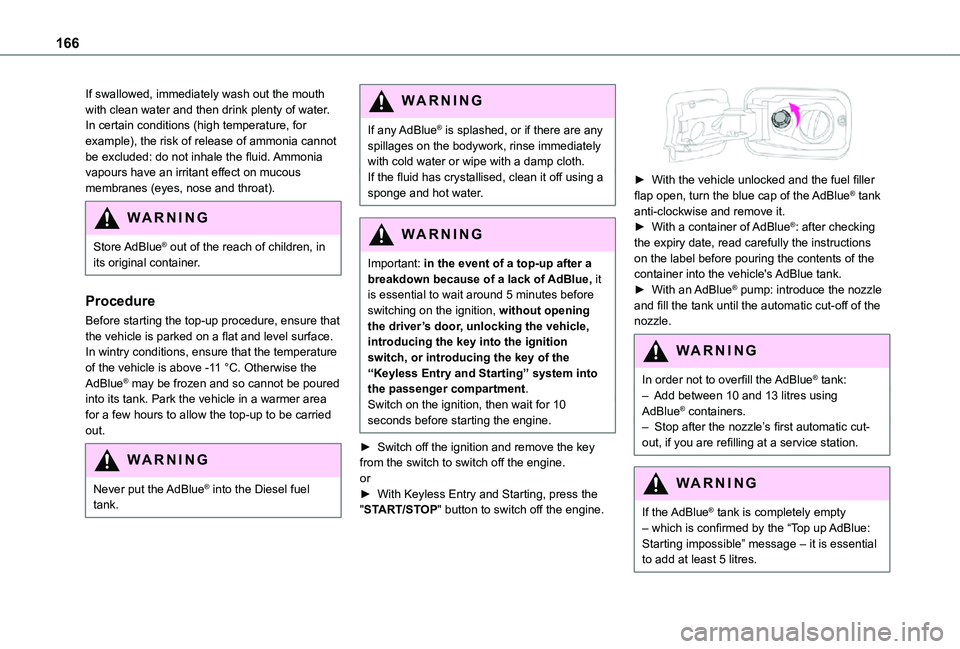
► With the vehicle unlocked and the fuel filler flap open, turn the blue cap of the AdBlue® tank anti-clockwise and remove it.► With a container of AdBlue®: after checking the expiry date, read carefully the instructions on the label before pouring the contents of the container into the vehicle's AdBlue tank.► With an AdBlue® pump: introduce the nozzle and fill the tank until the automatic cut-off of the nozzle.
WARNI NG
In order not to overfill the AdBlue® tank:– Add between 10 and 13 litres using AdBlue® containers.– Stop after the nozzle’s first automatic cut-out, if you are refilling at a service station.
WARNI NG
If the AdBlue® tank is completely empty – which is confirmed by the “Top up AdBlue: Starting impossible” message – it is essential to add at least 5 litres.