2021 TOYOTA PROACE CITY VERSO key
[x] Cancel search: keyPage 29 of 272
29
Access
2
Central locking not
functioning
Use these procedures in the following cases:– Central locking malfunction.– Battery disconnected or discharged.
WARNI NG
In the event of a malfunction of the central
locking system, the battery must be disconnected to ensure that the vehicle is locked fully.
Locking part of the vehicle (front
passenger door/sliding side door/
side-hinged doors)
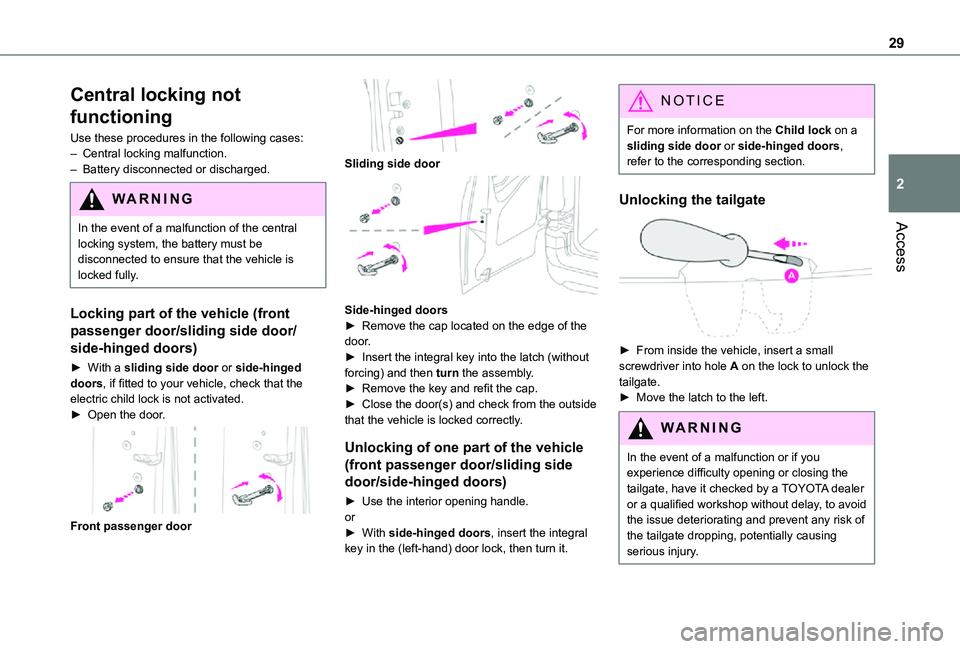
► With a sliding side door or side-hinged doors, if fitted to your vehicle, check that the electric child lock is not activated.► Open the door.
Front passenger door
Sliding side door
Side-hinged doors► Remove the cap located on the edge of the door.► Insert the integral key into the latch (without forcing) and then turn the assembly.► Remove the key and refit the cap. ► Close the door(s) and check from the outside that the vehicle is locked correctly.
Unlocking of one part of the vehicle
(front passenger door/sliding side
door/side-hinged doors)
► Use the interior opening handle.or► With side-hinged doors, insert the integral key in the (left-hand) door lock, then turn it.
NOTIC E
For more information on the Child lock on a sliding side door or side-hinged doors, refer to the corresponding section.
Unlocking the tailgate
► From inside the vehicle, insert a small screwdriver into hole A on the lock to unlock the tailgate.► Move the latch to the left.
WARNI NG
In the event of a malfunction or if you experience difficulty opening or closing the tailgate, have it checked by a TOYOTA dealer or a qualified workshop without delay, to avoid the issue deteriorating and prevent any risk of the tailgate dropping, potentially causing
serious injury.
Page 30 of 272
30
Changing the battery
If the battery is discharged, this warning lamp comes on, accompanied by an audible signal and an onscreen message.
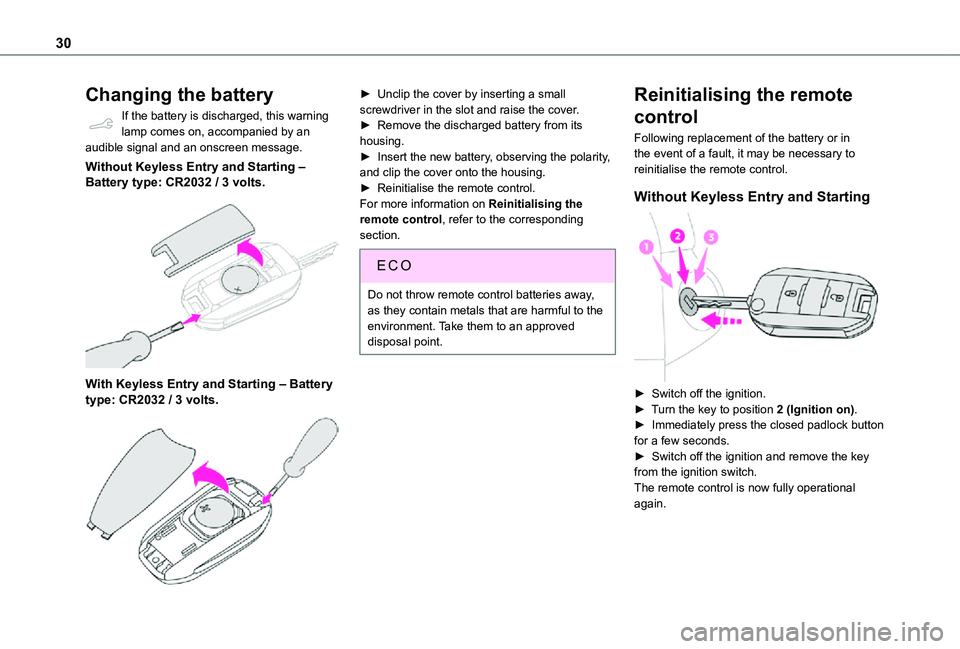
Without Keyless Entry and Starting ‒ Battery type: CR2032 / 3 volts.
With Keyless Entry and Starting ‒ Battery type: CR2032 / 3 volts.
► Unclip the cover by inserting a small screwdriver in the slot and raise the cover.► Remove the discharged battery from its housing.► Insert the new battery, observing the polarity, and clip the cover onto the housing.► Reinitialise the remote control.For more information on Reinitialising the remote control, refer to the corresponding section.
EC O
Do not throw remote control batteries away, as they contain metals that are harmful to the environment. Take them to an approved disposal point.
Reinitialising the remote
control
Following replacement of the battery or in the event of a fault, it may be necessary to reinitialise the remote control.
Without Keyless Entry and Starting
► Switch off the ignition.► Turn the key to position 2 (Ignition on).► Immediately press the closed padlock button for a few seconds.
► Switch off the ignition and remove the key from the ignition switch.The remote control is now fully operational again.
Page 31 of 272
31
Access
2
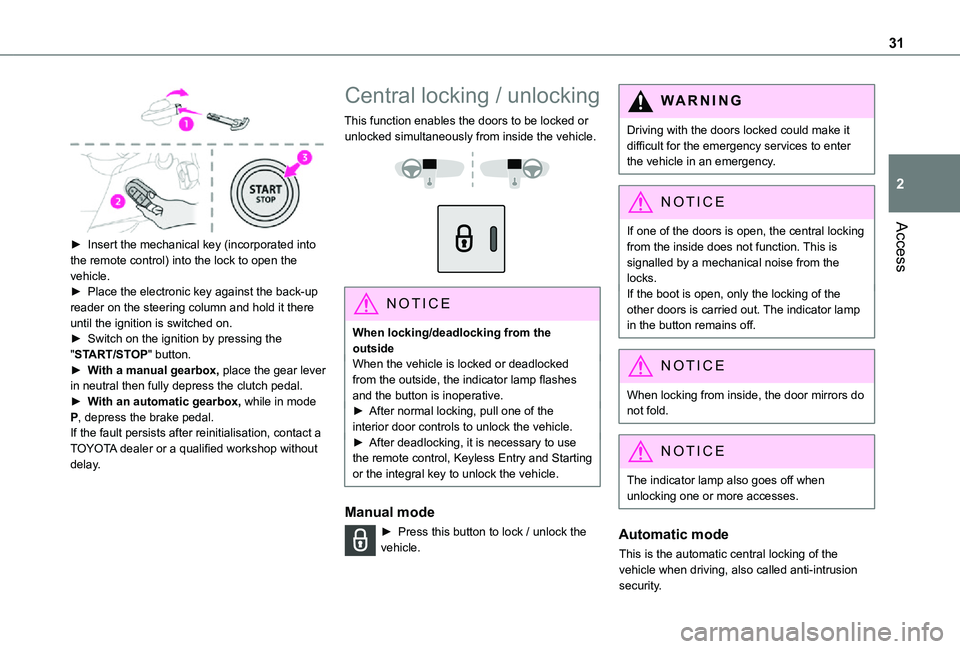
► Insert the mechanical key (incorporated into the remote control) into the lock to open the vehicle.► Place the electronic key against the back-up reader on the steering column and hold it there until the ignition is switched on.► Switch on the ignition by pressing the "START/STOP" button.► With a manual gearbox, place the gear lever in neutral then fully depress the clutch pedal.► With an automatic gearbox, while in mode P, depress the brake pedal.If the fault persists after reinitialisation, contact a TOYOTA dealer or a qualified workshop without delay.
Central locking / unlocking
This function enables the doors to be locked or unlocked simultaneously from inside the vehicle.
NOTIC E
When locking/deadlocking from the outsideWhen the vehicle is locked or deadlocked from the outside, the indicator lamp flashes and the button is inoperative.► After normal locking, pull one of the interior door controls to unlock the vehicle.► After deadlocking, it is necessary to use the remote control, Keyless Entry and Starting or the integral key to unlock the vehicle.
Manual mode
► Press this button to lock / unlock the vehicle.
WARNI NG
Driving with the doors locked could make it difficult for the emergency services to enter the vehicle in an emergency.
NOTIC E
If one of the doors is open, the central locking
from the inside does not function. This is signalled by a mechanical noise from the locks.If the boot is open, only the locking of the other doors is carried out. The indicator lamp in the button remains off.
NOTIC E
When locking from inside, the door mirrors do not fold.
NOTIC E
The indicator lamp also goes off when unlocking one or more accesses.
Automatic mode
This is the automatic central locking of the vehicle when driving, also called anti-intrusion security.
Page 35 of 272
35
Access
2
The alarm is triggered if anyone breaks a window, enters the passenger compartment or moves inside the vehicle.
NOTIC E
If your vehicle is fitted with Additional Heating / Ventilation, volumetric monitoring is not compatible with this system.For more information on Additional Heating / Ventilation, refer to the corresponding section.
Anti-tilt monitoring
The system checks for any change in the attitude of the vehicle.The alarm is triggered if the vehicle is lifted or moved.
NOTIC E
When the vehicle is parked, the alarm will not be triggered if the vehicle is knocked.
Locking the vehicle with full
alarm system
Activation
► Switch off the engine and exit the vehicle.► Lock the vehicle using the remote control or the "Keyless Entry and Starting" system.
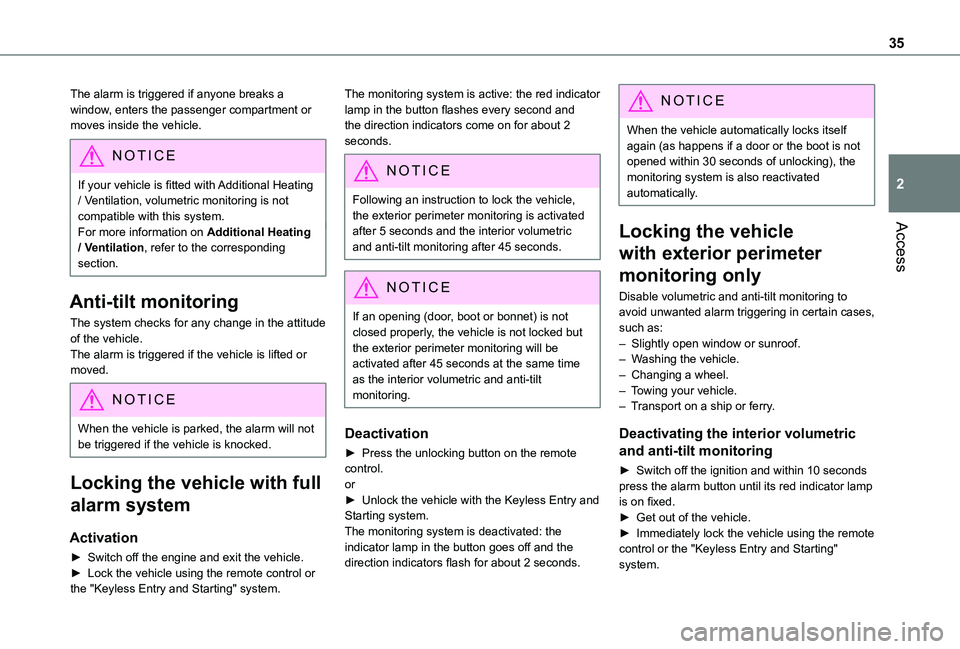
The monitoring system is active: the red indicator lamp in the button flashes every second and the direction indicators come on for about 2 seconds.
NOTIC E
Following an instruction to lock the vehicle, the exterior perimeter monitoring is activated after 5 seconds and the interior volumetric
and anti-tilt monitoring after 45 seconds.
NOTIC E
If an opening (door, boot or bonnet) is not closed properly, the vehicle is not locked but the exterior perimeter monitoring will be activated after 45 seconds at the same time as the interior volumetric and anti-tilt monitoring.
Deactivation
► Press the unlocking button on the remote control.or► Unlock the vehicle with the Keyless Entry and Starting system.The monitoring system is deactivated: the
indicator lamp in the button goes off and the direction indicators flash for about 2 seconds.
NOTIC E
When the vehicle automatically locks itself again (as happens if a door or the boot is not opened within 30 seconds of unlocking), the monitoring system is also reactivated automatically.
Locking the vehicle
with exterior perimeter
monitoring only
Disable volumetric and anti-tilt monitoring to avoid unwanted alarm triggering in certain cases, such as:– Slightly open window or sunroof. – Washing the vehicle.– Changing a wheel.– Towing your vehicle.– Transport on a ship or ferry.
Deactivating the interior volumetric
and anti-tilt monitoring
► Switch off the ignition and within 10 seconds press the alarm button until its red indicator lamp is on fixed.► Get out of the vehicle.► Immediately lock the vehicle using the remote control or the "Keyless Entry and Starting" system.
Page 36 of 272
36
Only the exterior perimeter monitoring is activated; the red indicator lamp in the button flashes every second.
NOTIC E
To be taken into account, the deactivation must be carried out every time the ignition is switched off.
Reactivating the interior volumetric
and anti-tilt monitoring
► Deactivate the perimeter monitoring by unlocking the vehicle with the remote control or the Keyless Entry and Starting system.The indicator lamp in the button goes off.► Reactivate all monitoring by locking the vehicle with the remote control or the Keyless Entry and Starting system.The red indicator lamp in the button once again flashes every second.
Triggering of the alarm
This is indicated by sounding of the siren and flashing of the direction indicators for 30 seconds.Depending on the country of sale, certain monitoring functions remain active until the alarm has been triggered eleven times consecutively.When the vehicle is unlocked using the remote control or the "Keyless Entry and Starting" system, rapid flashing of the red indicator lamp
in the button informs you that the alarm was triggered during your absence. When the ignition is switched on, the flashing stops immediately.
Failure of the remote control
To deactivate the monitoring functions:► unlock the vehicle using the key (integral to the remote control) in the driver's door lock,► open the door; the alarm is triggered,► switch on the ignition; the alarm stops; the indicator lamp in the button goes off.
Locking the vehicle without
activating the alarm
► Lock or deadlock the vehicle using the key (integral to the remote control) in the driver's door lock.
Malfunction
When the ignition is switched on, fixed illumination of the red indicator lamp in the button indicates a malfunction of the system.
Have it checked by a TOYOTA dealer or a qualified workshop.
Automatic activation
(Depending on the country of sale)The system is activated automatically 2 minutes after the last door or the boot is closed.► To avoid triggering the alarm on entering the vehicle, first press the unlocking button on the
remote control or unlock the vehicle using the “Keyless Entry and Starting” system.
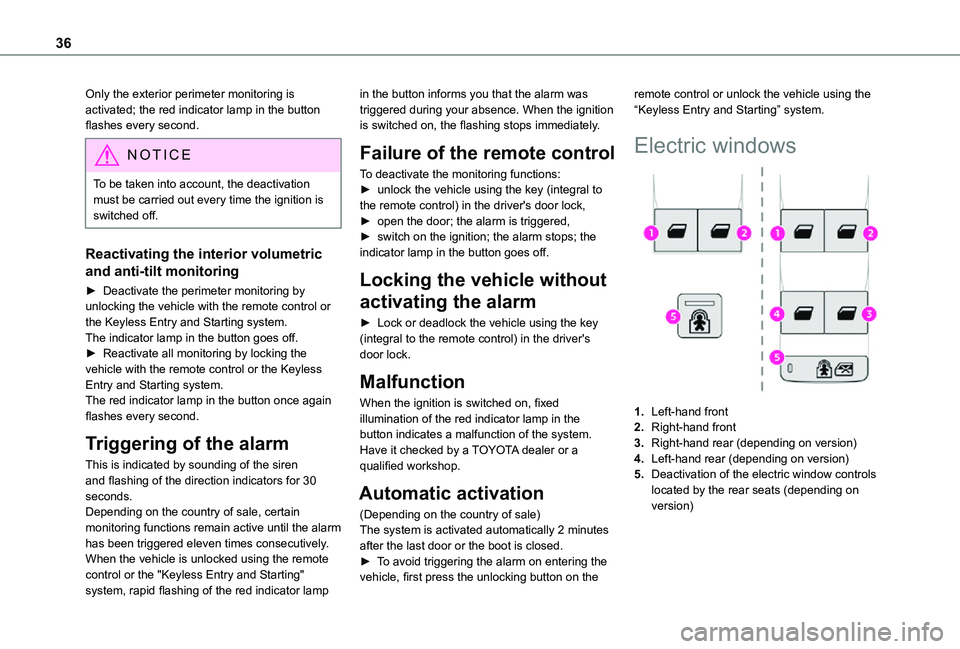
Electric windows
1.Left-hand front
2.Right-hand front
3.Right-hand rear (depending on version)
4.Left-hand rear (depending on version)
5.Deactivation of the electric window controls located by the rear seats (depending on version)
Page 37 of 272
37
Access
2
Manual operation
► To open/close the window, press/pull the switch without passing the point of resistance; the window stops as soon as the switch is released.
Automatic operation
(Depending on version)► To open/close the window, press/pull the switch past its resistance point: the window opens/closes completely when the switch is released.Operating the switch again stops the movement of the window.
NOTIC E
Window controls remain operational for approximately 45 seconds after switching off the ignition or after locking the vehicle.After that time, the controls are disabled. To reactivate them, switch on the ignition or unlock the vehicle.
Anti-pinch
(Depending on version)If the window meets an obstacle while rising, it stops and immediately partially lowers again.
Deactivating the rear
controls for the rear electric
windows
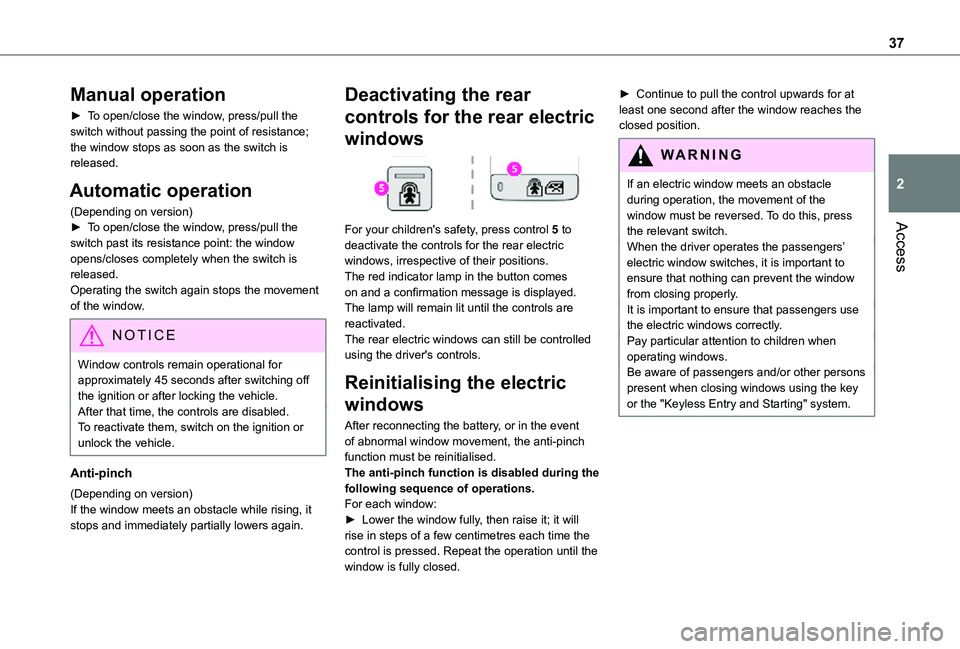
For your children's safety, press control 5 to
deactivate the controls for the rear electric windows, irrespective of their positions.The red indicator lamp in the button comes on and a confirmation message is displayed. The lamp will remain lit until the controls are reactivated.The rear electric windows can still be controlled using the driver's controls.
Reinitialising the electric
windows
After reconnecting the battery, or in the event of abnormal window movement, the anti-pinch function must be reinitialised.The anti-pinch function is disabled during the following sequence of operations.For each window:► Lower the window fully, then raise it; it will rise in steps of a few centimetres each time the control is pressed. Repeat the operation until the window is fully closed.
► Continue to pull the control upwards for at least one second after the window reaches the closed position.
WARNI NG
If an electric window meets an obstacle during operation, the movement of the window must be reversed. To do this, press the relevant switch.
When the driver operates the passengers’ electric window switches, it is important to ensure that nothing can prevent the window from closing properly.It is important to ensure that passengers use the electric windows correctly.Pay particular attention to children when operating windows.Be aware of passengers and/or other persons present when closing windows using the key or the "Keyless Entry and Starting" system.
Page 43 of 272
43
Ease of use and comfort
3
WARNI NG
As a safety measure, the mirrors should be adjusted to reduce the blind spots.The objects observed are, in reality, closer than they appear.Take this into account when assessing the distance of vehicles approaching from behind.
Manual folding
You can manually fold the mirrors (parking obstruction, narrow garage, etc.)► Turn the mirror towards the vehicle.
Electric folding
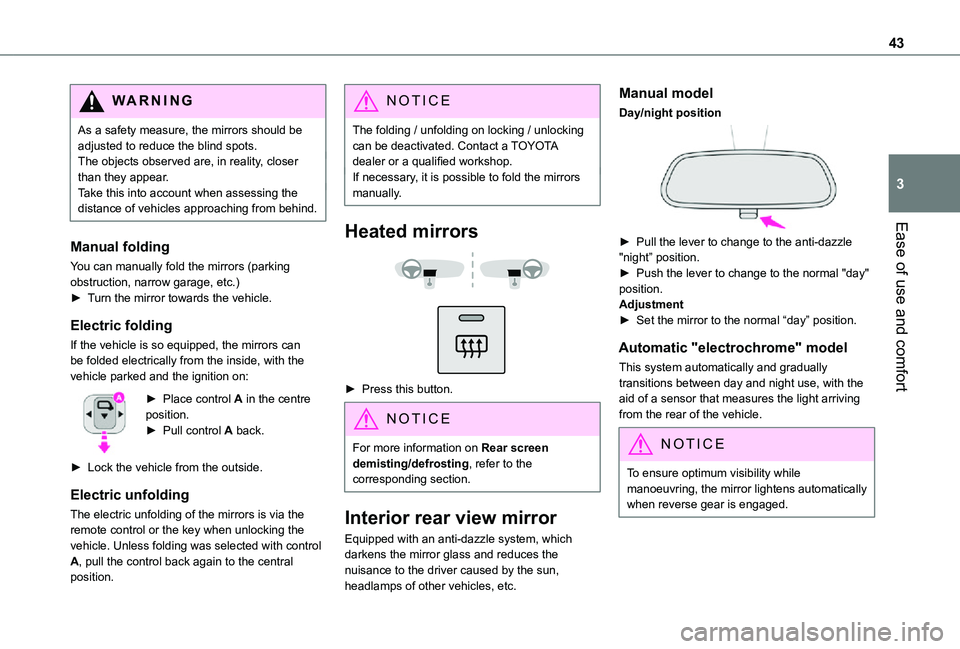
If the vehicle is so equipped, the mirrors can be folded electrically from the inside, with the vehicle parked and the ignition on:
► Place control A in the centre position.► Pull control A back.
► Lock the vehicle from the outside.
Electric unfolding
The electric unfolding of the mirrors is via the remote control or the key when unlocking the vehicle. Unless folding was selected with control A, pull the control back again to the central position.
NOTIC E
The folding / unfolding on locking / unlocking can be deactivated. Contact a TOYOTA dealer or a qualified workshop.If necessary, it is possible to fold the mirrors manually.
Heated mirrors
► Press this button.
NOTIC E
For more information on Rear screen demisting/defrosting, refer to the corresponding section.
Interior rear view mirror
Equipped with an anti-dazzle system, which
darkens the mirror glass and reduces the nuisance to the driver caused by the sun, headlamps of other vehicles, etc.
Manual model
Day/night position
► Pull the lever to change to the anti-dazzle
"night” position.► Push the lever to change to the normal "day" position.Adjustment► Set the mirror to the normal “day” position.
Automatic "electrochrome" model
This system automatically and gradually transitions between day and night use, with the aid of a sensor that measures the light arriving from the rear of the vehicle.
NOTIC E
To ensure optimum visibility while manoeuvring, the mirror lightens automatically when reverse gear is engaged.
Page 51 of 272
51
Ease of use and comfort
3
Wireless smartphone
charger
It allows wireless charging of a portable device such as a smartphone, using the magnetic induction principle, in accordance with the Qi 1.1 standard.The portable device to be charged must be compatible with the Qi standard, either by design or by using a compatible holder or shell.The charging area is identified by the Qi symbol.The charger works with the engine running and with the Stop & Start system in STOP mode.Charging is managed by the smartphone.With Keyless Entry and Starting, the charger’s operation may be briefly disrupted when a door is opened or the ignition is switched off.
Charging
► With the charging area clear, place a device in its centre.
When the portable device is detected, the charger’s indicator lamp lights up green. It remains lit for the whole time that the battery is being charged.
WARNI NG
The system is not designed to charge multiple devices simultaneously.
WARNI NG
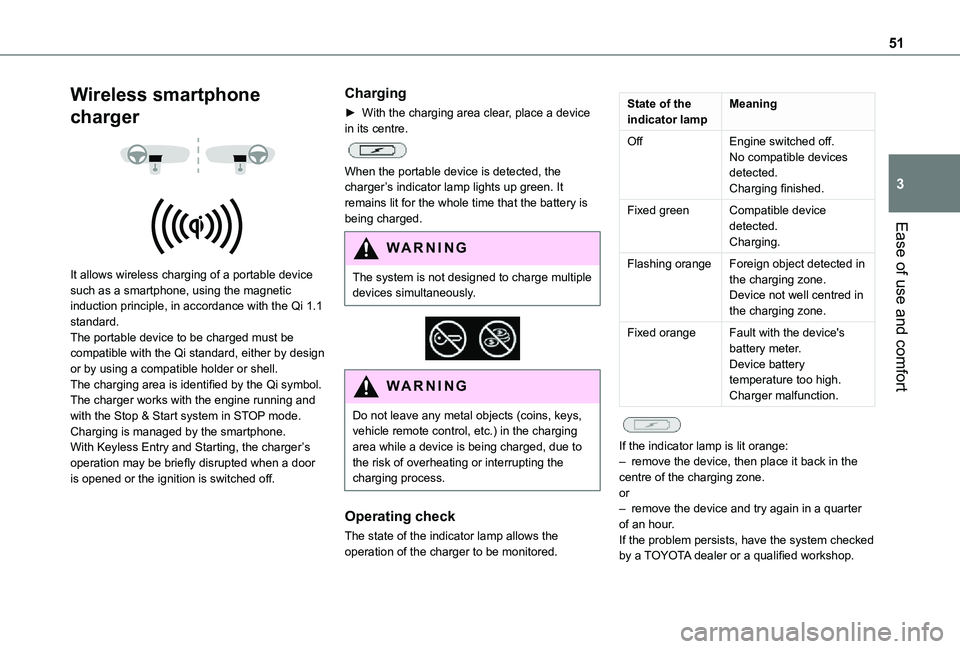
Do not leave any metal objects (coins, keys, vehicle remote control, etc.) in the charging area while a device is being charged, due to the risk of overheating or interrupting the charging process.
Operating check
The state of the indicator lamp allows the
operation of the charger to be monitored.
State of the indicator lampMeaning
OffEngine switched off.No compatible devices detected.Charging finished.
Fixed greenCompatible device detected.Charging.
Flashing orangeForeign object detected in the charging zone.Device not well centred in the charging zone.
Fixed orangeFault with the device's battery meter.Device battery temperature too high.Charger malfunction.
If the indicator lamp is lit orange:– remove the device, then place it back in the centre of the charging zone.or– remove the device and try again in a quarter of an hour.If the problem persists, have the system checked by a TOYOTA dealer or a qualified workshop.