2021 TOYOTA PROACE CITY VERSO key
[x] Cancel search: keyPage 234 of 272
234
Press “OK” to confirm your selection.
NOTIC E
The "Notifications", in the upper bar, can be accessed at any time.
NOTIC E
Danger zone alerts may or may not be displayed, depending on the applicable legislation and subscription to the corresponding service.
When "TOMTOM TRAFFIC” appears, the services are available.
NOTIC E
The services offered with connected navigation are as follows.A Connected Services pack:– Weather,– Filling stations,– Car park,– Traffic,– POI local search.A Danger area pack (optional).
Declaration: "Risk areas
alert"
WARNI NG
To send information about danger zones, select the option:Allow declaration of danger zones
Press Navigation to display the main
page.Press the "Declare a new danger zone" button located in the side bars or the upper bar of the touch screen (depending on equipment).Select the "Type” option to select the type of "Danger area".Select the ""Speed" option and enter it using the virtual keypad.Press "OK" to save and send the information.
Displaying fuel information
Press Navigation to display the main page.Press this button to display the list of services.Press "POI on map" to display the list of points of interest.Press one of the buttons to search for "Stations".
Activate/deactivate "Stations".
Press this button to display a secondary page.Select the "Settings” tab.
Select the desired fuel.
Press "OK" to save.
Displaying charging station
details
Press Navigation to display the main page.Press this button to display the list of services.Press "POI on map" to display the list of points of interest.Press one of the buttons to search for "Stations".Activate/deactivate "Stations".
Press this button to display a secondary page.Select the "Settings” tab.
Select the desired connector type.
Press "OK" to save.
Page 238 of 272
238
NOTIC E
The "Mobile internet data" profile must be activated for connected navigation (if the vehicle does not have "Emergency and assistance call" services), after first activating smartphone connection sharing.
Select one or more profiles.
Press "OK" to confirm.
Wi-Fi connection
Network connection via the smartphone's Wi-Fi.Press Connect-App to display the main page.Press the "OPTIONS" button to access the secondary page.Select "Wi-Fi network connection".
Select the "Secured", "Not secured" or "Stored” tab.
Select a network.
Using the virtual keypad , enter the Wi-Fi network "Key" and "Password".Press "OK" to establish the connection.
NOTIC E
The Wi-Fi connection and Wi-Fi connection sharing are exclusive.
Wi-Fi connection sharing
Creation of a local Wi-Fi network by the system.Press Connect-App to display the main page.Press the "OPTIONS" button to access the secondary page.Select "Share Wi-Fi connection".
Select the "Activation" tab to activate or deactivate Wi-Fi connection sharing.And/orSelect the "Settings" tab to change the system’s network name and password.Press "OK" to confirm.
NOTIC E
To protect against unauthorised access and to make all systems as secure as possible, the use of a security code or a complex password is recommended.
Managing connections
Press Connect-App to display the main page.Press the "OPTIONS" button to access the secondary page.Select "Manage connection".
With this function, you can view the access to connected services, the availability of connected services and modify the connection mode.
Radio
Selecting a station
Press Radio Media to display the main page.Press "Frequency".Press one of the buttons to perform an automatic search for radio stations.OrMove the slider to manually search for
frequencies up or down.OrPress Radio Media to display the main page.Press the "OPTIONS" button to access the secondary page.Select "Radio stations" on the secondary page.Press "Frequency".Enter the values using the virtual keypad.
Page 243 of 272
243
TOYOTA Connect Nav
12
Press the "OPTIONS" button to access the secondary page.Select "Bluetooth connection" to display the list of paired devices.Press the "Details" button.
Select one or more profiles.
Press "OK" to confirm.
Managing paired telephones
This function lets you connect or disconnect a device or delete a pairing.Press Telephone to display the main page.Press the "OPTIONS" button to access the secondary page.Select "Bluetooth connection" to display the list of paired devices.Press on the name of the telephone selected in the list to disconnect it.Press again to connect it.
Deleting a telephone
Select the basket at top right of the screen to display a basket alongside the telephone chosen.Press the basket alongside the telephone chosen to delete it.
Receiving a call
An incoming call is announced by a ring and a superimposed display in the screen.Make a short press on the steering mounted telephone button to accept an incoming call.AndMake a long press
on the steering mounted telephone button to reject the call.OrSelect "End call" on the touch screen.
Making a call
WARNI NG
Using the telephone is not recommended while driving.Park the vehicle.Make the call using the steering mounted controls.
Calling a new number
Press Telephone to display the main page. Enter the phone number using the digital keypad.Press "Call" to start the call.
Calling a contact
Press Telephone to display the main page.Or press and hold
the steering mounted telephone button.
Select "Contact".Select the desired contact from the displayed list.Select "Call".
Calling a recently used
number
Press Telephone to display the main page.OrPress and hold
the steering mounted telephone button.
Select "Calls".
Select the desired contact from the displayed list.
NOTIC E
It is always possible to make a call directly from the telephone; as a safety measure, first park the vehicle.
Page 245 of 272
245
TOYOTA Connect Nav
12
Settings
Audio settings
Press Settings to display the main page.
Select "Audio settings".
Then select "Ambience", "Position"; "Sound", "Voice" or "Ringtone".Press "OK" to save the settings.
NOTIC E
The balance/distribution (or spatialisation with the Arkamys© system) uses audio processing to adjust the sound quality according to the number of passengers in the vehicle.Available only with the front and rear speaker configuration.
NOTIC E
The Ambience setting (choice of 6 ambiences) and the Bass, Medium and Treble sound settings are different and independent for each audio source.Activate or deactivate "Loudness".
The "Position” settings (All passengers, Driver and Front only) are common to all sources.Activate or deactivate "Touch tones", "Volume linked to speed" and "Auxiliary input".
NOTIC E
Onboard audio: Arkamys Sound Staging©
optimises the sound distribution inside the passenger compartment.
Configuring profiles
Press Settings to display the main page.
Press the "OPTIONS" button to access the secondary page.Select "Setting of the profiles".
Select "Profile 1", "Profile 2", "Profile 3” or "Common profile".Press this button to enter a name for the profile using the virtual keypad.Press "OK" to confirm.
Press this button to add a photograph to the profile.Insert a USB memory stick containing the photograph in the USB port.Select the photograph.
Press "OK" to accept the transfer of the photograph.Press "OK" again to save the settings.
NOTIC E
The location for the photograph is square; the system reshapes the original photograph if in another format.
Press this button to reset the selected profile.
WARNI NG
Resetting the selected profile activates the English language by default.
Select a "Profile" (1 or 2 or 3) to link "Audio settings" with it.Select "Audio settings".
Then select "Ambience", "Position"; "Sound", "Voice" or "Ringtone".Press "OK" to save the selected profile’s settings.
Modifying system settings
Press Settings to display the main page.
Press the "OPTIONS" button to access the secondary page.
Page 246 of 272
246
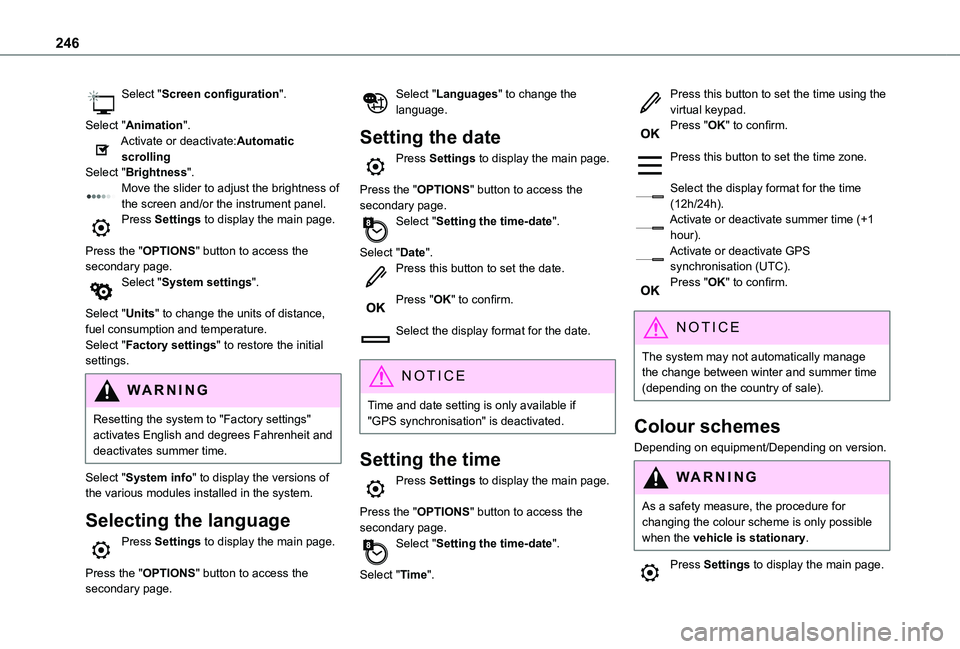
Select "Screen configuration".
Select "Animation".Activate or deactivate:Automatic scrollingSelect "Brightness".Move the slider to adjust the brightness of the screen and/or the instrument panel.Press Settings to display the main page.
Press the "OPTIONS" button to access the secondary page.Select "System settings".
Select "Units" to change the units of distance, fuel consumption and temperature.Select "Factory settings" to restore the initial settings.
WARNI NG
Resetting the system to "Factory settings" activates English and degrees Fahrenheit and deactivates summer time.
Select "System info" to display the versions of the various modules installed in the system.
Selecting the language
Press Settings to display the main page.
Press the "OPTIONS" button to access the secondary page.
Select "Languages" to change the language.
Setting the date
Press Settings to display the main page.
Press the "OPTIONS" button to access the secondary page.Select "Setting the time-date".
Select "Date".Press this button to set the date.
Press "OK" to confirm.
Select the display format for the date.
NOTIC E
Time and date setting is only available if "GPS synchronisation" is deactivated.
Setting the time
Press Settings to display the main page.
Press the "OPTIONS" button to access the secondary page.Select "Setting the time-date".
Select "Time".
Press this button to set the time using the virtual keypad.Press "OK" to confirm.
Press this button to set the time zone.
Select the display format for the time (12h/24h).Activate or deactivate summer time (+1 hour).Activate or deactivate GPS synchronisation (UTC).Press "OK" to confirm.
NOTIC E
The system may not automatically manage the change between winter and summer time (depending on the country of sale).
Colour schemes
Depending on equipment/Depending on version.
WARNI NG
As a safety measure, the procedure for changing the colour scheme is only possible when the vehicle is stationary.
Press Settings to display the main page.
Page 252 of 272

252
Filter, particle 162–163Filter, passenger compartment 55, 162Finisher 176Fitting a wheel 174–176Fitting roof bars 157–158Fittings, interior 48, 52Flap, fuel filler 152–153Flashing indicators 67–68, 180Fluid, brake 161Fluid, engine coolant 161Foglamp, rear 180Foglamps 180Foglamps, front 66, 178Foglamps, rear 66Folding the rear seats 44–45Frequency (radio) 239Fuel 7, 151Fuel consumption 7Fuel tank 151, 153Fusebox, dashboard 182Fusebox, engine compartment 182, 184Fuses 182–184
G
Gauge, fuel 151–152Gearbox, automatic 104, 108, 11 0–11 3, 11 5, 163Gearbox, manual 108–109, 11 5, 163Gear lever, automatic gearbox 11 0–11 3Gear lever, manual gearbox 109
Gear shift indicator ~ Gear efficiency indicator 11 3Glove box 48G.P.S. 232
H
Hazard warning lamps 55, 78headlamp adjustment 70Headlamp adjustment 70Headlamps, automatic dipping 69–70, 140Headlamps, automatic illumination 67–69Headlamps, dipped beam 66, 178Headlamps, halogen 177Headlamps, main beam 66, 178–179Head restraints, front 47Head restraints, rear 44Head-up display 11 7–11 8Heating 55–57, 61–63Heating, additional 35, 62–63Heating, programmable 35, 62–63
Hill Assist Descent Control (HADC) 82–83Hill Descent Control 82–83Hill start assist 108–109Horn 78
I
Ignition 104, 244Ignition on 104
Immobiliser, electronic 101Indicator, coolant temperature 16Indicator lamps, operation 66Indicators, direction 67Inflating tyres 164, 194Inflating tyres and accessories (using the kit) 170, 172Infrared camera 11 9Instrument panel 9, 120Internet browser 232, 237ISOFIX 96
J
Jack 173Jump starting 185
K
Key 23, 25–26, 28–29
Key, electronic 23–24, 104Keyless Entry a nd Starting 23, 25–27, 102, 104Key with remote control 26–27Kit, hands-free 202–203, 217–218, 242Kit, puncture repair 169Kit, temporary puncture repair 169–170, 172–173
Page 254 of 272

254
R
Radar (warnings) 11 9Radio 197–198, 212, 214, 238–239Radio, digital (Digital Audio Broadcasting - DAB) 198, 213, 240Range, AdBlue 162RDS 212, 239Rear screen, demisting 61Recharging the battery 186Recirculation, air 57–58Recovery 188Reduction of electrical load 157Regeneration of the particle filter 163Reinitialisation of the under-inflation detection system 11 7Reinitialising the remote control 30Reminder, key in ignition 104Reminder, lighting on 67Remote control 23–26, 28, 101Removing a wheel 174–176Removing the mat 48
Replacing bulbs 176–178Replacing fuses 182–184Replacing the air filter 163Replacing the oil filter 163Replacing the passenger compartment filter 162Reservoir, screenwash 161Reversing camera 11 9, 145–146Reversing lamps 180Roof 48
Roof bars 157–158Running out of fuel (Diesel) 169
S
Safety, children 86, 89–93, 96–98Saturation of the particle filter (Diesel) 163Screen menu map 216Screen, multifunction (with audio system) 197Screenwash, front 71Screenwash, rear 72SCR (Selective Catalytic Reduction) 164Seat belts 83–85, 92Seat, rear bench 44, 46Seats, front 39–41Seats, heated 42Seats, rear 39, 44–46, 90Sensors (warnings) 120Serial number, vehicle 194Service indicator 16Servicing 16, 162
Settings, system 219, 245Sidelamps 66, 68, 178–179Side parking sensors 144Side repeater 178Sliding side door, electric 27, 34Snow chains 11 6, 153–154Snow chains, link 154Socket, 12 V accessory 48–49Socket, 220 V 50Socket, auxiliary 201
Socket, Jack 201Speed limiter 123–126, 133Speed limit recognition 120, 122Speedometer 120Stability control (ESC) 78–81Starting a Diesel engine 151Starting the engine 101Starting the vehicle 102, 104, 11 0–11 3Starting using another battery 185Station, radio 197, 212, 238–239Stay, bonnet 159Steering mounted controls, audio 196, 209, 224Steering wheel, adjustment 42Stickers, customising ~ Stickers, expressive 168Stopping the vehicle 104, 11 0–11 3Stop & Start 22, 56, 60, 11 4–11 5, 151, 158, 162, 185, 187Storage 48Storage boxes 52Stowing rings 54Sunshine sensor 55
Switching off the engine 101, 103Synchronising the remote control 30
T
Tables of fuses 182–184Tank, fuel 151–153Technical data 192–193Telephone 51, 202–205, 217–219, 242–244