2021 RAM PROMASTER CITY tow bar
[x] Cancel search: tow barPage 80 of 280

78STARTING AND OPERATING
(Continued)
Weight-Distributing Hitch
The weight-distributing hitch works by applying
leverage through spring (load) bars. They are
typically used for heavier loads to distribute
trailer tongue weight to the tow vehicle's front
axle and the trailer axle(s). When used in
accordance with the manufacturer's directions,
it provides for a more level ride, offering more
consistent steering and brake control thereby
enhancing towing safety. The addition of a
friction/hydraulic sway control also dampens
sway caused by traffic and crosswinds and
contributes positively to tow vehicle and trailer
stability. Trailer Sway Control (TSC) and a weight
distributing (load equalizing) hitch are recommended for heavier Tongue Weights (TW)
and may be required depending on vehicle and
trailer configuration/loading to comply with
Gross Axle Weight Rating (GAWR) requirements.
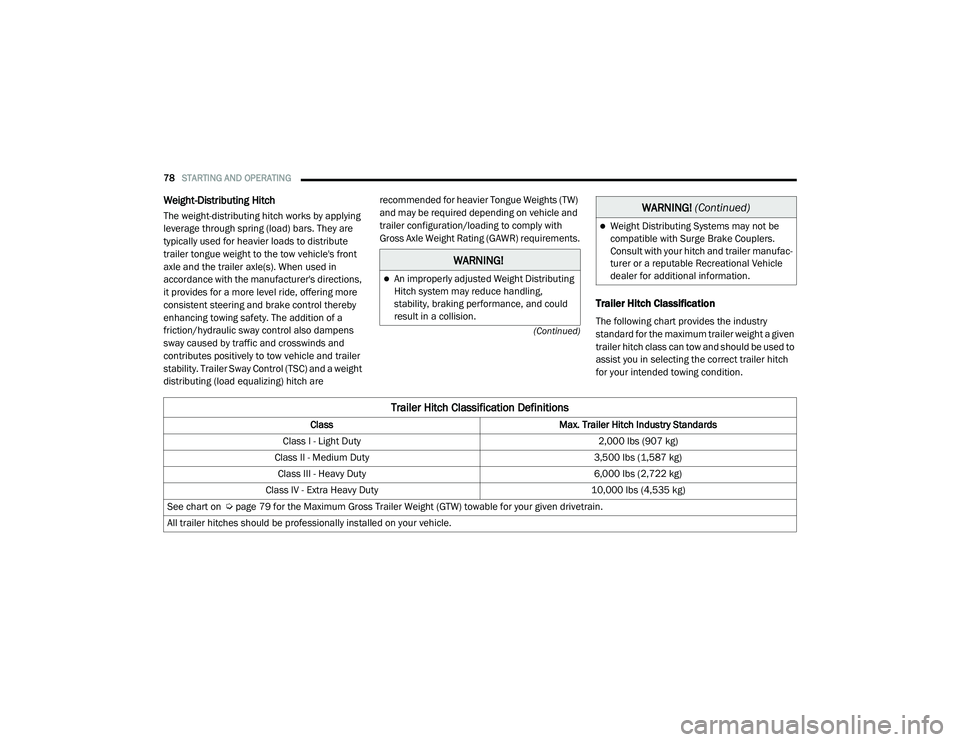
Trailer Hitch Classification
The following chart provides the industry
standard for the maximum trailer weight a given
trailer hitch class can tow and should be used to
assist you in selecting the correct trailer hitch
for your intended towing condition.
WARNING!
An improperly adjusted Weight Distributing
Hitch system may reduce handling,
stability, braking performance, and could
result in a collision.
Weight Distributing Systems may not be
compatible with Surge Brake Couplers.
Consult with your hitch and trailer manufac
-
turer or a reputable Recreational Vehicle
dealer for additional information.
WARNING! (Continued)
Trailer Hitch Classification Definitions
Class Max. Trailer Hitch Industry Standards
Class I - Light Duty 2,000 lbs (907 kg)
Class II - Medium Duty 3,500 lbs (1,587 kg)
Class III - Heavy Duty 6,000 lbs (2,722 kg)
Class IV - Extra Heavy Duty 10,000 lbs (4,535 kg)
See chart on Ú page 79 for the Maximum Gross Trailer Weight (GTW) towable for your given drivetrain.
All trailer hitches should be professionally installed on your vehicle.
21_VM_OM_EN_USC_t.book Page 78
Page 180 of 280

178SAFETY
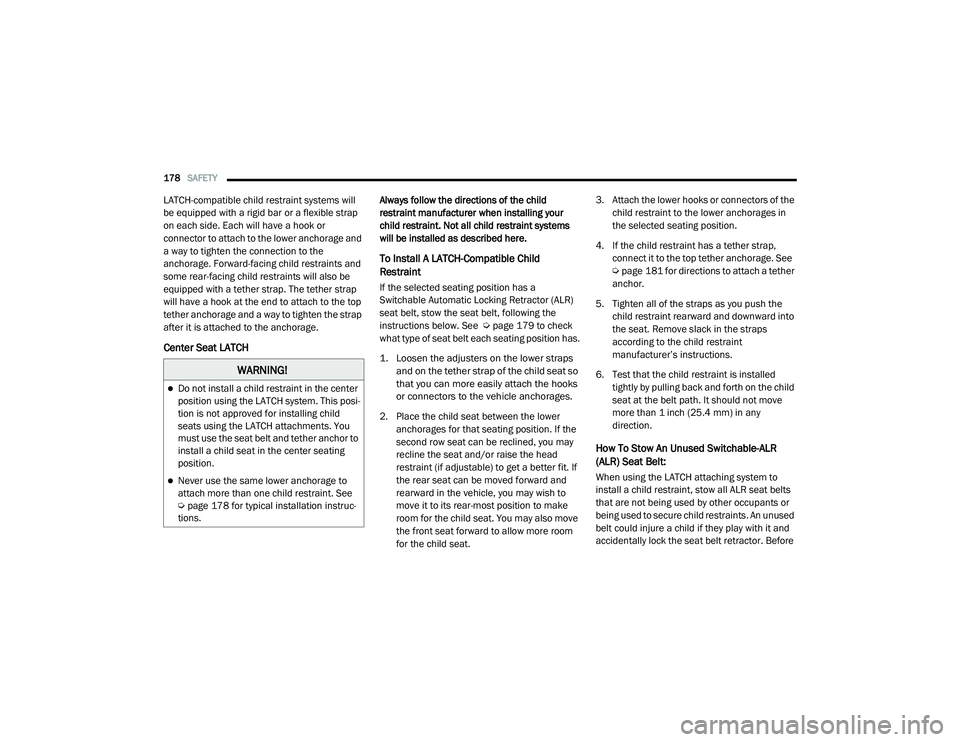
LATCH-compatible child restraint systems will
be equipped with a rigid bar or a flexible strap
on each side. Each will have a hook or
connector to attach to the lower anchorage and
a way to tighten the connection to the
anchorage. Forward-facing child restraints and
some rear-facing child restraints will also be
equipped with a tether strap. The tether strap
will have a hook at the end to attach to the top
tether anchorage and a way to tighten the strap
after it is attached to the anchorage.
Center Seat LATCH
Always follow the directions of the child
restraint manufacturer when installing your
child restraint. Not all child restraint systems
will be installed as described here.
To Install A LATCH-Compatible Child
Restraint
If the selected seating position has a
Switchable Automatic Locking Retractor (ALR)
seat belt, stow the seat belt, following the
instructions below. See Ú page 179 to check
what type of seat belt each seating position has.
1. Loosen the adjusters on the lower straps and on the tether strap of the child seat so
that you can more easily attach the hooks
or connectors to the vehicle anchorages.
2. Place the child seat between the lower anchorages for that seating position. If the
second row seat can be reclined, you may
recline the seat and/or raise the head
restraint (if adjustable) to get a better fit. If
the rear seat can be moved forward and
rearward in the vehicle, you may wish to
move it to its rear-most position to make
room for the child seat. You may also move
the front seat forward to allow more room
for the child seat. 3. Attach the lower hooks or connectors of the
child restraint to the lower anchorages in
the selected seating position.
4. If the child restraint has a tether strap, connect it to the top tether anchorage. See
Úpage 181 for directions to attach a tether
anchor.
5. Tighten all of the straps as you push the child restraint rearward and downward into
the seat. Remove slack in the straps
according to the child restraint
manufacturer’s instructions.
6. Test that the child restraint is installed tightly by pulling back and forth on the child
seat at the belt path. It should not move
more than 1 inch (25.4 mm) in any
direction.
How To Stow An Unused Switchable-ALR
(ALR) Seat Belt:
When using the LATCH attaching system to
install a child restraint, stow all ALR seat belts
that are not being used by other occupants or
being used to secure child restraints. An unused
belt could injure a child if they play with it and
accidentally lock the seat belt retractor. Before
WARNING!
Do not install a child restraint in the center
position using the LATCH system. This posi -
tion is not approved for installing child
seats using the LATCH attachments. You
must use the seat belt and tether anchor to
install a child seat in the center seating
position.
Never use the same lower anchorage to
attach more than one child restraint. See
Ú page 178 for typical installation instruc -
tions.
21_VM_OM_EN_USC_t.book Page 178
Page 205 of 280

IN CASE OF EMERGENCY203
(Continued)
Insert the power plug into the vehicle power
outlet socket. Start the vehicle engine.
Push the Tire Service Kit power button on. The
electric compressor will be turned on, sealant
and air will inflate the tire.
Minimum 26 psi (1.8 bar) of pressure should be
reached within 20 minutes. If the pressure has
not been reached, turn off and remove the Tire
Service Kit, drive the vehicle 30 feet
(10 meters) back and forth, to better distribute
the sealant inside the tire.
Attach the clear flexible filling tube of the
compressor directly to the tire valve and repeat
the inflation process.
When the correct pressure has been reached,
start driving the vehicle to uniformly distribute
the sealant inside the tire. After 10 minutes,
stop and check the tire pressure. If the pressure
is below 19 psi (1.3 bar), do not drive the
vehicle, as the tire is too damaged, contact the
nearest authorized dealer.WARNING!
Do not attempt to seal a tire on the side of
the vehicle closest to traffic. Pull far enough
off the road to avoid the danger of being hit
when using the Tire Service Kit.
Do not use Tire Service Kit or drive the
vehicle under the following circumstances:
If the puncture in the tire tread is
approximately 1/4 inch (6 mm) or
larger.
If the tire has any sidewall damage.
If the tire has any damage from driving
with extremely low tire pressure.
If the tire has any damage from driving
on a flat tire.
If the wheel has any damage.
If you are unsure of the condition of the
tire or the wheel.
Keep Tire Service Kit away from open
flames or heat source.
A loose Tire Service Kit thrown forward in a
collision or hard stop could endanger the
occupants of the vehicle. Always stow the
Tire Service Kit in the place provided.
Failure to follow these warnings can result
in injuries that are serious or fatal to you,
your passengers, and others around you.
Take care not to allow the contents of Tire
Service Kit to come in contact with hair,
eyes, or clothing. Tire Service Kit sealant is
harmful if inhaled, swallowed, or absorbed
through the skin. It causes skin, eye, and
respiratory irritation. Flush immediately
with plenty of water if there is any contact
with eyes or skin. Change clothing as soon
as possible, if there is any contact with
clothing.
Tire Service Kit Sealant solution contains
latex. In case of an allergic reaction or rash,
consult a physician immediately. Keep Tire
Service Kit out of reach of children. If swal -
lowed, rinse mouth immediately with plenty
of water and drink plenty of water. Do not
induce vomiting! Consult a physician imme -
diately.
WARNING! (Continued)
7
21_VM_OM_EN_USC_t.book Page 203
Page 213 of 280

IN CASE OF EMERGENCY211
TOWING A DISABLED VEHICLE
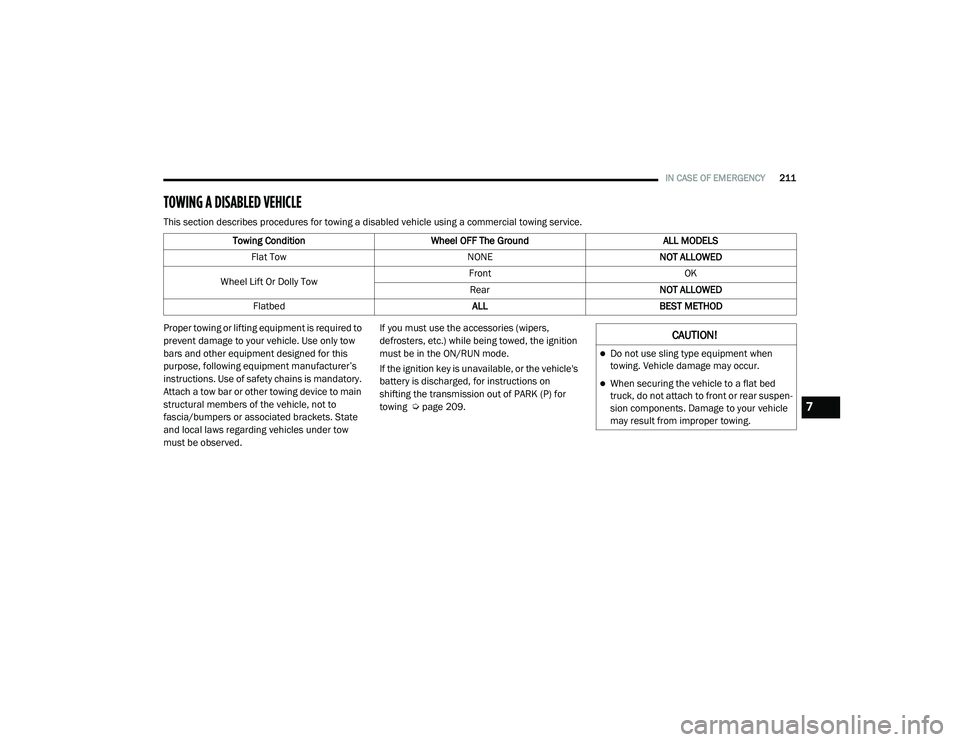
This section describes procedures for towing a disabled vehicle using a commercial towing service.
Proper towing or lifting equipment is required to
prevent damage to your vehicle. Use only tow
bars and other equipment designed for this
purpose, following equipment manufacturer’s
instructions. Use of safety chains is mandatory.
Attach a tow bar or other towing device to main
structural members of the vehicle, not to
fascia/bumpers or associated brackets. State
and local laws regarding vehicles under tow
must be observed. If you must use the accessories (wipers,
defrosters, etc.) while being towed, the ignition
must be in the ON/RUN mode.
If the ignition key is unavailable, or the vehicle's
battery is discharged, for instructions on
shifting the transmission out of PARK (P) for
towing Ú
page 209.
Towing Condition
Wheel OFF The Ground ALL MODELS
Flat Tow NONENOT ALLOWED
Wheel Lift Or Dolly Tow Front
OK
Rear NOT ALLOWED
Flatbed ALLBEST METHOD
CAUTION!
Do not use sling type equipment when
towing. Vehicle damage may occur.
When securing the vehicle to a flat bed
truck, do not attach to front or rear suspen-
sion components. Damage to your vehicle
may result from improper towing.
7
21_VM_OM_EN_USC_t.book Page 211