2021 Peugeot Landtrek light
[x] Cancel search: lightPage 21 of 176

19
Access
2Pressing and holding the handle closes the
windows.
When closing windows, ensure that no
person or object could prevent their
correct closure.
The locking, and the activation of the alarm
depending on version, is confirmed by the
temporary lighting of the direction indicators.
Depending on version, the door mirrors fold.
If one of the doors or the boot is still open
or if the electronic key for the Keyless
Entry and Starting
system has been left inside
the vehicle, central locking will not take place.
However
, if the vehicle is fitted with an alarm,
it will be activated after 45
seconds.
If the vehicle is unlocked but the doors
are not subsequently opened, the vehicle
will automatically lock itself again after
approximately 30
seconds. If the vehicle is
fitted with an alarm, it will also be reactivated
automatically.
The automatic relocking function is configured
via the touch screen’s vehicle configuration
menu.
The automatic door mirror folding/ unfolding function is configured by
pressing the button for the mirror folding/
unfolding control.
As a safety measure, never leave the vehicle, even for a short time, without
taking the Keyless Entry and Starting
system’s electronic key with you.
Be aware of the risk of theft of the vehicle if
the key is present in one of the defined areas
while the vehicle is unlocked.
To preserve the battery charge in the electronic key and the vehicle's battery,
the "hands-free" functions are set to
hibernation mode after 21 days without use.
To restore these functions, press one of the
remote control buttons or start the engine with
the electronic key against the back-up reader.
For more information on starting with the
Keyless Entry and Starting system, refer to
the corresponding section.
Electrical interference
The electronic key may not operate if
close to certain electronic devices such as
telephones (switched on or on standby) or
laptop computers, strong magnetic fields, etc.
Central locking
Manual
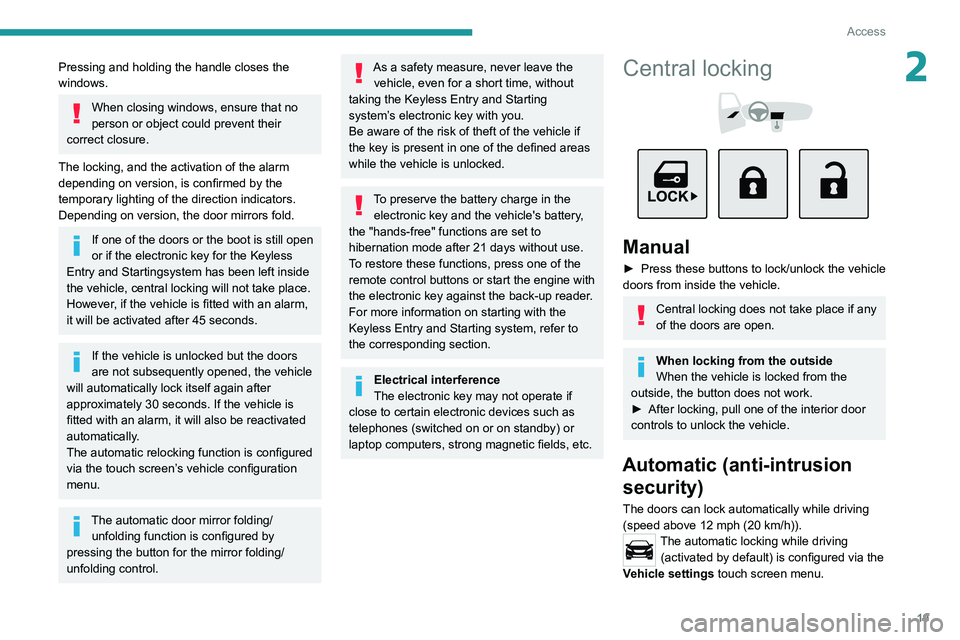
► Press these buttons to lock/unlock the vehicle
doors from inside the vehicle.
Central locking does not take place if any
of the doors are open.
When locking from the outside
When the vehicle is locked from the
outside, the button does not work.
►
After locking, pull one of the interior door
controls to unlock the vehicle.
Automatic (anti-intrusion security)
The doors can lock automatically while driving
(speed above 12 mph (20
km/h)).
The automatic locking while driving (activated by default) is configured via the
Vehicle settings touch screen menu.
Page 24 of 176

22
Access
Tailgate
Safety recommendations
Never drive with the tailgate down.
Ensure that there are no people or
obstacles present (on the ground and higher
up) when unloading.
Never place your hands near the bracket
when handling the tailgate, there is a risk of
trapping your fingers.
The loading bay tailgate is heavy, open it
carefully.
Observe the payload indicated on the
manufacturer's label present on the vehicle.
Regularly check that the suspensions are in
good condition and that the tyres are inflated
to the recommended pressure.
Spread the load evenly in the loading bay.
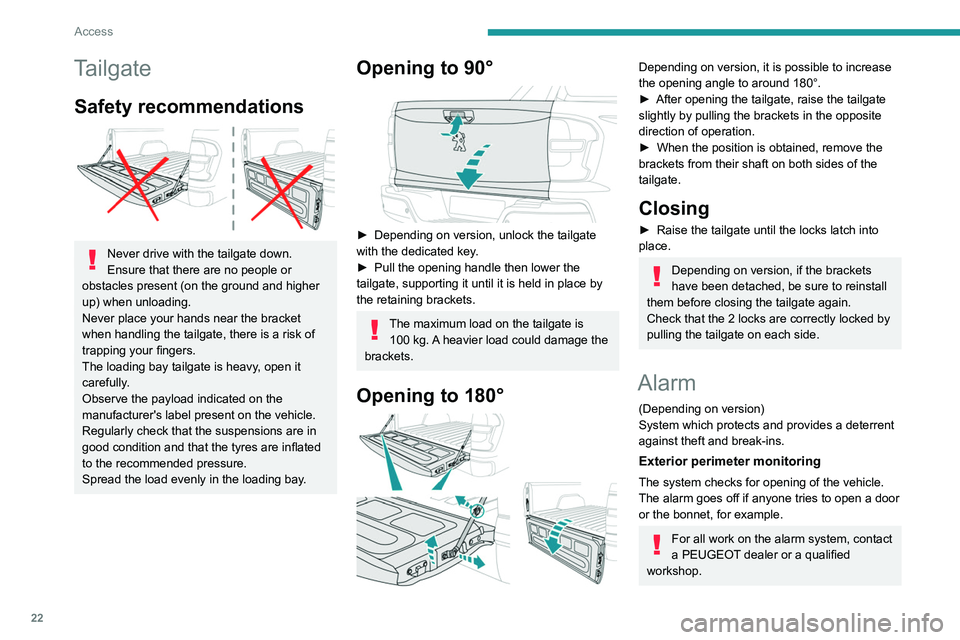
Opening to 90°
► Depending on version, unlock the tailgate
with the dedicated key .
►
Pull the opening handle then lower the
tailgate, supporting it until it is held in place by
the retaining brackets.
The maximum load on the tailgate is 100 kg. A heavier load could damage the
brackets.
Opening to 180°
Depending on version, it is possible to increase
the opening angle to around 180°.
►
After opening the tailgate, raise the tailgate
slightly by pulling the brackets in the opposite
direction of operation.
►
When the position is obtained, remove the
brackets from their shaft on both sides of the
tailgate.
Closing
► Raise the tailgate until the locks latch into
place.
Depending on version, if the brackets
have been detached, be sure to reinstall
them before closing the tailgate again.
Check that the 2 locks are correctly locked by
pulling the tailgate on each side.
Alarm
(Depending on version)
System which protects and provides a deterrent
against theft and break-ins.
Exterior perimeter monitoring
The system checks for opening of the vehicle.
The alarm goes off if anyone tries to open a door
or the bonnet, for example.
For all work on the alarm system, contact
a PEUGEOT dealer or a qualified
workshop.
Locking the vehicle with
alarm system
Activation
► Switch off the ignition and exit the vehicle.
► Lock the vehicle using the remote control or
with the “Keyless Entry and Starting” system.
When the monitoring system is active,
this indicator lamp flashes once per
second on the instrument panel and the direction
indicators flash for about 2 seconds.
The exterior perimeter monitoring is activated
after 5 seconds.
If an opening (door or bonnet) is not
properly closed, the vehicle is not locked,
but the exterior perimeter monitoring will be
activated after 45 seconds.
Deactivation
► Press the remote control unlocking
button.
or
► Unlock the vehicle with the Keyless Entry and
Starting system.
The monitoring system is deactivated: the
indicator lamp on the instrument panel goes off
and the direction indicators flash for about 2
seconds.
If the vehicle automatically locks itself
again (as happens if a door is not
Page 34 of 176

32
Ease of use and comfort
Air conditioning does not operate when the air flow is disabled.
To obtain cool air more quickly, enable interior
air recirculation for a brief period. Then return
to the intake of exterior air.
Switching off the air conditioning may result in
some discomfort (humidity or misting).
Maximum air conditioning
The system automatically adjusts the
temperature setting to the lowest possible, the
air distribution towards the central and side air
vents, the air flow to maximum and activates
recirculation of interior air.
► Press button 9 to activate/deactivate the
function (confirmed by the indicator lamp coming
on/switching off).
Once the function is deactivated, the system
returns to the previous settings.
Dual-zone automatic air
conditioning
1. Temperature.
2. Air flow.
3. Air distribution.
4. Recirculation of interior air.
of interior air recirculation. Risk of misting and
deterioration of the air quality!
If the interior temperature is very high
after the vehicle has stood for a long
time in the sunshine, air the passenger
compartment for a few moments.
Put the air flow control at a setting high
enough to quickly change the air in the
passenger compartment.
Condensation created by the air
conditioning results in a discharge of
water underneath the vehicle. This is perfectly
normal.
Servicing the ventilation and air
conditioning system
►
Ensure that the passenger compartment
filter is in good condition and have the filter
elements replaced regularly
.
We recommend using a composite passenger
compartment filter. Thanks to its special active
additive, this type of filter helps to purify the
air breathed by the occupants and keep the
passenger compartment clean (by reducing
allergic symptoms, unpleasant odours and
greasy deposits).
►
T
o ensure correct operation of the
air conditioning system, have it checked
according to the recommendations in the
Maintenance and Warranty Guide.
Heating
Manual air conditioning
1. Temperature.
2. Air flow/System switch-off.
3. Air distribution.
4. Recirculation of interior air.
5. System switch-off.
6. Front demisting/defrosting on/off.
7. Rear screen demisting/defrosting on/off.
8. Air conditioning on/off.
9. Maximum air conditioning.
The air conditioning system only operates with
the engine running.
Temperature
► Turn the thumbwheel 1 from "Blue" (cold)
to "Red" (hot) to adjust the temperature to your
requirements.
Air flow
► Turn the thumbwheel 2 to obtain a sufficient
air flow to ensure your comfort.
If the air flow control is in
the minimum position (system
deactivated), the temperature in the vehicle
will no longer be controlled. A slight flow of air
can still be felt, due to the forward movement
of the vehicle.
Air distribution
► Press one of the buttons 3 to direct the air
flow in turn towards:
–
windscreen, side windows and footwells,
–
central and side vents,
–
footwells,
–
central vents, side vents and footwells.
The air distribution can be adapted by combining
the corresponding buttons.
Air conditioning on/off
The air conditioning system is designed to
operate effectively in all seasons, with the
windows closed.
It is used to:
–
lower the temperature in summer
,
–
increase the effectiveness of the demisting in
winter
, above 3°C.
►
Press button
8 to activate/deactivate the air
conditioning system.
Page 36 of 176

34
Ease of use and comfort
Front demisting
- defrosting
With heating or manual air
conditioning
► Adjust the temperature to maximum (red).
► Adjust the air flow to maximum.
► Press this button to activate the air
distribution to the "Windscreen" position;
its indicator lamp comes on.
► Check that the recirculation of interior air is
deactivated; its indicator lamp must be off.
► Depending on version, switch on the air
conditioning by pressing the " A/C" button; its
indicator lamp comes on.
With automatic dual-zone
air conditioning
Automatic Visibility programme
This mode allows the windscreen and side
windows to be demisted or defrosted as quickly
as possible.
► Press this button to activate/deactivate
the mode (confirmed by the illumination/
extinction of the indicator lamp).
The programme automatically manages the air
conditioning (depending on version), air flow
and air intake, and provides optimum distribution
towards the windscreen and side windows.
When the indicator lamp in the button is on, the
air conditioning system operates automatically:
the system manages the temperature, air
flow and air distribution in the passenger
compartment in an optimum way according to
the selected comfort level.
In cold weather with the engine cold, the
air flow is increased gradually until the
comfort setting has been reached, in order to
limit the delivery of cold air into the passenger
compartment.
On entering the vehicle, if the interior
temperature is much colder or warmer than
the comfort setting requested, there is no
need to alter the value displayed to more
quickly reach the required level of comfort.
The system automatically corrects the
temperature difference as quickly as possible.
Manual mode
It is possible to make a different choice from that
offered by the system by changing a setting.
The other functions will still be automatically
managed.
The indicator lamp in the " AUTO” button goes
out if you change a setting.
Visibility programme
► Press the “ visibility” button 6 to demist or
defrost the windscreen and side windows as
quickly as possible. The system automatically manages the air
conditioning, air flow and air intake, and provides
optimum distribution towards the windscreen and
side windows.
►
Press the “
visibility
” button 6 again to stop
the programme.
Or
►
Press the “
AUTO” button 10 to return to the
automatic comfort programme.
"Dual” function
The comfort setting for the passenger side
can be indexed to the driver's comfort setting
(mono-zone).
►
Press the corresponding button 11 to
activate/deactivate the function.
The indicator lamp in the button comes on when
the function is activated.
The function is deactivated automatically if a
passenger uses the temperature control.
Maximum air conditioning
The system automatically adjusts the
temperature setting to the lowest possible, the
air distribution towards the central and side air
vents, the air flow to maximum and activates
recirculation of interior air.
►
Press button
9 to activate/deactivate the
function (confirmed by
the indicator lamp coming
on/switching off).
Once the function is deactivated, the system
returns to the previous settings.
Interior air recirculation
The intake of exterior air prevents the formation
of mist on the windscreen and side windows.
Recirculating the interior air isolates the
passenger compartment from outside odours
and fumes and allows the desired passenger
compartment temperature to be achieved more
rapidly.
► Press this button to activate/deactivate
the function (confirmed by the
illumination/extinction of the indicator lamp).
This function is activated automatically when reverse gear is engaged.
Switching off the air
conditioning system
► Press this button.
All of the indicator lamps for the system go off.
This action deactivates all of the functions of the
air conditioning system.
The temperature is no longer regulated. A slight
flow of air can still be felt, due to the forward
movement of the vehicle.
Page 37 of 176

35
Ease of use and comfort
3Front demisting
- defrosting
With heating or manual air
conditioning
► Adjust the temperature to maximum (red).
► Adjust the air flow to maximum.
► Press this button to activate the air
distribution to the "Windscreen" position;
its indicator lamp comes on.
►
Check that the recirculation of interior air is
deactivated; its indicator lamp must be off.
►
Depending on version, switch on the air
conditioning by pressing the " A/C
" button; its
indicator lamp comes on.
With automatic dual-zone
air conditioning
Automatic Visibility programme
This mode allows the windscreen and side
windows to be demisted or defrosted as quickly
as possible.
► Press this button to activate/deactivate
the mode (confirmed by the illumination/
extinction of the
indicator lamp).
The programme automatically manages the air
conditioning (depending on version), air flow
and air intake, and provides optimum distribution
towards the windscreen and side windows.
It is possible to manually change the air flow
without deactivating the automatic Visibility
programme.
In wintry conditions, remove all snow or
ice on the windscreen near the sensor
before moving off.
Otherwise, the operation of the equipment
associated with the sensor may be affected.
Rear screen demisting/ defrosting
Demisting/defrosting only operates with the
engine running.
Depending on version, this also applies to the
door mirrors.
► Press this button to activate/deactivate
the function (confirmed by the
illumination/extinction of the indicator lamp).
Demisting/defrosting switches off automatically
to prevent an excessive consumption of
electrical current.
Switch off demisting/defrosting when
you no longer need it; reducing
electrical consumption in turn decreases
energy consumption.
Front fittings
1. Grab handle
2. Sun visor
3. Boarding assistance handle
4. Glasses holder
5. Illuminated glove box with refrigeration
(depending on version)
6. Door pockets
7. Retractable cup holder (press down to take
it out)
8. USB socket and USB charger socket
9. Cigarette lighter/12
V (120 W) accessory
socket
10. Storage compartment
11 . Card holder
12. Cup holder and storage compartment
13. Front armrest with storage (depending on
version)
Page 38 of 176

36
Ease of use and comfort
Opening
► To access the closed storage compartment,
lift the lever to open the lid.
This storage compartment can be used to house portable devices (mobile phone,
MP3 player, etc.) which can be connected to
the USB/Jack sockets or charged from the 12
V accessories socket in the centre console.
Closing
► Close the cover until it locks.
Sun visor
► With the ignition on, raise the concealing
flap; depending on the version, the mirror is
illuminated automatically.
Glove box
► To open the glove box, raise the handle.
With the ignition on, the glove box is lit when
open.
Depending on version, it contains an adjustable
ventilation nozzle, distributing the same
conditioned air as the vents in the passenger
compartment.
Never drive with the glove box open
when a passenger is at the front. It may
cause injury during sharp deceleration!
Cigarette lighter/12 V
accessory socket(s)
► To use the cigarette lighter, press it in and
wait a few seconds until it pops out automatically.
► To use a 12 V accessory (max. power:
120 W), remove the cigarette lighter and connect
a suitable adaptor.
You can use this socket to connect a telephone
charger, a bottle warmer, etc.
After use, put the cigarette lighter back into place
straight away.
The connection of an electrical device not approved by PEUGEOT, such as a
USB charger, may adversely affect the
operation of vehicle electrical systems,
causing faults such as poor radio reception or
interference with displays in the screens.
USB socket(s)
Sockets 1, 2 and 3 (depending on version) can
be used to charge a portable device.
Socket
1 also enables audio files sent to your
audio system to be played via the vehicle's
speakers.
These files can be managed using the steering
mounted controls or those on the touch screen.
Depending on version,
socket 1 also allows a
smartphone to be connected by MirrorLink
TM,
Android Auto® or CarPlay®, enabling certain
smartphone applications to be used on the touch
screen.
For best results, use a cable made or approved
by the device manufacturer.
These applications can be managed using the
steering-mounted controls or the audio system
controls.
When the USB port is used, the portable
device charges automatically.
A message is displayed if the power drawn
by the portable device exceeds the current
supplied by the vehicle.
For more information on how to use this
equipment, refer to the Audio equipment
and telematics section .
Front armrest
(Depending on version)
It includes a storage space.
Page 40 of 176

38
Ease of use and comfort
Storage boxes
Storage boxes are provided in the floor, under
the cushions of the rear bench seat.
They may contain the vehicle’s tools.
► To open them, raise the corresponding
seat cushion and lift the carpet (depending on
version).
For more information on the Rear bench seat,
and especially on tilting the seat cushions, refer
to the corresponding section.
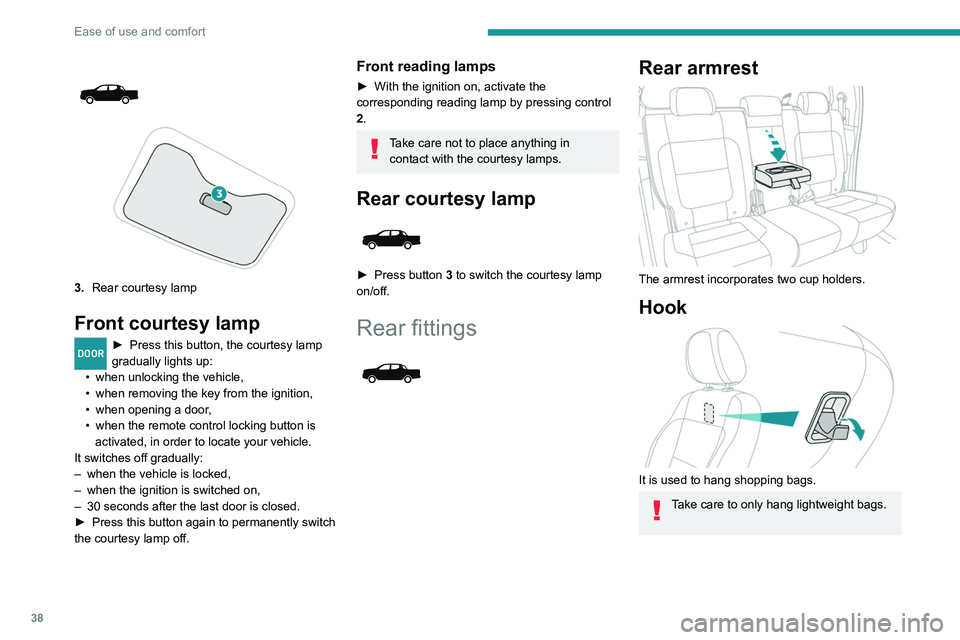
3. Rear courtesy lamp
Front courtesy lamp
DOOR► Press this button, the courtesy lamp
gradually lights up:
•
when
unlocking the vehicle,
•
when
removing the key from the ignition,
•
when
opening a door,
•
when the remote control locking button is
activated, in order to locate your vehicle.
It switches off gradually:
–
when the vehicle is locked,
–
when the ignition is switched on,
–
30 seconds after the last door is closed.
►
Press this button again to permanently switch
the courtesy lamp off.
Front reading lamps
► With the ignition on, activate the
corresponding reading lamp by pressing control
2.
Take care not to place anything in contact with the courtesy lamps.
Rear courtesy lamp
► Press button 3 to switch the courtesy lamp
on/off.
Rear fittings
Rear armrest
The armrest incorporates two cup holders.
Hook
It is used to hang shopping bags.
Take care to only hang lightweight bags.
Page 41 of 176

39
Ease of use and comfort
3Storage boxes
Storage boxes are provided in the floor, under
the cushions of the rear bench seat.
They may contain the vehicle’s tools.
►
T
o open them, raise the corresponding
seat cushion and lift the carpet (depending on
version).
For more information on the Rear bench seat,
and especially on tilting the seat cushions, refer
to the corresponding section.
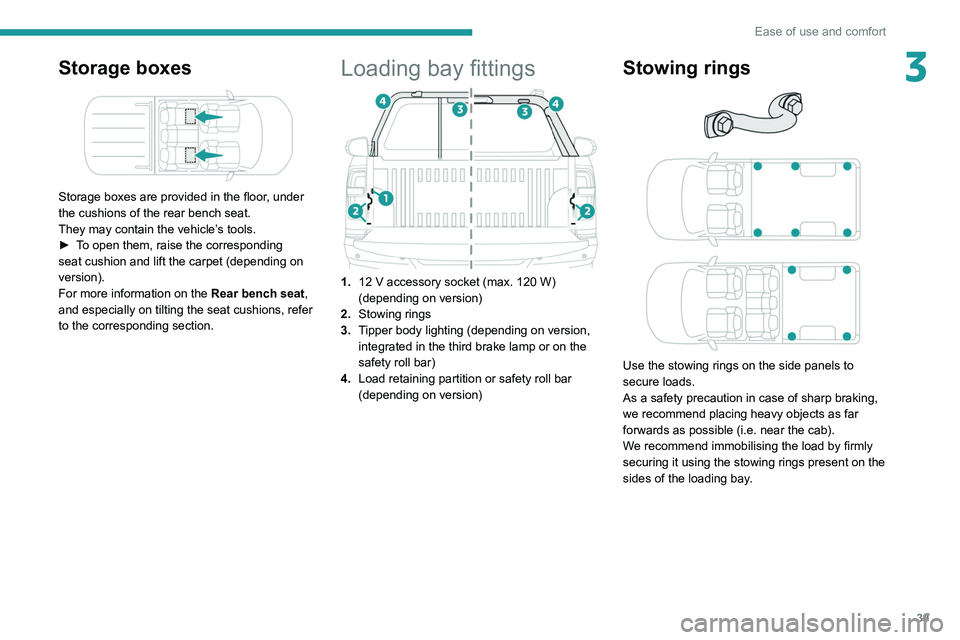
Loading bay fittings
1. 12 V accessory socket (max. 120 W)
(depending on version)
2. Stowing rings
3. Tipper body lighting (depending on version,
integrated in the third brake lamp or on the
safety roll bar)
4. Load retaining partition or safety roll bar
(depending on version)
Stowing rings
Use the stowing rings on the side panels to
secure loads.
As a safety precaution in case of sharp braking,
we recommend placing heavy objects as far
forwards as possible (i.e. near the cab).
We recommend immobilising the load by firmly
securing it using the stowing rings present on the
sides of the loading bay.