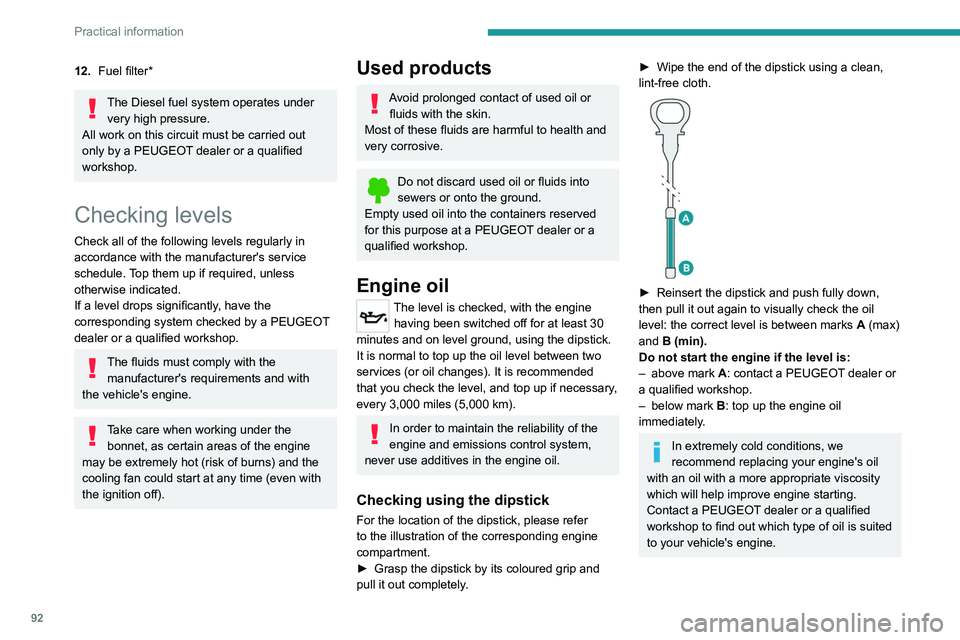
2021 Peugeot Landtrek oil dipstick
[x] Cancel search: oil dipstickPage 93 of 176

91
Practical information
7Opening
► Open the left-hand front door.
► Pull the interior release lever , located at the
bottom of the dashboard, towards you.
► Tilt the exterior safety catch to the left and
raise the bonnet.
►
Unclip the stay from its housing and place it
in the support slot to hold the bonnet open.
* Depending on engine.
Closing
► Hold the bonnet and pull out the stay from the
support slot.
►
Clip the stay in its housing.
►
Lower the bonnet and release it near the end
of its travel.
►
Pull on the bonnet to check that it is locked
correctly
.
Because of the presence of electrical
equipment under the bonnet, it is strongly
recommended that exposure to water (rain,
washing, etc.) be limited.
Engine compartment
The engine shown here is an example for
illustrative purposes only.
The locations of the following elements may
vary:
–
Air filter
.
–
Engine oil dipstick.
–
Engine oil filler cap.
–
Priming pump.
–
Degassing screw
.
Petrol engine
Diesel engine
1.Screenwash fluid reservoir
2. Engine coolant reservoir
3. Brake fluid reservoir
4. Battery
5. Power steering fluid reservoir
6. Fusebox
7. Air filter
8. Engine oil filler cap
9. Engine oil dipstick
10. Priming pump*
11 . Degassing screw*
Page 94 of 176

92
Practical information
Oil grade
Before topping up or changing the
engine oil, check that the oil is suitable
for your engine and complies with the
recommendations in the service schedule
supplied with the vehicle (or available
from your PEUGEOT dealer or qualified
workshop).
Use of non-recommended oil may invalidate
your warranty in the event of engine failure.
Topping up the engine oil level
For the location of the engine oil filler cap, please
refer to the corresponding engine compartment
illustration.
Never remove the oil filler cap with the
engine running. Risk of burns and
splashes inside the engine compartment.
► Add oil in small quantities, avoiding any spills
on engine components (risk of fire).
► Wait a few minutes before checking the level
again using the dipstick.
► Top up the level if necessary.
► After checking the level, carefully screw the
oil filler cap back on and replace the dipstick in
its tube.
Brake fluid
�� ������ ��
The level of this fluid should be close to
the "MAX" mark. If not, check the brake
pad wear.
12. Fuel filter*
The Diesel fuel system operates under
very high pressure.
All work on this circuit must be carried out
only by a PEUGEOT dealer or a qualified
workshop.
Checking levels
Check all of the following levels regularly in
accordance with the manufacturer's service
schedule. Top them up if required, unless
otherwise indicated.
If a level drops significantly, have the
corresponding system checked by a PEUGEOT
dealer or a qualified workshop.
The fluids must comply with the manufacturer's requirements and with
the vehicle's engine.
Take care when working under the bonnet, as certain areas of the engine
may be extremely hot (risk of burns) and the
cooling fan could start at any time (even with
the ignition off).
Used products
Avoid prolonged contact of used oil or fluids with the skin.
Most of these fluids are harmful to health and
very corrosive.
Do not discard used oil or fluids into
sewers or onto the ground.
Empty used oil into the containers reserved
for this purpose at a PEUGEOT dealer or a
qualified workshop.
Engine oil
The level is checked, with the engine having been switched off for at least 30
minutes and on level ground, using the dipstick.
It is normal to top up the oil level between two
services (or oil changes). It is recommended
that you check the level, and top up if necessary,
every 3,000 miles (5,000 km).
In order to maintain the reliability of the
engine and emissions control system,
never use additives in the engine oil.
Checking using the dipstick
For the location of the dipstick, please refer
to the illustration of the corresponding engine
compartment.
►
Grasp the dipstick by its coloured grip and
pull it out completely
.
► Wipe the end of the dipstick using a clean,
lint-free cloth.
► Reinsert the dipstick and push fully down,
then pull it out again to visually check the oil
level: the correct level is between marks A
(max)
and B (min).
Do not start the engine if the level is:
–
above mark
A: contact a PEUGEOT dealer or
a qualified workshop.
–
below mark B
: top up the engine oil
immediately.
In extremely cold conditions, we
recommend replacing your engine's oil
with an oil with a more appropriate viscosity
which will help improve engine starting.
Contact a PEUGEOT dealer or a qualified
workshop to find out which type of oil is suited
to your vehicle's engine.
Page 95 of 176

93
Practical information
7Oil grade
Before topping up or changing the
engine oil, check that the oil is suitable
for your engine and complies with the
recommendations in the service schedule
supplied with the vehicle (or available
from your PEUGEOT dealer or qualified
workshop).
Use of non-recommended oil may invalidate
your warranty in the event of engine failure.
Topping up the engine oil level
For the location of the engine oil filler cap, please
refer to the corresponding engine compartment
illustration.
Never remove the oil filler cap with the
engine running. Risk of burns and
splashes inside the engine compartment.
►
Add oil in small quantities, avoiding any spills
on engine components (risk of fire).
►
W
ait a few minutes before checking the level
again using the dipstick.
►
T
op up the level if necessary.
►
After checking the level, carefully screw the
oil filler cap back on
and replace the dipstick in
its tube.
Brake fluid
�� ������ ��
The level of this fluid should be close to
the "MAX" mark. If not, check the brake
pad wear.
To know how often the brake fluid should be
replaced, refer to the manufacturer's servicing
schedule.
Clean the cap before removing it to refill.
Use only DOT4 brake fluid from a sealed
container.
Power steering fluid
The level of this fluid should be close to the "MAX" mark. Check it, with the
vehicle parked on level ground and with the
engine cold.
Engine coolant
It is normal to top up this fluid between
two services.
The check and top-up must only be done with
the engine cold.
A level of coolant that is too low risks causing
major damage to the engine; the coolant level
must be close to the "MAX" mark without ever
going above it.
If the level is close to or below the " MIN” mark, it
is essential to top up.
When topping up with a cold engine, start the
engine and slowly add coolant until it reaches
the "MAX" mark.
When the engine is hot, the temperature of the
coolant is regulated by the fan.
As the cooling system is pressurised, wait at
least one hour after switching off the engine
before carrying out any work.
In order to avoid the risk of scalding if you need
to top up in an emergency, wrap a cloth around
the cap and unscrew the cap by two turns to
allow the pressure to drop.
Once the pressure has dropped, remove the cap
and top up to the required level.
Filling up with engine coolant
Do this when the engine coolant reservoir is
empty or when the cooling system has been
drained.
►
Open the cap on the reservoir and top up
until the level reaches the " MAX
" mark.
►
Replace the cap on the engine coolant
reservoir
.
►
Increase engine speed to 2,000 rpm until the
radiator's intake hose becomes hot.
►
Allow the engine to cool and add coolant until
the level reaches the " MAX
" mark.
►
Do this repeatedly until the level in the
reservoir no longer drops.
We recommend using a coolant that
contains a glycol-based long-life
anti-freeze agent.
Never use water to fill or top up the
coolant system - risk of freezing and
damaging the engine!
Page 102 of 176

100
Practical information
► Clean the seal face using a clean, lint-free
cloth.
► Screw the new filter back on, making sure
that the seal is correctly positioned against the
contact surface.
► Tighten the Diesel fuel filter correctly with
your hands without forcing to avoid leaks.
After the operation, bleed the air contained in the fuel system.
For more information on Running out of fuel
(Diesel) and in particular the procedure for
bleeding the Diesel fuel system, refer to the
corresponding section.
Cleaning the throttle body
Removing the throttle body
Petrol engine
► Switch off the engine and the ignition.
► Unscrew and remove the engine oil filler cap.
►
Under the vehicle, place a container below
the drain plug.
Do not remove the drain plug when the
engine is hot - risk of burns (hot oil)!
►
Loosen the drain plug with a suitable wrench
and remove it.
►
W
ait until the oil has completely drained into
the container.
►
Change the plug seal and screw the plug
back on the housing (tighten to a torque of 3.5 to
4 daN.m).
For more information on Engine oil and in
particular on oil filling and checking the level,
refer to the corresponding section.
Always change engine oil with an oil corresponding to the engine and in
accordance with the manufacturer's
recommendations.
Never start the engine without oil - risk of
serious damage to the engine!
Be careful, the oil is a petroleum-based
product. It is harmful if swallowed and
irritating to the skin and eyes.
Keep the drained oil out of the reach of
children and animals.
Changing the oil filter
Petrol engine
Diesel engine
► Switch off the engine and the ignition.
► Under the vehicle, place a container below
the oil filter
.
►
Loosen and remove the oil filter with a
suitable wrench.
►
Clean the seal face using a clean, lint-free
cloth.
►
Oil the seal of the new filter (use new oil).
►
Screw the new filter back on, making sure
that the seal is correctly positioned against the
seal
► Tighten the oil filter correctly with your hands
without forcing to avoid leaks.
After the operation, check the engine oil level with the dipstick and top up if
necessary.
For more information on Engine oil and in
particular on checking the level, refer to the
corresponding section.
Never start the engine without the oil
filter - risk of splashing and serious
damage to the engine!
Changing the Diesel fuel
filter
► Switch off the engine and the ignition.
► Place a container below the Diesel fuel filter .
►
Loosen and remove the Diesel fuel filter with
a suitable wrench.
Page 141 of 176

139
Alphabetical index
Courtesy lamp, rear 38
Courtesy lamps
38
Cruise control
76–78
Cup holder
36
D
Date (setting) 13, 136
Daytime running lamps
43, 110
Deactivating the passenger airbag
55, 58
Defrosting
35
Defrosting, front
35
Demisting
35
Demisting, front
35
Demisting, rear
35
Demisting, rear screen
35
Dials and gauges
7
Dimensions
125
Dipstick
92
Direction indicators
43–44, 110–112
Display screen, instrument panel
7
Door pockets
36
Doors
21
Driving
61–62
Driving aids camera (warnings)
74
Driving aids (recommendations)
74
Driving economically
6
Dynamic stability control (DSC)
49–50
E
EBFD 49
Eco-driving (advice)
6
ECO mode
71
Electric windows
24
Electronic brake force distribution (EBFD)
49
Emergency braking assistance (EBA)
49
Emergency switching off
66
Emergency warning lamps
48, 104
Engine
96
Engine compartment
91
Engine, Diesel
88, 91, 105, 124
Engine, petrol
91, 123
Engines
122–124
Environment
6, 21
ESC (electronic stability control)
49
Extinguisher
104
F
Filling the fuel tank 88
Filter, air
94, 99
Filter, Diesel fuel
100
Filter, oil
94, 100
Filter, particle
95
Filter, passenger compartment
31, 94, 98
Fitting a wheel
107, 109
Fitting roof bars
90
Fittings, front
36
Fittings, interior
36–37
Fittings, rear 38–39
Flap, fuel filler
88
Flashing indicators
43–44, 111
Floor storage compartment
30
Fluid, brake
93
Fluid, engine coolant
93
Fluid, power steering
93
Foglamps, front
42–43, 110
Foglamps, rear
42
Folding bench seat
30
Folding the rear seat backrest
27
Folding the rear seats
29–30
Front map reading lights
38
Fuel
6, 88
Fuel consumption
6
Fuel tank
88
Fusebox, dashboard
11 3
Fusebox, engine compartment
113, 115
Fuses
113–115
G
Gauge, fuel 88
Gearbox, automatic
69, 72, 95, 118
Gearbox, manual
69, 72, 95
Gear lever, manual gearbox
69
Gear shift indicator ~ Gear efficiency
indicator
73
Glove box
36
Grab handles
36