2021 Peugeot Landtrek light
[x] Cancel search: lightPage 68 of 176

66
Driving
When parking on a slope, turn the
wheels against the kerb, apply the
parking brake, engage a gear and switch off
the ignition.
Locking the rear
differential
When the rear differential is locked, torque is
transmitted to both rear wheels equally, thereby
improving the vehicle's traction.
Locking the rear differential is especially useful
when the rear wheels are skidding (in a ditch or
on a slippery road, for example).
Operating conditions
The differential lock is activated manually (speed
below approximately 5 mph (8 km/h)).
The vehicle's wheels must not be skidding (wait
until they have stopped).
Switching on/off
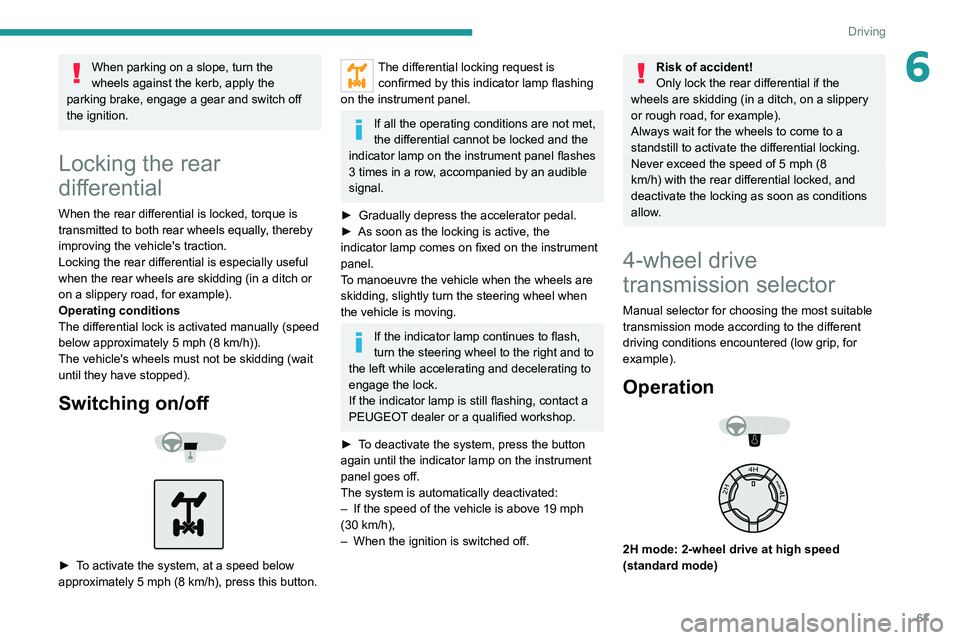
► To activate the system, at a speed below
approximately 5 mph (8 km/h), press this button.
Switching on the ignition
without starting the engine
With the electronic key in the passenger
compartment, the first two presses on the
“START/STOP” button, without pressing any
of the pedals , allow the accessories to be
switched on, then the ignition, without starting
the engine (turning on accessories such as the
audio system and the lighting, then turning on
the instrument panel).
►
Press this button
again to switch off the
ignition and allow the vehicle to be locked.
Key not detected
Back-up starting
A back-up reader is fitted in the front armrest, to
enable the engine to be started if the system fails
to detect the key in the recognition zone, or if the
battery in the electronic key is flat.
► Place and hold the remote control against the
reader .
►
W
ith a manual gearbox, place the gear lever
in neutral, then fully depress the clutch pedal.
►
W
ith an automatic gearbox, select mode P,
then depress the brake pedal.
►
Press the "
START/STOP" button.
The engine starts.
Back-up switch-off
If the electronic key is not detected or is no
longer in the recognition zone, a message
appears in the instrument panel when closing a
door or trying to switch off the engine.
►
T
o confirm the instruction to switch off the
engine, press the " START/STOP" button for
approximately 5
seconds.
In the event of a fault with the electronic key,
contact a PEUGEOT dealer or a qualified
workshop.
Emergency switch-off
In the event of an emergency only, the engine
can be switched off without conditions (even
when driving).
►
Press the "
START/STOP" button for about
5
seconds.
In this case, the steering column locks as soon
as the vehicle stops.
Manual parking brake
Release
► Pull the parking brake lever up slightly , press
the release button, then lower the lever fully.
When driving the vehicle, if this warning
lamp and the STOP warning lamp come
on, accompanied by the display of a message,
this means that the parking brake is still applied
or has not been fully released.
Application
► Pull the parking brake lever up to immobilise
the vehicle.
Page 69 of 176
67
Driving
6When parking on a slope, turn the
wheels against the kerb, apply the
parking brake, engage a gear and switch off
the ignition.
Locking the rear
differential
When the rear differential is locked, torque is
transmitted to both rear wheels equally, thereby
improving the vehicle's traction.
Locking the rear differential is especially useful
when the rear wheels are skidding (in a ditch or
on a slippery road, for example).
Operating conditions
The differential lock is activated manually (speed
below approximately 5 mph (8 km/h)).
The vehicle's wheels must not be skidding (wait
until they have stopped).
Switching on/off
► To activate the system, at a speed below
approximately 5 mph (8 km/h), press this button.
The differential locking request is confirmed by this indicator lamp flashing
on the instrument panel.
If all the operating conditions are not met,
the differential cannot be locked and the
indicator lamp on the instrument panel
flashes
3 times in a row, accompanied by an audible
signal.
►
Gradually depress the accelerator pedal.
►
As soon as the locking is active, the
indicator
lamp comes on fixed on the instrument
panel.
To manoeuvre the vehicle when the wheels are
skidding, slightly turn the steering wheel when
the vehicle is moving.
If the indicator lamp continues to flash,
turn the steering wheel to the right and to
the left while accelerating and decelerating to
engage the lock.
If the indicator
lamp is still flashing, contact a
PEUGEOT dealer or a qualified workshop.
►
T
o deactivate the system, press the button
again until the indicator
lamp on the instrument
panel goes off.
The system is automatically deactivated:
–
If the speed of the vehicle is above 19 mph
(30
km/h),
–
When the ignition is switched off.
Risk of accident!
Only lock the rear differential if the
wheels are skidding (in a ditch, on a slippery
or rough road, for example).
Always wait for the wheels to come to a
standstill to activate the differential locking.
Never exceed the speed of 5 mph (8
km/h) with the rear differential locked, and
deactivate the locking as soon as conditions
allow.
4-wheel drive
transmission selector
Manual selector for choosing the most suitable
transmission mode according to the different
driving conditions encountered (low grip, for
example).
Operation
��
��
2H mode: 2-wheel drive at high speed
(standard mode)
Page 72 of 176
70
Driving
Automatic operation
► Select position D for automatic changing of
the six gears.
The gearbox then operates in auto-adaptive
mode, without any intervention on the part of the
driver. It continuously selects the most suitable
gear according to the driving style, the road
profile and the load in the vehicle.
For maximum acceleration without touching the
selector, press the accelerator fully down (kick-
down). The gearbox changes down automatically
or holds the gear selected until the maximum
engine speed is reached.
When braking, the gearbox changes down
automatically to provide effective engine braking.
If you release the accelerator sharply, the
gearbox will not shift to a higher gear for safety
reasons.
Never select position N while the vehicle
is moving.
Never select positions P or R unless the
vehicle is completely stationary.
Manual operation
To limit fuel consumption during an extended standstill with the engine
running (for example, in a traffic jam), set the
gear selector to N and apply the parking
brake.
Gear selector module
P. Park
–
V ehicle immobilised, parking brake
applied or released.
–
Engine starting.
R. Reverse
–
Reversing manoeuvres, vehicle
stationary
, engine at idle.
N. Neutral
–
V
ehicle immobilised, parking brake
applied.
–
Engine starting.
D. Automatic operation
+/- Manual operation
►
T
o shift up/down through the gears,
push the control forwards/backwards.
Gear selector
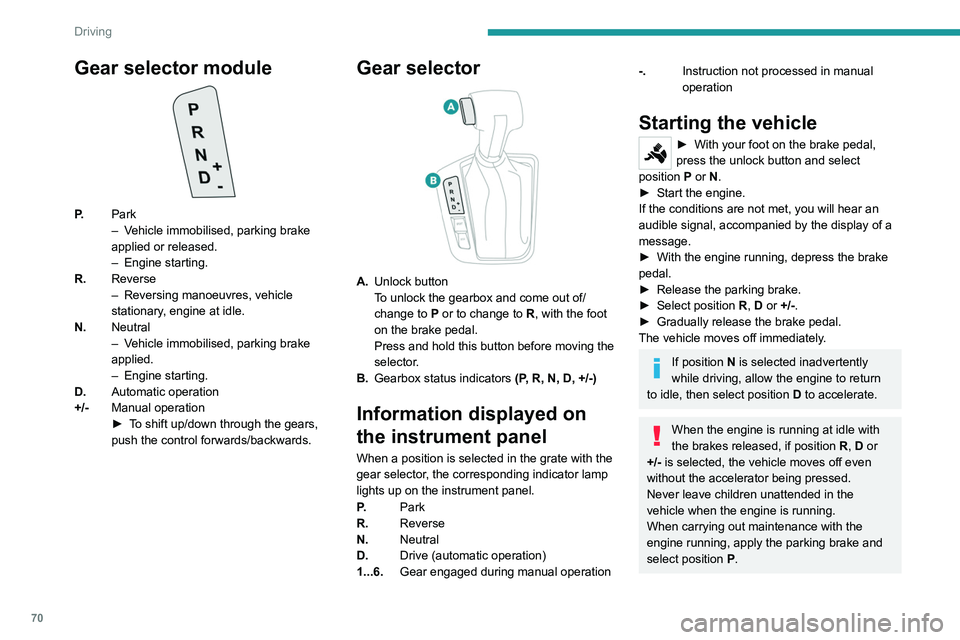
A. Unlock button
To unlock the gearbox and come out of/
change to
P or to change to R, with the foot
on the brake pedal.
Press and hold this button before moving the
selector.
B. Gearbox status indicators (P, R, N, D, +/-)
Information displayed on
the instrument panel
When a position is selected in the grate with the
gear selector, the corresponding indicator lamp
lights up on the instrument panel.
P.Park
R. Reverse
N. Neutral
D. Drive (automatic operation)
1...6. Gear engaged during manual operation
-.Instruction not processed in manual
operation
Starting the vehicle
► With your foot on the brake pedal,
press the unlock button and select
position P
or N.
►
Start the engine.
If the conditions are not met, you will hear an
audible signal, accompanied by the display of a
message.
►
With the engine running, depress the brake
pedal.
►
Release the parking brake.
►
Select position R
, D or +/-.
►
Gradually release the brake pedal.
The vehicle moves off immediately
.
If position N is selected inadvertently
while driving, allow the engine to return
to idle, then select position D to accelerate.
When the engine is running at idle with
the brakes released, if position R, D or
+/- is selected, the vehicle moves off even
without the accelerator being pressed.
Never leave children unattended in the
vehicle when the engine is running.
When carrying out maintenance with the
engine running, apply the parking brake and
select position P.
Page 76 of 176
74
Driving
Poor visibility (inadequate street lighting,
heavy rain, thick fog, snowfall), dazzle
(headlamps of an oncoming vehicle, low sun,
reflections on a damp road, leaving a tunnel,
alternating shade and light) can also impair
detection performance.
In the event of a grille replacement, contact
a PEUGEOT dealer or a qualified workshop
to recalibrate the camera; otherwise, the
operation of the associated driving aids may
be disrupted.
Other cameras
The images from the camera(s)
displayed on the touch screen or on the
instrument panel may be distorted by the
relief.
In the presence of areas in shade, or in
conditions of bright sunlight or inadequate
lighting, the image may be darkened and with
lower contrast.
Obstacles may appear further away than they
actually are.
Sensors
The operation of the sensors, as well as
any associated functions, may be disrupted
by noise pollution such as that emitted by
noisy vehicles and machinery (e.g. lorries,
pneumatic drills), by the accumulation of
snow or dead leaves on the road or in the
event of damaged bumpers.
Under-inflation alert
This is signalled by the fixed illumination of this warning lamp, accompanied by an
audible signal and the display of a message.
In the event of an anomaly noted on one or more
tyres, the symbol displayed on the instrument
panel identifies them.
►
Reduce speed immediately
, avoid excessive
steering movements and avoid sudden braking.
►
Stop the vehicle as soon as it is safe to do
so.
The loss of pressure detected does not always cause visible bulging of the tyre.
Do not rely on just a visual check.
►
Check the pressures of the four tyres when
cold.
►
If it is not possible to carry out this check
immediately
, drive carefully at reduced speed.
►
In the event of a puncture, replace the
punctured wheel by the spare wheel.
The alert is kept active until the tyre/tyres
concerned is/are reinflated, repaired or
replaced.
Reinitialisation
The system is automatically reinitialised when
the vehicle is in motion.
If the alert is maintained, make sure that
the pressure of the 4 tyres complies with
the values written on the tyre pressure label.
Malfunction
These warning lamps come on in the event of a malfunction.
A message appears, accompanied by an audible
signal.
In this case, the tyre under-inflation monitoring
function is no longer performed.
Have the system checked by a PEUGEOT
dealer or a qualified workshop.
Driving and manoeuvring
aids - General
recommendations
Driving and manoeuvring aids cannot, in
any circumstances, replace the need for
vigilance on the part of the driver.
The driver must comply with the Highway
Code, must remain in control of the vehicle in
all circumstances and must be able to retake
control of it at all times. The driver must adapt
the speed to climactic conditions, traffic and
the state of the road.
It is the driver's responsibility to constantly
check the traffic, to assess the relative
distances and speeds of other vehicles and to
anticipate their movements before indicating
and changing lane.
The systems cannot exceed the limits of the
laws of physics.
Driving aids
You should hold the steering wheel
with both hands, always use the interior and
exterior rear view mirrors, always keep the
feet close to the pedals and take a break
every two hours.
Manoeuvring aids
The driver must always check the
surroundings of the vehicle before and during
the whole manoeuvre, in particular using the
mirrors.
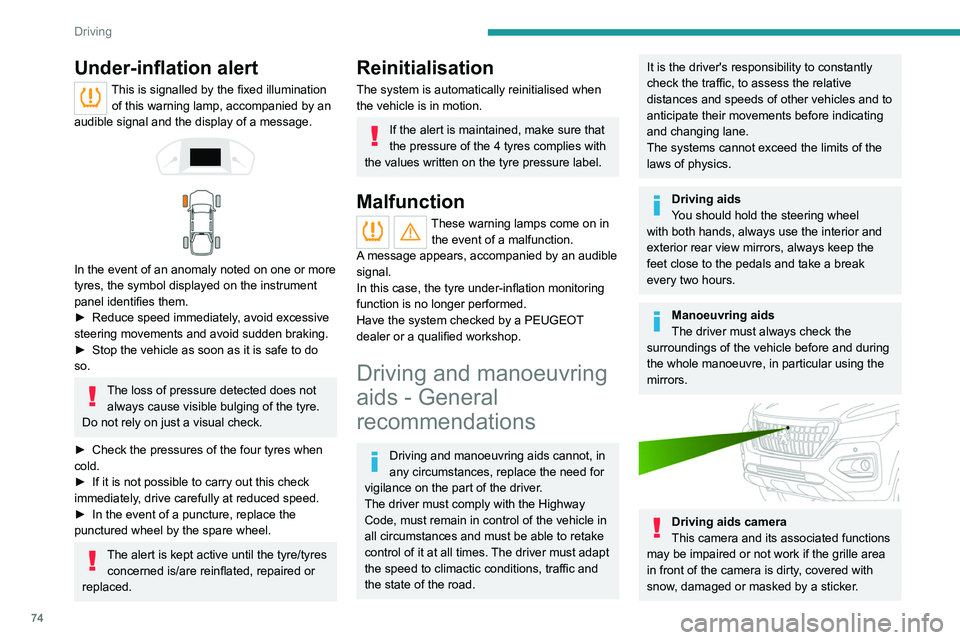
Driving aids camera
This camera and its associated functions
may be impaired or not work if the grille area
in front of the camera is dirty, covered with
snow, damaged or masked by a sticker.
Page 77 of 176
75
Driving
6Poor visibility (inadequate street lighting,
heavy rain, thick fog, snowfall), dazzle
(headlamps of an oncoming vehicle, low sun,
reflections on a damp road, leaving a tunnel,
alternating shade and light) can also impair
detection performance.
In the event of a grille replacement, contact
a PEUGEOT dealer or a qualified workshop
to recalibrate the camera; otherwise, the
operation of the associated driving aids may
be disrupted.
Other cameras
The images from the camera(s)
displayed on the touch screen or on the
instrument panel may be distorted by the
relief.
In the presence of areas in shade, or in
conditions of bright sunlight or inadequate
lighting, the image may be darkened and with
lower contrast.
Obstacles may appear further away than they
actually are.
Sensors
The operation of the sensors, as well as
any associated functions, may be disrupted
by noise pollution such as that emitted by
noisy vehicles and machinery (e.g.
lorries,
pneumatic drills), by the accumulation of
snow or dead leaves on the road or in the
event of damaged bumpers.
When reverse gear is engaged, an audible
signal (long beep) indicates that the sensors
may be dirty.
A front or rear impact to the vehicle can
upset the sensors’ settings, which is not
always detected by the system: distance
measurements may be distorted.
The sensors do not systematically detect
obstacles that are too low (pavements, studs)
or too thin (trees, posts, wire fences).
Certain obstacles located in the sensors’ blind
spots may not be detected or may no longer
be detected during the manoeuvre.
Certain materials (fabrics) absorb sound
waves: pedestrians may not be detected.
Maintenance
Clean the bumpers and door mirrors and
the field of vision of the cameras regularly.
When washing your vehicle at high pressure,
direct the spray from at least 30
cm away
from the sensors and cameras.
Mats
The use of mats not approved by
PEUGEOT may interfere with the operation of
the speed limiter or cruise control.
To avoid any risk of jamming the pedals:
–
Ensure that the mat is secured correctly
.
–
Never fit one mat on top of another
.
Units of speed
Ensure that the units of speed displayed
in the instrument panel (mph or km/h) are
those for the country you are driving in.
If this is not the case, when the vehicle is
stationary, set the display to the required
units of speed so that it complies with what is
authorised locally.
In case of doubt, contact a PEUGEOT dealer
or a qualified workshop.
Speed limiter
Refer to the General recommendations on the
use of driving and manoeuvring aids .
This system prevents the vehicle from
exceeding the speed programmed by the
driver (speed setting).
The speed limiter is switched on manually.
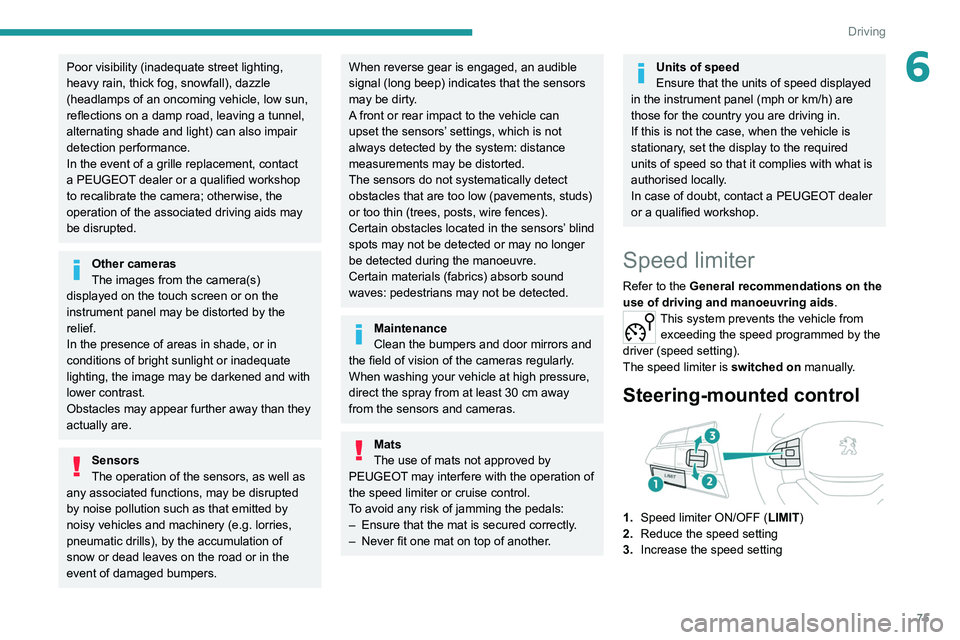
Steering-mounted control
1.Speed limiter ON/OFF (LIMIT )
2. Reduce the speed setting
3. Increase the speed setting
Page 79 of 176
77
Driving
6To return to the speed setting, release the
accelerator pedal (when the set speed is
reached again, the displayed speed stops
flashing).
Operating limits
Never use the system in the following
situations:
–
In an urban area with the risk of
pedestrians crossing the road.
–
In heavy traffic.
–
On winding or steep roads.
–
On slippery or flooded roads.
–
In poor weather conditions.
–
Driving on a speed circuit.
–
Driving on a rolling road.
–
When using snow chains, non-slip covers
or studded tyres.
Cruise control
Refer to the General recommendations on the
use of driving and manoeuvring aids and to
Cruise control - particular recommendations.
This system automatically keeps the vehicle’s speed at the cruise value
programmed by the driver (speed setting),
without using the accelerator pedal.
Cruise control is switched on manually.
It requires a minimum vehicle speed of 25 mph
(40
km/h).
With a manual gearbox, third gear or higher must
be engaged.
With an automatic gearbox, mode
D
or second
gear or higher in manual mode must be
engaged.
Switching off the ignition cancels any
speed setting.
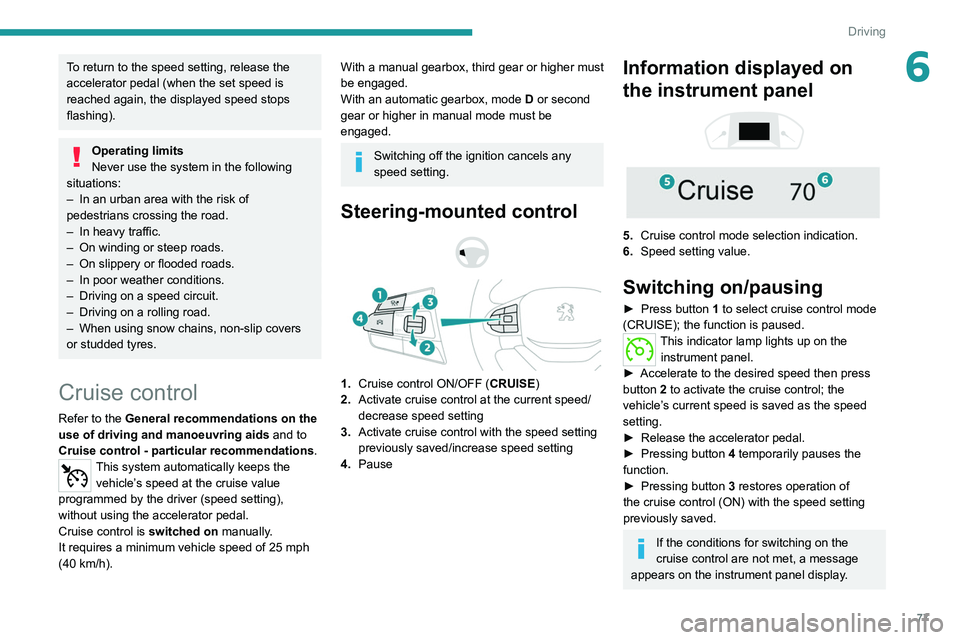
Steering-mounted control
1. Cruise control ON/OFF (CRUISE)
2. Activate cruise control at the current speed/
decrease speed setting
3. Activate cruise control with the speed setting
previously saved/increase speed setting
4. Pause
Information displayed on
the instrument panel
5. Cruise control mode selection indication.
6. Speed setting value.
Switching on/pausing
► Press button 1 to select cruise control mode
(CRUISE); the function is paused.
This indicator lamp lights up on the instrument panel.
►
Accelerate to the desired speed then press
button
2 to activate the cruise control; the
vehicle’s current speed is saved as the speed
setting.
►
Release the accelerator pedal.
►
Pressing button 4
temporarily pauses the
function.
►
Pressing button 3
restores operation of
the cruise control (ON) with the speed setting
previously saved.
If the conditions for switching on the
cruise control are not met, a message
appears on the instrument panel display.
Page 90 of 176
88
Practical information
► Turn the filler cap to the left, remove it and
place it on its support (on the filler flap).
► Introduce the filler nozzle and push it in as far
as possible before starting to refuel (to minimise
the risk of splashing).
Do not continue after the nozzle’s third cut-
out. Doing so may cause malfunctions.
► Put the filler cap back in place and turn it to
the right.
► Close the fuel filler flap.
If you have put in the wrong fuel for the
vehicle, you must have the fuel tank
drained and filled with the correct fuel before
starting the engine.
Depending on version, the vehicle is fitted with
a catalytic converter, which helps to reduce the
level of harmful emissions in the exhaust gases.
For petrol engines, you must use unleaded
fuel.
The filler neck is narrower, admitting unleaded
petrol nozzles only.
Towing device
Load distribution
► Distribute the load in the trailer so that the
heaviest items are as close as possible to the
axle, and the nose weight approaches the
maximum permitted without exceeding it.
Air density decreases with altitude, thus reducing
engine performance. The maximum towable load
Recommended fuel
The vehicle complies with Euro 1, Euro 4 and Euro 5 emission standards.
The petrol engines are compatible with 92 RON
minimum unleaded fuel.
Diesel engines are compatible with type B0
fuel
not containing Fatty Acid Methyl Ester
(biofuel) and B7 and B10 type fuels conforming
to EN590 and EN16734 standards containing
respectively up to 7% and 10% of Fatty Acid
Methyl Ester.
Depending on the country of sale, the Diesel
fuel must be suited to the ambient temperature
in order to optimise engine performance and
minimise polluting emissions.
Temperature greater than Diesel quality
5°C (+41°F) N°0
-5°C (+23°F) N°-10
-10°C (+14°F) N°-20
-25°C (-13°F) N°-35
The use of any other type of (bio) fuel
(vegetable or animal oils, pure or diluted,
domestic fuel, etc.) is strictly prohibited (risk
of damage to the engine and fuel system).
Diesel at low temperature
At temperatures below 0 °C (+32 °F), the
formation of paraffins in summer-type Diesel
fuels could prevent the engine from operating
correctly
. In these temperature conditions, use
winter-type Diesel fuel and keep the fuel tank
more than 50
% full.
At temperatures below -15
°C (+5 °F) to avoid
problems starting, it is best to park the vehicle
under shelter (heated garage).
Travelling abroad
Certain fuels could damage your vehicle’s
engine.
In certain countries, the use of a particular
fuel may be required (specific octane rating,
specific trade name, etc.) to ensure correct
operation of the engine.
For all additional information, consult a dealer.
Refuelling
Fuel tank capacity: approximately 80 litres.
Reserve level: approximately 11 litres.
Low fuel level
When the low fuel level is reached, this
warning lamp lights up on the instrument
panel. When it first comes on, about 11 litres of
fuel remain.
Until sufficient fuel is added, this warning lamp
appears every time the ignition is switched on,
accompanied by an onscreen message and
an audible signal. When driving, this message
and audible signal are repeated with increasing
frequency as the fuel level drops towards 0.
You must refuel as soon as possible to avoid
running out of fuel.
For more information on Running out of fuel
(Diesel), refer to the corresponding section.
A small arrow by the warning lamp indicates which side of the vehicle the
fuel filler flap is located on.
Refuelling
When refuelling, at least 10 litres must be added
in order to be registered by the fuel gauge.
Opening the filler cap may create a noise caused
by an inrush of air. This vacuum is normal,
caused by the sealing of the fuel system.
To refuel in complete safety:
►
Always switch off the engine.
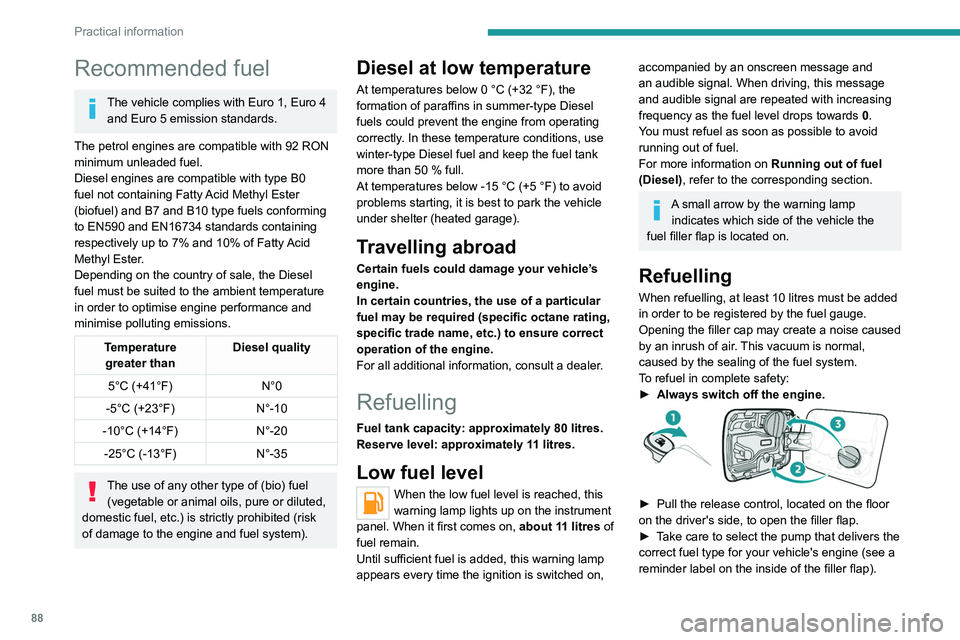
► Pull the release control, located on the floor
on the driver's side, to open the filler flap.
►
T
ake care to select the pump that delivers the
correct fuel type for your vehicle's engine (see a
reminder label on the inside of the filler flap).
Page 96 of 176
94
Practical information
Particle filter (Diesel)
(Depending on version)The start of clogging of the particle filter is indicated by the temporary lighting of this
warning lamp, accompanied by an alert
message.
As soon as the traffic conditions permit,
regenerate the filter by driving at a speed of at
least 37 mph (60 km/h) until the warning lamp
goes off.
If the warning lamp stays on, this
indicates a low Diesel additive level.
For more information on Checking levels,
refer to the corresponding section.
Following prolonged operation of the
vehicle at very low speed or at idle, you
may, in exceptional circumstances, notice
water vapour coming from the exhaust while
accelerating. These emissions have no
impact on the vehicle’s behaviour and the
environment.
New vehicle
During the first few particle filter
regeneration operations, you may notice a
"burning" smell. This is perfectly normal.
Manual gearbox
The gearbox does not require any maintenance (no oil change).
Screenwash fluid
Top up to the required level when necessary.
Tank capacity: 3 litres.
Fluid specification
The fluid must be topped up with a pre-mixed
product.
In winter (temperatures below zero), a fluid
containing an anti-freeze agent which is
appropriate for the temperature conditions
must be used in order to protect the system's
components (pump, tank, ducts, jets).
Filling with pure water is prohibited in all
circumstances (risk of freezing,
limescale, etc.).
Checks
Unless otherwise indicated, check these
components in accordance with the
manufacturer's service schedule and according
to your engine.
Otherwise, have them checked by a PEUGEOT
dealer or a qualified workshop.
Only use products recommended by
PEUGEOT or products of equivalent
quality and specification.
In order to optimise the operation of
components as important as those in the
braking system, PEUGEOT selects and offers
very specific products.
12 V battery
The battery does not require any maintenance.
Check regularly that the terminals are correctly
tightened (versions without quick-release
terminals) and that the connections are clean.
For more information on the precautions
to take before any work on the 12 V
battery, refer to the corresponding section.
Passenger compartment
filter
Depending on the environment and the
use of the vehicle (e.g. dusty atmosphere,
city driving), change it twice as often, if
necessary .
A clogged passenger compartment filter
can adversely affect air conditioning
system performance and generate
undesirable odours.
Air filter
Depending on the environment and the
use of the vehicle (e.g. dusty atmosphere,
city driving), change it twice as often, if
necessary .
Oil filter
Change the oil filter each time the engine
oil is changed.
Diesel fuel filter
Change the Diesel fuel filter according to
the schedule of operations in the
manufacturer's service schedule.
A clogged Diesel fuel filter can reduce engine performance and damage the
injection system.
Bleeding water from the Diesel fuel
filter
If this warning lamp comes on, bleed the
filter. Otherwise, bleed regularly at each
engine oil change.
–
T
o drain the water, unscrew the bleed screw
located under the filter.
–
Operate it until all the water in the transparent
tube has drained, then tighten the bleed screw
again.
For more information on the Engine
compartment, in particular the location
of the Diesel fuel filter, refer to the
corresponding section.