Page 105 of 176

103
Practical information
7Bodywork
High-gloss paint
Do not use abrasive products, solvents,
petrol or oil to clean the bodywork.
Never use an abrasive sponge to clean
stubborn stains - risk of scratching the
paintwork!
Do not apply polish in strong sunshine, or to
plastic or rubber parts.
Use a soft cloth and soapy water or a pH
neutral product.
Gently wipe the bodywork with a clean
microfibre cloth.
Apply polish with the vehicle clean and dry.
Comply with the instructions for use stated on
the product.
Decals
(Depending on version)
Do not use a high-pressure washer to
clean the vehicle - risk of damaging or
detaching the decals!
Use a high-flow hose (temperature
between 25°C and 40°C).
Place the jet of water perpendicular to the
surface to be cleaned.
Rinse the vehicle with demineralised water.
Corrosion protection
Avoid accumulation of salt, dirt, chemicals and moisture in hard-to-clean
areas.
Have damaged parts of the bodywork
repaired.
Avoid parking the vehicle in wet areas; favour
aerated and ventilated areas.
Remove dust or sand from under the
mats and dry any moisture.
Regularly clean the drain holes in the doors,
the bodywork and the chassis.
When transporting corrosive objects (acids,
fertilisers, salt), use special containers and
clean after unloading.
Wash the vehicle, paying particular attention
to hard-to-reach areas, after driving on roads
treated with road salt.
Leather
Leather is a natural product. Appropriate regular
care is essential for its durability.
It must be protected and nourished using a
specific leather product, to keep it supple and
preserve its original appearance.
Do not clean leather using unsuitable
cleaning agents such as solvents,
detergents, petrol or pure alcohol.
When cleaning items partly made from
leather, take care not to damage the other
materials with the specific leather product.
Before cleaning greasy stains or liquids,
quickly mop up any surplus.
Before cleaning, wipe off any residues liable
to scuff the leather, using a cloth that has
been dampened with demineralised water
and thoroughly wrung out.
Clean leather using a soft cloth moistened
with soapy water or a pH-neutral product.
Dry with a soft, dry cloth.
Page 106 of 176

104
In the event of a breakdown
Warning triangle
As a safety precaution, before leaving your
vehicle to set up and install the triangle, switch
on the hazard warning lamps and put on your
high visibility vest.
Storage
Storage compartments located under each rear
bench seat cushion can store a folded triangle or
its storage box.
For more information on the Rear bench seat,
and especially on the storage compartments
under the seat cushions, refer to the
corresponding section.
Storage compartments located behind the
passenger seat or passenger bench seat
(depending on version) can store a folded
triangle or its storage box.
For more information on the Front seats or on
the Front bench seat, and in particular their
use, refer to the corresponding section.
Assembling and placing the triangle
For versions supplied with a triangle as original
equipment, refer to the illustration above.
For other versions, refer to the assembly
instructions provided with the triangle.
►
Put the triangle in place behind the vehicle,
as required by local legislation.
Fire extinguisher
(Depending on country of sale)
It should be used in an emergency, such as a
fire.
For more information on its use, refer to the label
on the fire extinguisher.
Accessing the fire extinguisher
The fire extinguisher is located under the front
passenger seat.
► Pull lever A outwards to unhook the
tightening strap.
After using the fire extinguisher, store it in a safe
place, then replace it with a new extinguisher as
soon as possible.
Never keep a fire extinguisher that has
already been used or that does not bear
its seal.
When the fire extinguisher is not used, attach
it to its support. There is a risk of movement
in the event of sudden braking or an accident.
The fire extinguisher must be replaced
approximately every 5 years; the expiry date
is written on its label.
Contact a PEUGEOT dealer or a
qualified workshop to replace the fire
extinguisher with one that has the same
specifications as the original.
Running out of fuel
(Diesel)
With Diesel engines, the fuel system must be
primed if you run out of fuel.
Before starting to prime the system, it is
essential to put at least 5 litres of Diesel into the
fuel tank.
For more information on Refuelling and
on the Engine compartment (in
particular the location of the priming pump),
refer to the corresponding section.
► Open the bonnet.
► Loosen the degassing bolt about 2 to 3 turns.
Page 107 of 176

105
In the event of a breakdown
8Never keep a fire extinguisher that has
already been used or that does not bear
its seal.
When the fire extinguisher is not used, attach
it to its support. There is a risk of movement
in the event of sudden braking or an accident.
The fire extinguisher must be replaced
approximately every 5 years; the expiry date
is written on its label.
Contact a PEUGEOT dealer or a
qualified workshop to replace the fire
extinguisher with one that has the same
specifications as the original.
Running out of fuel
(Diesel)
With Diesel engines, the fuel system must be
primed if you run out of fuel.
Before starting to prime the system, it is
essential to put at least 5 litres of Diesel into the
fuel tank.
For more information on Refuelling and
on the Engine compartment (in
particular the location of the priming pump),
refer to the corresponding section.
►
Open the bonnet.
►
Loosen the degassing bolt about 2 to 3 turns.
► Activate the priming pump until fuel
(without air) appears through the
degassing bolt.
►
Retighten the degassing bolt.
►
Operate the starter motor until the engine
starts (if the engine does not start at the first
attempt, wait around 15 seconds before trying
again).
►
If the engine does not start after a few
attempts, operate the priming pump again, then
start the engine.
►
Close the bonnet.
Tool kit
Set of tools supplied with the vehicle.
Accessing the tools
Depending on version, the tools are stored under
the rear passenger seat cushion or behind the
front passenger seat or bench seat.
To access the tools under the rear passenger
seat:
►
Open the rear passenger door
.
► Lift the right-hand rear seat cushion by pulling
the strap to unlock it, then lift up the carpet
(
unscrew the jack to take it out of its support).
To access the tools behind the passenger seat
or the passenger bench seat (depending on
version):
►
Open the passenger door
.
►
Fold down the seat backrest.
For more information on the Front bench seats
,
Rear bench seats and Front seats, and in
particular their use, refer to the corresponding
section.
Page 108 of 176

106
In the event of a breakdown
List of tools
1.Reversible Phillips and flat screwdriver
2. Wheelbrace
To remove the wheel fixing nuts and use the
extension
3. Extension kit
To unscrew/screw the spare wheel winch
screw and raise/lower the jack.
4.Bottle jack
To raise the vehicle.
5.Scissor jack
To raise the vehicle.
Before using the scissor jack 5, contact a
PEUGEOT dealer or a qualified
workshop to find out how it works.
These tools are specific to the vehicle and may vary according to the level of
equipment.
Do not use them for any other purpose.
The jack must only be used to change a wheel with a damaged or punctured tyre.
Do not use any jack other than the one
supplied with the vehicle.
If the vehicle does not have its original jack,
contact a PEUGEOT dealer or a qualified
workshop to obtain the one that was intended
by the manufacturer.
The jack meets European standards, as
defined in the Machinery Directive 2006/42/
CE.
The jack does not require any maintenance.
Spare wheel
Accessing the spare wheel
The spare wheel is held by a winch system
underneath the rear of the vehicle.
Removing the spare wheel
► Assemble the elements of the extension 3
and place the wheelbrace 2 at the end.
Page 109 of 176

107
In the event of a breakdown
8
► With the extension 3 and the wheelbrace 2,
turn the control screw clockwise to unwind the
winch until the spare wheel is lying flat on the
ground. Unwind the length required to access
the spare wheel easily.
►
Remove the wheel from the rear of the
vehicle.
► Pass the connecting piece through the wheel
hub to release it.
Putting the winch and spare wheel
back in place
When the spare wheel is fitted in place of
a wheel with a punctured tyre, the winch
and punctured tyre must be put back in
position underneath the vehicle before
restarting.
►
Position the wheel flat, with the valve
upwards.
► Pass the connecting piece through the wheel
hub.
►
Centre and position the connecting piece
under the spare wheel, making sure that the
claw
A comes out of one of the wheel tightening
holes.
A padlock can be fitted in the hole of the claw A to lock the chain to the spare
wheel to act as an anti-theft device.
►
T
ighten the winch chain by turning the control
screw with the wheelbrace 2 and the extension 3
anticlockwise.
► Place the wheel under the rear of the vehicle.
► Raise the wheel under the vehicle, by turning
the winch control screw with the wheelbrace 2
and the extension 3 anticlockwise.
►
When the wheel is halfway up, check that the
suspended
chain can enter the hole in the wheel.
►
T
ighten fully.
►
Check that the wheel is properly flattened
against the floor
.
Check that the wheel is not caught on the
external parts.
Check that the wheel is held firmly against
its support by trying to turn and push it. If
the wheel moves, repeat the positioning
procedure.
Removing a wheel
Parking the vehicle
Immobilise the vehicle where it does
not obstruct traffic: the ground must be level,
stable and non-slippery.
With a manual gearbox, engage first gear
then switch off the ignition to block the
wheels.
With an automatic gearbox, place the gear
selector in position P then switch off the
ignition to block the wheels.
Apply the parking brake and check that the
indicator lamp lights up on the instrument
panel.
Page 110 of 176
108
In the event of a breakdown
Ensure that the occupants have left the
vehicle and are located in a safe place.
Never start the engine while the vehicle is on
the jack.
Never go underneath a vehicle raised using a
jack; use an axle stand.
Always place a chock against the wheel
diagonally opposite to the one being replaced.
► Loosen the nuts using the wheelbrace 2 .
Front
Rear
► Place the foot of jack 4 on the ground and
ensure that it is directly below the front A or
rear
B jacking point on the underbody, whichever
is closest to the wheel to be changed.
► Extend the jack 4, using the knob integrated
to the jack, until its head comes into contact
with the jacking point
A
or B, whichever is being
used; the vehicle contact area
A
or B must be
perfectly flat against the head of the jack.
►
Raise the vehicle, using the extension 3
and
the wheelbrace 2, until there is sufficient space
between the wheel and the ground, to then
easily fit the spare (not punctured) wheel.
Page 111 of 176

109
In the event of a breakdown
8Ensure that the jack is stable. If the
ground is slippery or loose, the jack may
slip or collapse - risk of injury!
Take care to position the jack strictly at
one of the jacking points
A
or B under the
vehicle, ensuring that the head of the jack is
centred under the contact area on the vehicle.
Otherwise, there is a risk of damage to the
vehicle and/or of the jack collapsing - risk of
injury!
Stop raising the vehicle when the yellow
warning line appears on the jack cylinder.
► Remove the nuts and store them in a clean
place.
►
Depending on version, remove the wheel
trim.
►
Release the wheel.
Fitting a wheel
Fixing of the steel spare wheel
If the vehicle is equipped with alloy
wheels, the washers do not make contact with
the steel spare wheel. The wheel is secured
by the conical surface of each nut.
► Clean the contact surfaces between the
wheel and the hub.
►
Fit the wheel on the hub.
► Screw in the nuts by hand as far as possible.
► Pre-tighten the nuts using the wheelbrace 2
.
► Lower the vehicle again fully.
► Fold jack 4 and remove it.
► Tighten the nuts using the wheelbrace 2,
respecting the cross tightening order.
►
Refit the wheel trim (depending on
equipment).
►
Disassemble the extension 3
and the
wheelbrace 2.
►
Store the tools.
Page 112 of 176

11 0
In the event of a breakdown
After changing a wheel
Visit a PEUGEOT dealer or a qualified
workshop as soon as possible to have
the tightness of the nuts and the pressure of
the spare wheel checked.
Have the punctured tyre examined. After
inspection, the technician will advise you on
whether the tyre can be repaired or if it must
be replaced.
Changing a bulb
In some weather conditions (e.g. low
temperature or humidity), misting on the
internal surface of the glass of the headlamps
and rear lamps is normal, and will disappear
after the lamps have been on for a few
minutes.
The headlamps have polycarbonate lenses with a protective coating:
►
do not clean them with a dry or
abrasive cloth, nor with detergent or
solvent products,
►
use a sponge and soapy water or a pH
neutral product,
►
when using a high-pressure washer on
persistent marks, do not keep the lance
directed towards the lamps or their edges for
too long, so as not to damage their protective
coating and seals.
Changing a bulb must only be done with
the ignition off and after the lamp has
been switched off for several minutes - risk of
serious burns!
Do not touch the bulb directly with your
fingers, use a lint-free cloth.
It is essential only to use anti-ultraviolet
(UV) type bulbs, so as not to damage the
headlamp.
Always replace a failed bulb with a new bulb
of the same type and specification.
After changing a bulb
To refit, carry out the operations in
reverse order to removal.
Close the protective cover very carefully to
guarantee the sealing of the lamps.
Light-emitting diode (LED)
headlamps and lamps
Depending on version, the affected types of
headlamps / lamps are:
–
Offset daytime running lamps.
–
Direction indicator side repeaters.
–
Rear sidelamps.
–
Third brake lamp and loading bay lighting.
For the replacement of this type of bulb,
you must contact a PEUGEOT dealer or
a qualified workshop.
Front lamps
1. A: Sidelamps (W5W)
or
B: Daytime running lamps / sidelamps (LED)
2. A: Dipped beam headlamps (H8)
or
B: Dipped beam headlamps (LED)
3. A: Main beam headlamps (HB3)
or
B: Main beam headlamps (H9)
4. Direction indicators (PY21W)
5. Foglamps (H11)
6. Daytime running lamps (PY24W)
Opening the bonnet/Accessing the
bulbs
With the engine warm, proceed with caution -
risk of burns!
Take care with objects or clothing that could
be caught in the blades of the cooling fan -
risk of strangulation!
Halogen bulbs (Hx)
To ensure good quality lighting, check
that the bulb is correctly positioned in its
housing.
Sidelamps
► Remove the protective cover by giving it a
quarter turn.
► Pull the bulb holder backwards to remove it.
► Pull out the bulb and replace it.
When refitting the bulb holder in its housing,
press until you hear a click which means it is
locked in place.
 1
1 2
2 3
3 4
4 5
5 6
6 7
7 8
8 9
9 10
10 11
11 12
12 13
13 14
14 15
15 16
16 17
17 18
18 19
19 20
20 21
21 22
22 23
23 24
24 25
25 26
26 27
27 28
28 29
29 30
30 31
31 32
32 33
33 34
34 35
35 36
36 37
37 38
38 39
39 40
40 41
41 42
42 43
43 44
44 45
45 46
46 47
47 48
48 49
49 50
50 51
51 52
52 53
53 54
54 55
55 56
56 57
57 58
58 59
59 60
60 61
61 62
62 63
63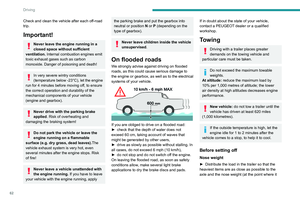 64
64 65
65 66
66 67
67 68
68 69
69 70
70 71
71 72
72 73
73 74
74 75
75 76
76 77
77 78
78 79
79 80
80 81
81 82
82 83
83 84
84 85
85 86
86 87
87 88
88 89
89 90
90 91
91 92
92 93
93 94
94 95
95 96
96 97
97 98
98 99
99 100
100 101
101 102
102 103
103 104
104 105
105 106
106 107
107 108
108 109
109 110
110 111
111 112
112 113
113 114
114 115
115 116
116 117
117 118
118 119
119 120
120 121
121 122
122 123
123 124
124 125
125 126
126 127
127 128
128 129
129 130
130 131
131 132
132 133
133 134
134 135
135 136
136 137
137 138
138 139
139 140
140 141
141 142
142 143
143 144
144 145
145 146
146 147
147 148
148 149
149 150
150 151
151 152
152 153
153 154
154 155
155 156
156 157
157 158
158 159
159 160
160 161
161 162
162 163
163 164
164 165
165 166
166 167
167 168
168 169
169 170
170 171
171 172
172 173
173 174
174 175
175