2021 Peugeot Landtrek reset
[x] Cancel search: resetPage 14 of 176
12
Instruments
Total distance recorder
The total distance recorder measures the total
distance travelled by the vehicle since its initial
registration.
With the ignition on, the total distance is
displayed at all times. It remains displayed for
30 seconds after switching off the ignition. It is
displayed when the driver's door is opened, and
when the vehicle is locked or unlocked.
When travelling abroad, you may have to
change the distance units (km or miles):
the road speed must be displayed in the local
country’s official unit (km/h or mph).
The unit is changed via the screen
configuration menu, with the vehicle
stationary.
Instrument panel lighting
dimmer
Instrument panel lighting
dimmer
► In the Settings tab, select
“Brightness”.
► Adjust the brightness, using the knob located
on the right side of the steering wheel.
Touch screen lighting
dimmer
► Press the " Settings" button.
► Select “Display” then “Brightness”.
► Adjust the brightness by moving the
slider
.
The brightness can be set differently for day mode (lighting control stalk in the
"OFF " position) and night mode (lighting
control stalk in any other position).
Trip computer
Displays information related to the current trip
(range, fuel consumption, average speed, etc.).
Display of data on the
instrument panel
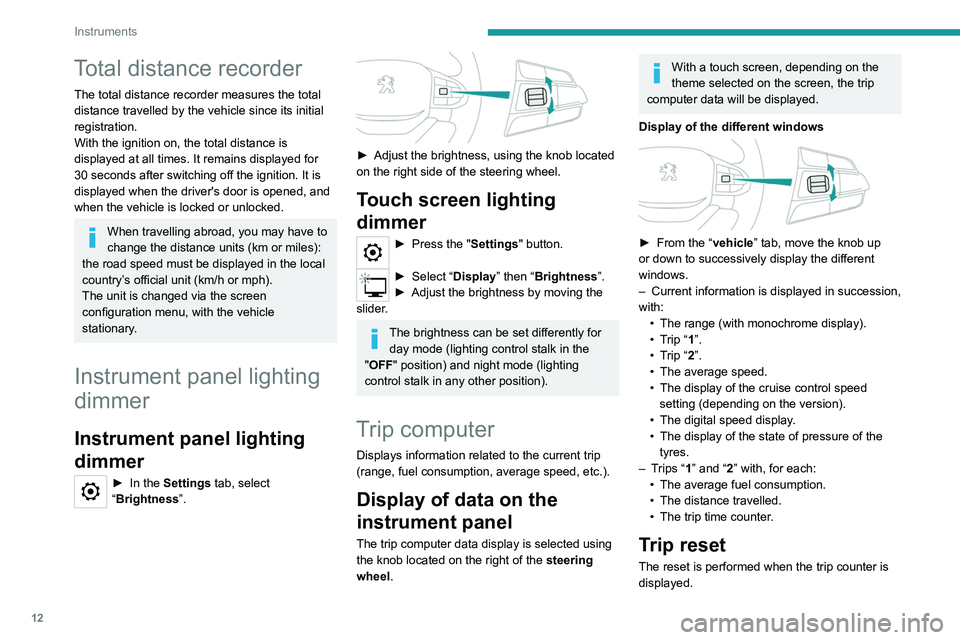
The trip computer data display is selected using
the knob located on the right of the steering
wheel.
With a touch screen, depending on the
theme selected on the screen, the trip
computer data will be displayed.
Display of the different windows
► From the “ vehicle” tab, move the knob up
or down to successively display the different
windows.
–
Current information is displayed in succession,
with: •
The range (with monochrome display).
•
T
rip “1”.
•
T
rip “2”.
•
The average speed.
•
The display of the cruise control speed
setting (depending on the version).
•
The digital speed display
.
•
The display of the state of pressure of the
tyres.
–
T
rips “1” and “2” with, for each:
•
The average fuel consumption.
•
The distance travelled.
•
The trip time counter
.
Trip reset
The reset is performed when the trip counter is
displayed.
Page 15 of 176
13
Instruments
1
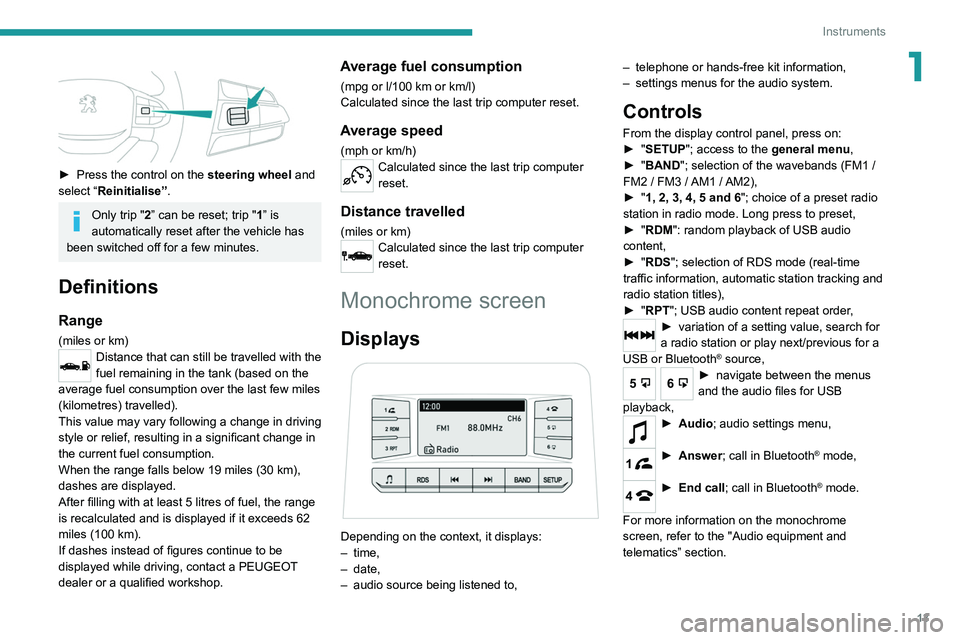
► Press the control on the steering wheel and
select “Reinitialise”.
Only trip "2” can be reset; trip "1” is
automatically reset after the vehicle has
been switched off for a few minutes.
Definitions
Range
(miles or km)Distance that can still be travelled with the
fuel remaining in the tank (based on the
average fuel consumption over the last few miles
(kilometres) travelled).
This value may vary following a change in driving
style or relief, resulting in a significant change in
the current fuel consumption.
When the range falls below 19 miles (30
km),
dashes are displayed.
After filling with at least 5 litres of fuel, the range
is recalculated and is displayed if it exceeds 62
miles (100
km).
If dashes instead of figures continue to be
displayed while driving, contact a PEUGEOT
dealer or a qualified workshop.
Average fuel consumption
(mpg or l/100 km or km/l)
Calculated since the last trip computer reset.
Average speed
(mph or km/h)Calculated since the last trip computer
reset.
Distance travelled
(miles or km)Calculated since the last trip computer
reset.
Monochrome screen
Displays
Depending on the context, it displays:
– time,
–
date,
–
audio source being listened to, –
telephone or hands-free kit information,
–
settings menus for the audio system.
Controls
From the display control panel, press on:
►
" SETUP"; access to the general menu,
►
"
BAND "; selection of the wavebands (FM1
/
FM2
/ FM3 / AM1 / AM2),
►
"
1, 2, 3, 4, 5 and 6"; choice of a preset radio
station in radio mode. Long press to preset,
►
"
RDM": random playback of USB audio
content,
►
"
RDS"; selection of RDS mode (real-time
traffic information, automatic station tracking and
radio station titles),
►
"
RPT"; USB audio content repeat order,
► variation of a setting value, search for
a radio station or play next/previous for a
USB or Bluetooth
® source,
56► navigate between the menus
and the audio files for USB
playback,
► Audio; audio settings men u,
1► Answer; call in Bluetooth® mode,
4► End call; call in Bluetooth® mode.
For more information on the monochrome
screen, refer to the "Audio equipment and
telematics” section.
Page 19 of 176

17
Access
2Selective unlocking
Driver's door
► Press the unlocking button.
►
Press it
again to unlock the other doors.
Complete or selective unlocking and alarm
deactivation is confirmed by flashing the
direction indicators.
Depending on version, the door mirrors unfold.
Opening the windows
Depending on version, holding the
unlocking button pressed for more than 3
seconds opens the windows.
The windows stop when the button is released.
With the key
Driver's door
► T urn the key in the driver's door lock towards
the front of the vehicle to unlock it.
If the vehicle has an alarm, it will not be
deactivated. Opening a door will trigger the
alarm, which can be stopped by pressing the
remote control unlocking button.
Tailgate (depending on version)
►
T
urn the dedicated key in the tailgate lock to
the left to unlock.
Locking the vehicle
With the remote control
► Press this button to lock the vehicle.
Locking and alarm activation is confirmed by the
lighting of the direction indicators.
Depending on version, the door mirrors fold.
An improperly closed door prevents the vehicle from locking. If the vehicle is
fitted with an alarm, it will be activated after
about 45
seconds.
If the vehicle is unlocked but the doors
are not subsequently opened, the vehicle
will automatically lock itself again after
approximately 30
seconds. If the vehicle
is fitted with an alarm, it will be reactivated
automatically.
Closing the windows
Holding the locking button pressed for
more than 3 seconds closes the windows.
When closing windows, ensure that no
person or object could prevent their
correct closure.
With the key
Driver's door
► T urn the key in the driver's door lock towards
the rear of the vehicle to lock it.
Check that the doors are properly closed.
Tailgate (depending on version)
►
T
urn the dedicated key in the tailgate lock to
the right to lock it.
Locating the vehicle
Helps you to locate your vehicle from a distance,
with the vehicle locked:
–
The direction indicators flash for approximately
10 seconds.
–
The sidelamps and dipped beam headlamps
come on for 30 seconds.
► Press this button.
Remote audible signal
Used to locate the vehicle when it is not visible.
Also used to dissuade anyone who wants to
enter the vehicle or damage it.
► Press this button twice consecutively
to activate the horn twice.
Advice
Remote control
The remote control is a sensitive, high-
frequency device; avoid handling it in your
pocket, due to the risk of unintentionally
unlocking the vehicle.
Avoid pressing the remote control buttons
while out of range of the vehicle, due to
the risk of rendering the remote control
inoperative. It would then be necessary to
reset it.
The remote control does not work
when the
key is in the ignition switch, even when the
ignition is switched off.
Page 121 of 176
11 9
In the event of a breakdown
8► Switch off all electricity-consuming devices
(audio system, wipers, lamps, etc.).
►
Switch off the ignition and wait for 4
minutes.
After accessing the battery, it is only necessary
to disconnect the (+) terminal.
Screwed terminal
Disconnecting the (+) terminal
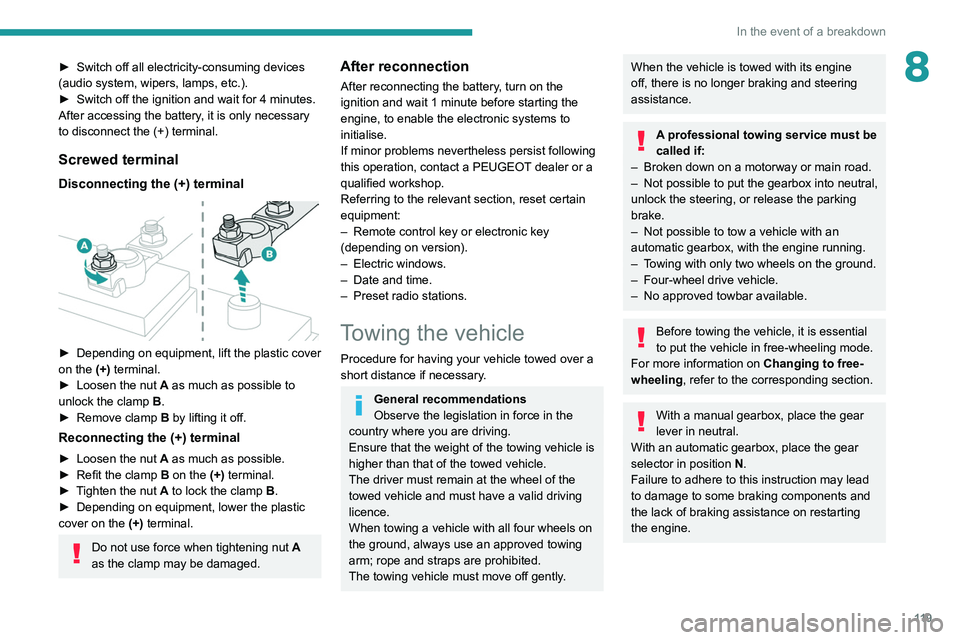
► Depending on equipment, lift the plastic cover
on the (+) terminal.
►
Loosen the nut
A as much as possible to
unlock the clamp B.
►
Remove clamp
B
by lifting it off.
Reconnecting the (+) terminal
► Loosen the nut A as much as possible.
► Refit the clamp B on the (+) terminal.
►
T
ighten the nut A to lock the clamp B.
►
Depending on equipment, lower the plastic
cover on the
(+) terminal.
Do not use force when tightening nut A
as the clamp may be damaged.
After reconnection
After reconnecting the battery, turn on the
ignition and wait 1 minute before starting the
engine, to enable the electronic systems to
initialise.
If minor problems nevertheless persist following
this operation, contact a PEUGEOT dealer or a
qualified workshop.
Referring to the relevant section, reset certain
equipment:
–
Remote control key or electronic key
(depending on version).
–
Electric windows.
–
Date and time.
–
Preset radio stations.
Towing the vehicle
Procedure for having your vehicle towed over a
short distance if necessary.
General recommendations
Observe the legislation in force in the
country where you are driving.
Ensure that the weight of the towing vehicle is
higher than that of the towed vehicle.
The driver must remain at the wheel of the
towed vehicle and must have a valid driving
licence.
When towing a vehicle with all four wheels on
the ground, always use an approved towing
arm; rope and straps are prohibited.
The towing vehicle must move off gently.
When the vehicle is towed with its engine
off, there is no longer braking and steering
assistance.
A professional towing service must be
called if:
–
Broken down on a motorway or main road.
–
Not possible to put
the gearbox into neutral,
unlock the steering, or release the parking
brake.
–
Not possible to tow a vehicle with an
automatic gearbox, with the engine running.
–
T
owing with only two wheels on the ground.
–
Four-wheel drive vehicle.
–
No approved towbar available.
Before towing the vehicle, it is essential
to put the vehicle in free-wheeling mode.
For more information on Changing to free-
wheeling , refer to the corresponding section.
With a manual gearbox, place the gear
lever in neutral.
With an automatic gearbox, place the gear
selector in position N.
Failure to adhere to this instruction may lead
to damage to some braking components and
the lack of braking assistance on restarting
the engine.
Page 138 of 176

136
Peugeot Connect 10" Touchscreen
– To configure the display when the screen is
off, choose Digital, Analogue or Black.
Audio settings
Press Settings to display the main page.
Select “Audio settings” then “Treble” or
“Medium” or “Bass”.
Press Reset to restore the default settings.
BT settings
Press Settings to display the main page.
Select “BT settings”.
Activate or deactivate the Bluetooth®
search.
Activate or deactivate the synchronisation of the contacts on the paired telephone.
– Press "Local name" to change the name of
the system.
– Manage paired telephones in " Suitable
devices”.
– Press "Add device" to update the list of
detected telephones.
Customising the theme
Press Settings to display the main page.
Select "Customise".
Choose one of the themes from those offered.
Connect the USB cable. The smartphone
charges when connected by the USB
cable.
A message appears on the smartphone.
Read it and then confirm with the " Authorise"
button.
Press "CarPlay" to display the CarPlay®
interface.
MirrorLinkTM smartphone
connection
Depending on country.
The "MirrorLinkTM" function requires the
use of a compatible smartphone and
compatible
applications.
Check the compatibility of the telephone on
the Brand's website (services).
When connecting a smartphone to the
system, we recommend enabling
Bluetooth
® on the smartphone.Connect the USB cable. The smartphone
charges when connected by the USB
cable.
Press "MirrorLinkTM" to start the
application in the system.
Depending on the smartphone, it may be
necessary to activate the "MirrorLink
TM"
function.
During the procedure, several screen
pages relating to certain features are
displayed.
Accept to start and complete the connection.
Once the connection is established, a page is
displayed, showing the applications already
downloaded to the smartphone that are
compatible with MirrorLink
TM technology.
Access to the menus for the system is possible
at any time using the dedicated buttons.
There may be a pause before applications become available,
depending on the quality of the network.
Android Auto smartphone connection
Depending on country.
Install the "Android Auto" application on
the smartphone via "Google Play".
The "Android Auto" function requires the use
of a compatible smartphone and compatible
applications.
Connect the USB cable. The smartphone
charges when connected by the USB
cable.
Press "Android Auto" to start the
application in the system.
During the procedure, several screen
pages relating to certain features are
displayed.
Accept to start and complete the connection.
Access to the menus for the system is possible
at any time using the dedicated buttons.
There may be a pause before applications become available,
depending on the quality of the network.
Settings
System settings
Press Settings to display the main page.
Select "System".
–
T
o change the language, select “ Languages”.
–
T
o set the date and time automatically, choose
the time zone corresponding to the country in
which the vehicle is being driven in " Time zone".
Then choose the time display format ( 12h/24h).
–
T
o adjust the tone when touching the screen,
select "Key tone".
–
T
o adjust the volume of the touch screen and
telephone calls, move the " Automatic volume
control" and "Mobile " sliders.
Display
Press Settings to display the main page.
Select "Display".
–
T
o adjust the screen brightness, move the
"Brightness" slider.
–
Activate or deactivate video playback while
driving.
Page 139 of 176
137
Peugeot Connect 10" Touchscreen
11– To configure the display when the screen is
off, choose Digital, Analogue or Black.
Audio settings
Press Settings to display the main page.
Select “Audio settings” then “Treble” or
“Medium” or “Bass”.
Press Reset to restore the default settings.
BT settings
Press Settings to display the main page.
Select “BT settings”.
Activate or deactivate the Bluetooth®
search.
Activate or deactivate the synchronisation of the contacts on the paired telephone.
–
Press "
Local name" to change the name of
the system.
–
Manage paired telephones in " Suitable
devices
”.
–
Press "
Add device" to update the list of
detected telephones.
Customising the theme
Press Settings to display the main page.
Select "Customise".
Choose one of the themes from those offered.
Updating the system
To perform system updates, visit a Peugeot
dealer.
Restoring factory settings
Press Settings to display the main page.
Select “Restore system’s factory
settings”.
Press “Restore system’s factory settings” to
restore the initial touch screen settings.
Page 143 of 176
141
Alphabetical index
Mountings, ISOFIX 59
N
Normal mode 71
O
Obstacle detection 80
Off-road camera
82
Oil change
92, 99
Oil consumption
92
OIl, engine
92, 99
On-board tools
105–106
Opening the bonnet
90–91
Opening the boot
18
Opening the doors
18, 21
Opening the windows
17
Over-speed buzzer
76
P
Pads, brake 95
Paint
103, 125
Paint colour code
125
Parking brake
66, 95
Parking sensors, audible and visual
80
Parking sensors, front
81
Parking sensors, rear
80
Plates, identification 125
Player, Apple®
129
Player, USB
129, 133–134
Port, USB
36, 129, 133–135
Pressures, tyres
95, 126
Pre-tensioning seat belts
54
Priming pump
105
Priming the fuel system
105
Protecting children
55–59
Puncture
106
R
Radio 128, 133
Reading lamps
38
Rear differential locking
67
Rear screen, demisting
35
Recharging the battery
11 8
Recirculation, air
34
Recovery
119, 121
Regeneration of the particle filter
95
Reinitialisation of the under-inflation
detection system
74
Reinitialising the remote control
21
Reminder, key in ignition
64
Reminder, lighting on
43
Remote control
16–20
Removing a wheel
107–109
Removing the mat
37
Replacing bulbs
110, 112
Replacing fuses
113–114
Replacing the air filter 94, 99
Replacing the battery
98
Replacing the Diesel filter
100
Replacing the oil filter
94, 100
Replacing the passenger compartment
filter
94, 98
Reservoir, screenwash
94
Reset trip
12
Rev counter
7
Reversing camera
75, 81
Reversing lamps
11 2
Roof bars
90
Running out of fuel (Diesel)
105
S
Safety, children 55–59
Saturation of the particle filter (Diesel)
95
Screen, monochrome
13
Screenwash
46
Screenwash, front
46
Seat angle
26
Seat belts
52–54
Seat belts, rear
53
Seat, bench front, 2-seat
26–27, 53
Seat, rear bench
29–30
Seats, electric
26
Seats, front
25–26
Seats, rear
29–30, 57
Selector, gear
70
Sensors (warnings)
75